 FREE 1 to 3-Day Delivery on Orders $149+ Details

How to Install DV8 Off-Road RS-1 Rear Bumper w/ Tire Carrier (07-18 Wrangler JK) on your Jeep Wrangler
Installation Time
1.5 hours
Tools Required
- Lug Wrench
- Sockets/Wrenches (5/8", 13mm, 18mm, 19mm)
- Allen Wrench (4mm)
- Torx Driver (Size 20)
- Large Adjustable Wrench

Shop Parts in this Guide
These instructions are based on installing the DV8 RS-1 Rear Bumper with Tire Carrier onto a stock 07-17 Jeep Wrangler JK.
Installation Instructions
1. Remove the spare tire using the lug wrench.
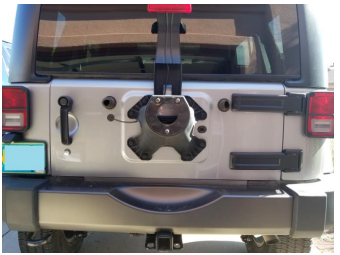
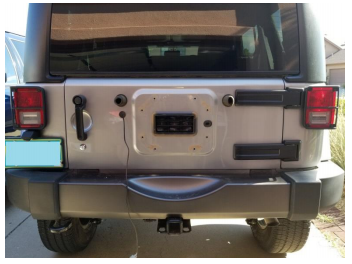
2. Remove the stock spare tire carrier by removing the 8 bolts using a 13mm socket or wrench.
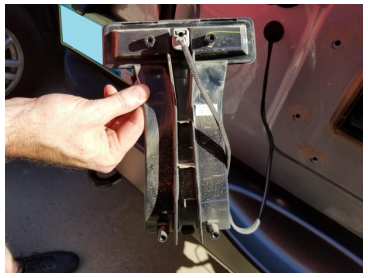
3. Remove the 3rd brake light from the stock tire carrier by removing the 4 screws using a size 20 Torx driver. Remount as desired. Alternately, wiring may be unplugged from the break light and stored inside the tailgate or rerouted as desired.
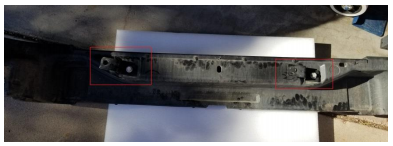
4. Remove the stock rear bumper:
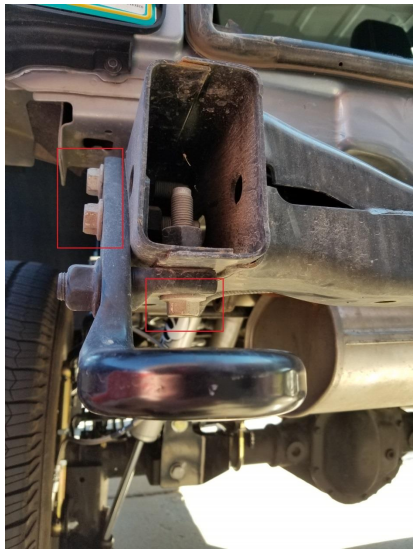
a. Remove the brackets from both sides of the bumper by removing the 4 bolts on each side using a 5/8” socket or wrench.
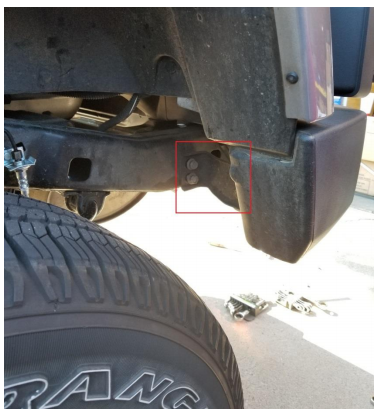
b. Remove the 2 lower bolts from the center brackets located about a foot from the center of the bumper on each side. This requires a 5/8” socket or wrench.
c. Rotate the 2 center brackets from a vertical position to a horizontal position so they don’t hook onto the frame when removing the bumper, then pull the bumper out and off.
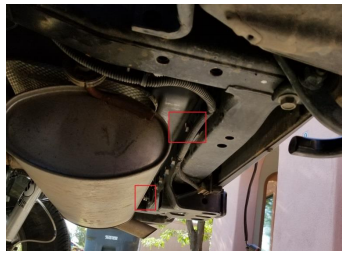
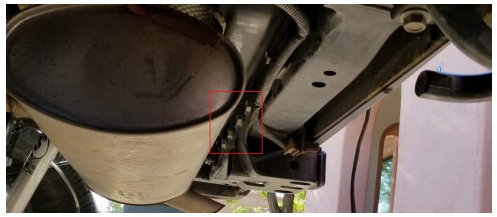
5. Remove the tow hitch (if equipped):
a. Slide the rubber tow wiring grommet down to disconnect it from the tow hitch.
b. Remove the 4 bolts from the back side of the tow hitch using an 18mm wrench and slide the hitch off of the frame rail. You may opt to drop the muffler for easier access. Note that the nuts on the front side of the stock tow hitch are welded on.
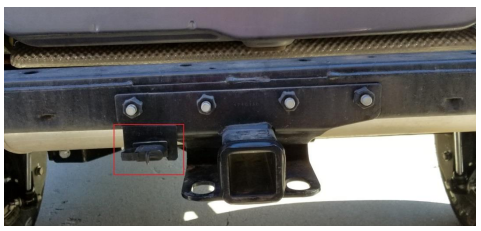
6. Remove the rear recovery tow hook (if equipped) by removing the 3 lighter colored bolts using an 18mm socket or wrench.
7. Insert the 2 nut plates into the frame rails, lining up the nuts to the factory holes in the frame.
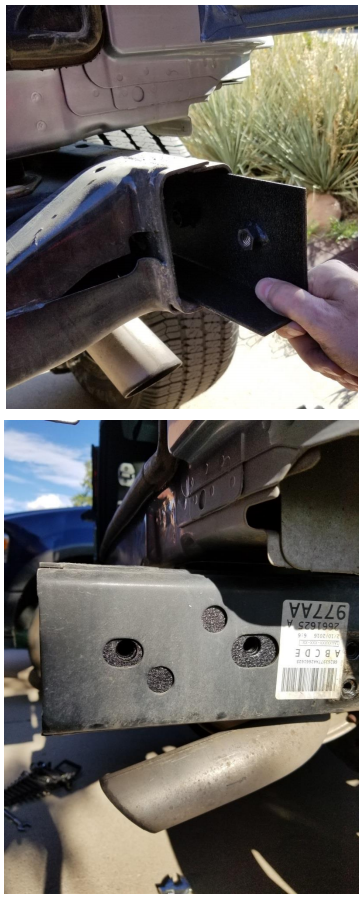
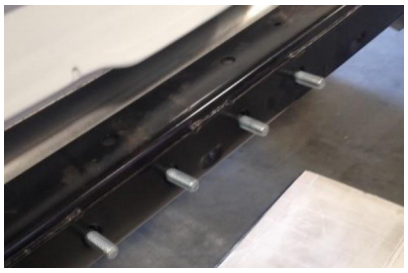
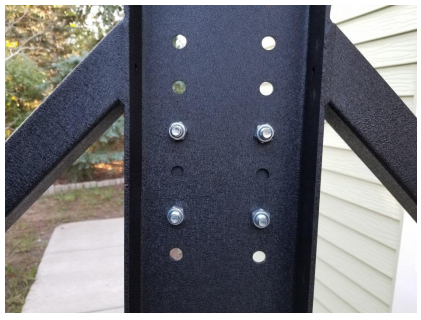
8. Insert the 4 large 4” 18mm bolts with washers through the rear frame rail from behind the rail, threads pointed toward the back of the Jeep. You will want to insert them by angling the head of the bolts above the muffler.
9. Install the DV8 RS-1 Bumper:
a. The bumper should be lifted and slid onto the 4 large bolts inserted in the rear frame rail without pushing the bolts back through. (You should have a friend or two assisting with this to ensure safety and to make installation easier.) Then secure it with the 4 19mm nylon nuts to hold the bumper in place and against the frame.
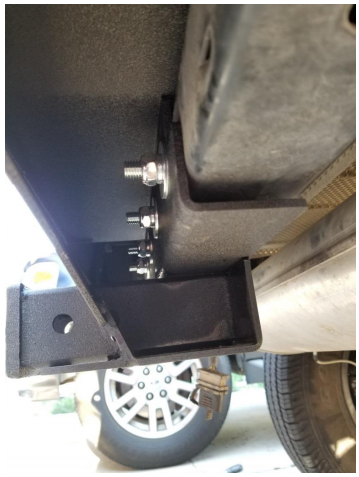
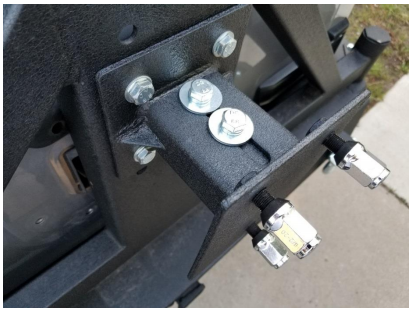
b. Install the 4 shorter bolts with washers, 2 on each side, into the nut plates installed in step 7 using a 19mm socket or wrench. Leave the bolts a bit loose for now.
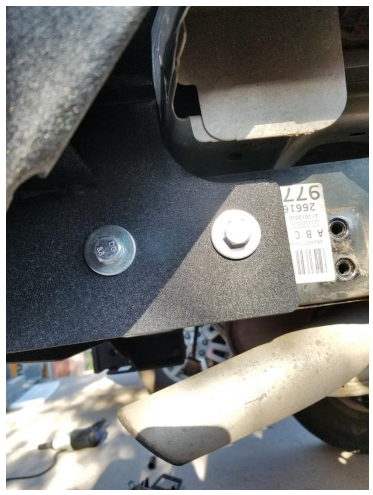
c. Torque the 4 center bolts to 60 ft/lbs.
d. Check to ensure the bumper is level with the Jeep. If it is not level, loosen the 4 center bolts and have a friend hold the bumper level.
e. Torque the 4 side bolts to 60 ft/lbs. If you loosened the center bolts in the above step, re-torque them back to 60 ft/lbs now that the bumper is level.
10. Install the DV8 Tire Carrier onto the bumper:
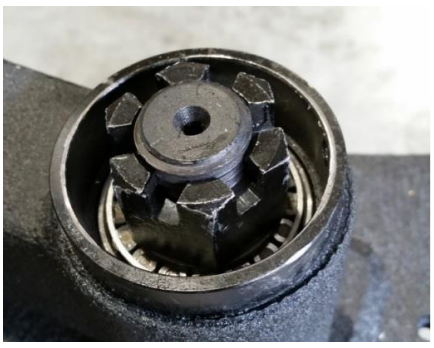
a. The bearings are pre-installed in the tire carrier hinge, but it is a good idea to remove the bearings and ensure they are properly packed with grease. Then re-install the bearings into the hinge in the same order as removed.
b. Remove the castle nut from the carrier shaft that is pre-installed on the RS-1 rear bumper, then slide the tire carrier onto the carrier shaft, taking care to not damage the bottom hinge seal or push out the bearings.
c. Tighten the castle nut slowly onto the threaded shaft to press the hinge and bearings down until it stops and is fully seated. A large adjustable wrench is recommended for this.
d. Remove the castle nut and install the large washer over the threaded shaft.
e. Re-install the castle nut again and tighten it down until it stops and is fully seated again. Then back it off just enough to insert the cotter pin. If there is not enough room for the cotter pin, then you need to add additional torque to press the bearing race in a little more.
f. Install the cotter pin and bend the ends to secure it in place.

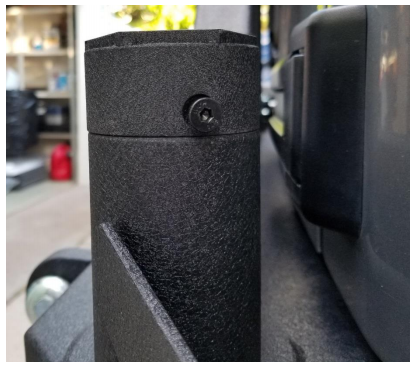
g. Install the hinge cap over the top, lining up the hole in the cap with the screw hole at the top of the hinge and secure it with the small taper head screw using a size 4 allen wrench.
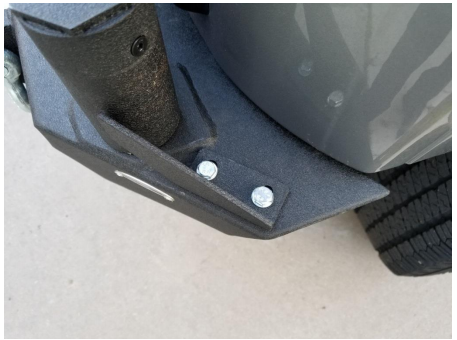
h. Install the hinge stop bracket on the bumper, to the right of the hinge, using the 2 13mm bolts with washers.
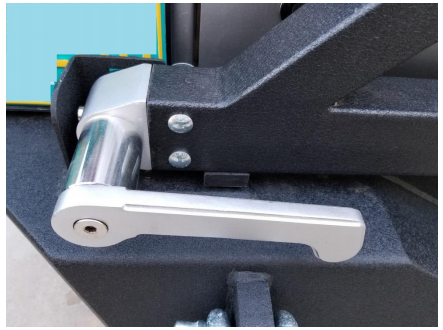
11. Install the tire carrier handle by sliding the rectangle end of the handle into the left hand end of the tire carrier and secure with appropriately sized bolts.
12. Using the 4 shorter 18mm bolts with washers, attach the tire adapter to the tire carrier, adjusting the height as needed for your tire size. Secure the bolts with the 19mm nylon nuts. This may require some trial and error as you should install it as low as possible.
13. Position and set the tire holder:
a. Slide the 3 lug tire holder into the adapter arm and loosely install the 2 longer bolts with washers and nuts.
b. Place your spare tire on the holder and push it snuggly against the carrier, then carefully remove the tire without disturbing the holder.
c. Push the holder in about 1/4" and tighten the bolts. This ensures the tire will be firmly pressed against the carrier once installed to reduce movement. You are now ready to install your spare tire.
Installation Instructions Written by ExtremeTerrain Customer on 08/10/2017
