 FREE 1 to 3-Day Delivery on Orders $149+ Details

How Install a ARB 12V TWIN ON BOARD AIR COMPRESSOR on a Wrangler 87-17
Installation Time
30 minutes
Tools Required
- (2) Adjustable wrenches
- Thread sealing tape

Shop Parts in this Guide
Optional Additional Parts:
Stainless steel braided line and fittings
Mounting provisions
Small rubber plug Installation Notes: The ARB tire inflation kit comes with hardware to connect directly to the compressor.
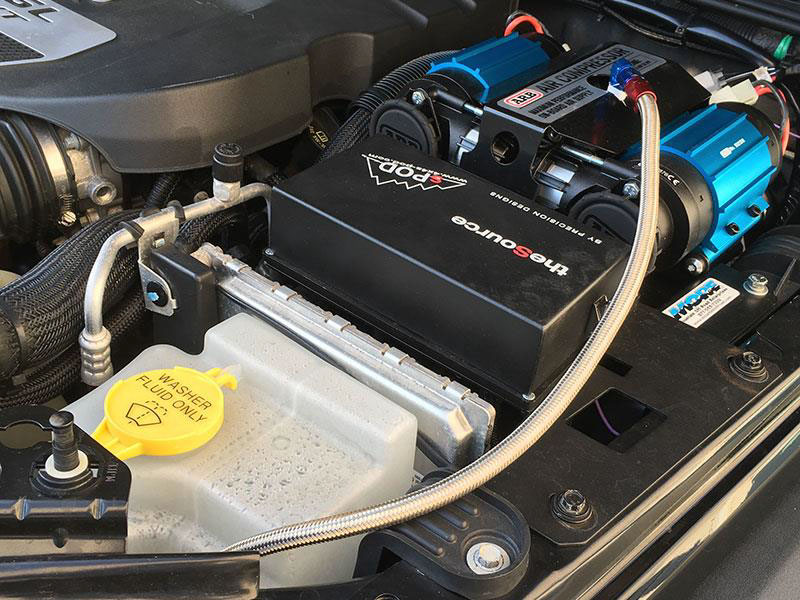
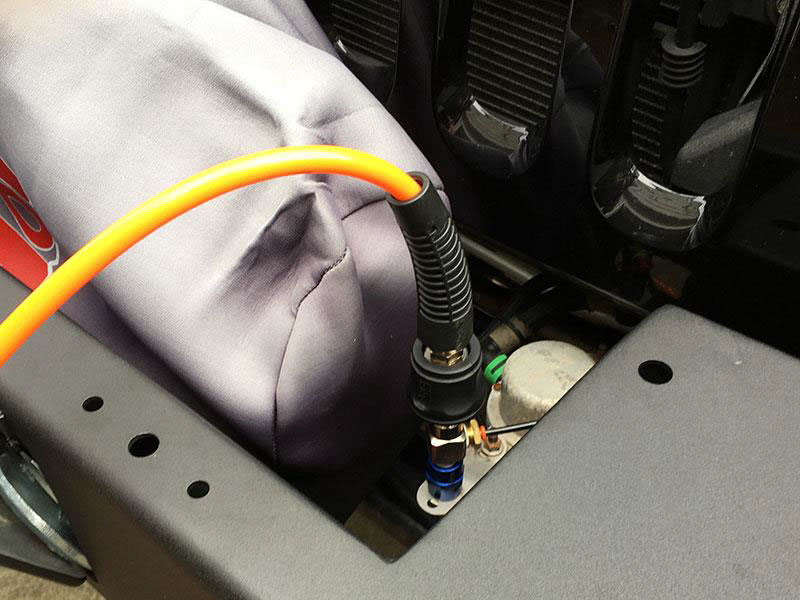
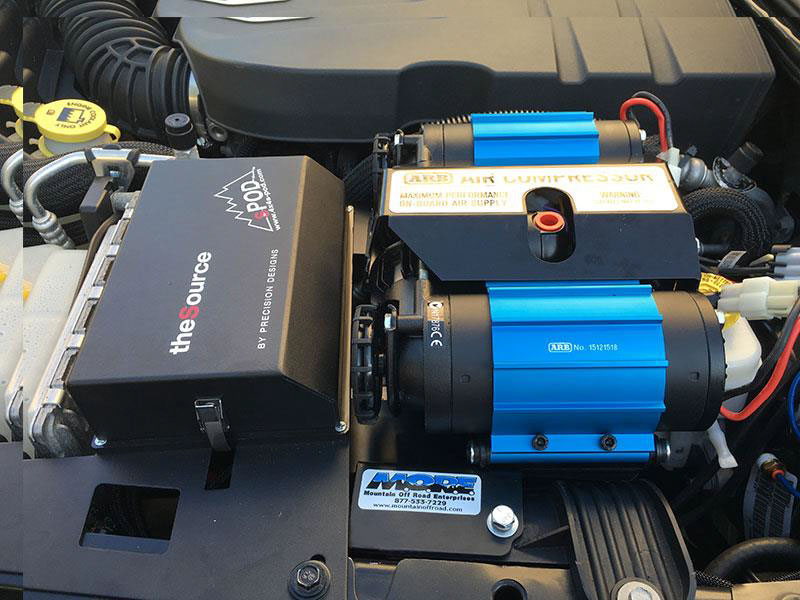
This install guide takes into account one of the most challenging locations, which involves working with an ARB Twin compressor mounted in the engine bay. Under this scenario, there isn’t enough vertical space to install the hardware directly, instead you will need to use a steel braided hose and fitting to route the connection point to a more accessible location, in this case, an opening in the front aftermarket bumper with a customized mounting solution. Installation Instructions:
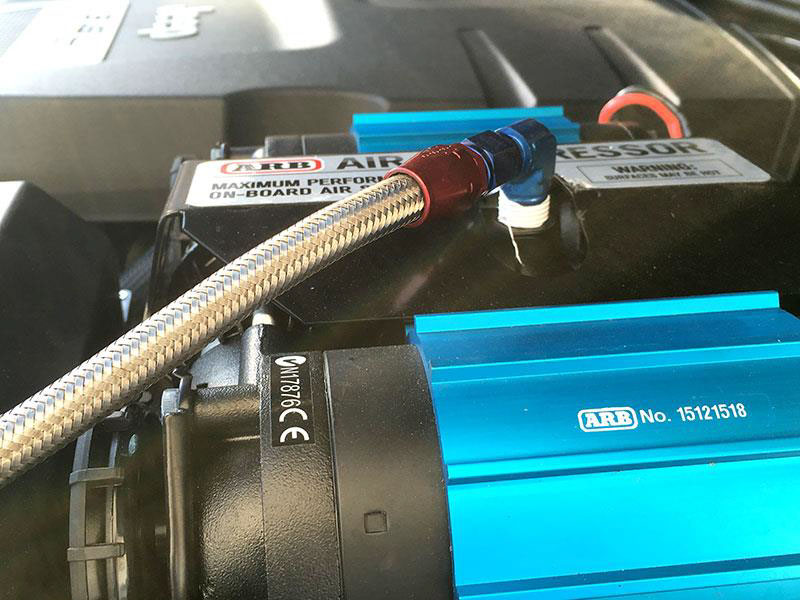
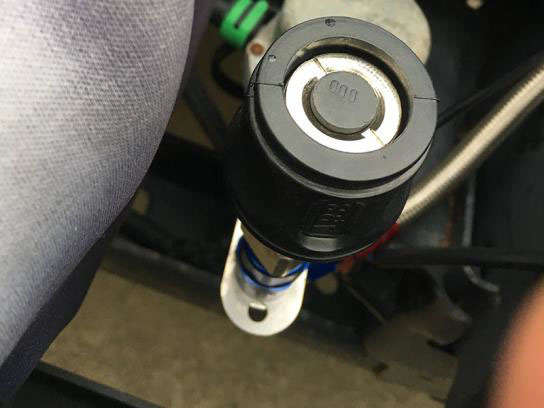
1. The ARB tire inflation kit comes with a T-Fitting and quick connect coupler, apply thread sealing tape to both threaded ends. The T-fitting has provisions for an optional air gauge or additional air hose/outlet. If you don’t plan on connecting anything else, you will have to purchase a plug to cover the extra outlet.

2. As stated in the installation notes, this install will detail steps to route an optional steel braided hose from within the engine bay. If you choose to install the air compressor inside the Jeep, or a different location, then the following step may not apply. Using aluminum fittings, apply thread sealing tape to all threads and route the steel braided line to your desired mounting location.
3. The mounting location for this install guide positions the quick connect coupler within a space in the front bumper. A custom bracket was used to secure the position. In addition to the steel braided line, a thinner vinyl air gauge hose was connected to the T-Fitting.
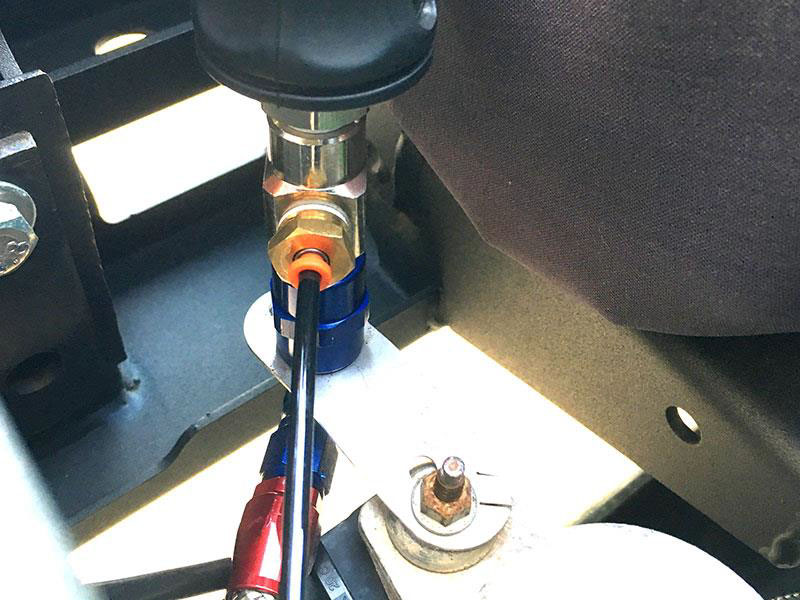
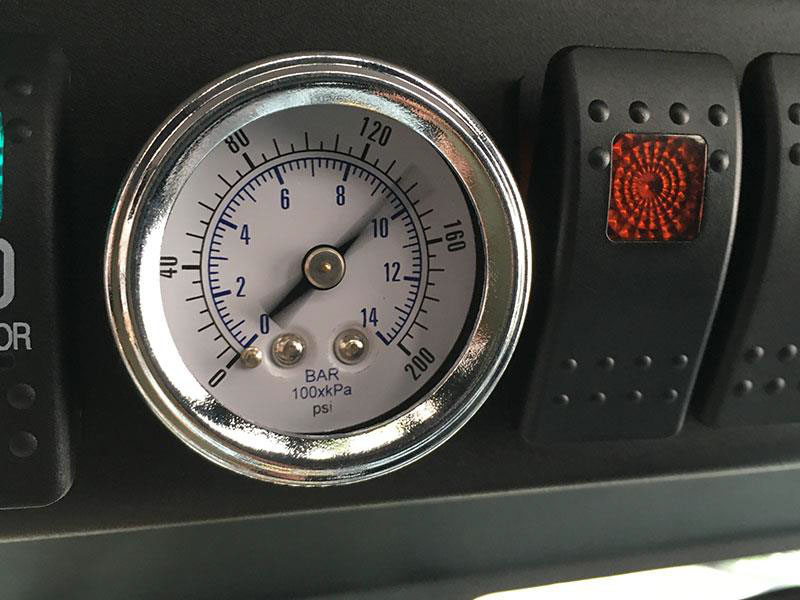
4. Using the (2) adjustable wrenches, tighten all connections. You can perform a leak test to ensure that no air is escaping through any of the threaded connections. If you’ve connected an air gauge to the T-fitting, it should note a constant level of pressure around 130-140psi when the compressor is turned on. In addition, the compressor will turn on and then off once it builds up the pressure, then on again when the air issued, this toggling of power is normal.
5. Connect the ARB hose to the quick connect coupler, ideally the connection to the coupler should be made before turning the compressor on, or the pressure built up by the compressor might make the connection difficult. The same principle applies to the air chuck or nozzle on the other end of the hose.
6. Once you have finished using the system, turn off the air compressor and release any built up air within the line before disconnecting the hose from the quick disconnect coupler. If the quick connect coupler is exposed to the elements, cover the hole with a rubber plug to prevent any water/debris from accumulating.
Before

After
Installation Instructions Written by ExtremeTerrain Customer Louis Orellana 07/19/2016