 FREE 1 to 3-Day Delivery on Orders $149+ Details

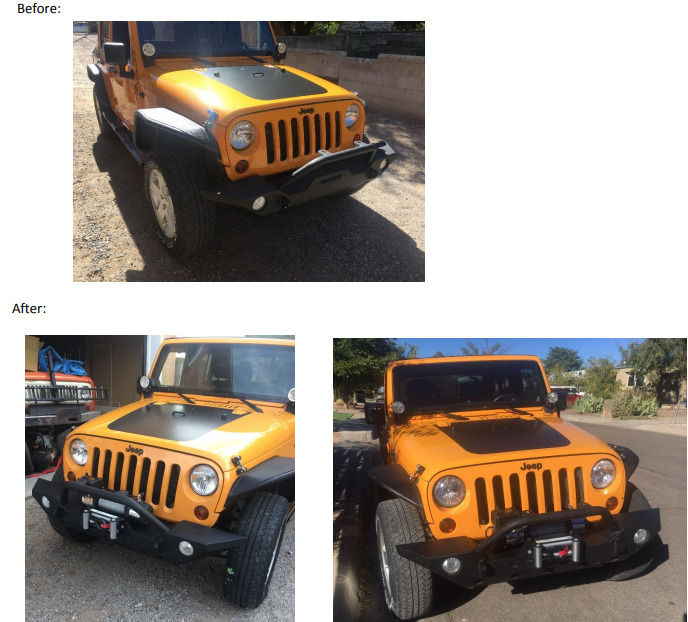
How to Install Rugged Ridge Nautic 9,500 lb. Winch w/ Steel Cable on your Jeep Wrangler
Installation Time
60 minutes
Tools Required
- 3/8" Drive Ratchet
- 10mm, 14mm, 16mm, and 18mm Sockets
- 14mm, 16mm, and 18mm Wrenches
- 4mm Allen Wrench (Provided)
- 6mm Allen Wrench

Shop Parts in this Guide
1. Decide on solenoid boc placement.
- The manufacterer's instructions outline four different options for mounting the solenoid box (three angles over the wire spool and one over the motor). This guide shows how to mount it over the motor. Whichever option you use, there will be extra brackets and hardwate left over.
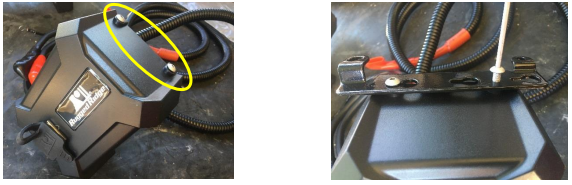
2. Install solenoid box mounting bracket.
- Place winch and solenoid box on a large flat work surface. Remove the twist ties from the cables on the solenoid boc. Loosen rear screw on the right side of the solenoid box (as seen from the top) and remove the front one.
- Install the side mounting bracket as shown.
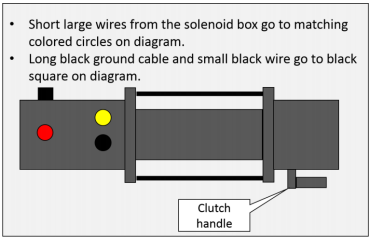
3. Connect power / control cables
- Connect cables from solenoid box to motor terminals (see diagram).
- Do not tighten remaining nuts yet.
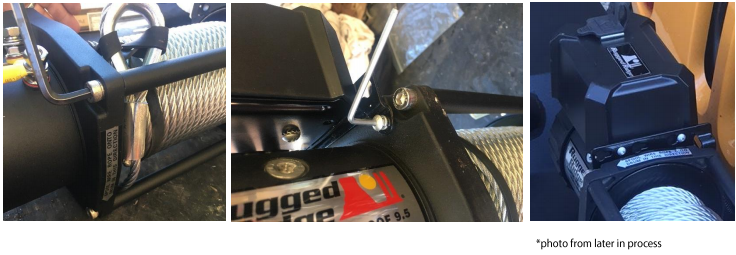
4. Mount solenoid box.
- Remove the rear tie rod allen bolt.
- Attach solenoid box to the winch body by replacing the tie rod allen bolt though the rear-most hole in the solenoid box mounting bracket. The second attachment point is a small threaded hole just behind the front tie rod bolt. Install one of the small allen bolts though the small hole in the mounting bracket into this hole.
5. Tighten power / controll cables.
- Align the previously connect cables neatly and tighten terminal nuts. Make sure that they are positioned so that they will not chafe or be pinched when the winch is sitting as it will be mounted.
- Attach the small black wire and the large black ground cable to the single terminal on the rear of the motor.
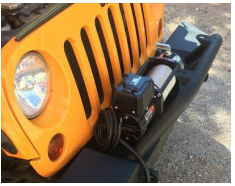
6. Set the winch on your mounting location.
- Depending on your setup, you may need a winch mounting plate. for this install I am mounthing the winch on a Barricade Trail Force HD front bumper. This should be typical of mounting to an aftermarket bumper or mounting plate.
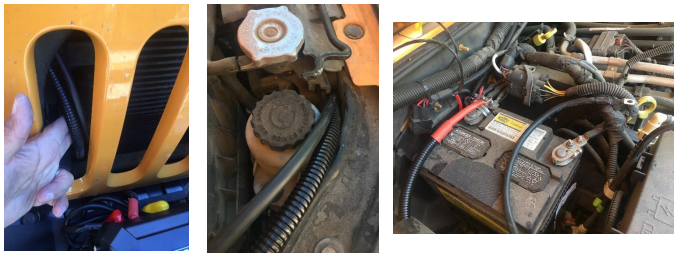
7. Route the power cables.
- Run the long positive (protected in a split loom jacket) and negative cables underneath the grill (not between the slats) and up the front of the radiator.
- There is a small gap at the top passenger-side of the radiator. Route the cables through this gap and back, along the inner fender, to the battery.
- Run the positive lead behind the plastic battery box side and to the positive terminal.
- To keep the cables neat and in place, secure the two together using zip ties.
- Attach the power cables to their respective terminals.
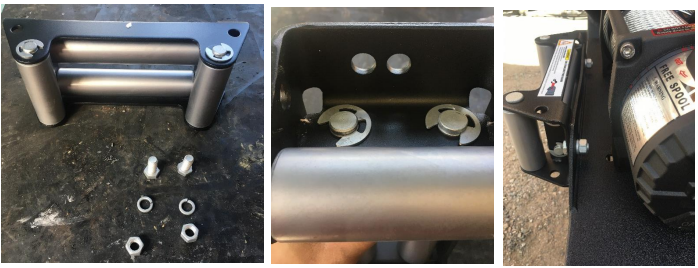
8. Mount the fairlead.
- There are four sets of fairlead mounting hardware (bolt,nut and lock washer) but you will only need two.
- Align your fairlead with the cable slot on the bumper. Note whether the upper or lower holes on the fairlead best match this alignment.
- Use two mounting bolts to attach the fairlead to the bumper.
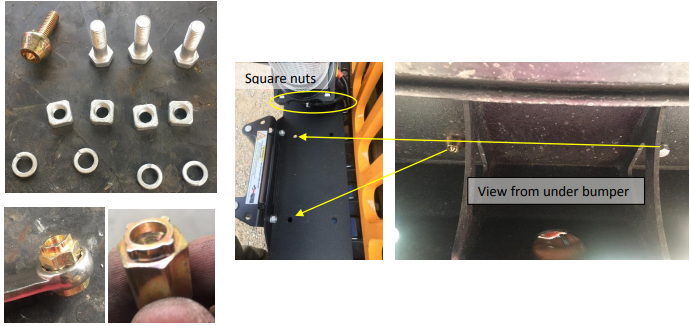
9. Mounting the winch.
- Install the four square nuts in the recesses in the winch body base.
- Align the winch so that the nuts line up with the mounting holes in your bumper.
- From beneath install four winch mounting bolts.
- For added security, you may want to use anti-theft bolts to foil thieves. I used Factor 55 winch lock. This replaces one of the winch mounting bolts and is installed using the provied key instead of a socket.
10. Attach hook and strap.
- Remove the cotter pin and clevis pin from the hook. Set all of these pieces where you can reach them from in front of the winch.
- Remove rubber strap keeping the winch cabe tight on the drum (be prepared for it to spring lose).
- Route the cable through the slot in your bumper and the fairlead.
- Install the hook on the eye at the end of the winch cable and replace the clevis and cotter pins.
- Place the hook through the loop on the red strap.

11. Test winch function.
- Install the remote in the port on the solenoid box (release button to the left).
- Use the red strap to pull tension on the winch cable and press the remote toggle switch to "out", ensuring that the winch powers the cable out.
- Repeat this for powering the cables in (this is a good time to ensure that your cable is laid out neatly on the drum).
- Power the cable in until the hook is flat and just snug against the fairlead (it should be just too tight for you to tip the hoolk up on the fairlead). Too tight will break things, too loose and it will beat up your fairlead flopping in the wind..
Installation instructions written by Clark Adams 10/22/2017.