 FREE 1 to 3-Day Delivery on Orders $149+ Details

How to Install MORryde Heavy Duty Spare Tire Carrier (07-18 Wrangler JK) on your Jeep Wrangler
Installation Time
45 minutes
Tools Required
- Large or Torque Wrench and Lug Key(s)
- Socket Wrench
- 7/16 Socket
- 1/2 Socket
- T-20 TORX Bit and Driver
- 4mm Hex Head Wrench

Shop Parts in this Guide
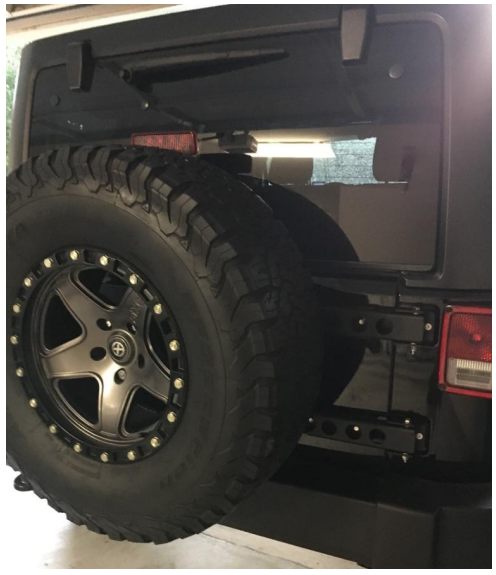
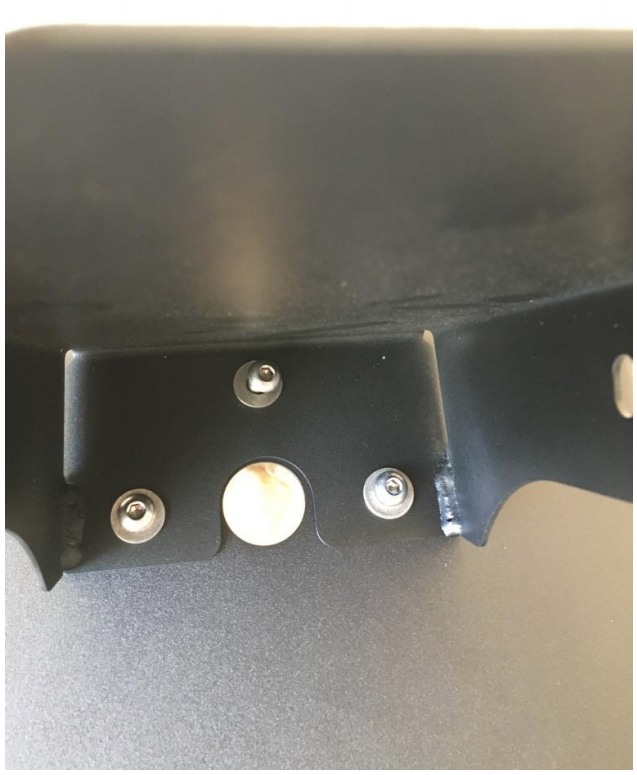
Factory/Before Pictures
Installation Instructions
Note: I installed the spare tire carrier with the Tailgate Reinforcement Kit installed, but the installation instructions are the same if installed directly to the tailgate.
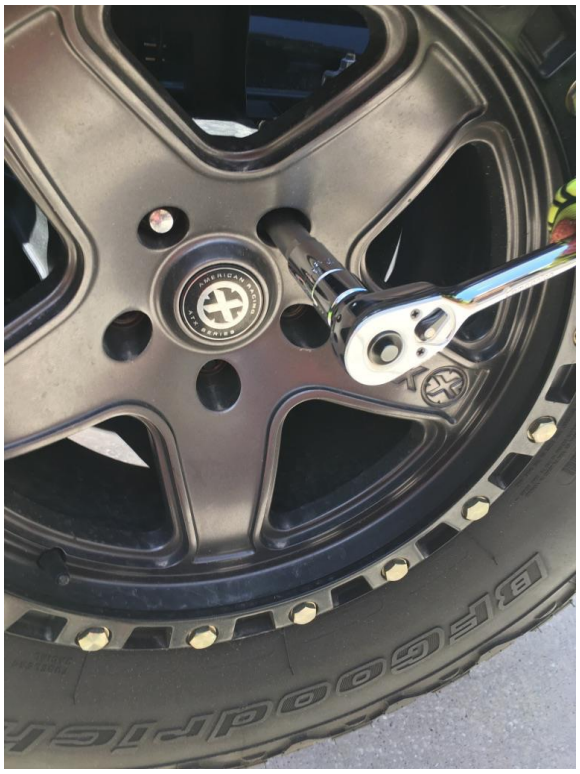
1. Use large wrench and lug key(s) to remove spare tire from factory mount and set spare tire aside.
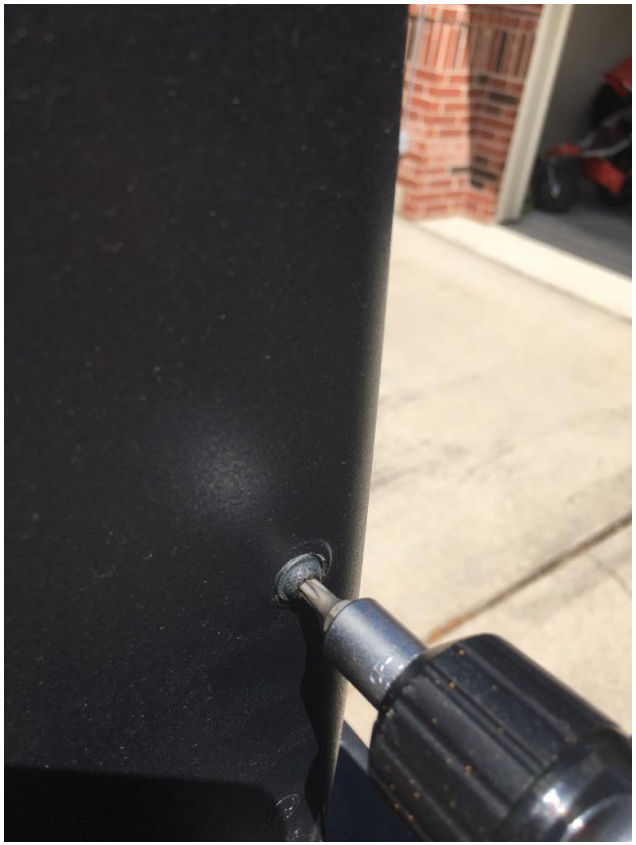
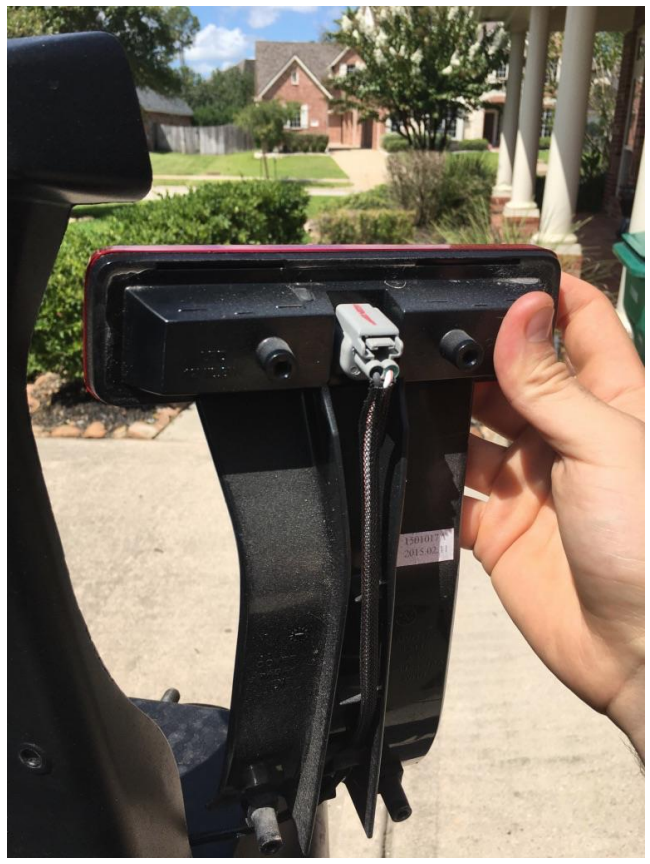
2. Open tailgate to expose back of 3rd brake light riser arm and remove 3rd brake light assembly - remove assembly by removing four (4) bolts behind riser arm with T-20 TORX bit and driver, unplug grey quick connect from light by depressing the tab on the connector and pulling from the light assembly, and set light assembly aside.
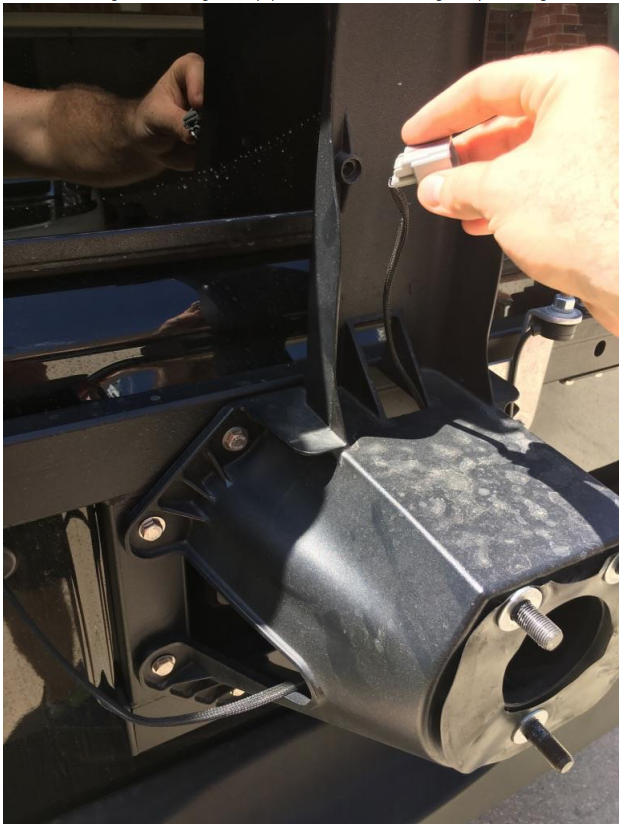
3. Weave 3rd brake light cable through factory spare tire mount and let hang from port in tailgate.
4. With tailgate closed, use socket wrench and 1/2 socket to remove all eight (8) bolts holding the factory spare tire carrier to the tailgate and remove tire carrier (Note: It may be necessary to remove other accessories like CB radio antenna mounts at this point. Also, if installing with the Tailgate Reinforcement Kit, it is good practice to loosen the bolts connecting the reinforcement frame to the heavy duty hinges.)
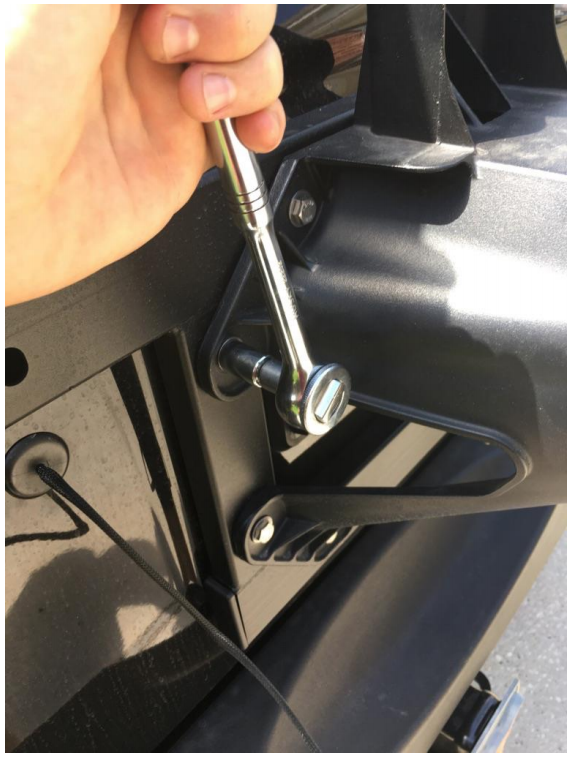
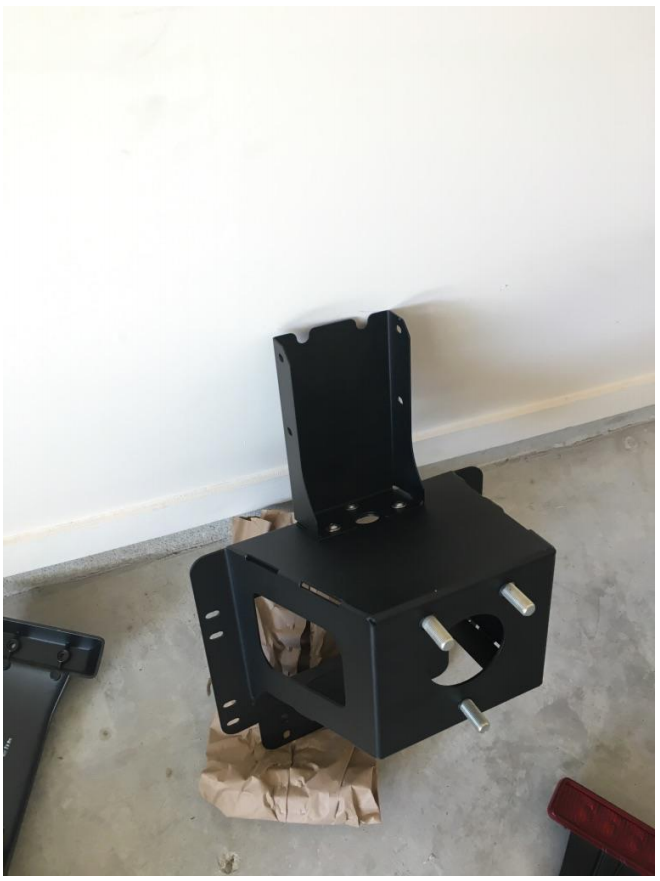
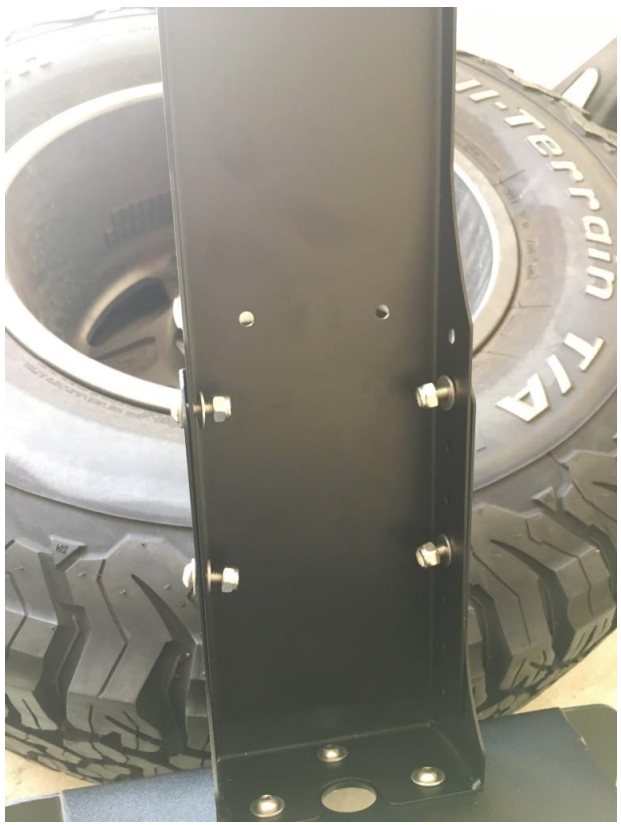
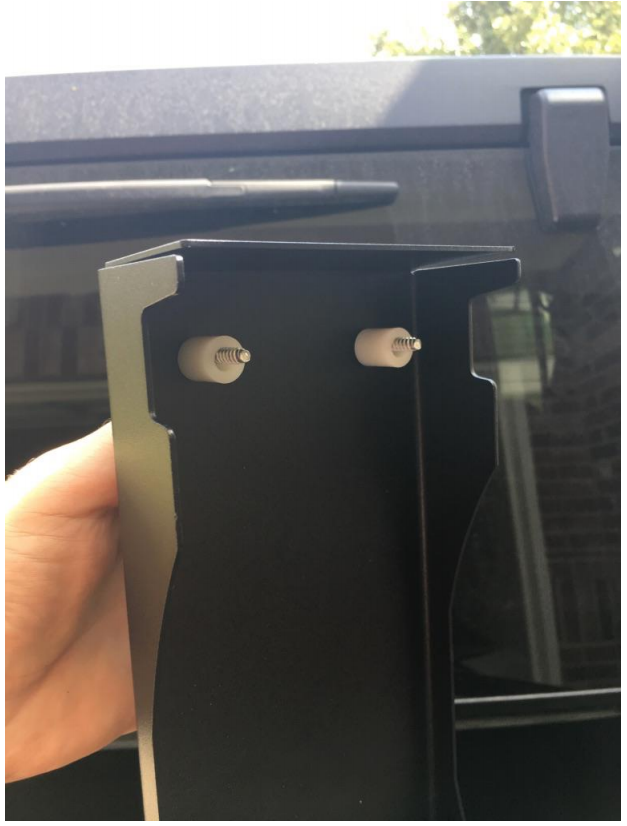
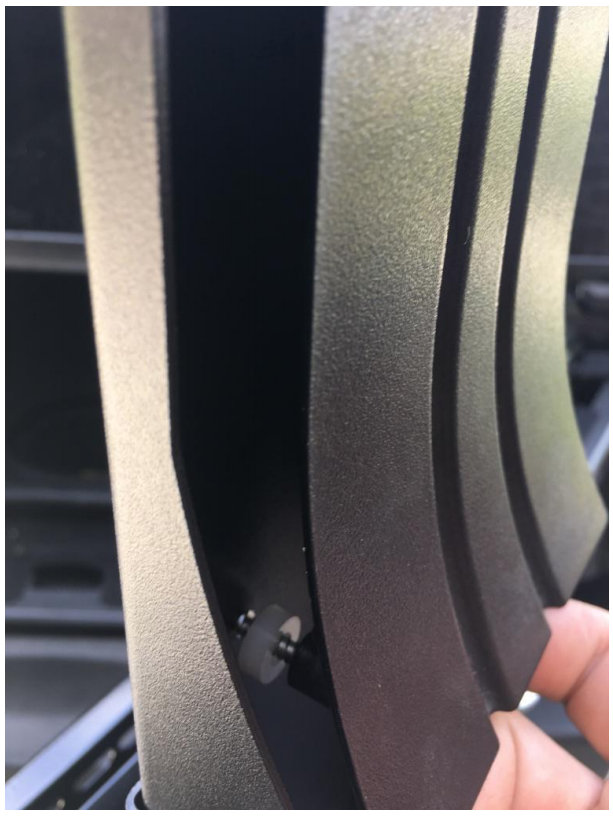
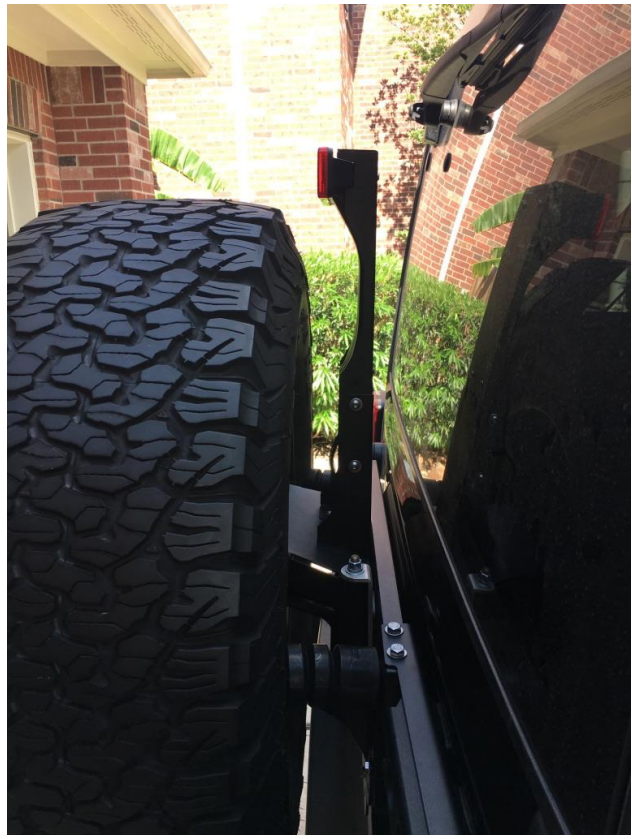
5. Using 4 mm hex head wrench and 7/16 socket / wrench, attach aftermarket 3rd brake light riser base (smaller piece) to aftermarket spare tire carrier with three (3) bolts / nuts included with the kit (Note: Enough washers are provided to install a washer on both the bolt head and nut side)
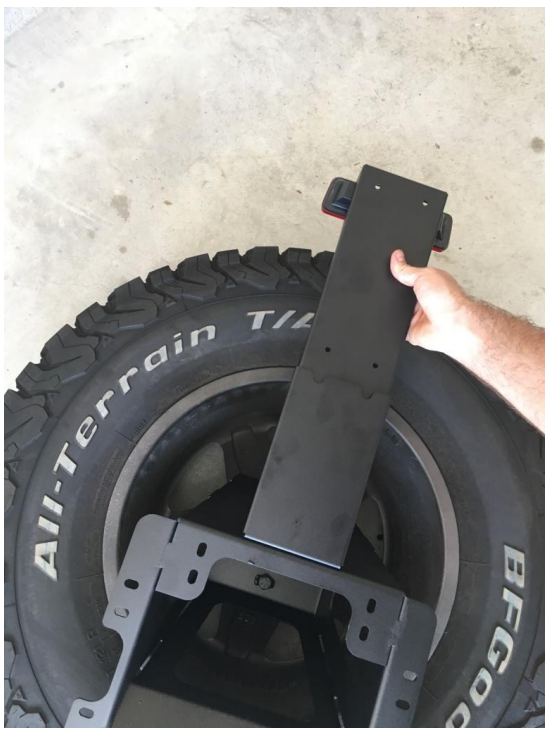
6. Using the removed spare tire, “mock up” the light riser to decide which setting / bolt holes on the upper portion of the riser should be utilized in order to clearly see the 3rd brake light above the spare tire (Note: With my 35” tires, I used the 2nd lowest setting)
7. Attach the upper portion of the 3rd brake light riser to the lower portion using the same methods / tools outlined in “Step 5” and four (4) bolts included in the kit.
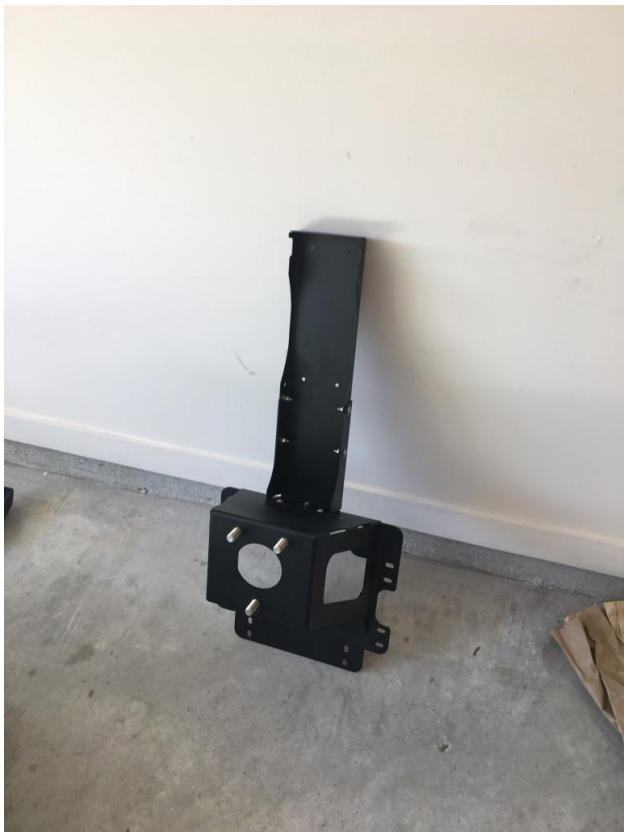
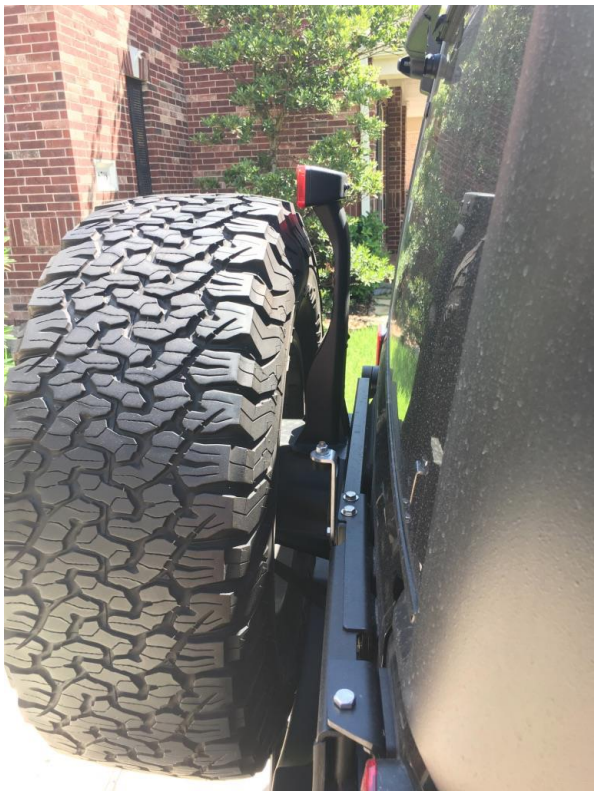
8. Using 1/2 socket and wrench, attach the spare tire assembly directly to the tailgate or tailgate reinforcement frame with eight (8) bolts previously removed using either the upper or lower mounting holes on tire carrier based on tire size (Note: With 35” tires, I elected to use the upper mounting holes on the tire carrier so that the tire would sit in a lower position. At this point, if you have previously loosened the bolts attaching the reinforcement frame to the heavy duty hinges, re-tighten these bolts and reinstall accessories.)
9. Weave the 3rd brake light wire back through the tire carrier and attach to the 3rd brake light assembly.
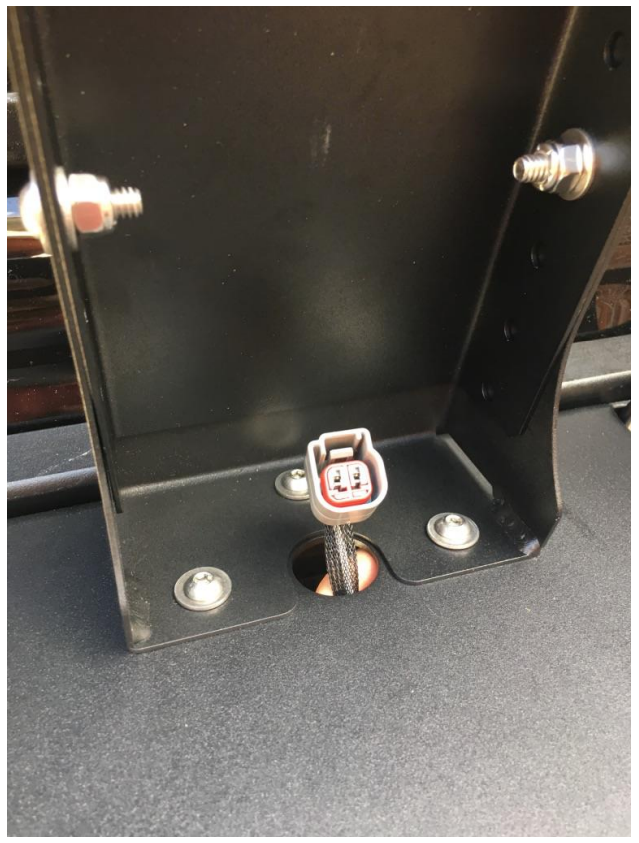
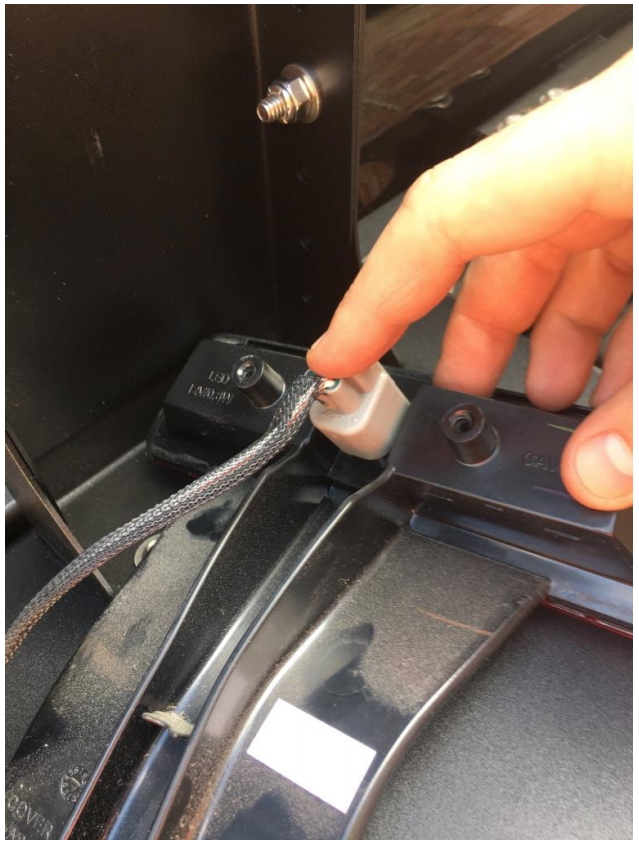
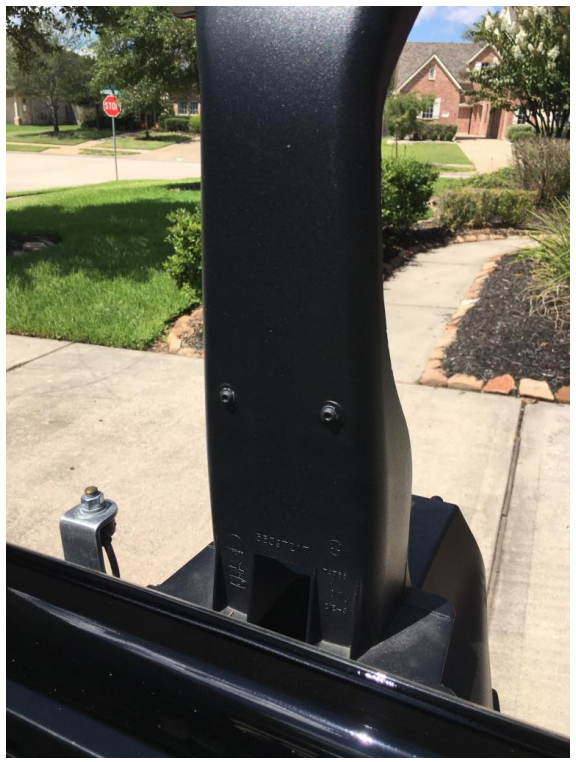
10. With the bushings provided in the kit (large bushings on top and smaller bushings on bottom) and the four (4) bolts included with the kit and using the T-20 TORX bit and driver, attach the 3rd brake light assembly to the brake light riser (Note: Be careful when installing not to strip the screws. Also, the easiest method to install is to get the top screws started, gently pry back the assembly to get the bottom screws and bushings in place, and then tighten all bolts.)
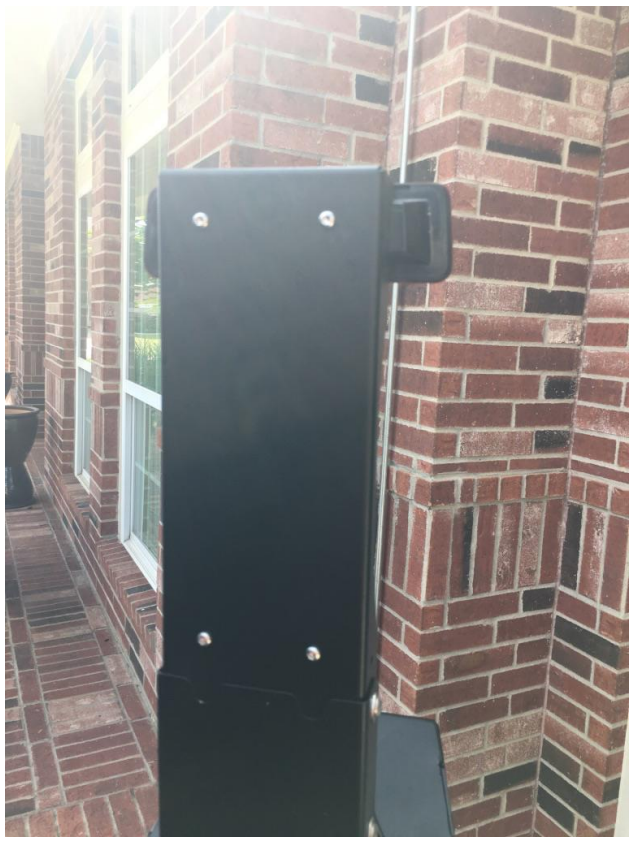
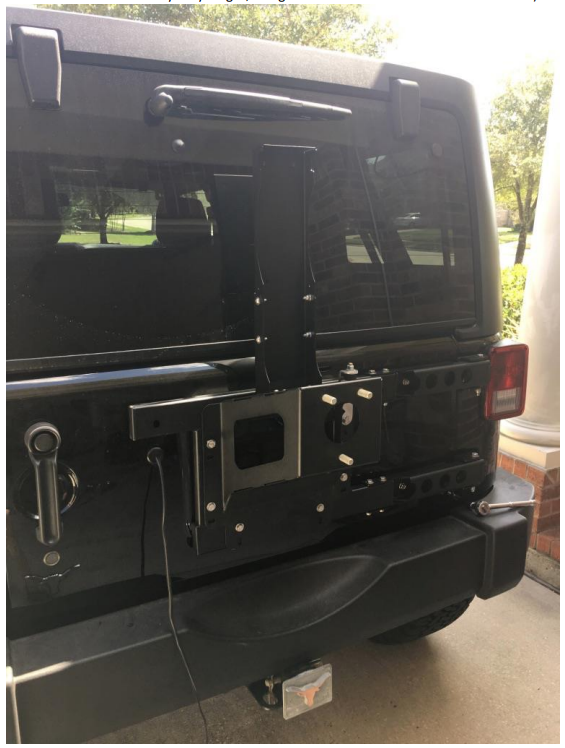
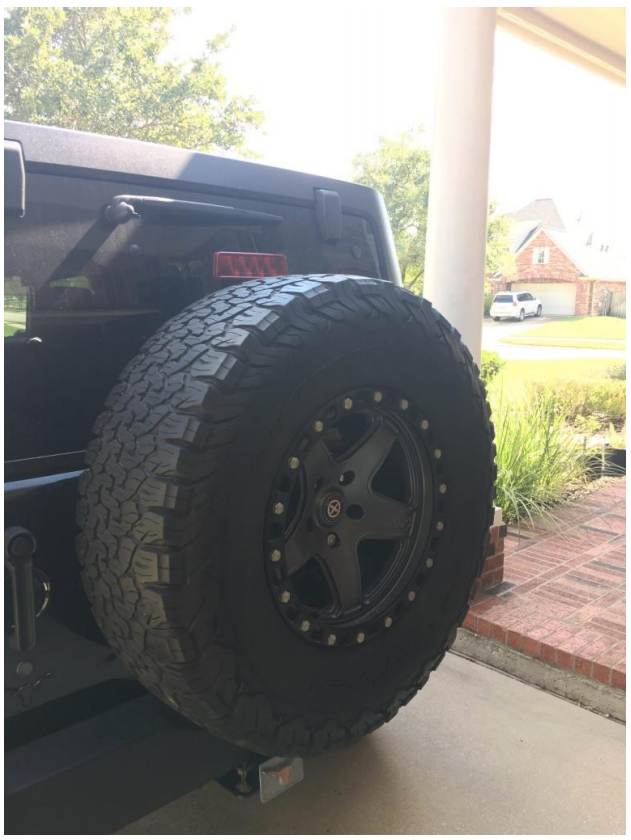
11. Reinstall spare tire.
12. Check 3rd brake light to make ensure that it is connected properly.
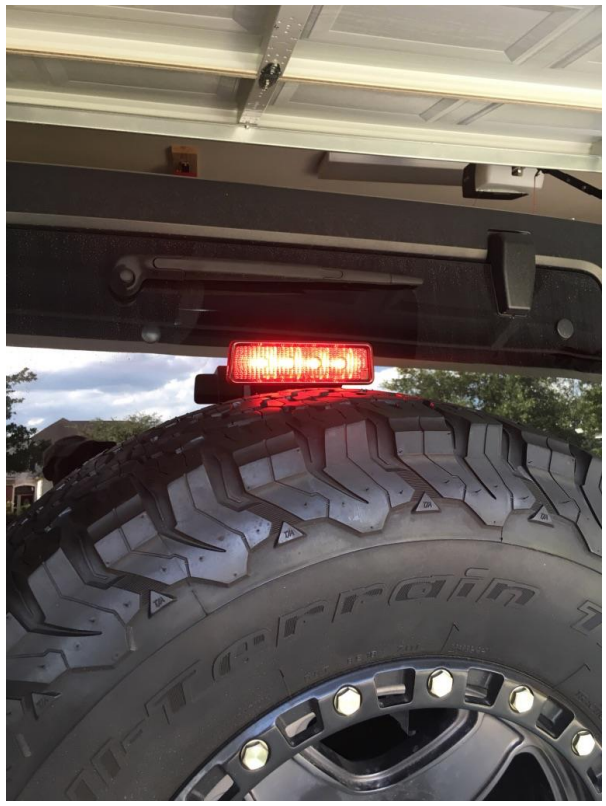
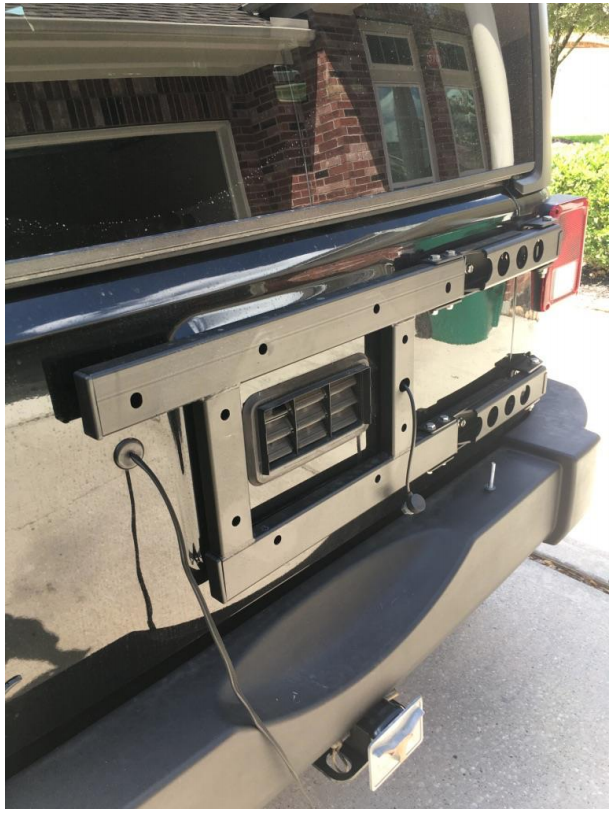
Installed Photos
Installation Instructions Written by ExtremeTerrain Customer Brian Dunn 08/23/2017
