FREE 1 to 3-Day Delivery on Orders $149+ Details

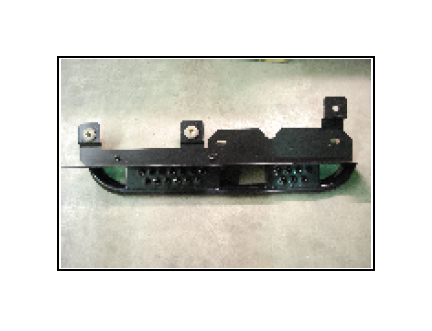
How to Install Hyline Offroad Rock Slider Set on your Wrangler
Installation Time
1 hours
Tools Required
- Ratchet 9/16” Deep Socket 12” Extension 16mm Socket
- Floor Jack Approx, 18” Block of Wood
- Hand Drill
- 3/8’’ Bit
- 3/8” Transfer Punch
- C-Clamp or Vise Clamp
- Light Duty Hammer
- 7/32 Allen Wrench 8mm Wrench
- Safety Glasses
Qty:
1 Passenger & Driver Side Rocker Panels
2 Rocker Panel Back up Strip
10 3/8” x 1” Stainless Cap Bolts
10 3/8” Flanged Lock Nut
2 Paint Guard Adhesive Foam
Tube Step Rocker Panel Installation
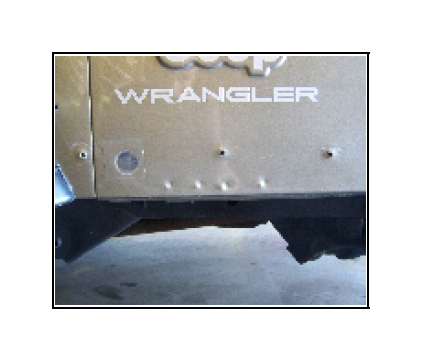
Step 1 – Remove plastic fender flare extensions by using 8mm wrench to remove 3 screws (See Figure 1). You WILL have to drill out the three threaded inserts. Do this by SLOWLY & LIGHTLY drilling with a drill bit about the same size as the diameter of the threaded insert. Drill until the head of the insert is removed, then using a punch you can pop the inserts out of the sheet metal.
Step 2 – Install Paint Guard Foam onto Rocker Panel by peeling back paper to expose adhesive. Cut any excess foam material off and cutout holes.
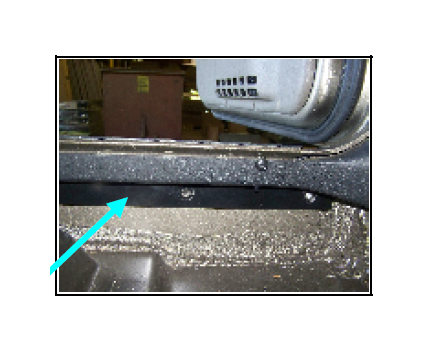
Step 3 – Thoroughly clean the area of the Jeep body that the Rocker will be mounted to both under the door and underneath the body.
Step 4 – Remove the body mount bolts from the following places using 16mm socket:
1 – Front Center (Fig. 2)
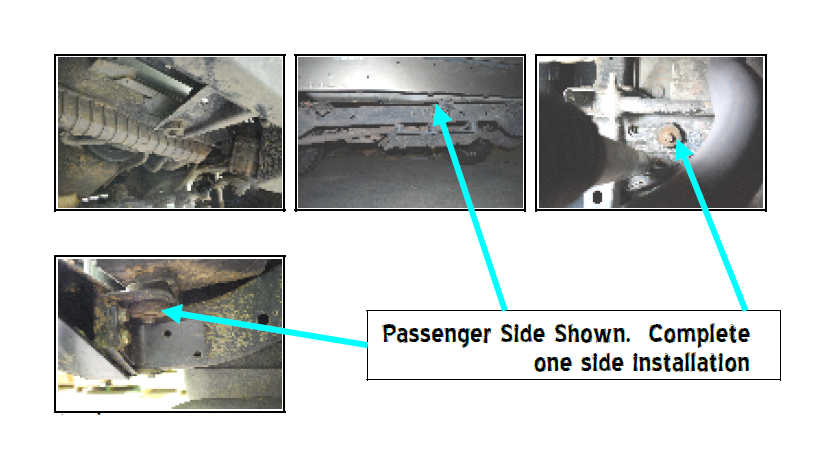
3 – Passenger Side (Fig. 3)
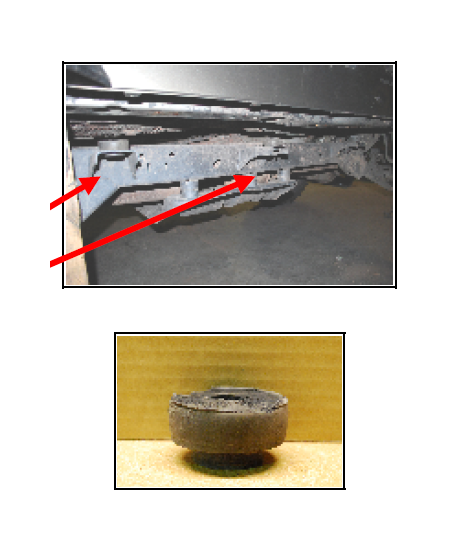
1 – Next to the Rear Shock Mount (Fig. 4)
1 – Below the Rear Corner Panel (Fig. 5)
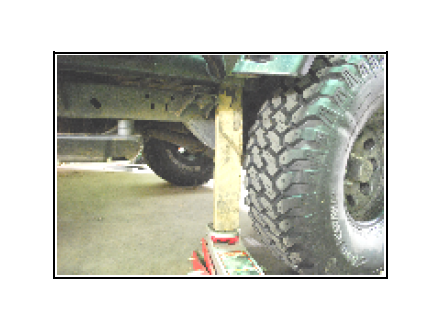
Step 5 – Once the body mount bolts are removed you can use the floor jack and extension board to raise the passenger side first. (See Figure 6 for best jacking location) Raise the body enough so that you’re able to remove the body mounts.
Step 6 – Remove the two body mount bushings that are shown in Figure 7. Remove the metal cap washer from bushing before trimming. You will need to cut about 1/8” off of the rubber body mount bushings, to allow for the material thickness of the Tube Step Rocker. (See Figure 8: Trimmed rubber bushing)
You only have to trim down the two body mount bushings located directly beneath the passenger and driver side doors. The other bushing that is closer to the front DOES NOT have to be trimmed and will remain in place
Step 7 – Place the two metal cap washers from the bushings into the two holes on the Tube Step Rocker as shown in (Figure 9). Also, place the trimmed rubber bushings back into the body mount brackets on the Jeep. Then slide the Tube Step Rocker into place onto the Jeep side while positioning the metal cap washers into the rubber bushings. Gently lower the body back down.
Step 8 – Position/Center Tube Step Rocker on the Jeep to prepare it for drilling. Make sure it’s exactly where you want it before continuing.
Step 9 – Re-install the 3 Body Mount Bolts and Hand Tighten Only
Step 10 - Using a C-Clamp or Vise Clamp, clamp the Tube Step Rocker to the body. Then using the 3/8” Transfer Punch and hammer locate each of the 5 Holes. Carefully remove the Tube Step Rocker from the Jeep and set to the side until drilling is complete.
Step 11 – Check for and move Wires, Carpet or other obstructions before drilling. Use the 3/8” Bit to drill the 5 holes that were located in Step 10. After drilling, remove all sharp burrs, wipe out all metal shavings and touch up bare metal with clear aerosol spray or similar rust inhibitor.
Step 12 – Re-Install the Tube Step Rocker onto the Jeep the same way you did in Step 7. Align the holes in the Tube Step Rocker with the holes you just drilled and install the 3/8” x 1” Stainless Bolts with 3/8” Nuts. Use the Rocker Panel Backup Strip behind the 4 Bolts under the door. (See Figure 10)
Step 13 – Re-Install all Body Mount Bolts that were Previously removed. The very front body Mount will be kept off until the opposite Tube Step Rocker is installed. Tighten to Factory Specs.
Step 14 – Repeat Steps 1 – 13 on the opposite side. Recheck to make sure all bolts have been tightened. Check again after about 50 driven miles.