FREE 1 to 3-Day Delivery on Orders $149+ Details

How to Install Uniden CB Radio (87-18 Wrangler YJ, TJ, JK & JL) on your Jeep Wrangler
Installation Time
90 minutes
Tools Required
- Phillips Screw Driver
- Drill and Bit Set
- Multimeter Tester
- Electrician’s Stripper/Cutter
Shop Parts in this Guide
Additional items needed to complete a new install of the Uniden CB Radio:
- CB antenna
- Antenna mounting bracket
- Coaxial antenna wire
This install was completed with a FireStik CB Antenna (available at Extreme Terrain), FireStik MK-J4R Hood Channel Jeep Antenna Mount and Fire-Flex coaxial cable. Optionally a mount can be purchased to mount the CB in various locations (available at Extreme Terrain).
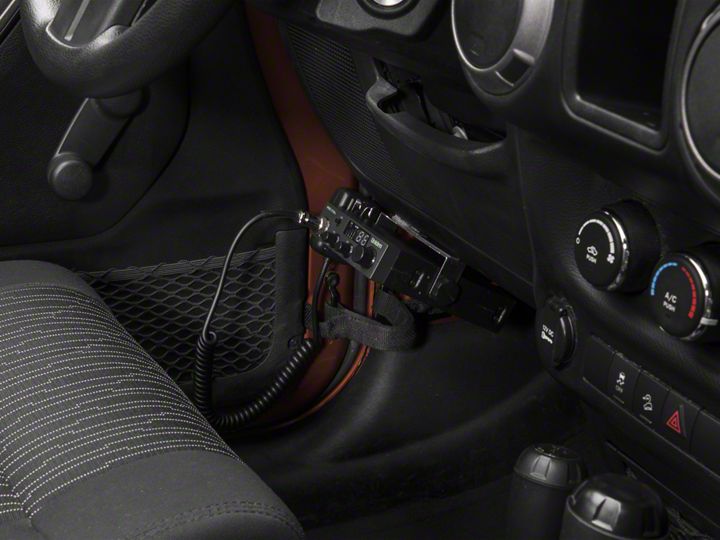
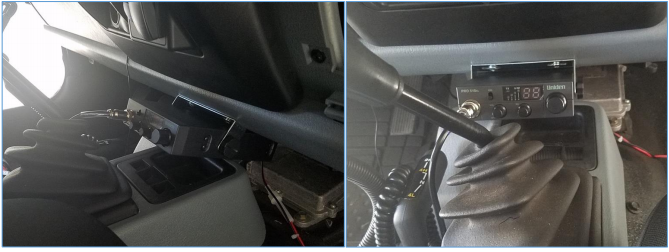
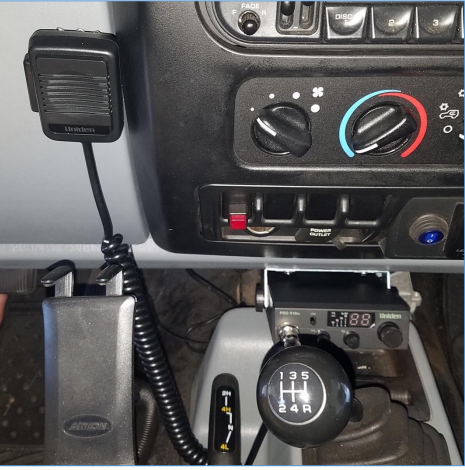
1. Choose a location to mount Uniden CB Radio. Make sure you can access power, grounding screw and coaxial antenna wire. Once a location is selected that best fits your needs, use two provided self-tapping screws to mount Uniden CB Radio bracket. This Radio was mounted under the dash in front of the gear shifter. Tip: A 1/8 drill bit was used to create a pilot hole for the screws.
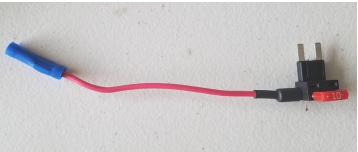
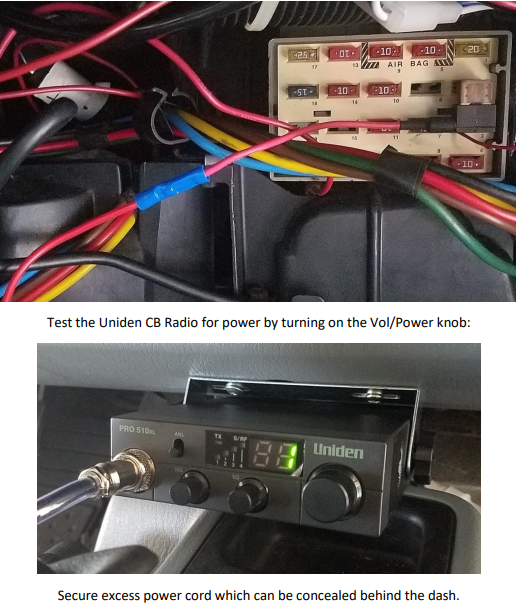
2. Selecting a Power Source: The Uniden CB Radio has an inline fuse on the power wire (Red). The Radio could be wired by splicing an existing power wire. The Radio can also be powered by using a Fuse tap in the fuse panel. This install demonstrates using a Fuse Tap (sold separately).
3. Remove the glove box to access the Fuse panel. Use the fuse diagram to locate a fuse such as ‘Cigarette Lighter’ or an open fuse bank. Do not use fuses related to Air Bags or Safety equipment. Determine if you want the CB Radio to function with or without the ignition on. ‘With’ the ignition turned on requires the key to be turned on for power to be sent to the CB Radio. ‘Without’ means the CB Radio will function if the key is on or off.
4. Fuse bank 3 (label as Alternate Accessory) was not being used and provided power without the ignition being turned on. Use the Multimeter Tester (DC mode) to find the power side of the fuse. This is done by placing the black probe on a ground source and testing each side of the fuse post. You are looking for approximately 12 – 13 Volts on the multimeter tester.
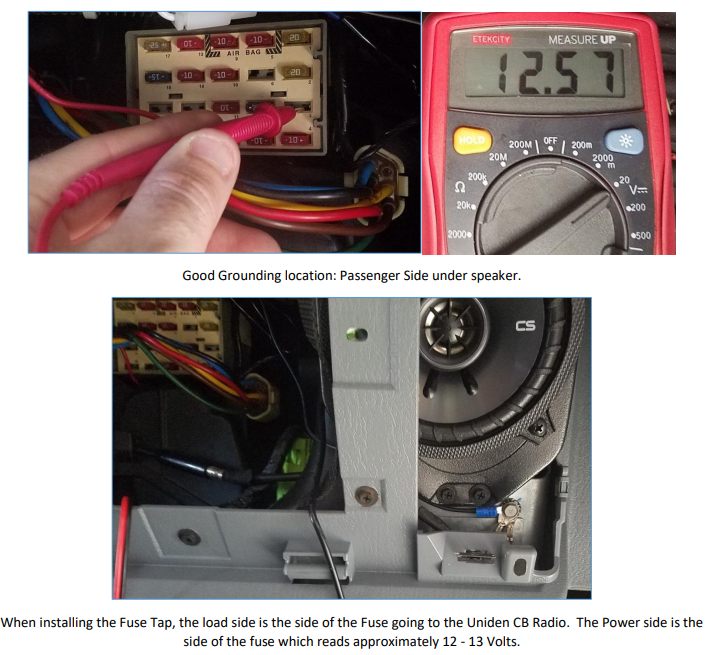
5. Feed wires through the dash to the Fuse panel. Connect black wire to the grounding screw pictured above. Connect red wire to Fuse tap and crimp the wire butt connector. Use a 5 AMP fuse to supply the Uniden CB Radio.
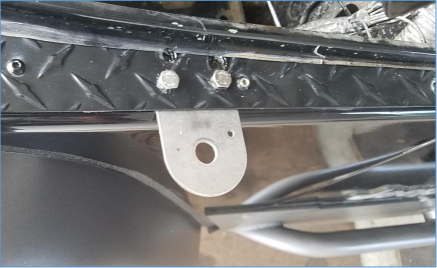
6. Install the Antenna Mount. Pictured below is the FireStik MK-J4R Hood Channel Jeep Antenna Mount. This is mounted on the Driver Front Fender. A grounding wire was used to ensure a good ground to the antenna.
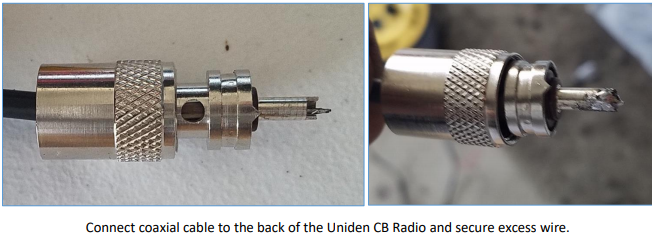
7. Install the Antenna Coaxial Cable. Picture below if the FireStik Fire-Flex (18 foot) coaxial cable.

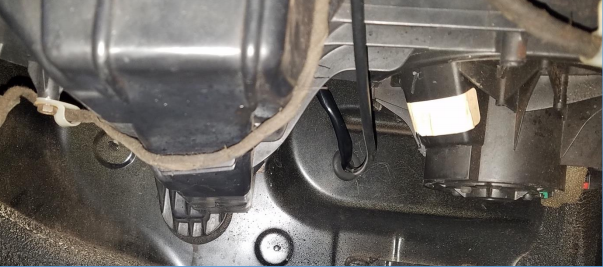
8. Feed the coaxial cable through to the passenger compartment. This can be done on the Driver or Passenger side and may require drilling through the firewall. This was install by passing through a rubber grommet on the passenger side.
9. The Fire-Flex coaxial cable requires soldering the end connector to be able to connect the coaxial cable to the Uniden CB Radio. THIS IS NOT REQUIRED FOR ALL COAXIAL CABLES. If required, follow cable instructions.
10. Choose a location to mount the microphone and use the two provided screws to mount the clip.
11. Secure any additional loose wires and replace glove box. Install CB Antenna. This may require the Antenna to be tuned. Refer to the manufacture instructions if required.
Installation Instructions Written by ExtremeTerrain Customer Tim Hoffecker 6/2/2018.