 FREE 1 to 3-Day Delivery on Orders $149+ Details

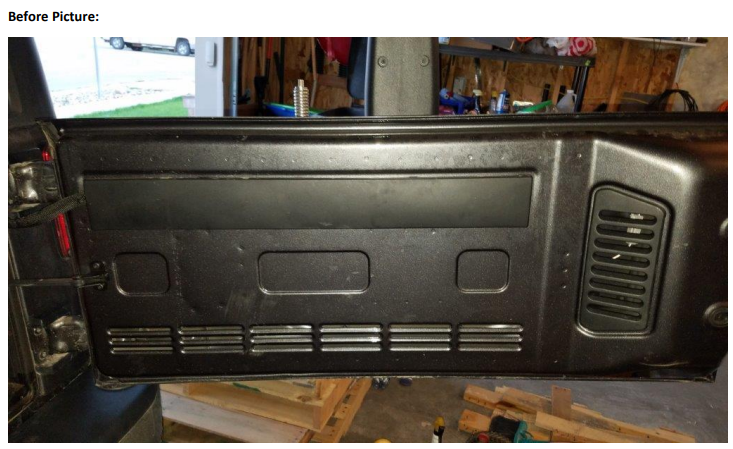
How to Install Smittybilt Tailgate Table (07-18 Wrangler JK) on your Jeep Wrangler
Installation Time
1.5 hours
Tools Required
- Sockets: 7mm, 10mm, 13mm
- Socket Wrench
- Screwdriver
- 19mm Lug Wrench
- Step Drill Bit
- Drill
- Nutsert Tool (AKA Rivnut Tool) (must have 3/8"-16 attachment)
- Center Punch
- Hammer

Shop Parts in this Guide
Installation Instructions
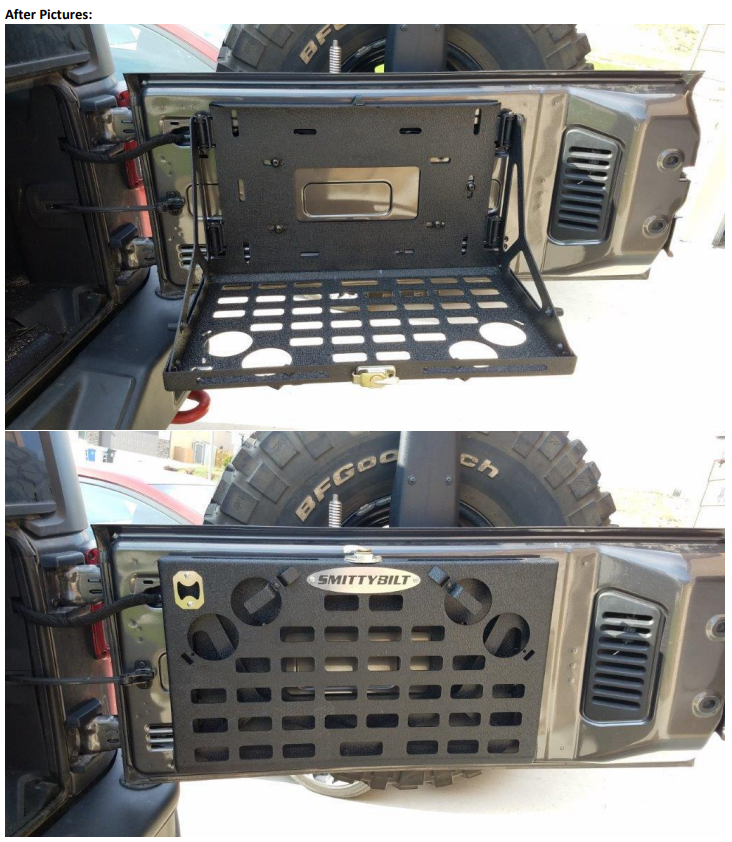
1. Mine came pre-installed, but you may need to install the bottle opener, sash lock, and Smittybilt logo. If needed, use the supplied stainless hardware and install as shown.

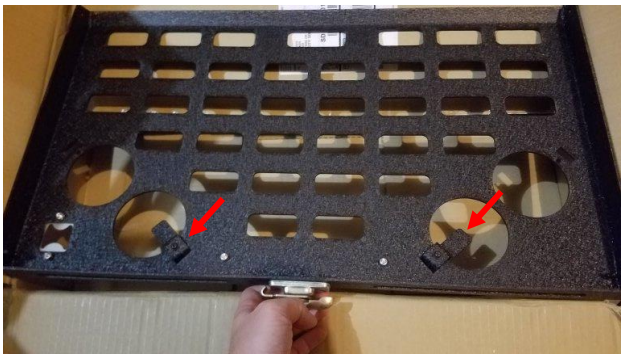
2. If you will be using the cup holder attachments, install them now. I chose to start with 2 and see how I like them. Using the supplied 10-24x1/4” hardware (the smallest supplied nuts/bolts) install the brackets as shown below. Tighten using the supplied allen wrench and a 7mm socket.
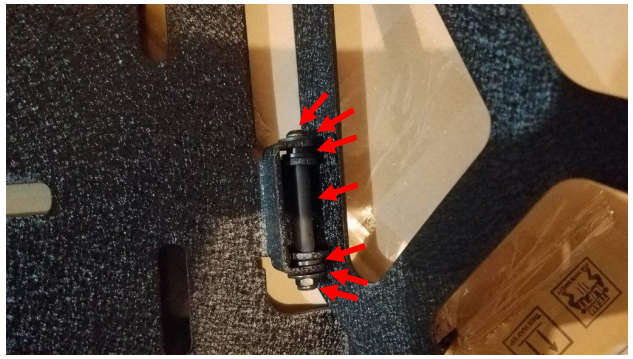
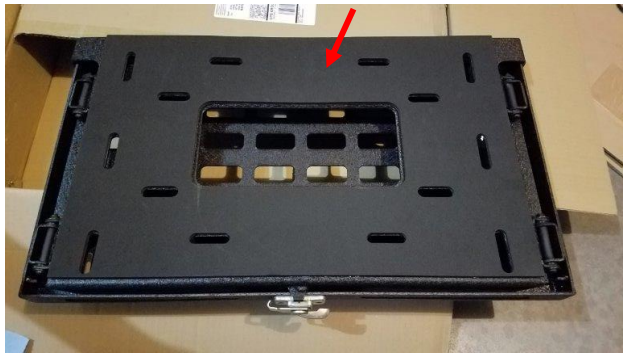
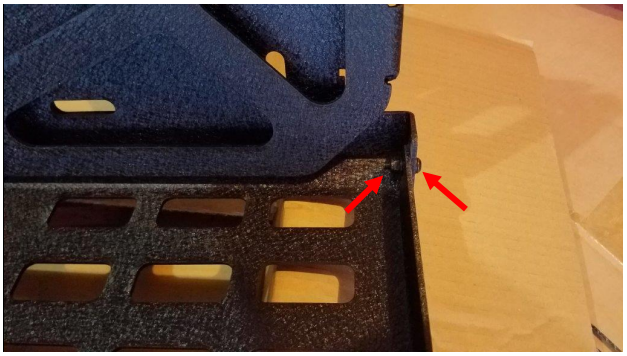
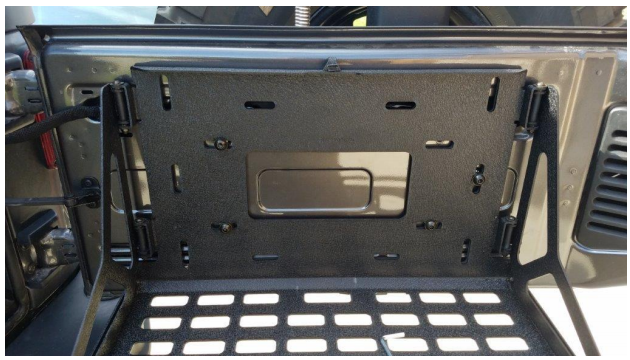
3. Next you will attach the swing arms to the base. Looking at the picture below I will list from top to bottom what hardware is installed. 6mm x 80mm bolt, washer, nylon flange sleeve washer (smaller portion facing upward), rubber sleeve, nylon flange sleeve washer (smaller portion facing down), washer, 6mm nylock nut. Build all 4 hinges in that order, and hand tighten the nut for now.
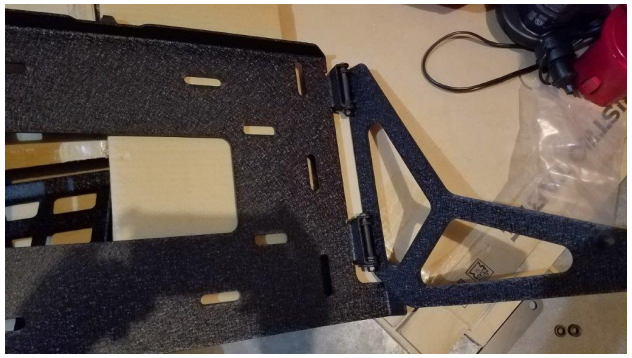
4. The swingarms should look like this. Now using the supplied allen wrench and a 10mm socket, tighten all 4 hinges until the swingarms move smooth with slight resistance.
5. Next, install the supplied gasket to the back of the mounting base. This gasket sits between the mounting base and your tailgate. Wipe the base clean, peel the paper backing off the gasket, line it up as shown below, then press it down into place.
6. Now attach the table to the mounting plate. Use the supplied ¼”-20 x1” bolts and hardware. Install bolts on both sides of the table. Using the supplied allen wrench and a 10mm socket tighten until the table folds smoothly with slight drag.
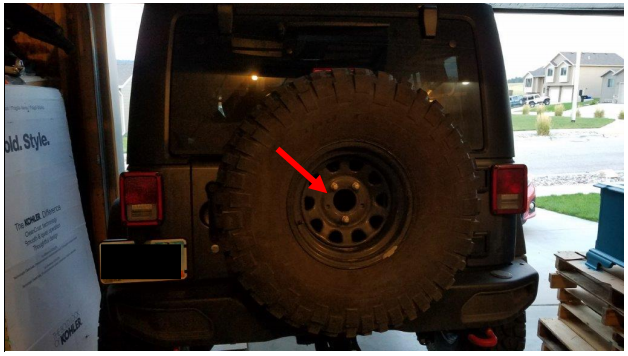
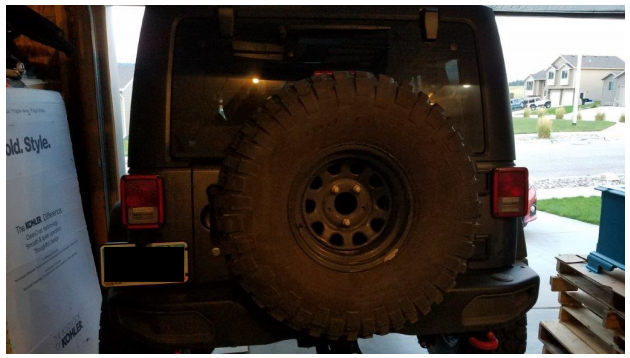
7. Using a lug wrench, remove the 3 lugs holding the spare tire in place and remove the spare tire.
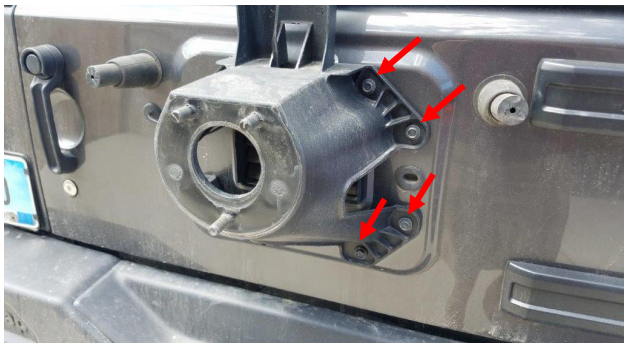
8. Using a 13mm socket remove the 8 bolts attaching holding your spare tire carrier to the tailgate and remove the spare tire carrier. Then remove the plastic vent grill behind it. This will give you a view inside your tailgate to make sure you don’t drill in the wrong place.
Note: After learning the hard way, I highly recommend this step.
9. Remove the plastic cover on the inside of your tailgate.
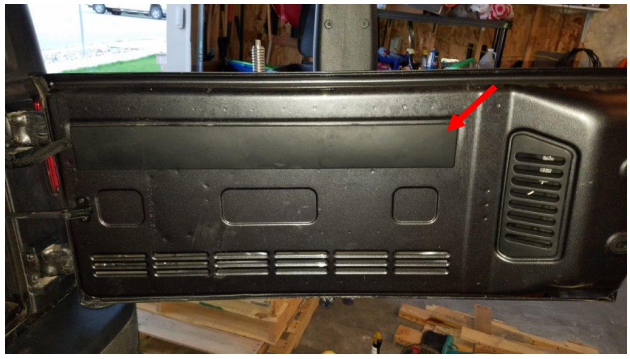
10. I recommend wrapping the colored wires in electrical tape for a cleaner finished look. Then hold up the table in the desired location. Make sure it will clear the floor and any soft top hardware when the tailgate is closed. Then mark your desired bolt locations. Then center punch the marked locations for drilling.
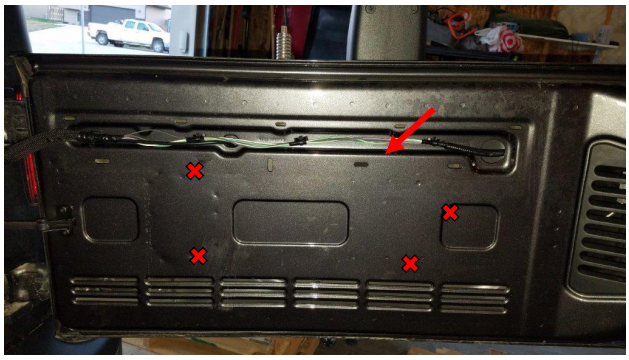
11. Before drilling take a look inside the tailgate through the hole where the spare tire was. Locate your center punched drill locations and make sure they won’t hit anything that might get in the way.
12. Relocate any holes as necessary.
13. Using a step drill bit, drill each hole to ½”. Then you can insert the supplied nutserts to make sure the fit.
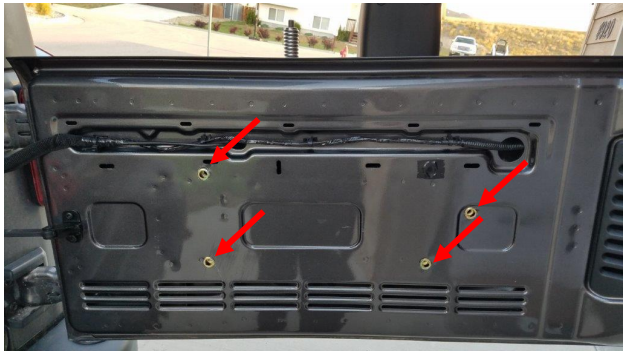
14. Using a 3/8”-16 nutsert tool, install all 4 nutserts. Then check to make sure none are loose.
15. Lift the table into place and hand tighten the 4 supplied 3/8” x 1” bolts with washers. Note: It helps to have a separate set of hands to hold the table in place. Then use the supplied allen wrench to tighten all 4 bolts. Be careful not to overtighten or the nutserts could become loose and start to spin
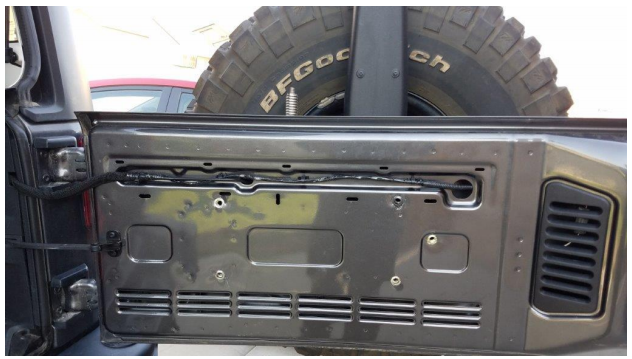
16. Reverse steps 7 and 8 to reinstall the spare tire.
Installation Instructions Written by ExtremeTerrain Customer John Parker 08/30/2017
