 FREE 1 to 3-Day Delivery on Orders $149+ Details

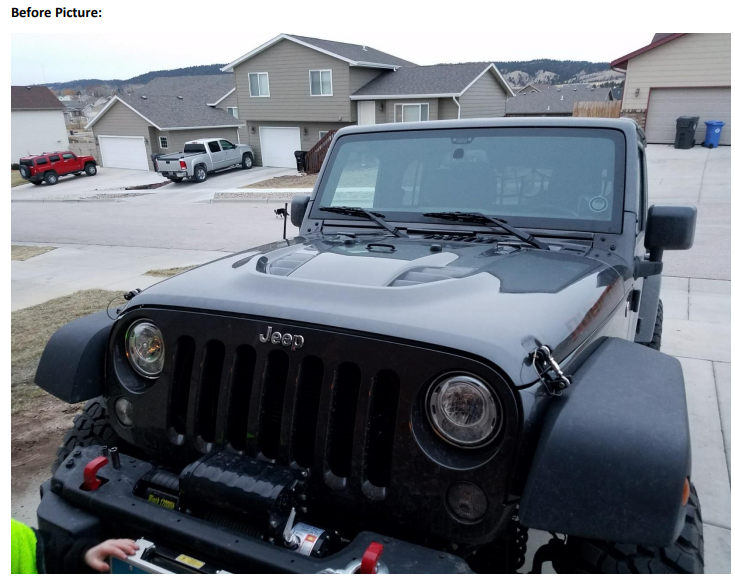
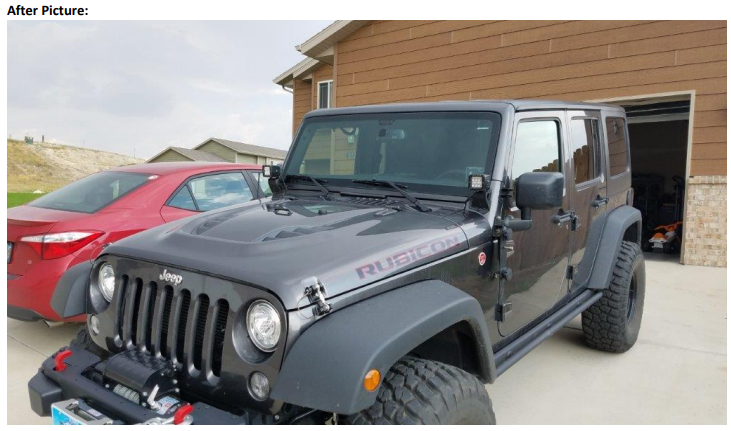
How to Install Raxiom 3 in. Square 6-LED Off Road Light - Spot Beam (87-18 Wrangler YJ, TJ, JK & JL) on your Jeep Wrangler
Installation Time
1 hours
Tools Required
- Hex keys: 4mm, 5mm
- Wrenches: 2x 14mm
- T25 bit (found in your Jeep tool kit)
- Wire strippers
- Electrical wire (recommend at least 16 gauge)
- Wire terminals
- Soldering iron
- Electrical tape
- Zip ties
- Light mount brackets
Installation Instructions
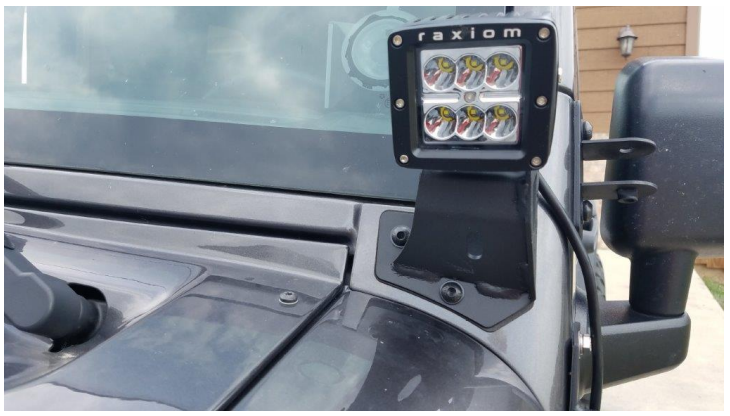
1. First you will need to measure and cut the amount of wire needed to stretch from your power source to your light mounting points. I will be mounting mine on the A-pillar. I used about 3ft for the left light and 6ft for the right light. I used 14 gauge wire found at Lowes, but 16 gauge would also work fine.
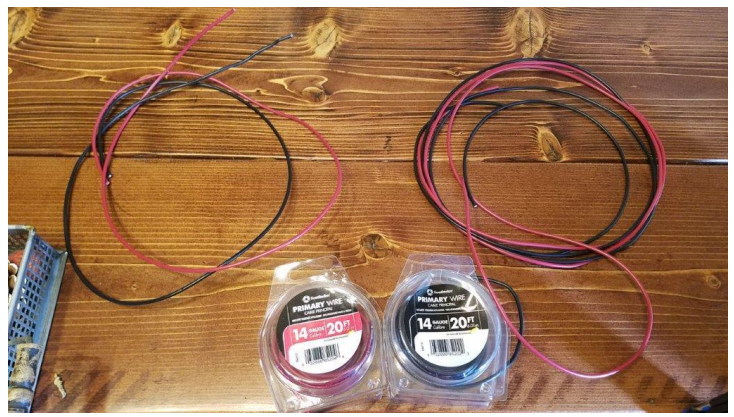
2. Use wire strippers to strip about ½” on the ends of all your wires.

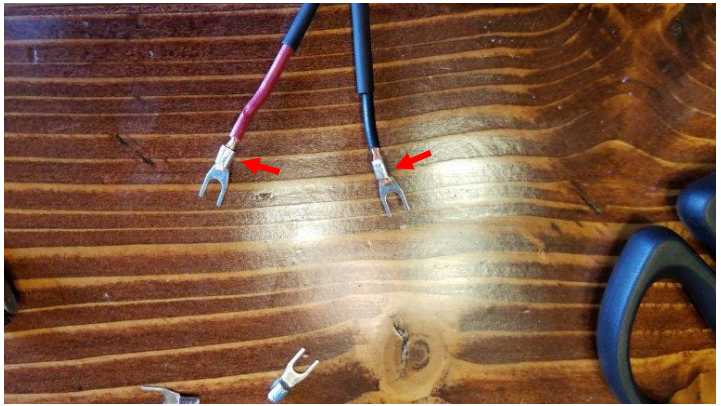
3. For the end of each wire that will connect to your power source, crimp and solder terminals as shown below.
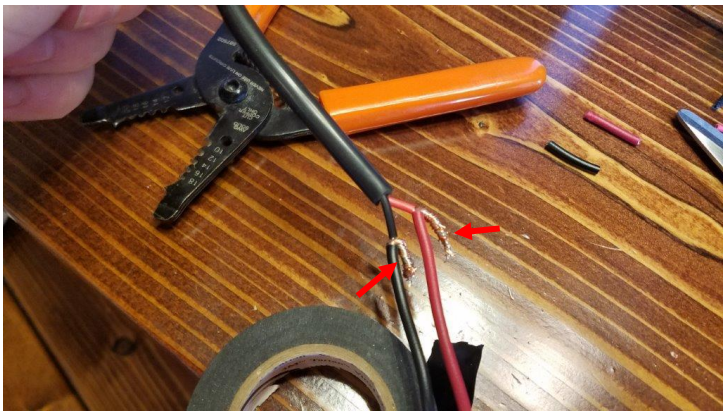
4. There are many ways to connect your electrical wire to the wire coming from the light. They make all sorts of crimp connectors that work well. However, I like to twist the wires together as shown, then solder them. Connect the wires to each light using whichever connection method you prefer.
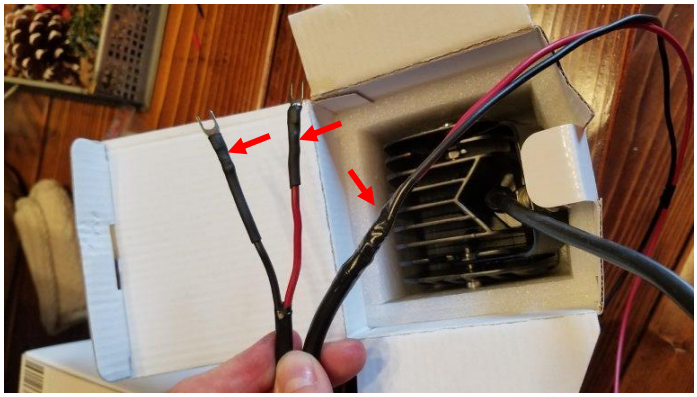
5. Then use heat shrink or electrical tape to cover all exposed wire as shown. Make sure your red and black wire splices are taped separate first, then you can wrap them together. At this point you should have 1 light that has about 3-4ft of wire with terminals on the end, and 1 light with about 6-7ft of wire with terminals on the end.
Note: Your wire length may differ depending on your mounting location.
6. Then mount the lights to your desired mounting bracket. Use 2x 14mm wrenches and the supplied hardware to attach them. Make sure the lights are pointed near the direction you want them. Use a 4mm hex key for the bolts on both sides of the light to keep it from moving up and down.
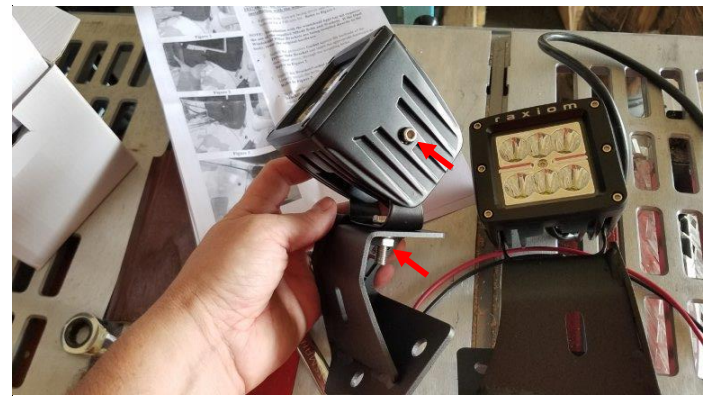
7. Then mount both brackets using your bracket specific mounting instructions. Adjust the aim of the lights as you desire, and tighten all hardware from step 6.
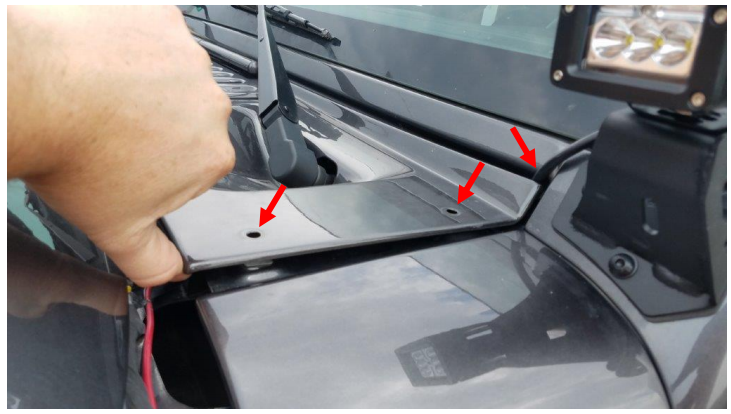
8. Open your hood. Use your T25 bit to remove the 2 screws holding this panel down. Then route the wire under the panel and into the engine compartment. Do this for each light on both sides of the Jeep. Then reinstall the T25 bolts.
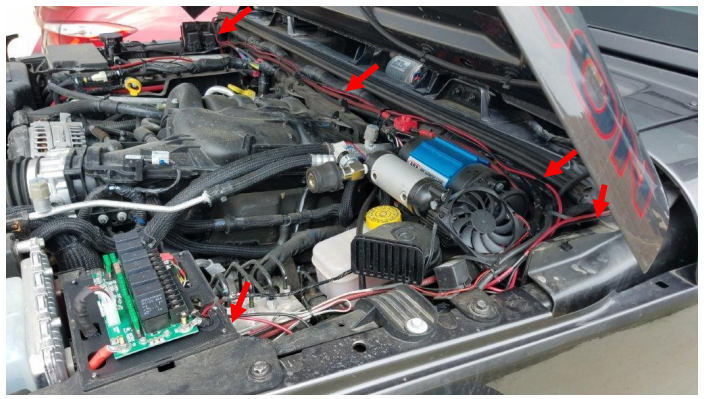
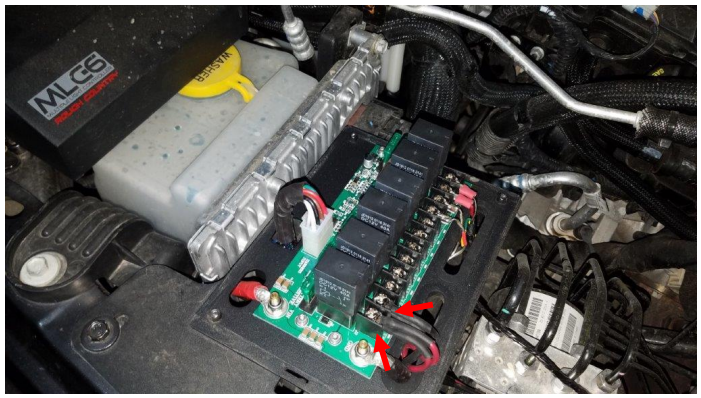
9. Route the wires to your power supply. I am using the Rough Country MLC-6, but it will be similar for most switching pods on the market. Make sure you keep the wires away from moving parts, and hot parts to keep them safe. Use zip ties to keep them in place.
10. Attach the both red to the positive and the both black to the negative terminals on your switch pod.
11. Now just switch your lights on and test them out.
Installation Instructions Written by ExtremeTerrain Customer John Parker 09/22/2017