 FREE 1 to 3-Day Delivery on Orders $149+ Details

How to Install Dirty Dog 4x4 Front Netting - Black (07-18 Wrangler JK) on your Jeep Wrangler

Shop Parts in this Guide
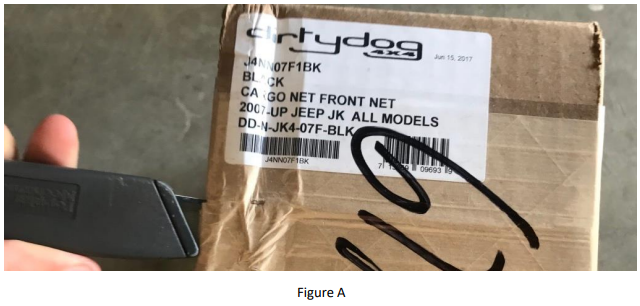
1. Carefully open the package using a box cutter or knife (Figure A) and ensure the netting and accessories are included and undamaged.
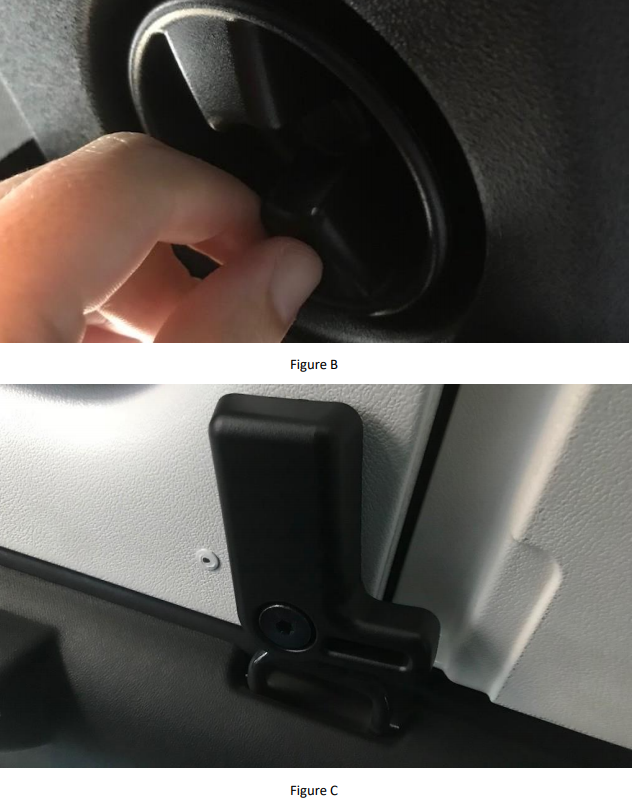
2. If a hardtop is on the vehicle, remove the two freedom top panels, removing the roll-top screws (Figure B) and the slide-on clips (Figure C).
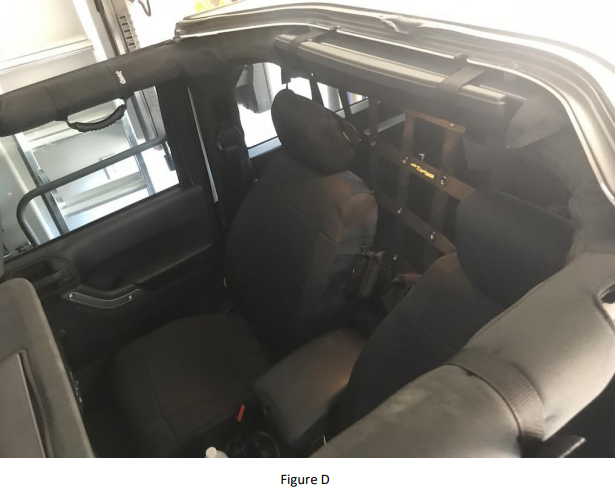
3. Remove the panels and sit to the side so the top front is open (Figure D).
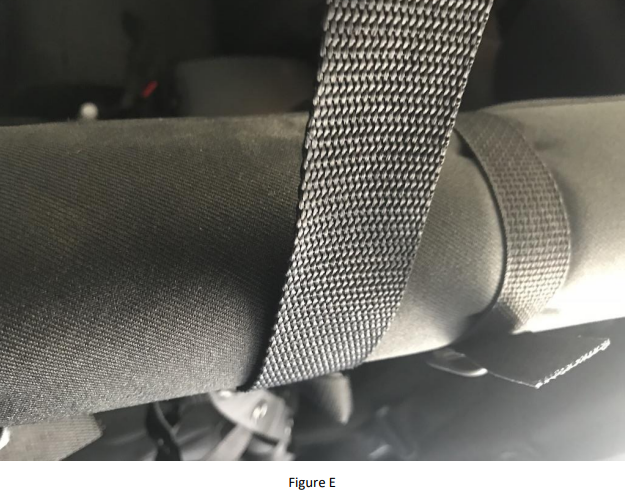
4. Begin running the netting under the driver's side door's roll bar (Figure E). Ensure the netting is facing the correct direction by having the side of netting with no loops or strips facing the windshield.
5. Run the strip through the buckle (Figure F).

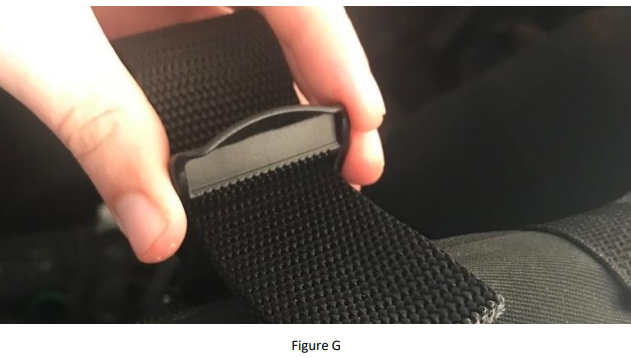
6. Then run the strip back through (Figure G).
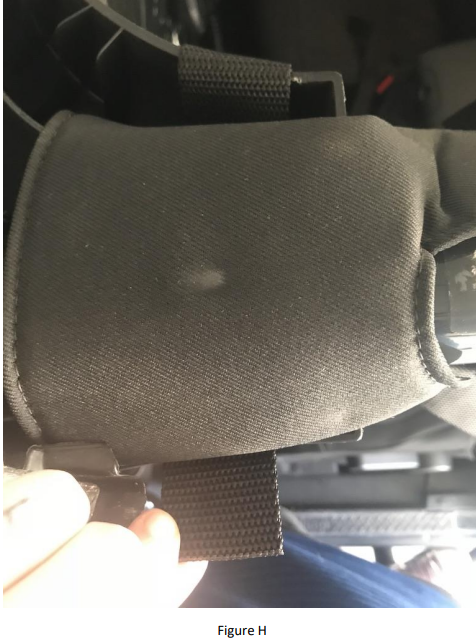
7. For the front-most strip, run the strip under the roll bar but above the paneling (Figure H).
8. Follow Steps 4-7 on the passenger side, as well.
9. Tighten the straps on both sides.
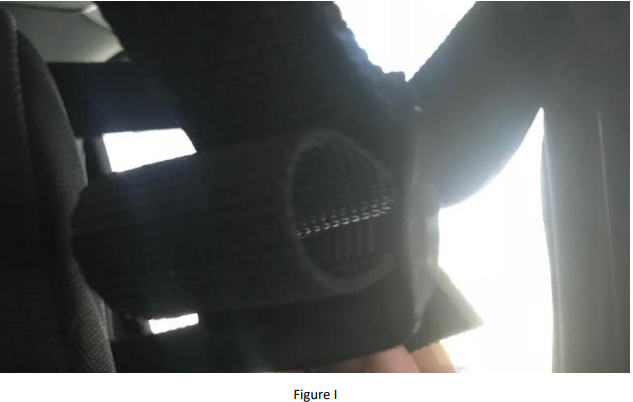
10. Run the rear corner strip around the middle roll bar near the speaker bar on both sides. Pull the strip through and thread it through the buckle like the other strips (Figure I). Then tighten both corner strips.
11. Thread each of the two 20" fabric strips (provided) through the roll bar, then thread the strip through the rearfacing clasp on the netting .
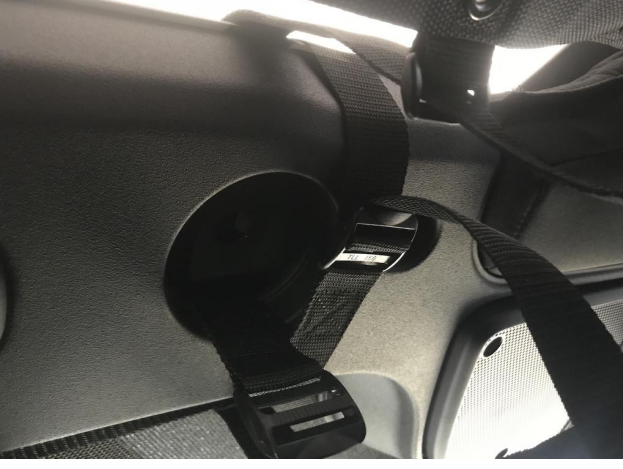
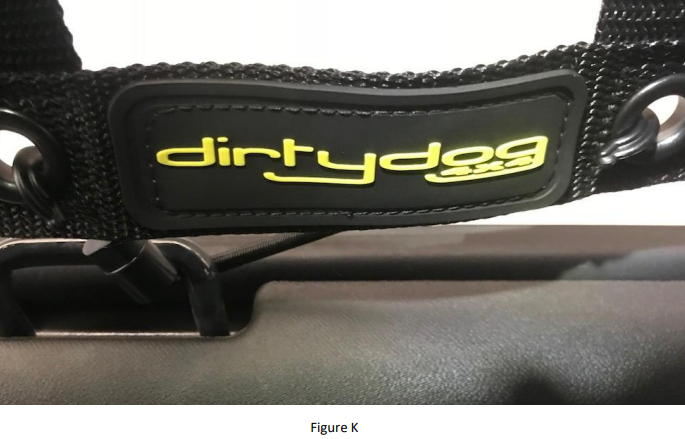
12. Affix the bungee strap (provided) through the front loop of the windshield and snap the hooks into the closest two holes (Figure K).
Installation Instructions Written by ExtremeTerrain Customer J. Sandlin 01/30/2018.
