FREE 1 to 3-Day Delivery on Orders $149+ Details

How to Install Barricade Adventure Door Kit - Textured Black (07-17 Wrangler JK 4 Door) on your Jeep Wrangler
Installation Time
1 hours
Tools Required
- Phillips screwdriver
- socket wrench
- T50 torx bit
- socket extension
- grease
- 1/2” socket
- 1/2” wrench
- 13mm socket
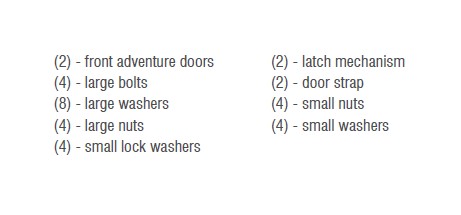
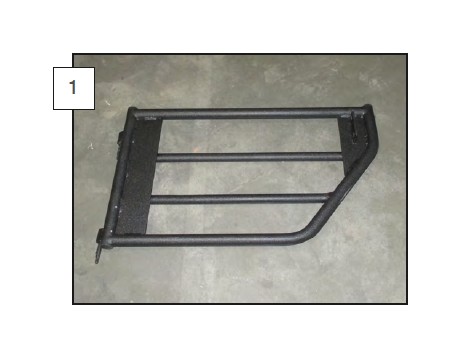
Contents:
It is recommended that you have an additional person available to help during this installation, parts can be awkward to hold and support by yourself. Block wheels and set parking brake before beginning work.
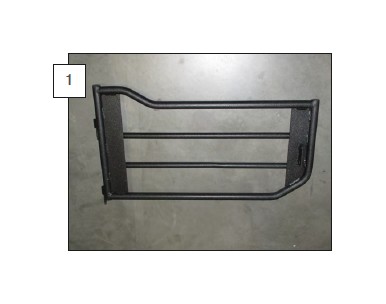
Lay the trail door on the ground, use a blanket between the door and the ground to keep the outside of the door from scratching.
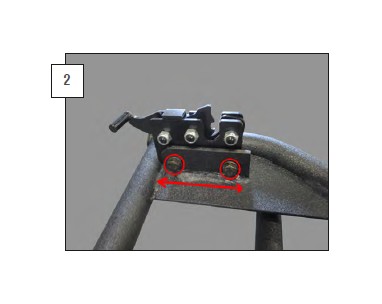
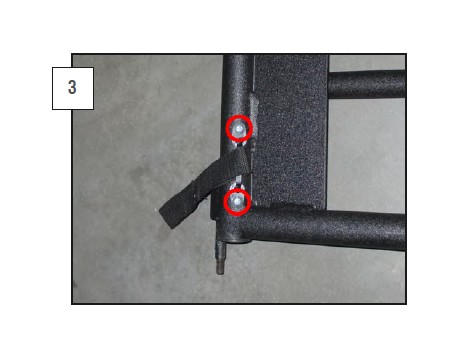
Install the latch, as shown, with the handle up top on the back side of the latch mount. Insert the bolts from the front of the door to the back of the door. Secure the bolts with the supplied nuts. Be sure to use a washer on both sides of the bolt and nut combination. Keep the latch loose so it can be moved up and down as needed, if it does not line up with the striker..
On the front, inner bottom of the door there are (2) screw holes. Insert the included strap mount through the included strap. Place the strap mount on the door and tighten down the (2) phillips head screws.

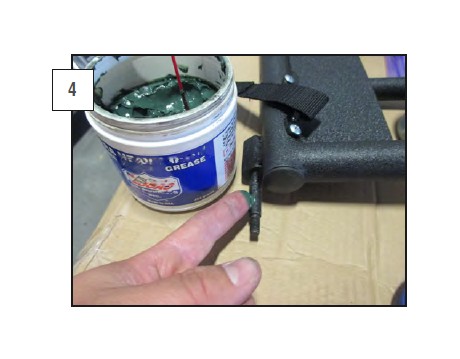
Lubricate the trail door’s hinge pins with some automotive grease.
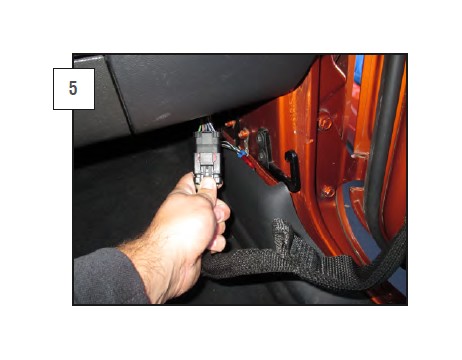
On the inside of the Jeep, Under the dashboard. Remove the door electrical harness (is your vehicle is equipped). Push the red tab to the right, then press down on the locking tab and pull the harness apart.

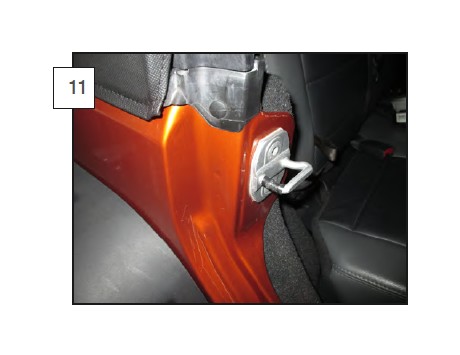
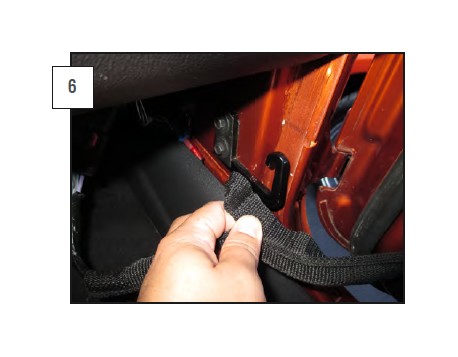
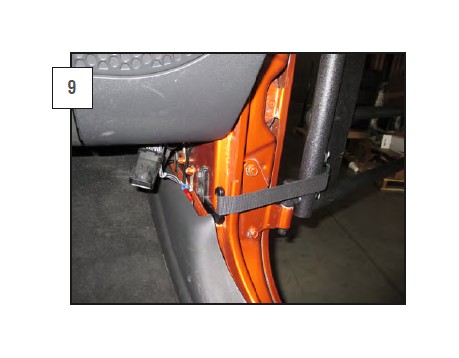
Next to the electrical connector is the door securing strap. Pull this up and over the vehicle’s strap retaining hook. CAUTION: Make sure you keep the door supported from here on out. The door can swing wide open and dent the fender without this strap.

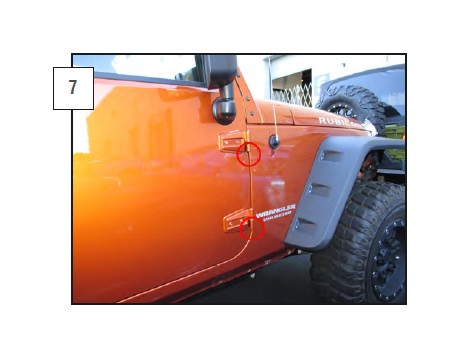
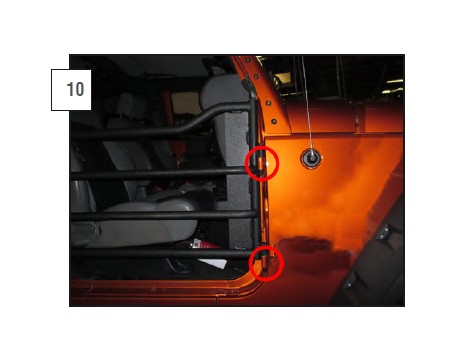
Using a T50 torx driver; Remove the hinge pin retaining nut from the bottom of the upper door hinge, then remove the lower hinge’s retaining nut.
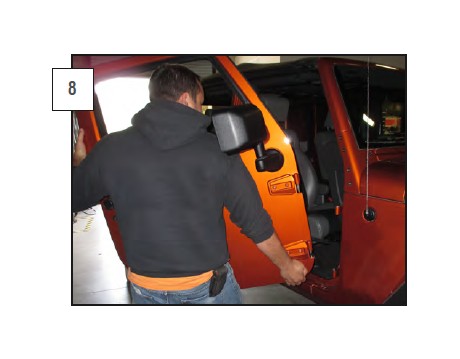
Remove the door by grasping it securely and lifting straight up, then pulling it away from the vehicle. The doors can be heavy and it may be necessary to have someone help with the uninstall. If the door is too hard to remove, it can be swung back and forth slowly to aid in removal.
Place the strap over the top of the retaining hook and make sure the door is secured.

Install the included washer, lock washer and nut to the top hinge, install the other set on the lower hinge. Tighten the hardware with a 13mm socket. If the door creaks or is hard to swing, loosen the 13mm nut until it swings freely, yet is still secure.
Close the latch on the striker and tighten down the hardware to keep the latch in place.

Some vehicles may have slightly twisted bodies or the strikers are worn from use. This may cause the doors to rattle lightly. Electrical tape can be wrapped around the striker to keep the doors from rattling.

Contents:
It is recommended that you have an additional person available to help during this installation, parts can be awkward to hold and support by yourself. Block wheels and set parking brake before beginning work.
Lay the trail door on the ground, use a blanket between the door and the ground to keep the outside of the door from scratching.
Install the latch, as shown, with the handle up top on the back side of the latch mount. Insert the bolts from the front of the door to the back of the door. Secure the bolts with the supplied nuts. Be sure to use a washer on both sides of the bolt and nut combination. Keep the latch loose so it can be moved up and down as needed, if it does not line up with the striker.

On the front, inner bottom of the door there are (2) screw holes. Insert the included strap mount through the included strap. Place the strap mount on the door and tighten down the (2) phillips head screws.
Lubricate the trail door’s hinge pins with some automotive grease.

On the inside of the Jeep, behind the access door in the back. Remove the door electrical harness (is your vehicle is equipped). Push the red tab to the right, then press down on the locking tab and pull the harness apart.
Next to the electrical connector is the door securing strap. Pull this up and over the vehicle’s strap retaining hook. CAUTION: Make sure you keep the door supported from here on out. The door can swing wide open and dent the fender without this strap.
Using a T50 torx driver; Remove the hinge pin retaining nut from the bottom of the upper door hinge, then remove the lower hinge’s retaining nut.

Remove the door by grasping it securely and lifting straight up, then pulling it away from the vehicle. The doors can be heavy and it may be necessary to have someone help with the uninstall. If the door is too hard to remove, it can be swung back and forth slowly to aid in removal.

Place the strap over the top of the retaining hook and make sure the door is secured.
Install the included washer, lock washer and nut to the top hinge, install the other set on the lower hinge. Tighten the hardware with a 13mm socket. If the door creaks or is hard to swing, loosen the 13mm nut until it swings freely, yet is still secure. Close the latch on the striker and tighten down the hardware to keep the latch in place.
Some vehicles may have slightly twisted bodies or the strikers are worn from use. This may cause the doors to rattle lightly. Electrical tape can be wrapped around the striker to keep the doors from rattling.