 FREE 1 to 3-Day Delivery on Orders $149+ Details

How to Install a Barricade Mirror Relocation Kit on your 2007-2017 Jeep Wrangler JK
Installation Time
2 hours
Tools Required
- 5mm allen key
- T40 torx key
- 13mm socket
- socket wrench
- socket extension

Shop Parts in this Guide
Contents:
(2) - relocation brackets
It is recommended that you have an additional person available to help during this installation, parts can be awkward to hold and support by yourself. Block wheels and set parking brake before beginning work. Disconnect the negative (-) batter cable.
Remove the T40 torx bolt from the underside of the Jeep mirror. Push up on the mirror housing to remove it from the mirror support arm.
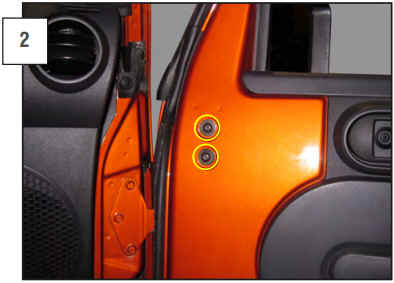
Open the door and roll down the window. Remove the (2) 5mm allen bolts from the inside of the door. Be sure to support the mirror arm on the outside of the vehicle.
Remove the mirror support arm from the outside of the door, by pulling it away from the vehicle.
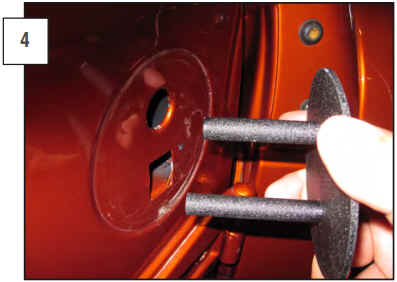
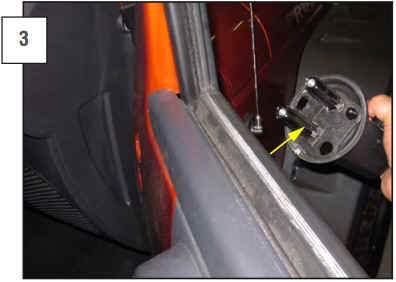
Install the mirror door plug into the mirror support arm hole in the door. Be sure to have the longer shaft in the bottom, square hole. Use the round gasket between the plug and the door to seal the area. Reinstall the (2) 5mm allen bolts through the inside of the door, into the door plug.
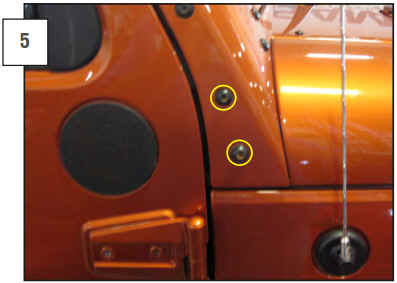
Remove the lower (2) T40 screws from the windshield frame. Set them aside, they will be reused for the install.
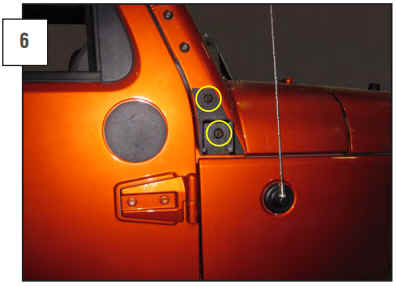
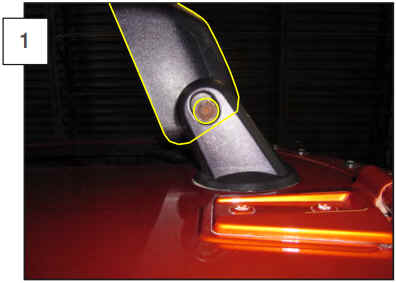
Install the mirror relocation bracket over the two holes in the windshield frame. Reinsert the (2) T40 screws through the relocation bracket and into the windshield frame. Be sure to use the included rubber gasket between the mirror relocation bracket and the paint.
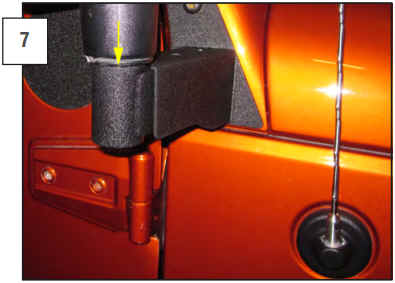
Insert the stock mirror down into the end of the relocation bracket as shown. Secure it with the (1) T40 torx screw removed from the stock support arm. Insert the movable section of the relocation bracket into the other half of the bracket that is attached to the vehicle.
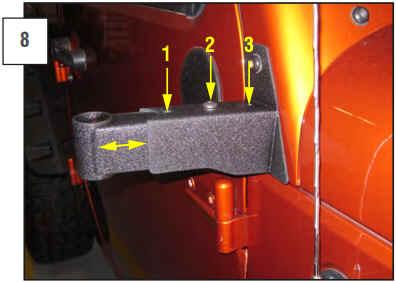
Insert the (1) 5mm bolt into one of the 3 corresponding adjustment holes in the arm. Insert the (1) 13mm nut into the bottom of the bracket and tighten the nut. Be sure to use the washer on the top side and the lock washer on the lower/nut side.
