 FREE 1 to 3-Day Delivery on Orders $149+ Details

How to Install a Teraflex Leveling Kit w/o Shocks on your 2007-2015 Jeep Wrangler JK
Installation Time
6 hours
Tools Required
- Floor jack
- 2 Jack stands
- Tire Iron
- 3/8 in. or 1/2 in. socket set (10mm thru 21mm set will work)
- Combination wrench set (10mm thru 21mm set will work)
- 3/8 in. or 1/2 in. breaker bar (if necessary for stubborn bolts)
- Small pry bar (to remove factory spring isolators & pop out wiring harness retainer clips)
- Axle grease (to assist in seating rear spacers)
- Small block of 4x4 wood (to assist in seating rear spacers)

Shop Parts in this Guide
Installation Instructions (Front):
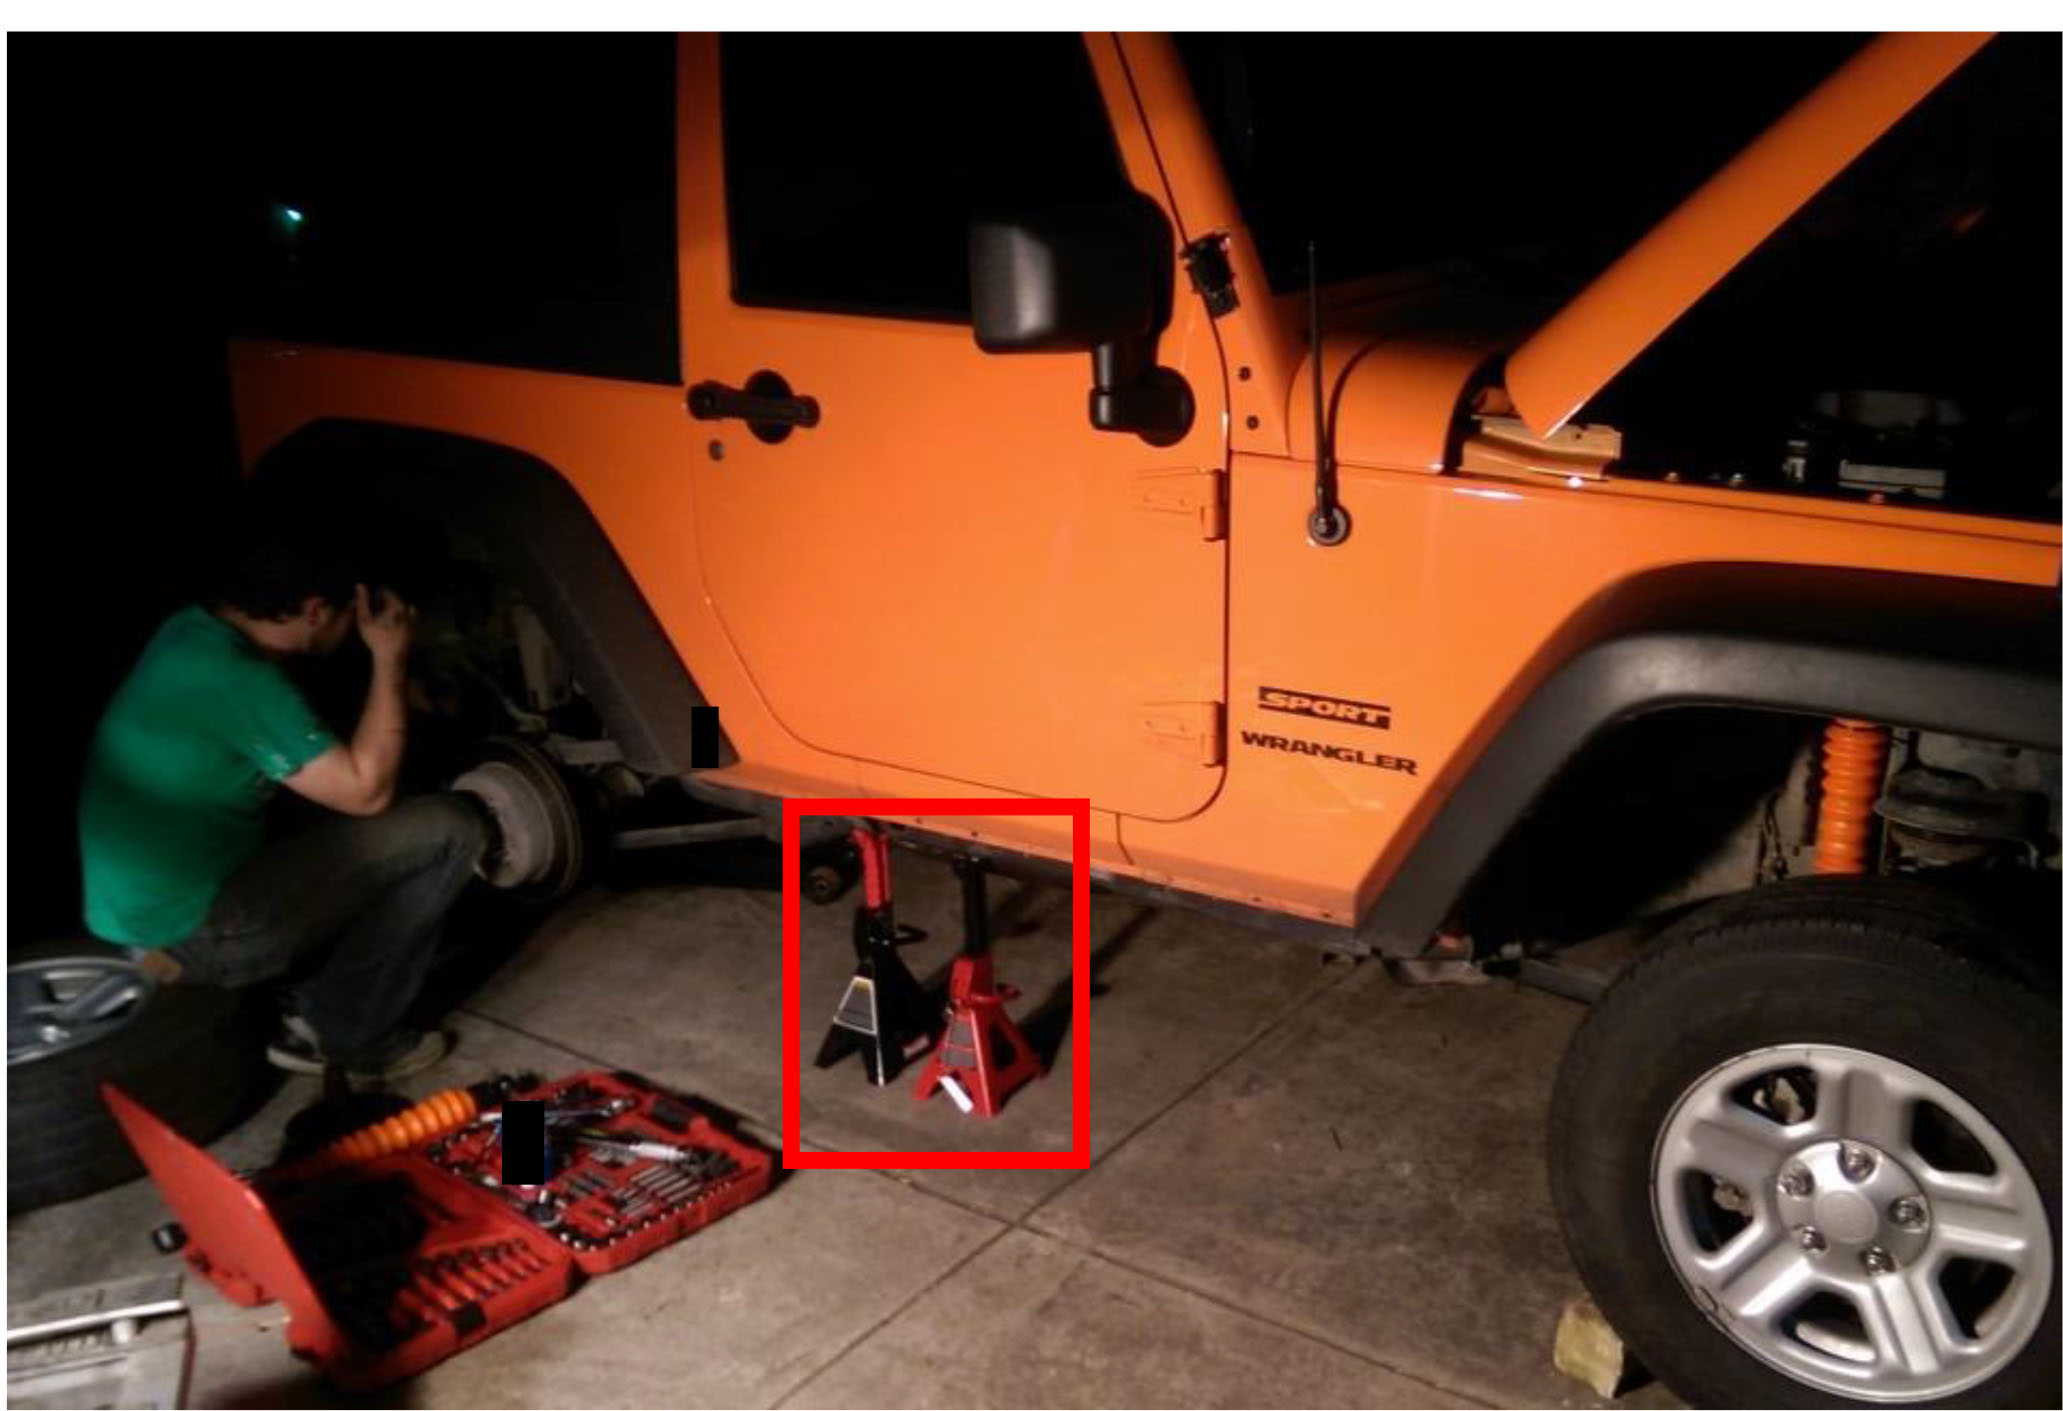
1. Beginning with the front, loosen the lug nuts with the tire iron. Then, jack up each side of the Jeep and place jack stands under the frame for safe support. Remove the tires.
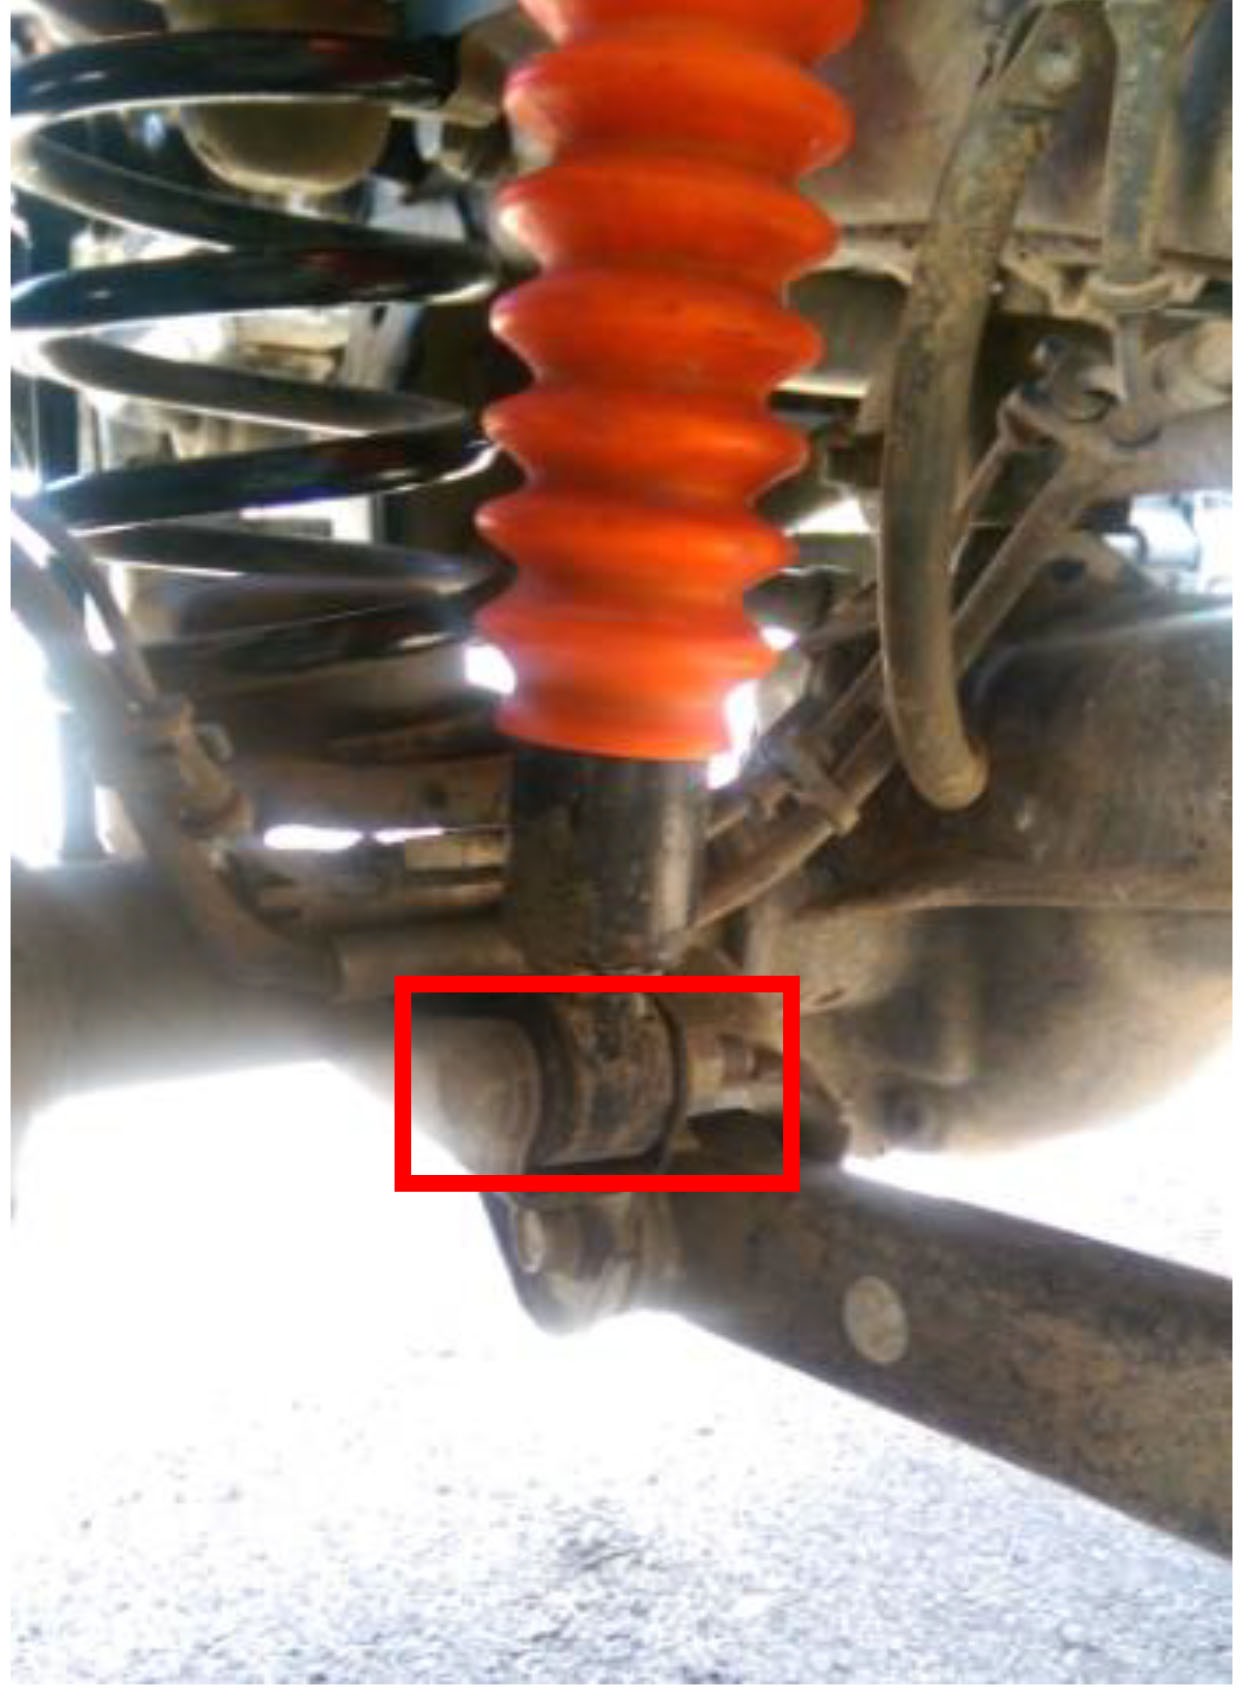
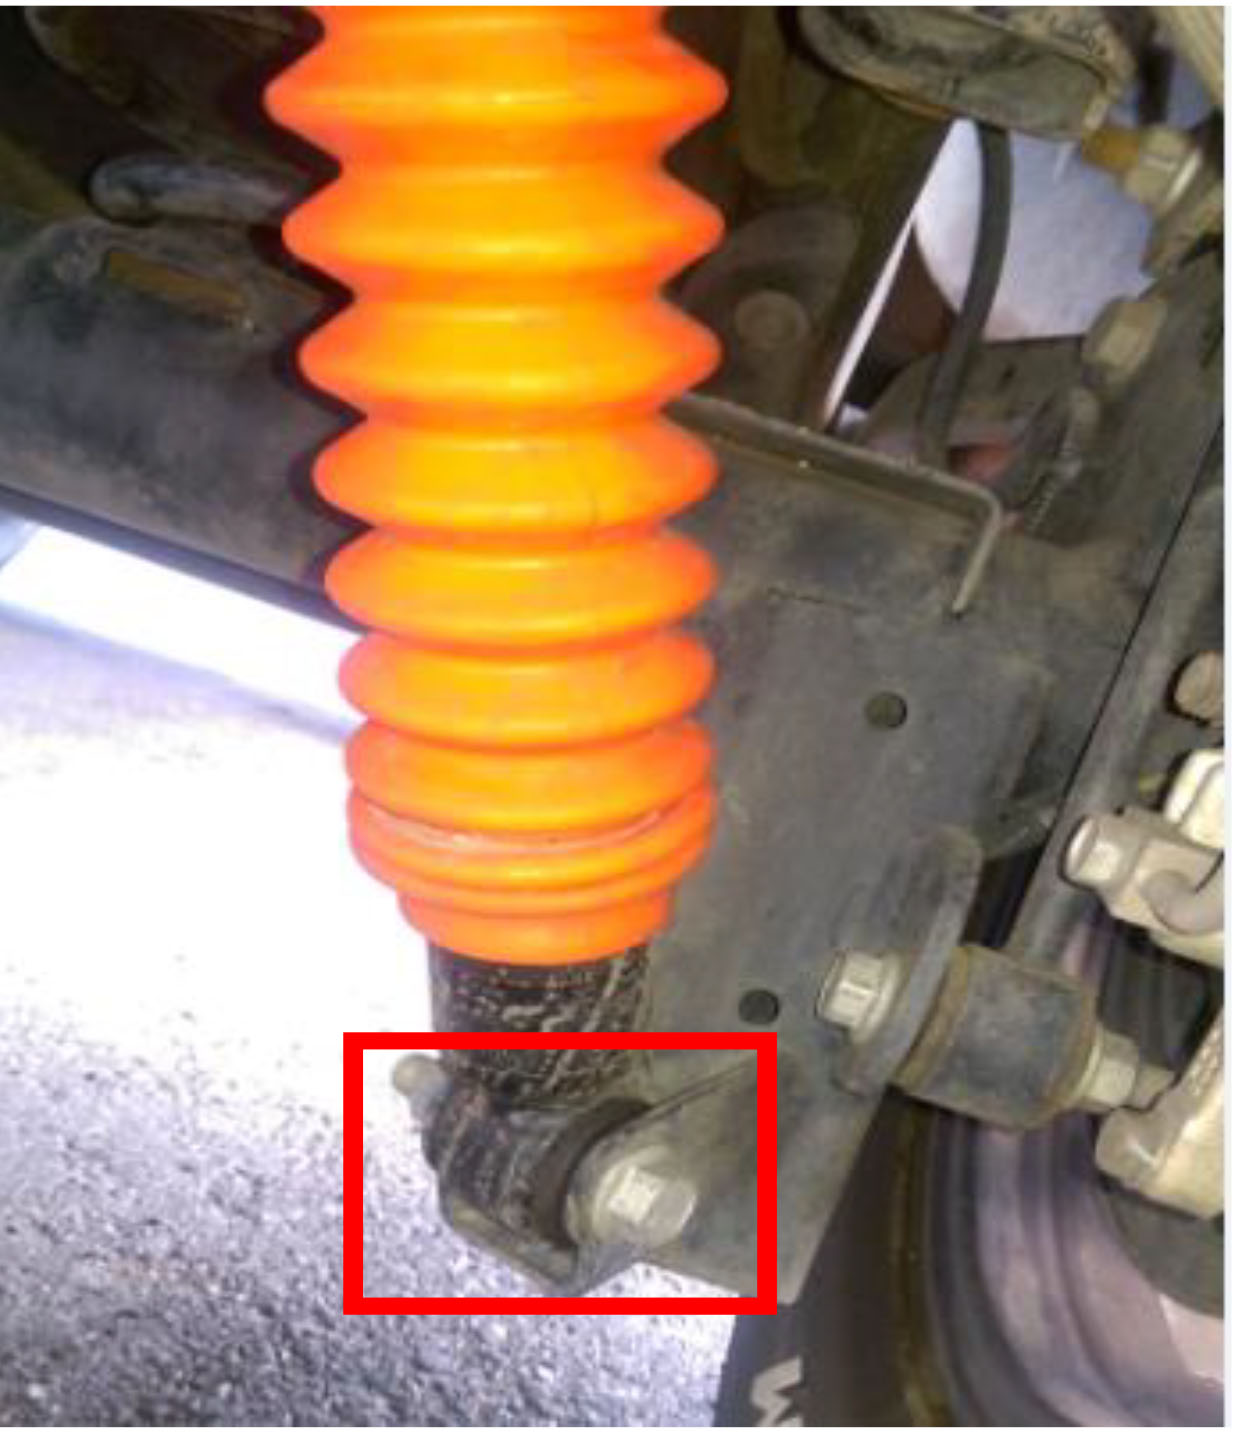
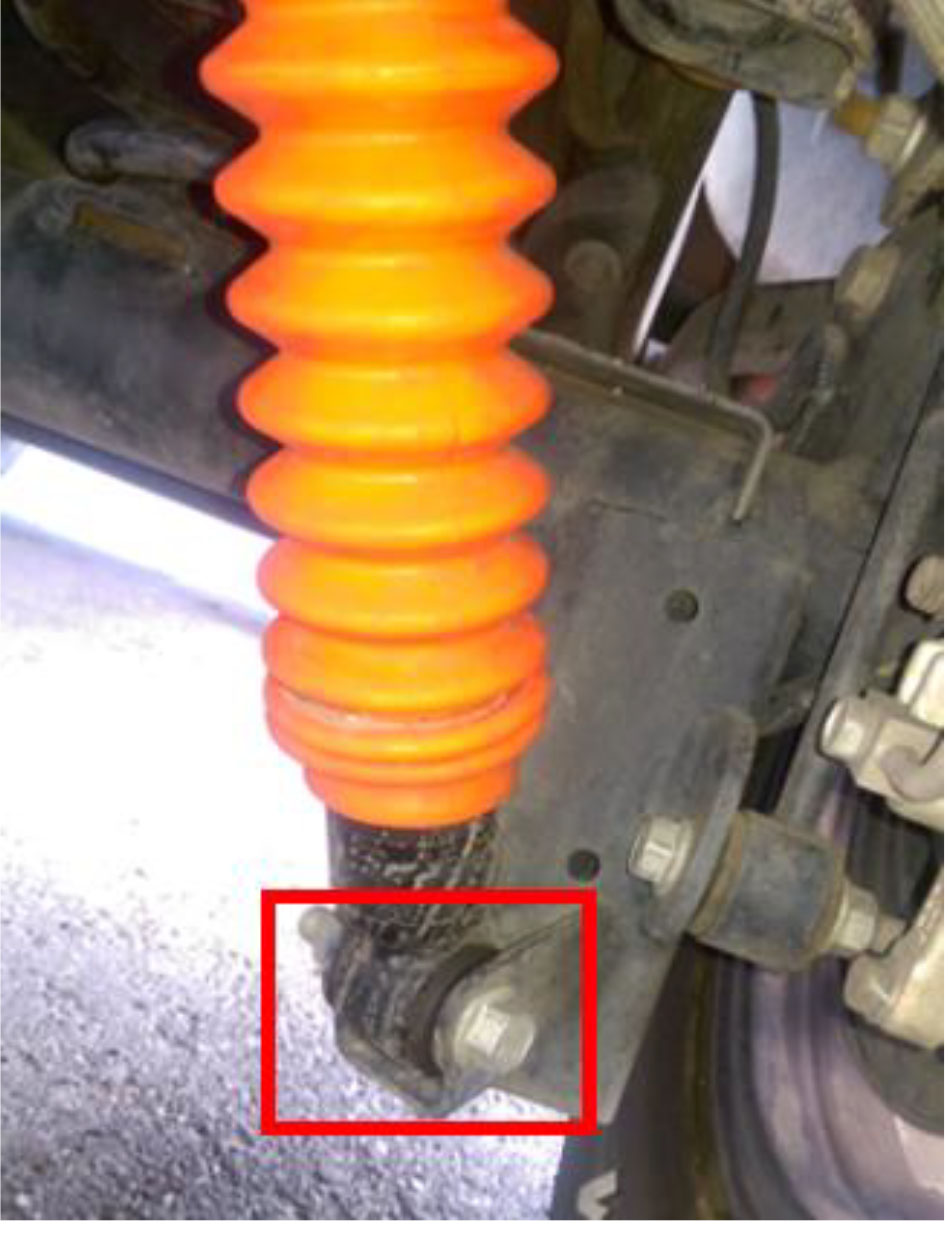
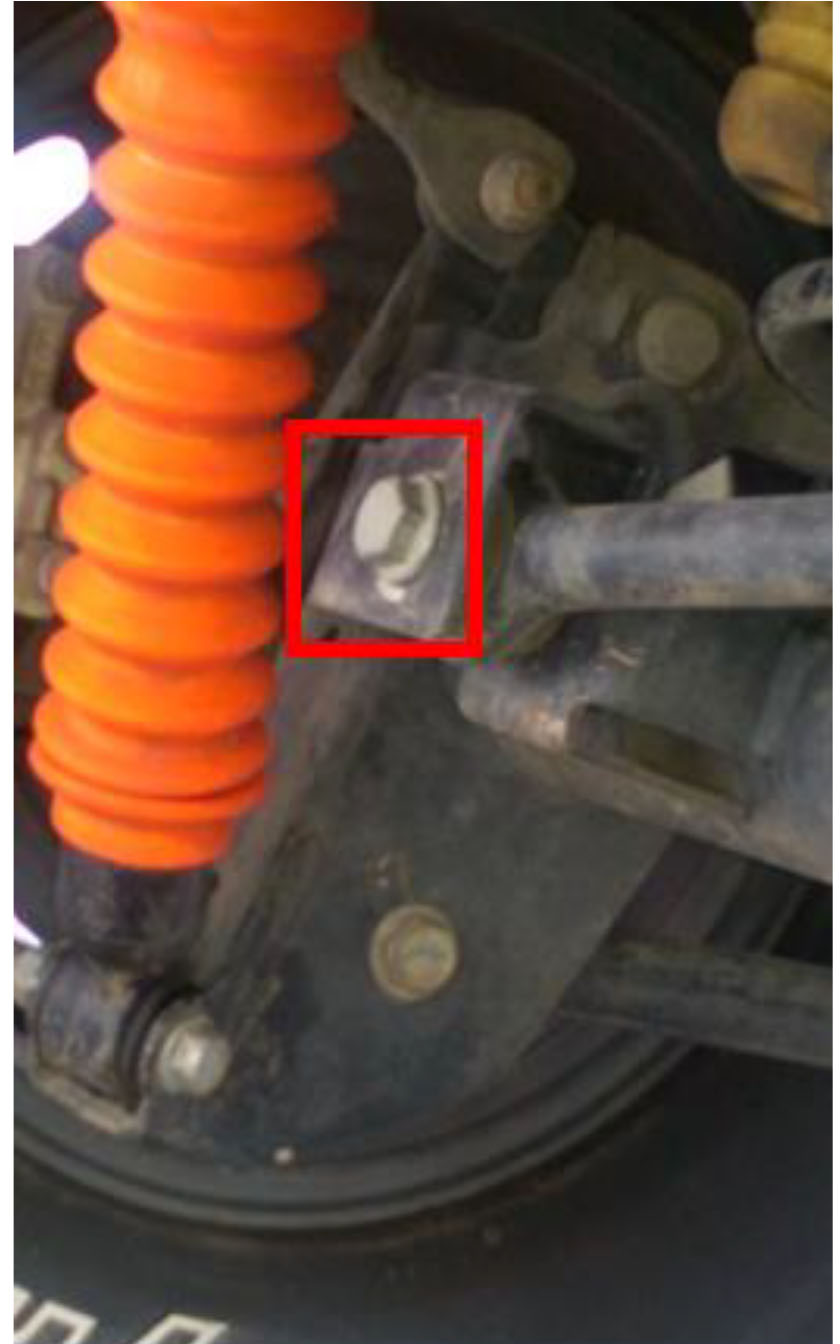
2. Jack up the axle slightly and remove only the lower shock bolts using an 18mm wrench & socket.
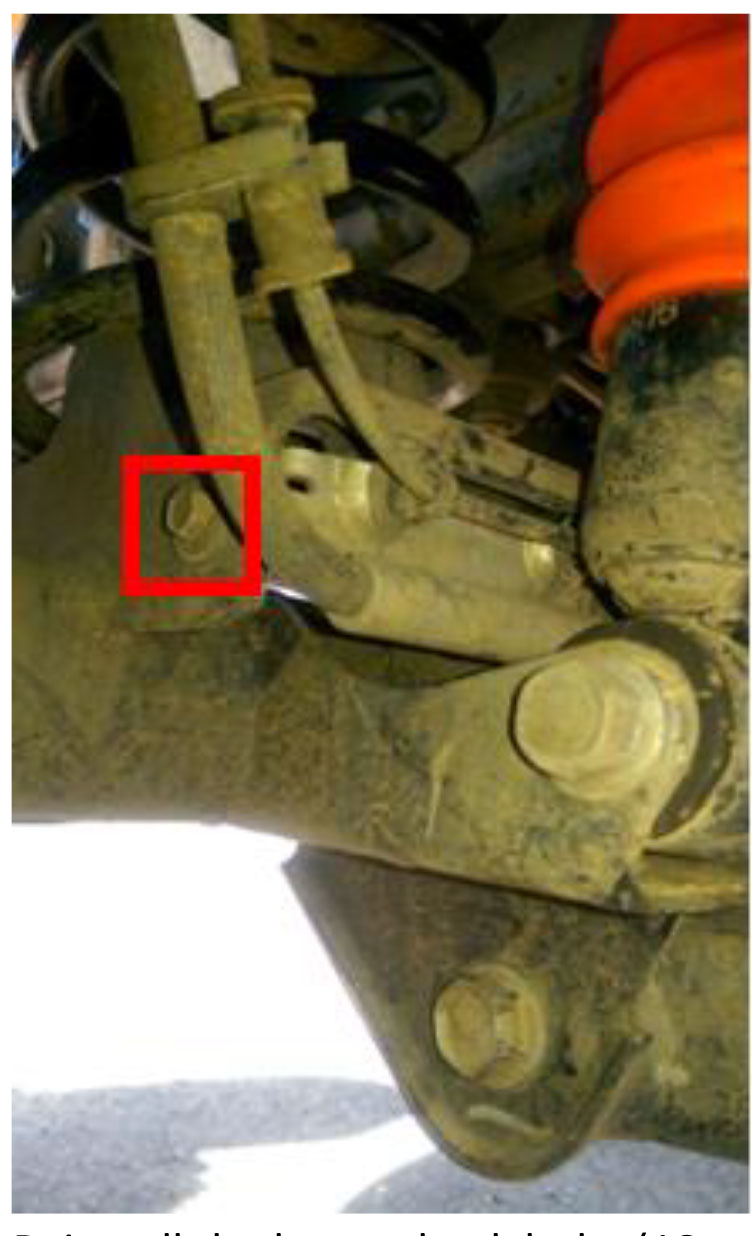
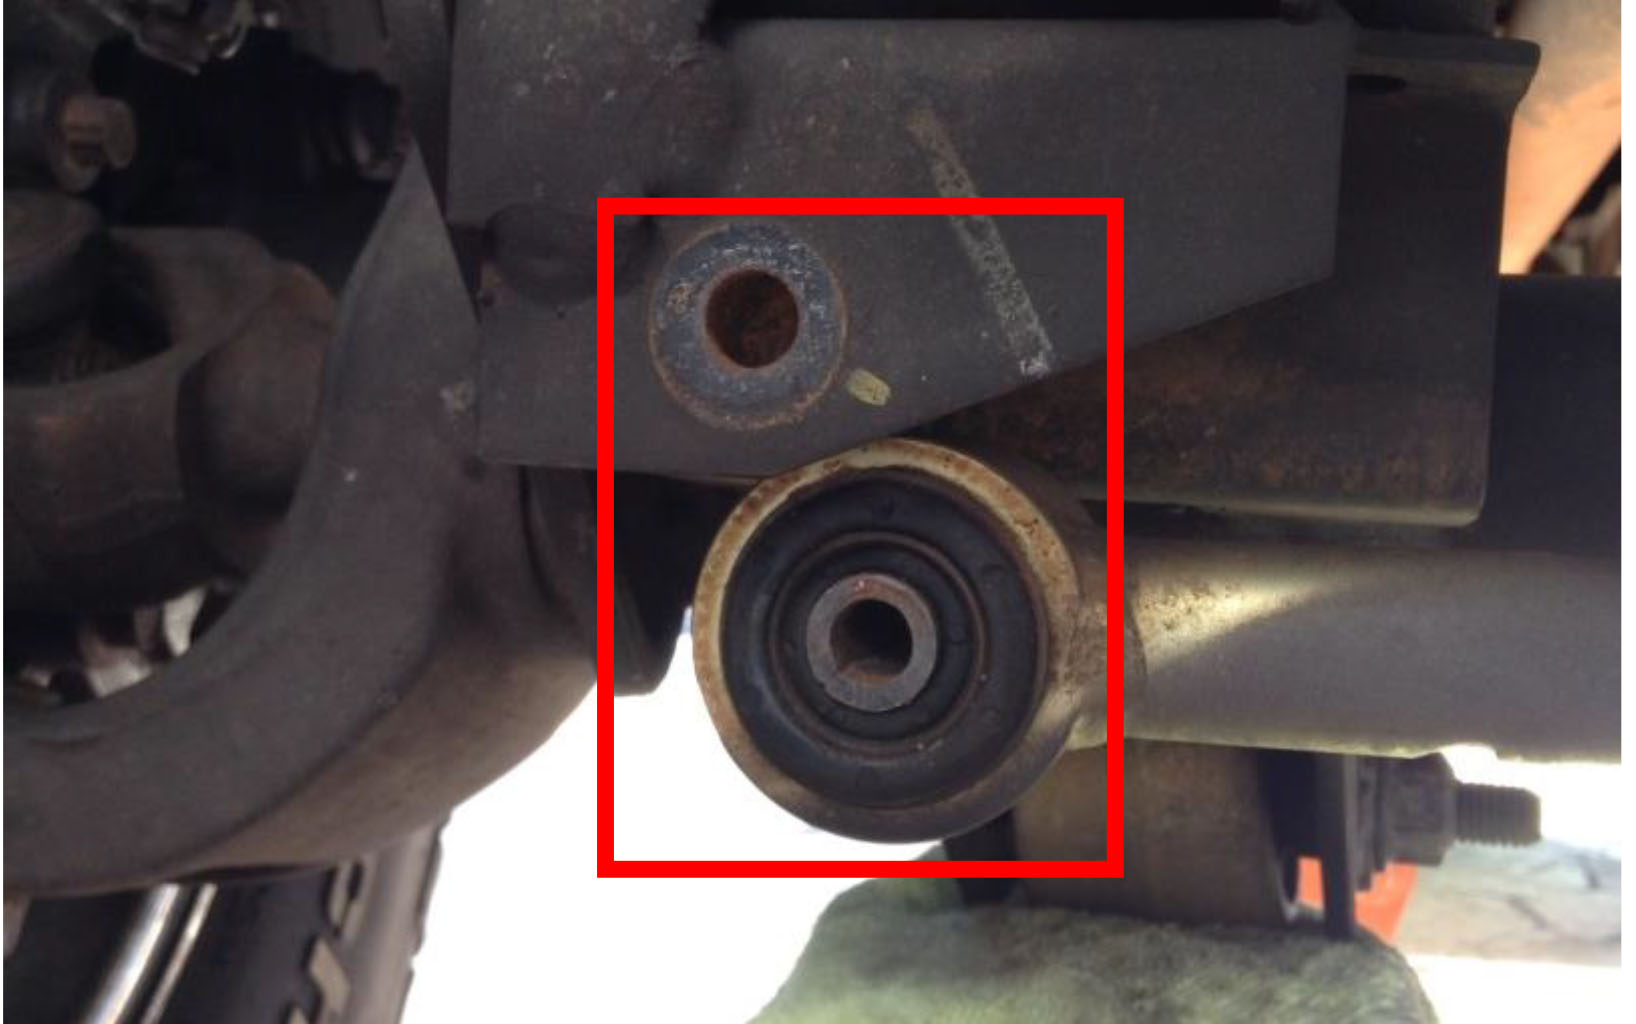
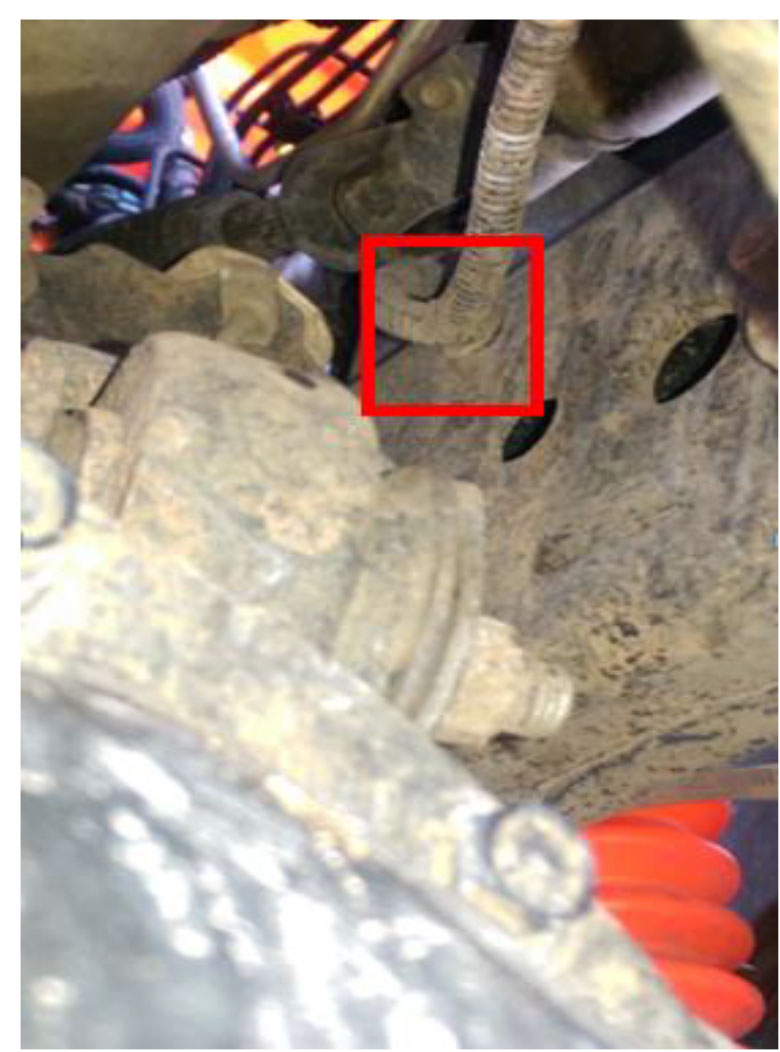
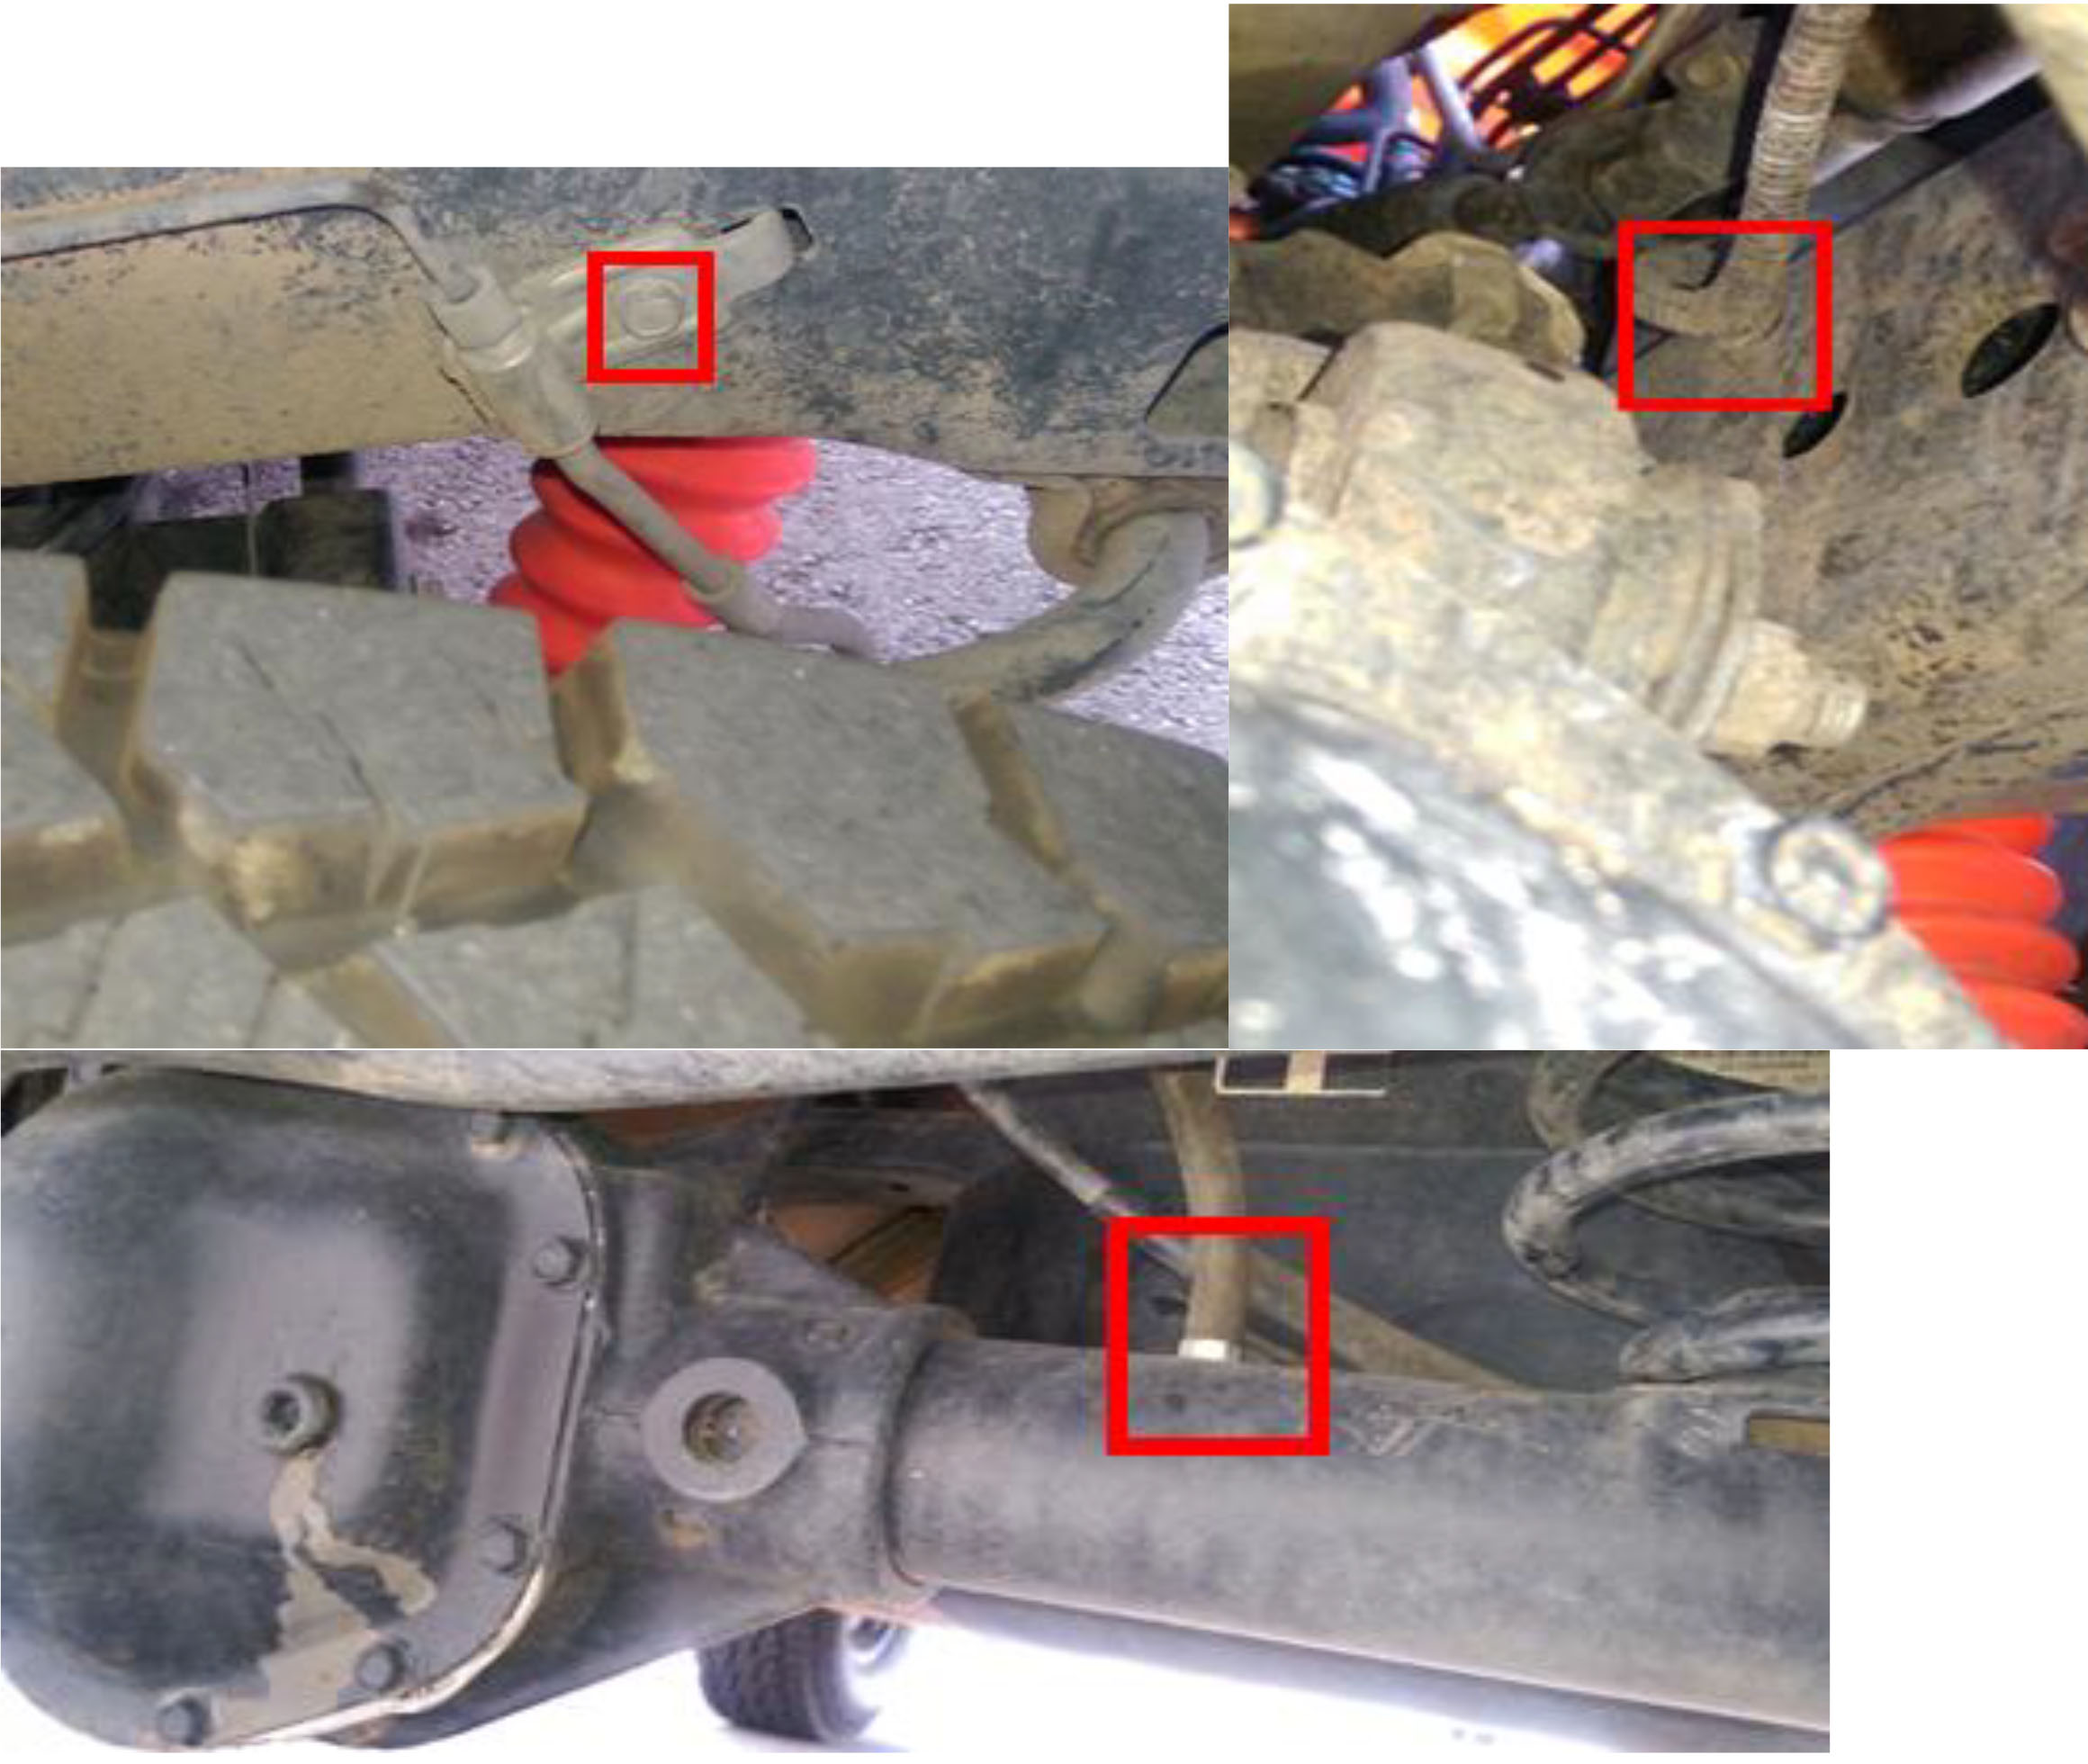
3. Using a 10mm wrench, disconnect the brake line bracket from the frame and move to the side. This will prevent the line from breaking with the axle movement associated with install.

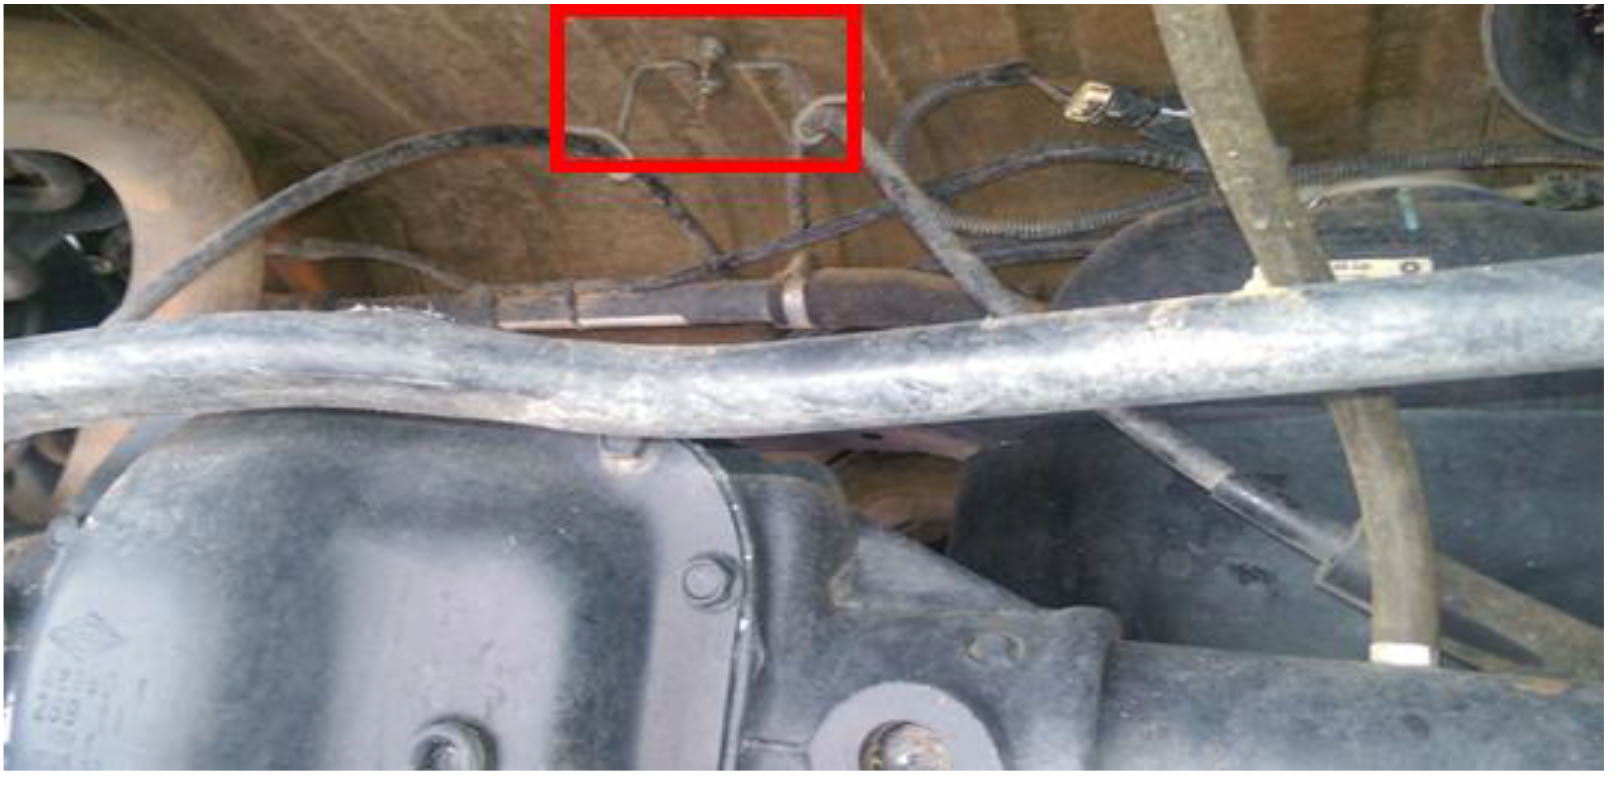
4. Pop loose any wiring harnesses that are clipped on to the frame that may be damaged with the axle movement associated with install.
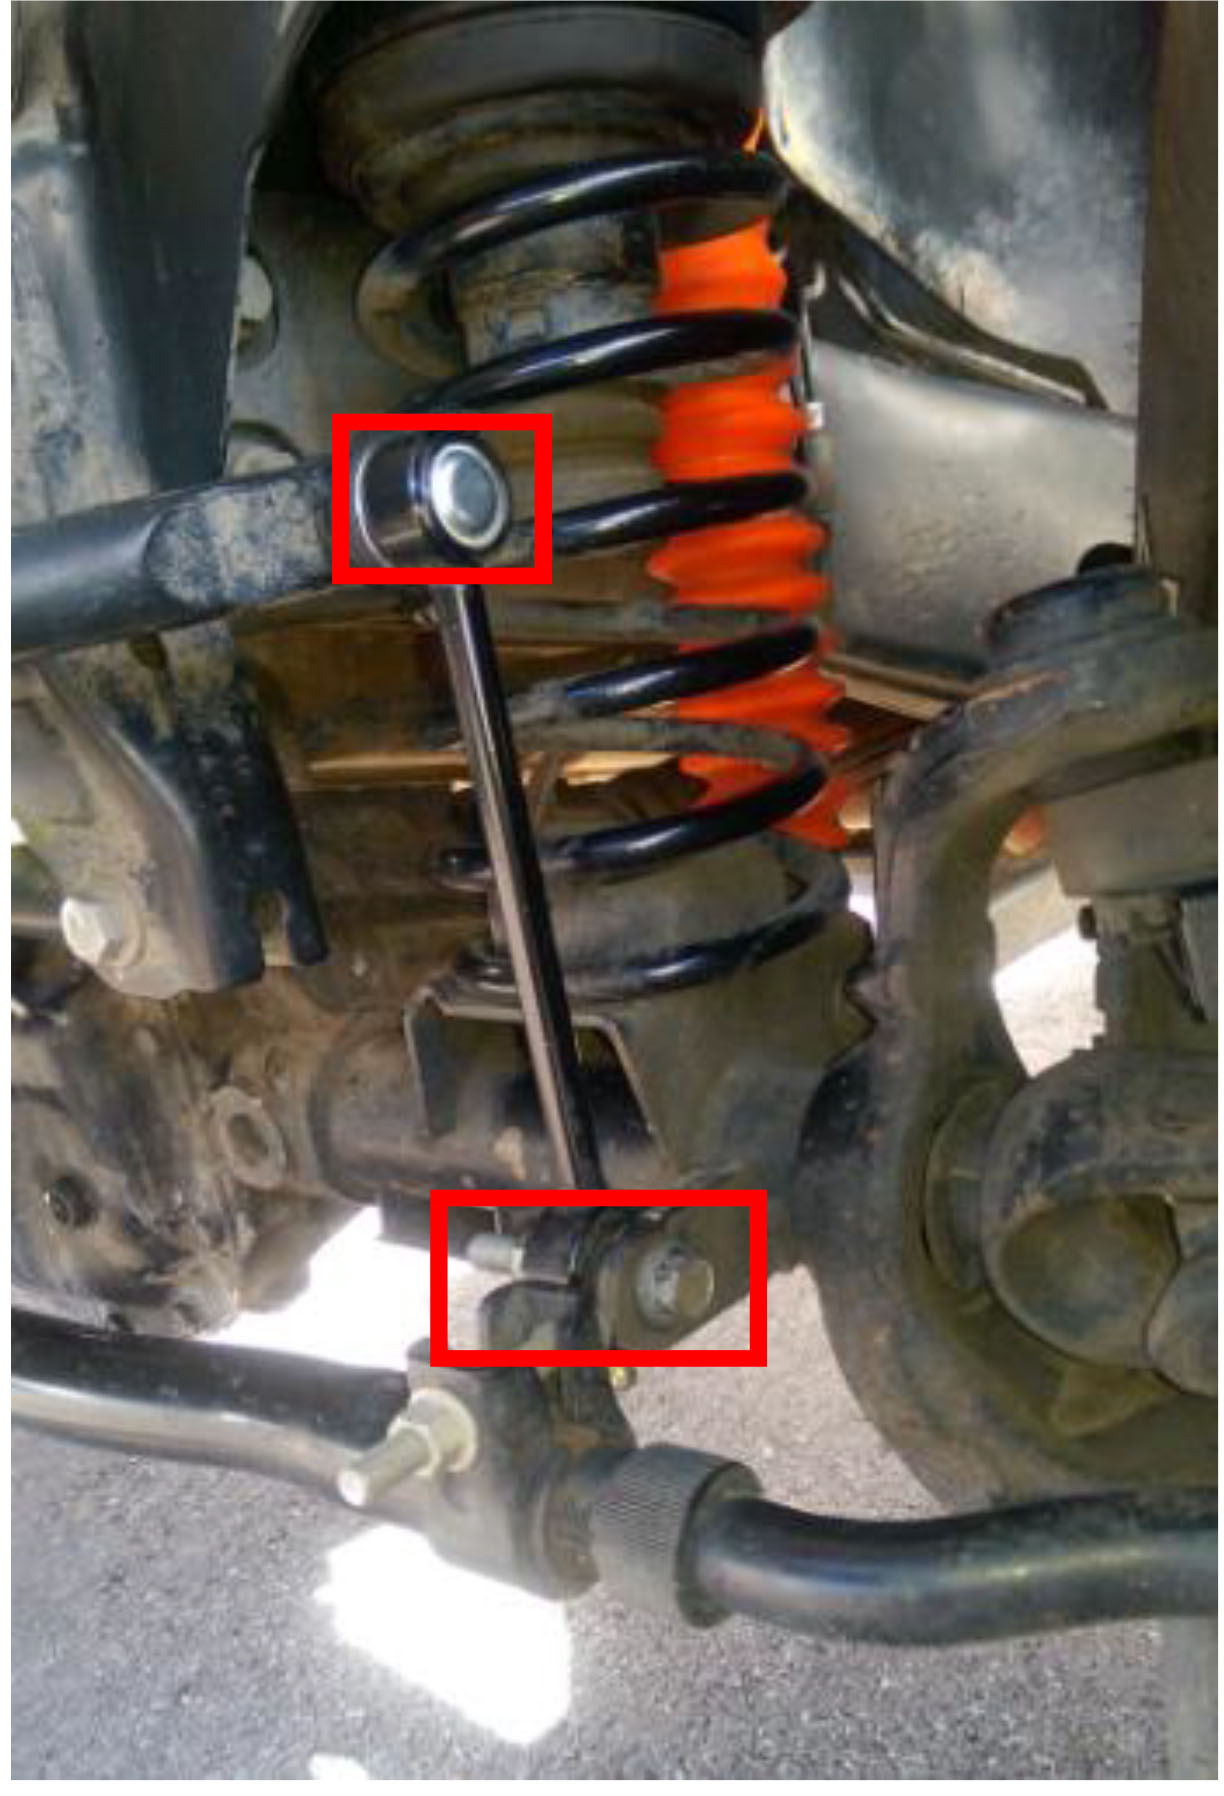
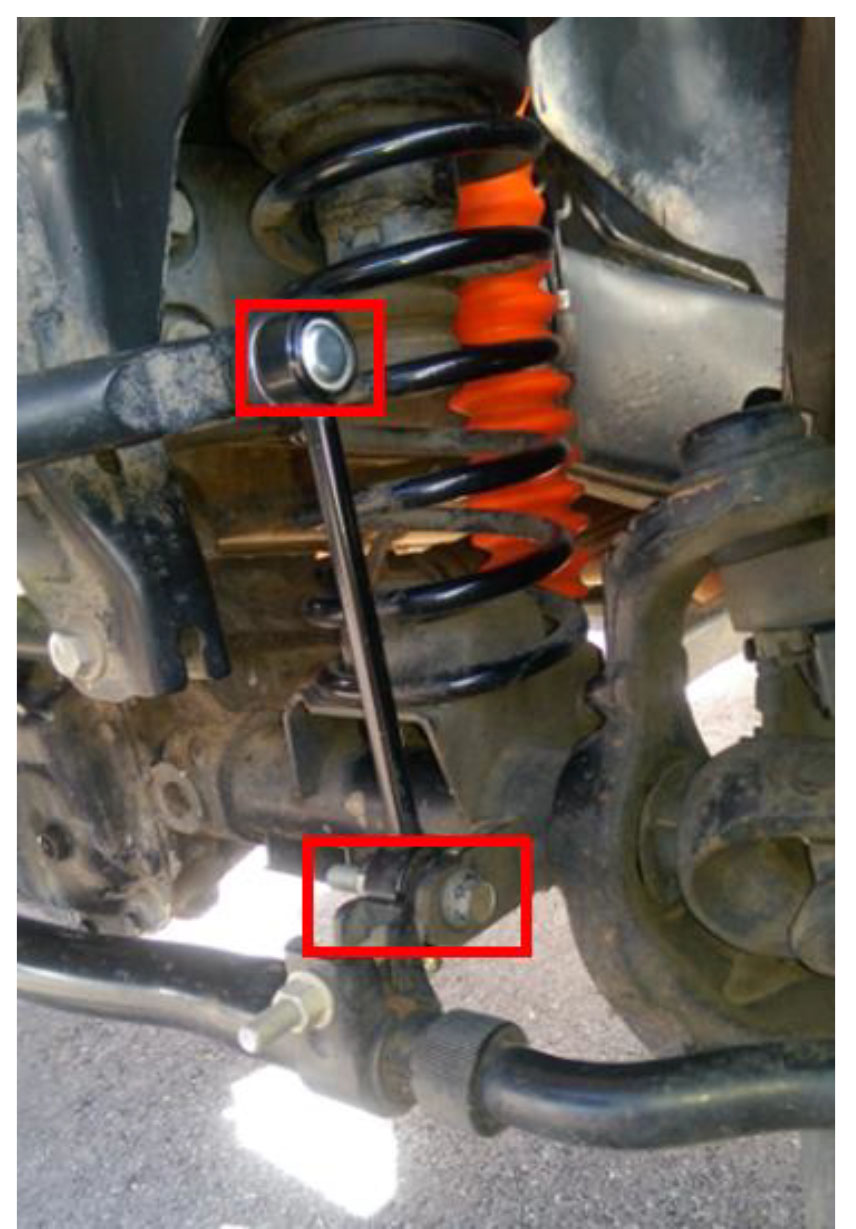
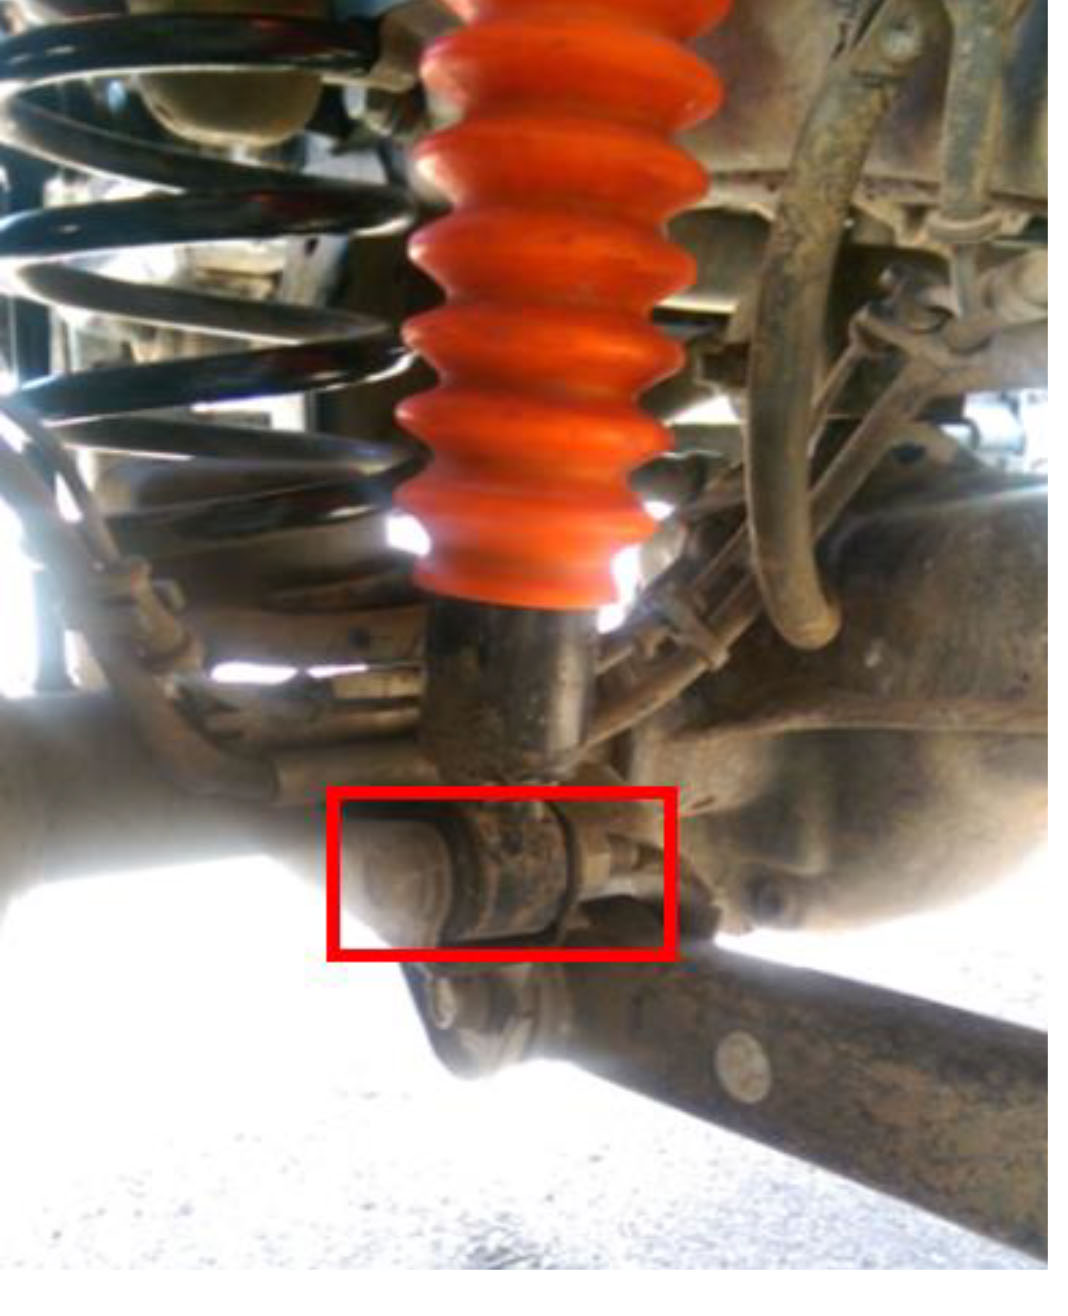
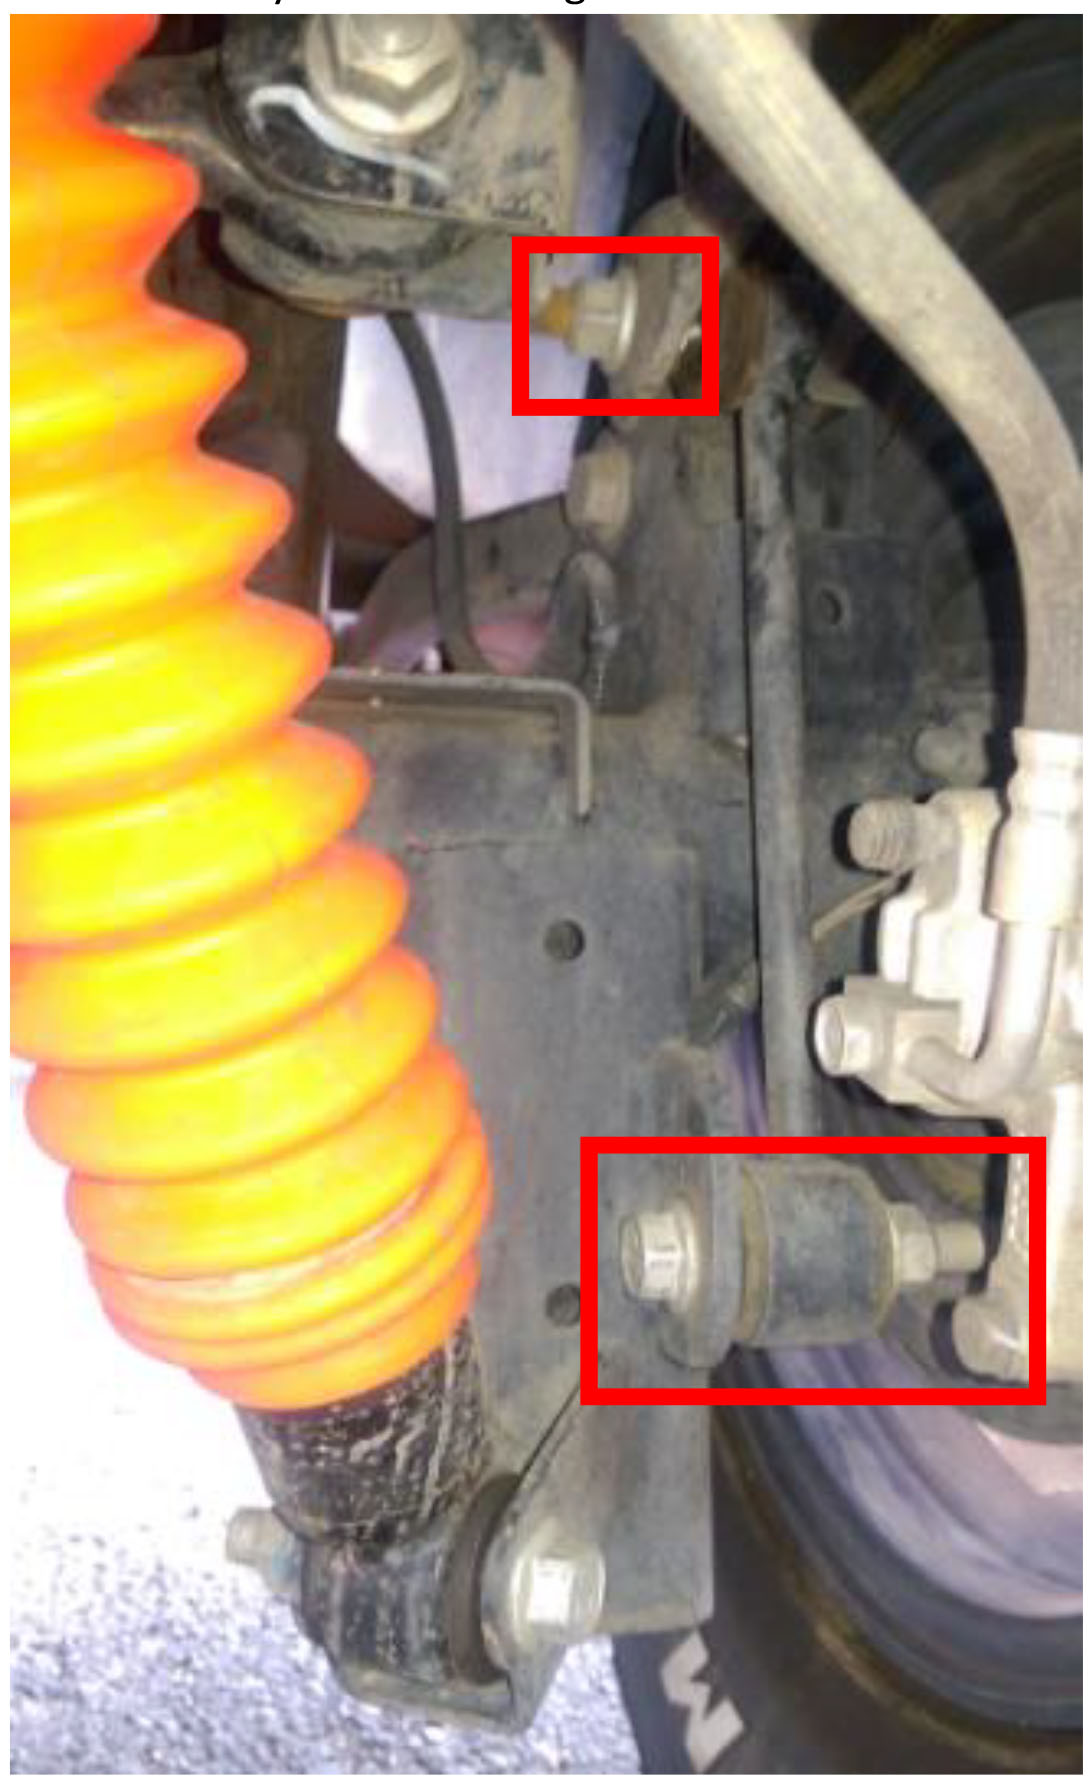
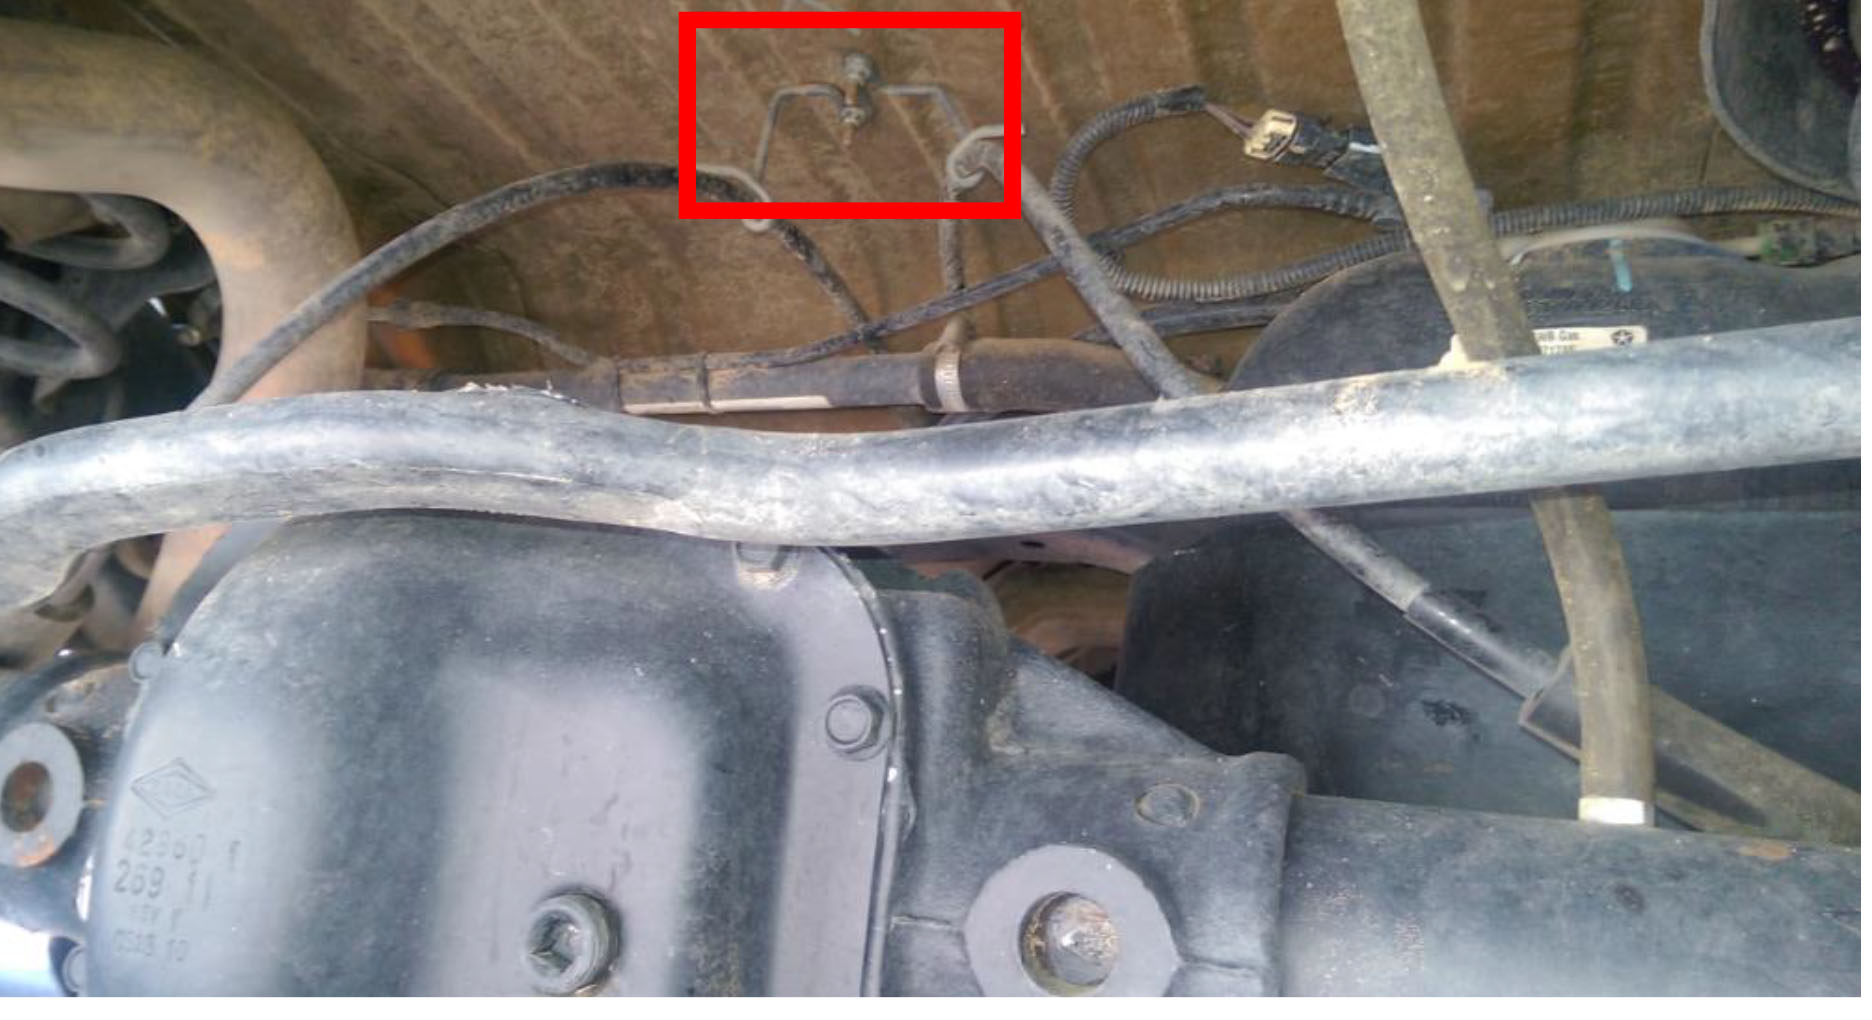
5. Remove the sway bar links using an 18mm wrench & socket on the bottom, and a 19mm socket on the top.
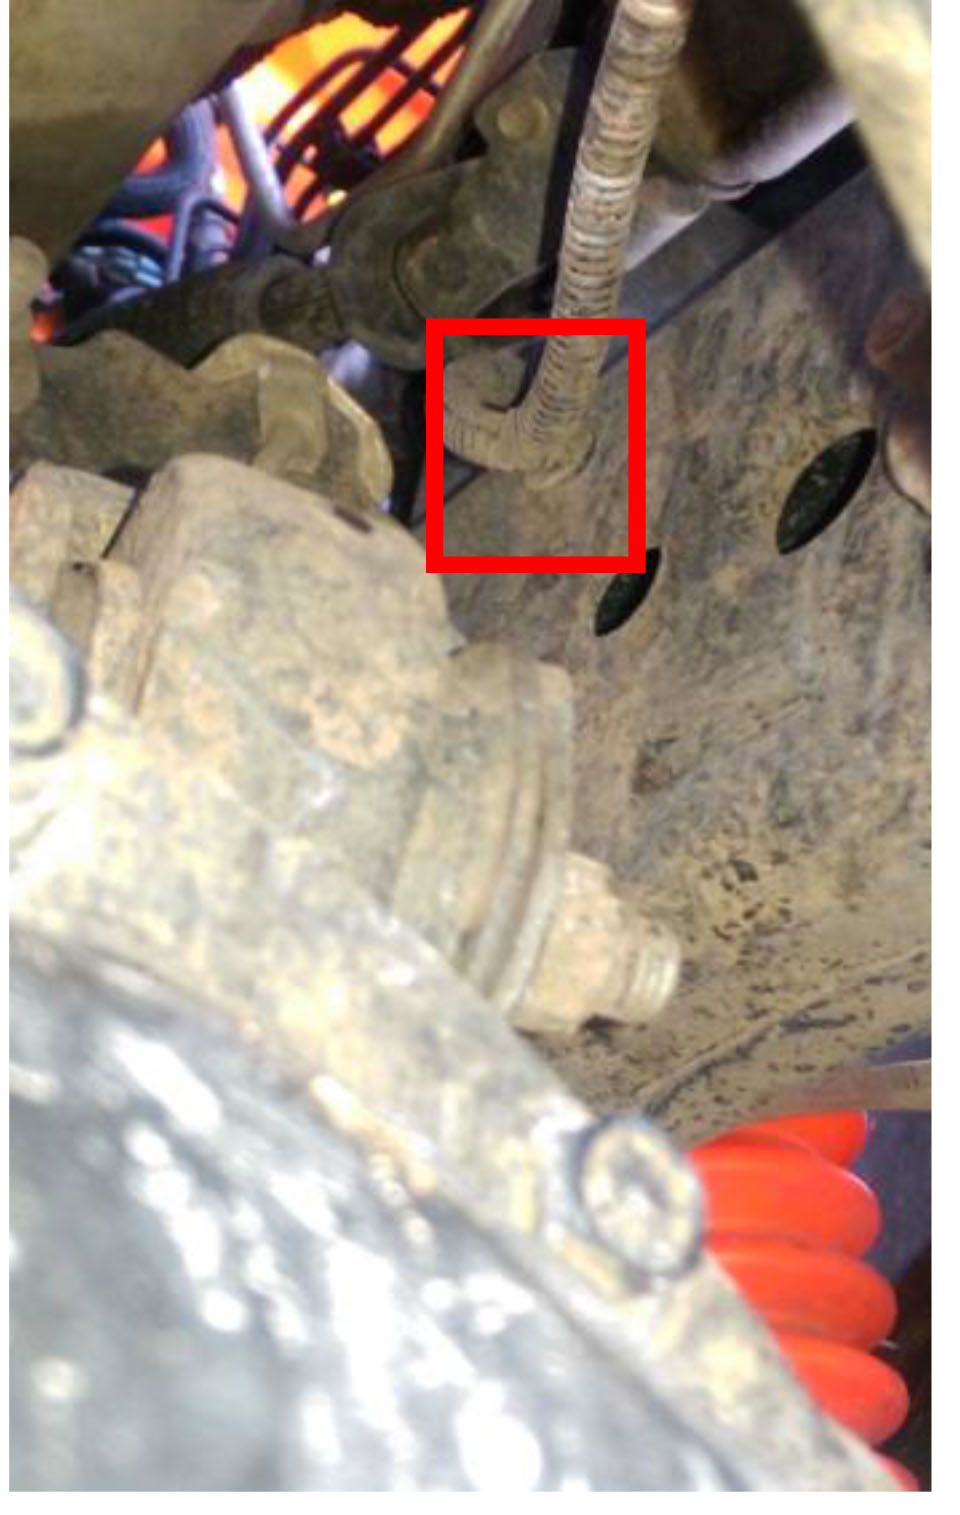
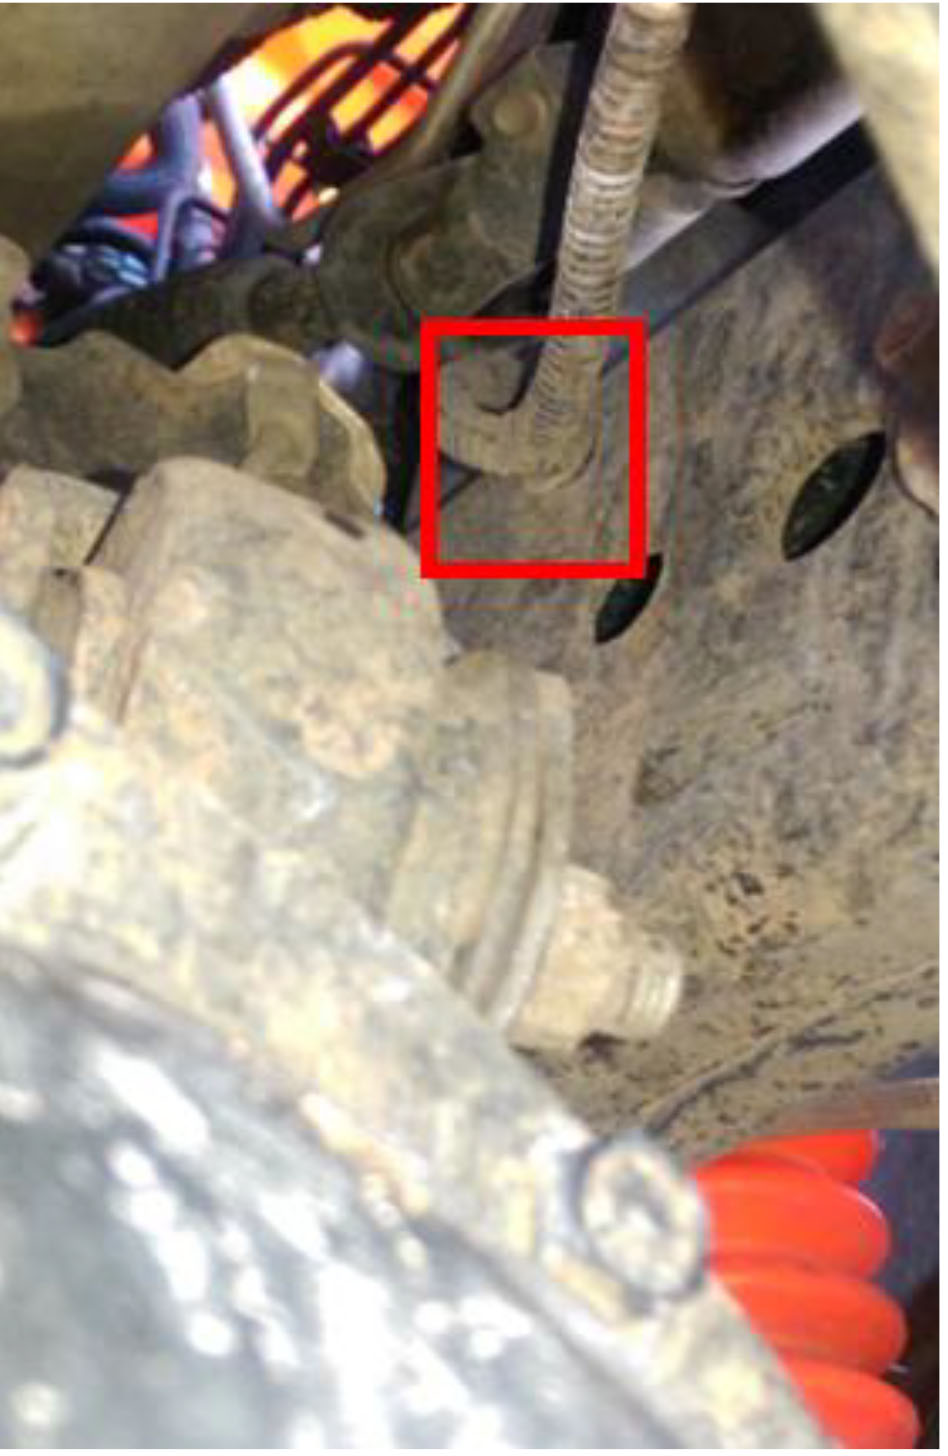
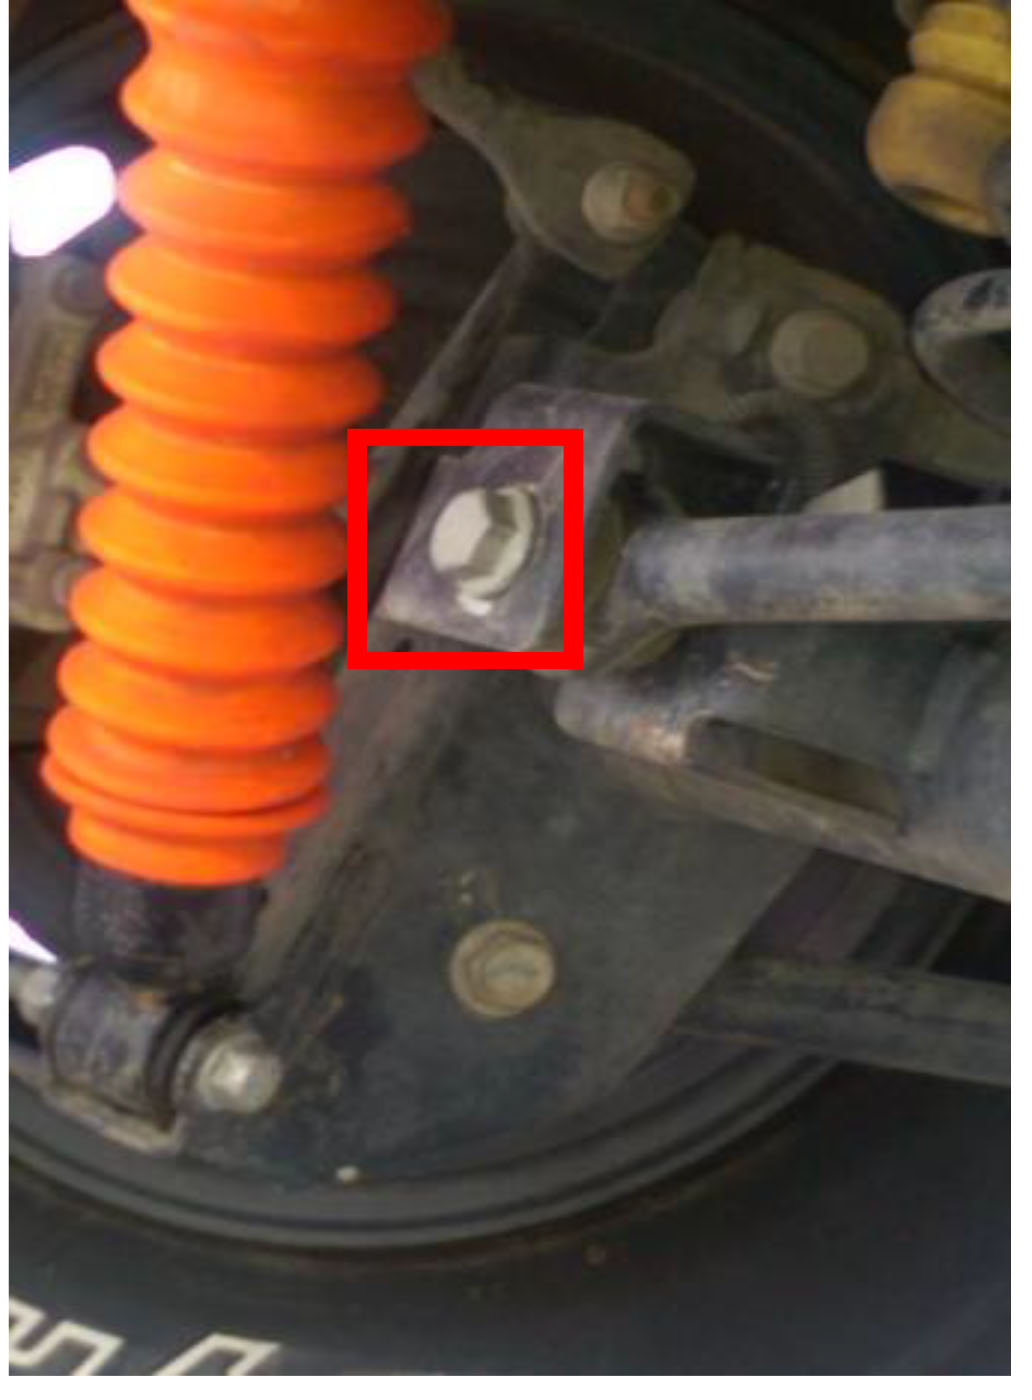
6. Remove the track bar bolts with a 21mm socket.
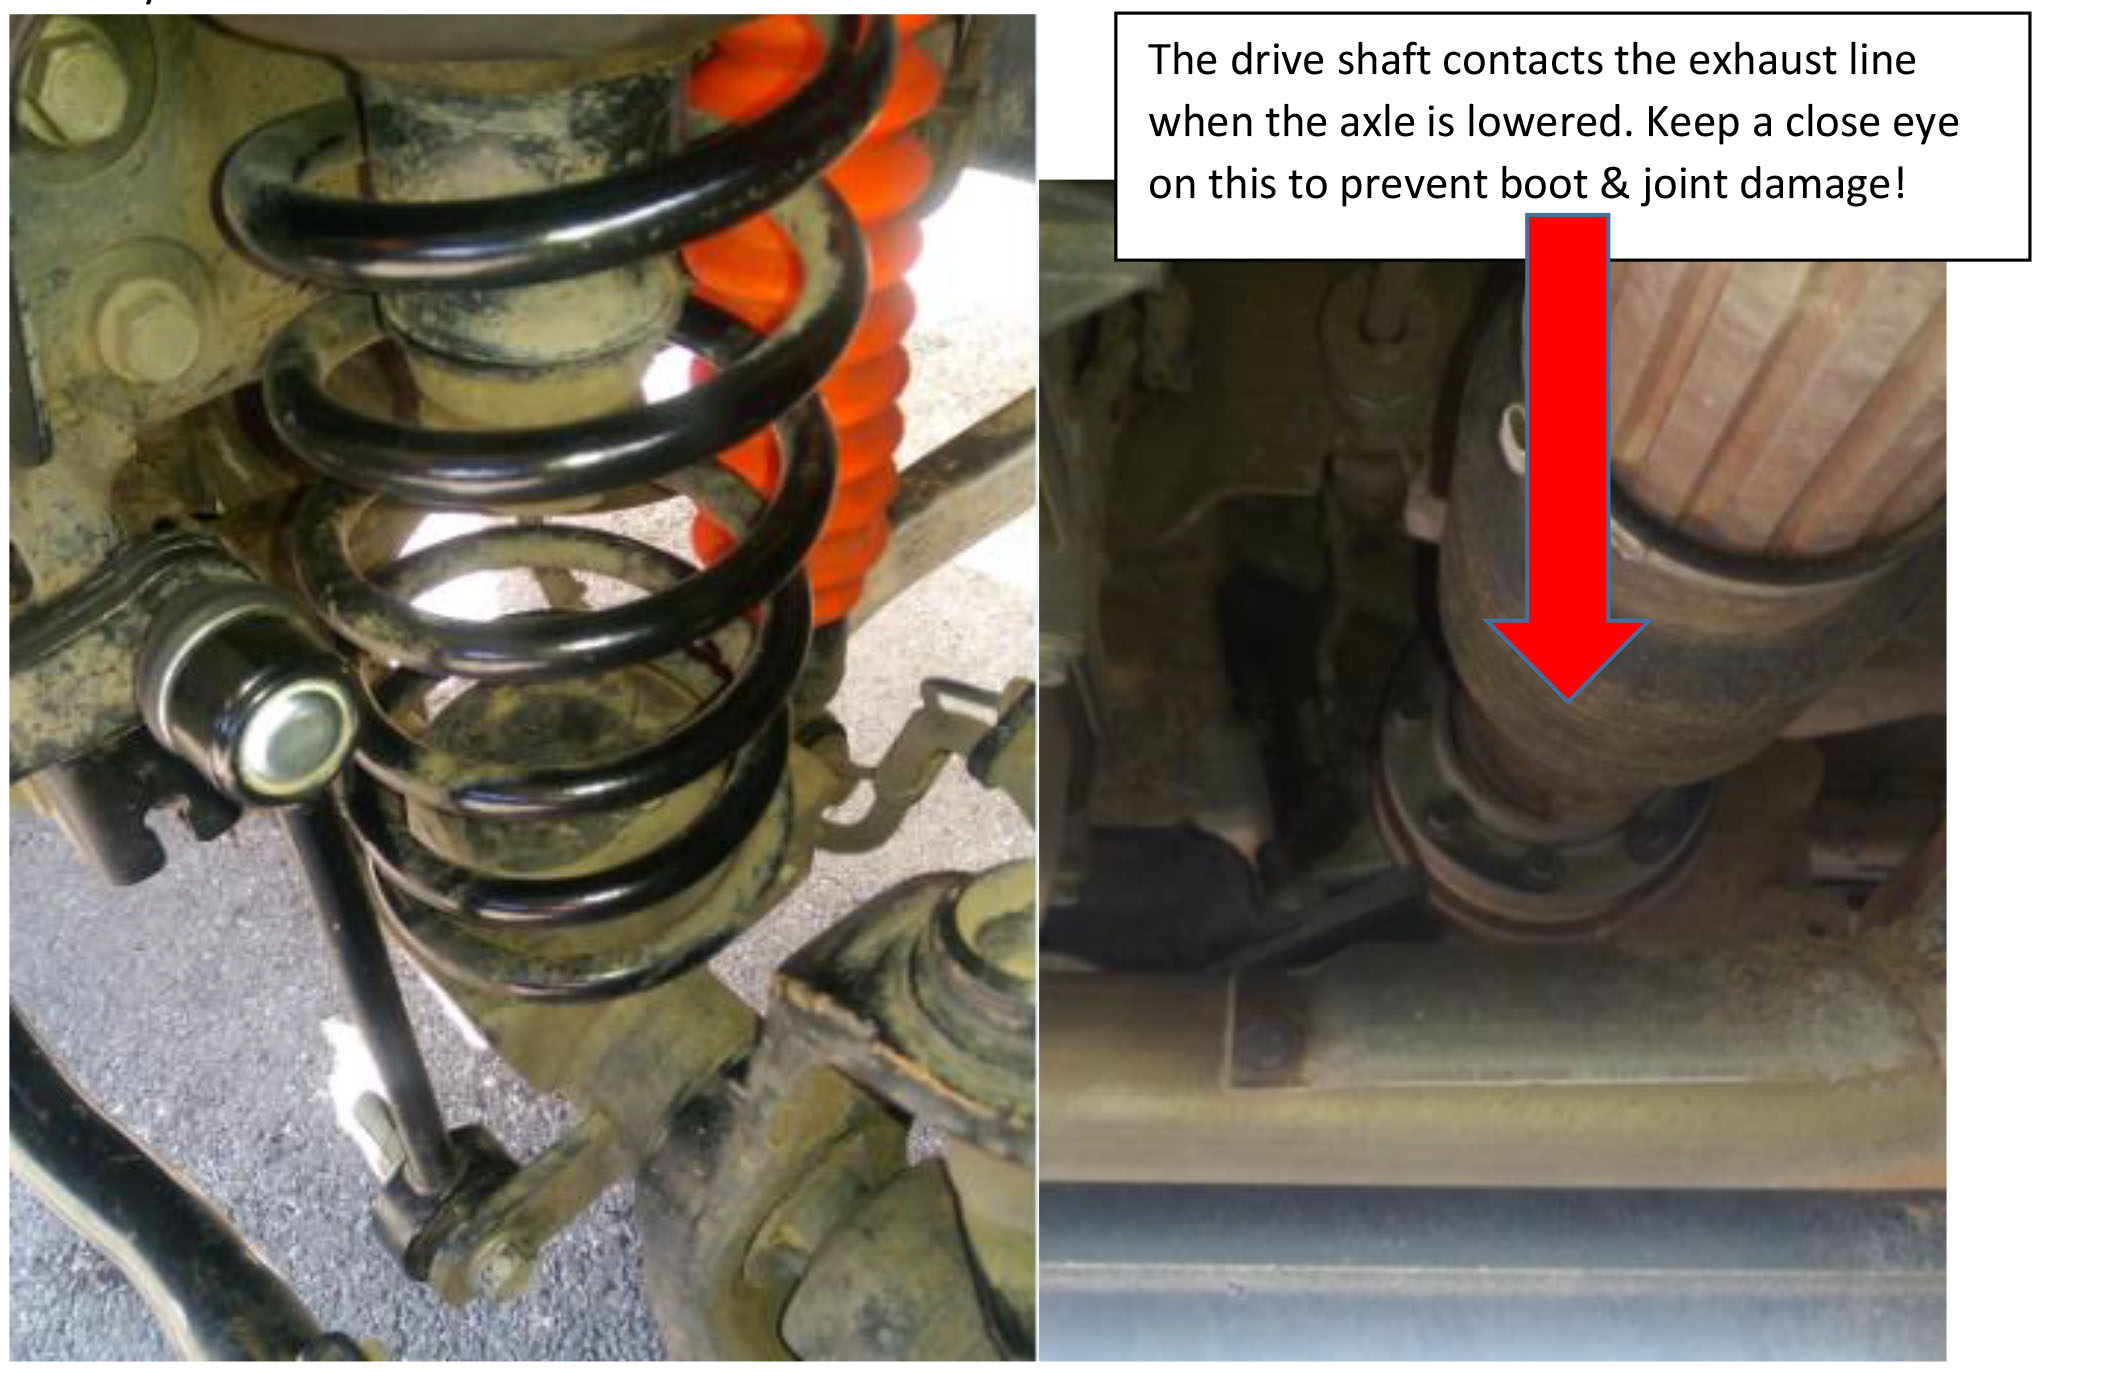
7. Lower the axle so there is plenty of space in order to remove the coil springs. When lowering the axle, keep an eye on the brake lines & wiring harnesses. Pull out the coil springs. Also keep an eye on the driveshaft. It will contact the exhaust line on 2012 models. Place a small towel between the two for added cushion and keep a close eye on the contact it makes.
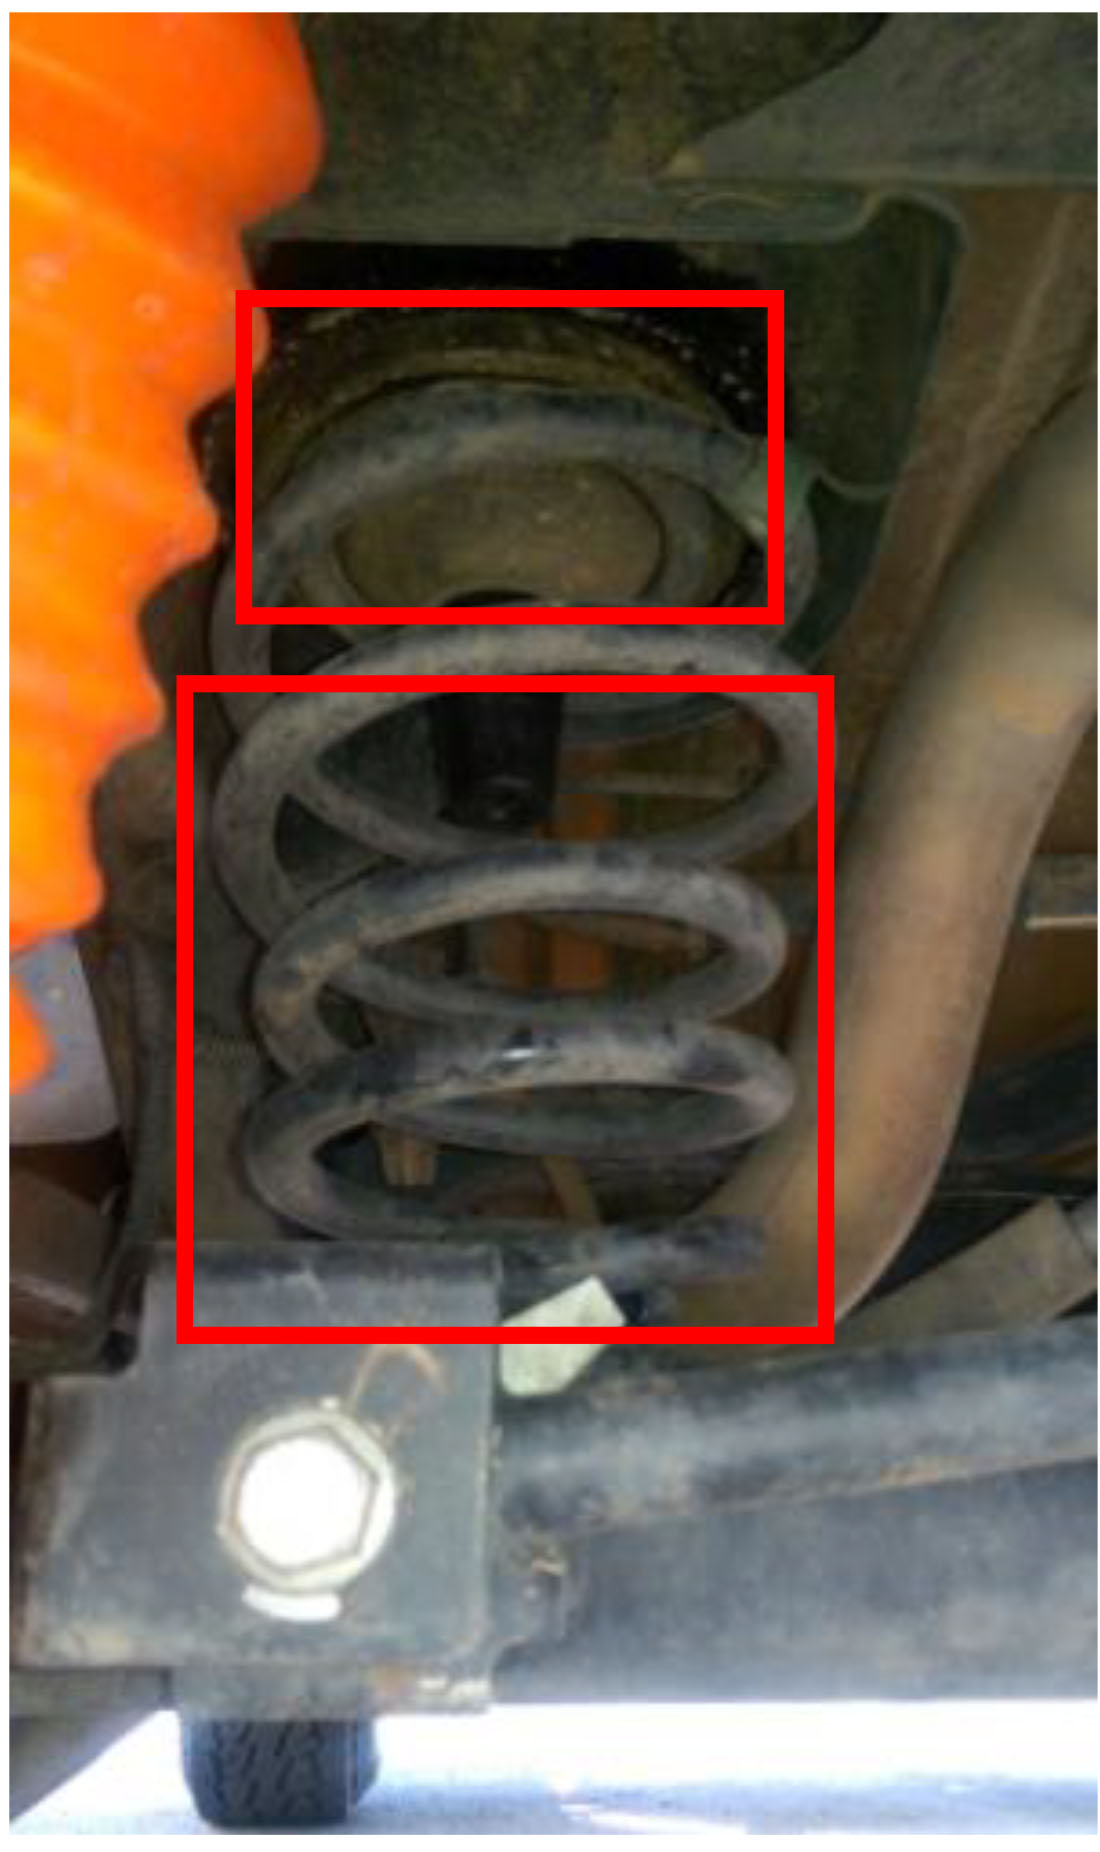
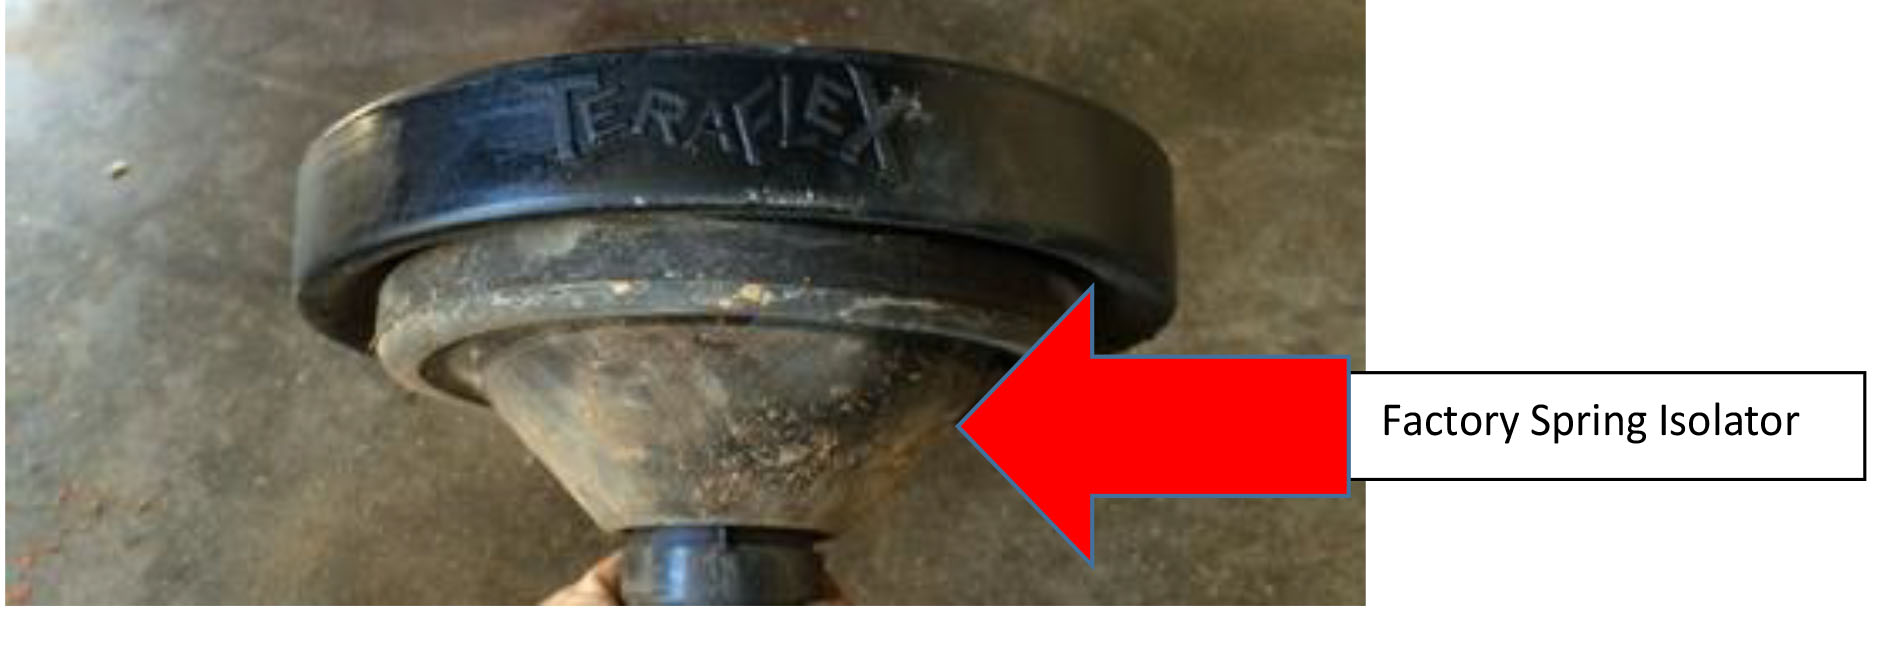
8. Using a small pry bar, pop out the factory spring isolators that sit above the coil springs.

9. Install the front Teraflex spacers, followed by the factory spring isolator. Put the coil springs back on, ensuring the lower spring curls are properly seated in the groove.
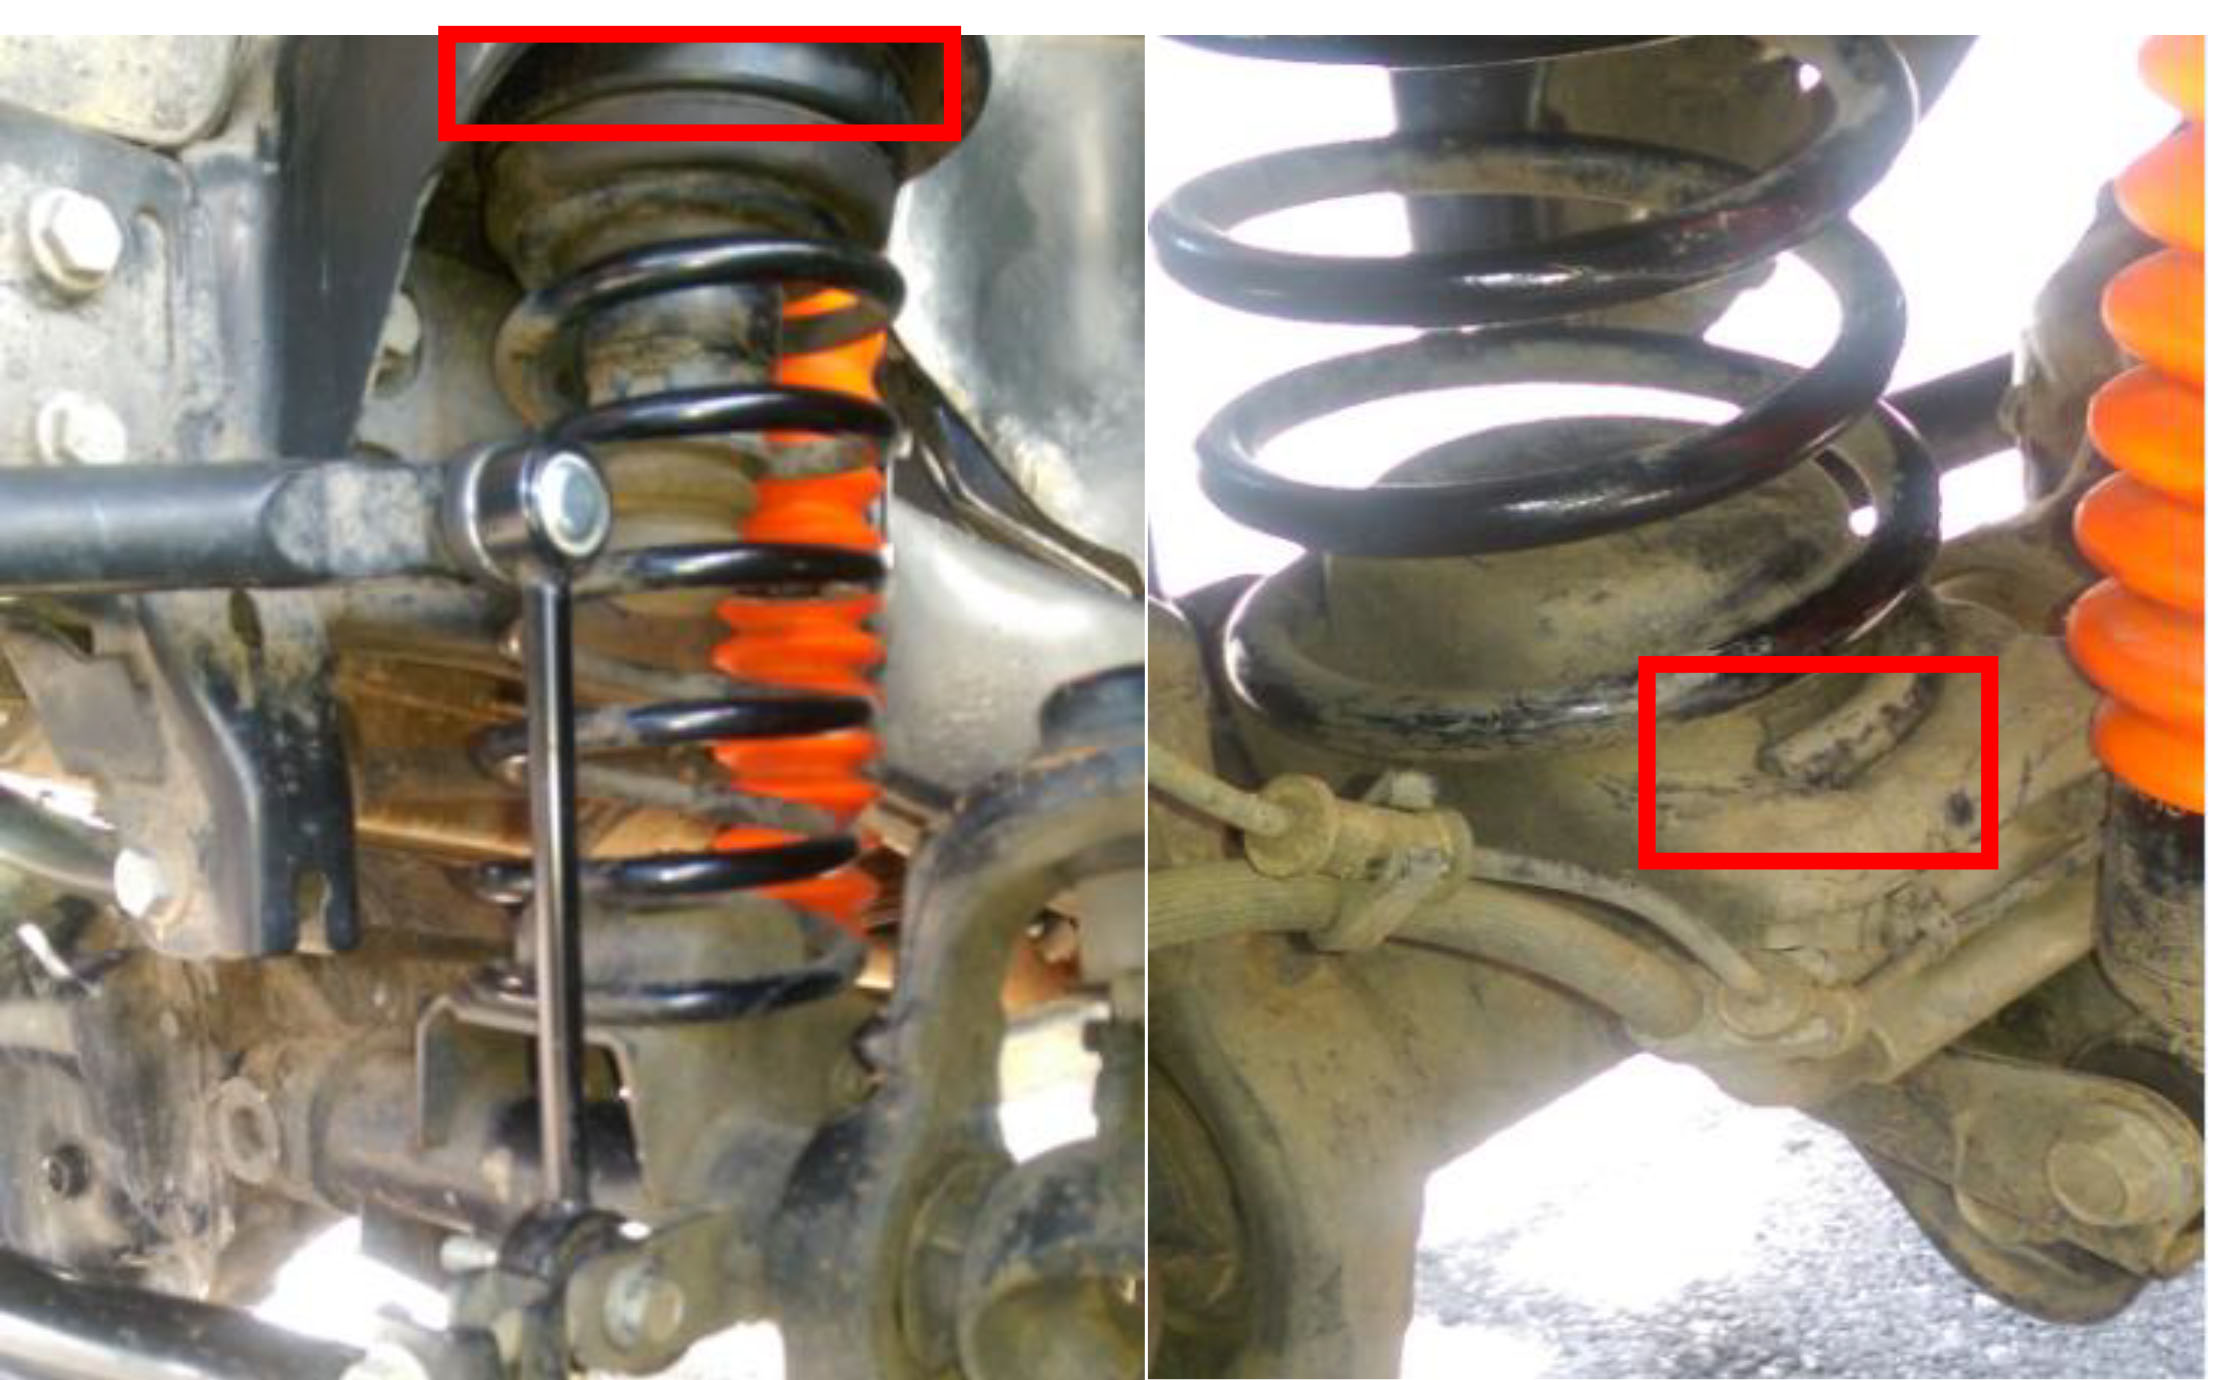
10. Raise the axle, and install the new, included Teraflex front sway bar links (18mm wrench & socket for the bottom, 19mm socket on top).
11. Reinstall the brake line brackets (10mm wrench) and pop in the wiring harness retainers in their original locations.
12. Reinstall the lower shock bolts (18mm wrench & socket).
13. Reinstall the track bar (21mm socket). This may be easier once the Jeep is lowered to the ground.
Installation Instructions (Rear):
1. Moving on to the rear, loosen the lug nuts with the tire iron. Then, jack up each side of the Jeep and place jack stands under the frame for safe support. Remove the tires.
2. Jack up the axle slightly and remove only the lower shock bolts using an 18mm wrench & socket.
3. Remove the rear track bar bolts with a 21mm socket.
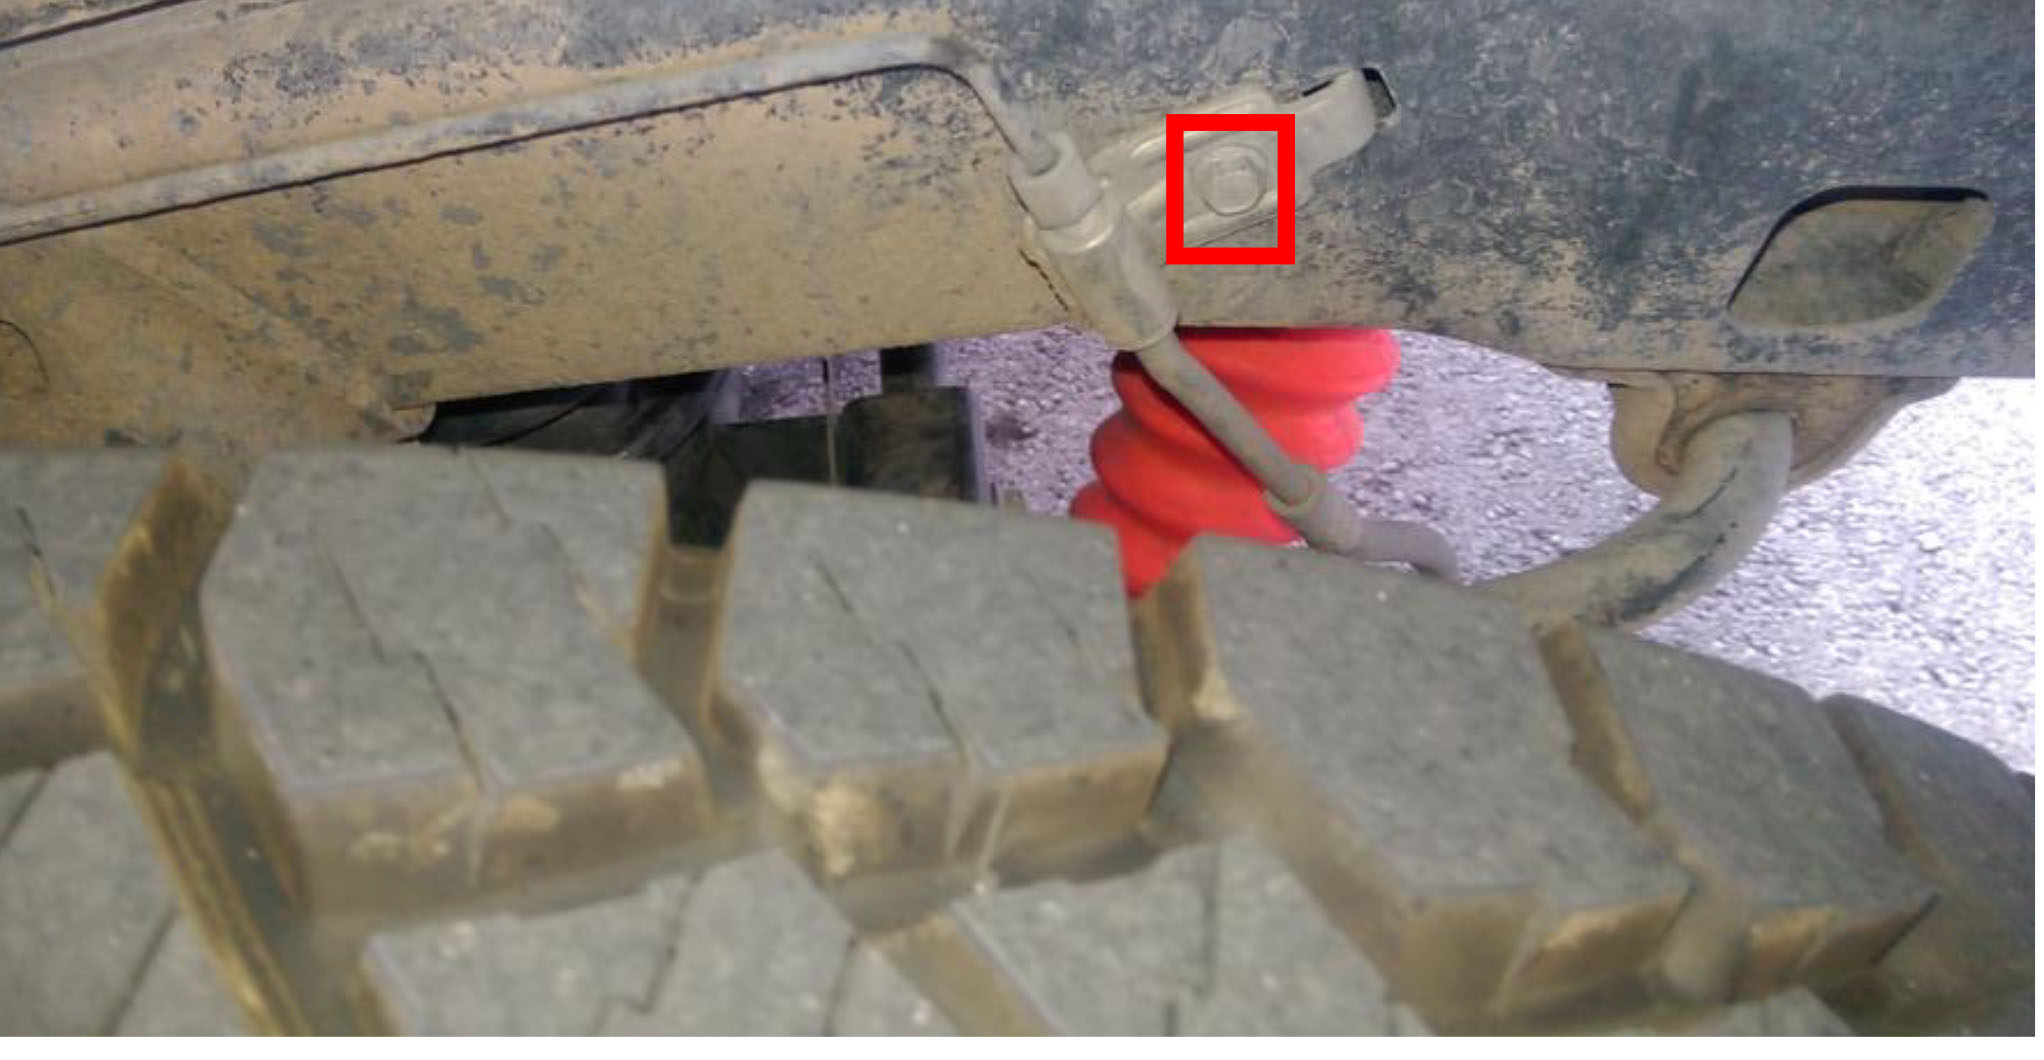
4. Loosen, but don’t remove entirely, the lower sway bar link bolts using an 18mm wrench & socket. Then remove the top of the sway bar links from the sway bar arms using the 19mm socket.
5. Remove the brake line frame mounts using the 10mm socket.
6. Pop loose any wiring harnesses that are clipped on to the frame that may be damaged with the axle movement associated with install.
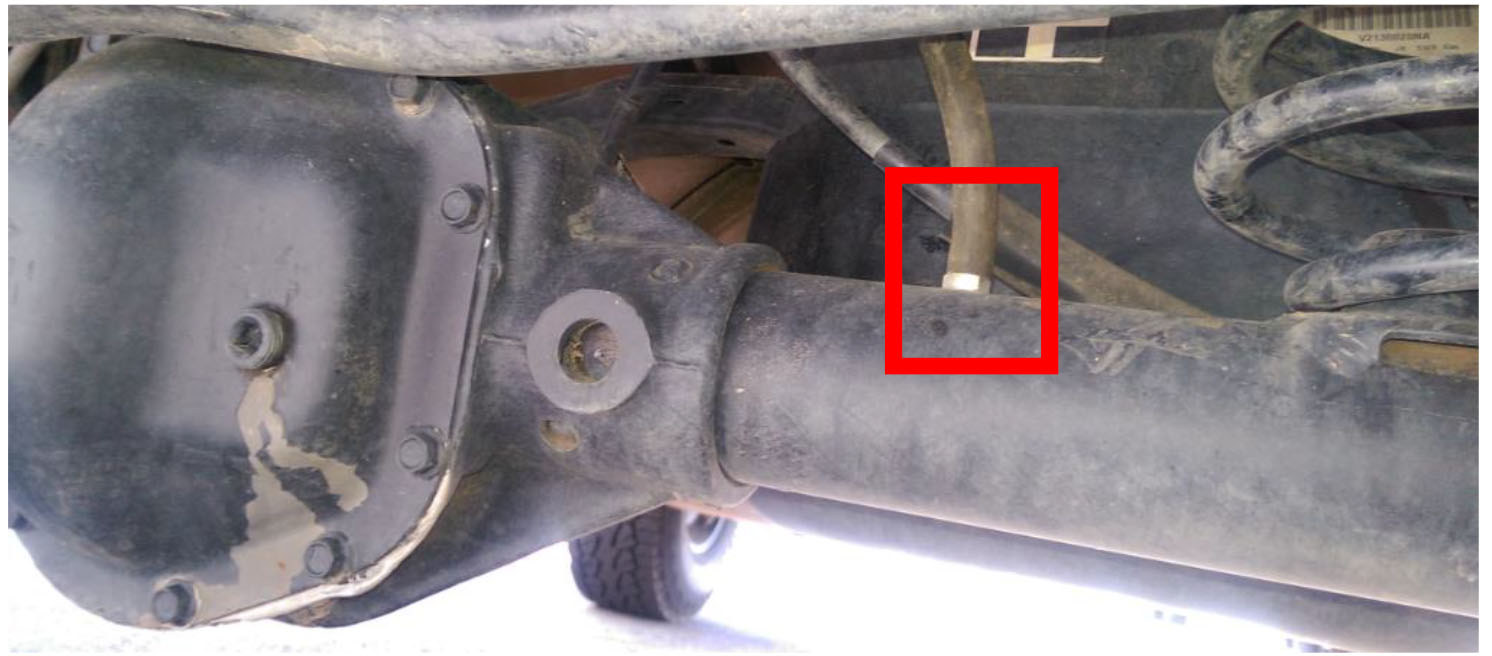
7. On the rear only, pull off the transfer case breather tube from the axle, to prevent damage from axle movement associated with install.
8. Use a 10mm deep socket to remove the two bolts holding parking brake cable hanger to the body of the jeep.
9. Now that all restricting elements have been removed, lower the axle far enough to remove the coil springs and factory spring isolators.
10. Push the factory spring isolators on to the rear Teraflex spacers. Using axle grease will help.
11. In order to properly seat the rear spacers back into the upper isolator mount spring seat, grease the upper area of the seat and use a small 4x4 block of wood and place between the axle and the rear Teraflex spacers.
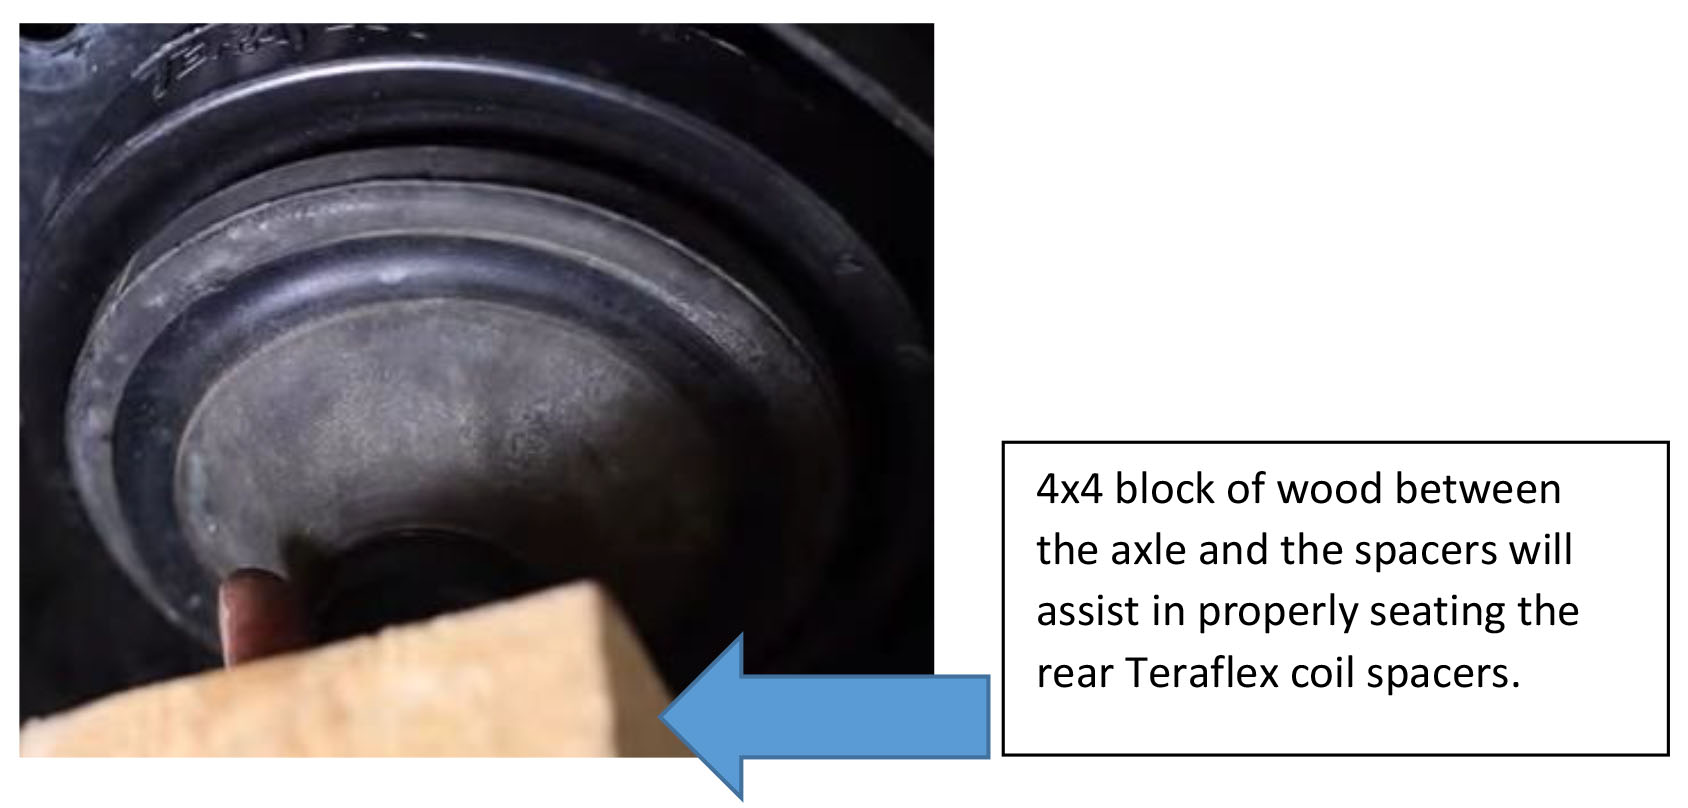
12. Raise the axle with the wood block pushing against the spacers until you hear it seat into place. You will hear a slight, but distinct “click” when they are properly seated.
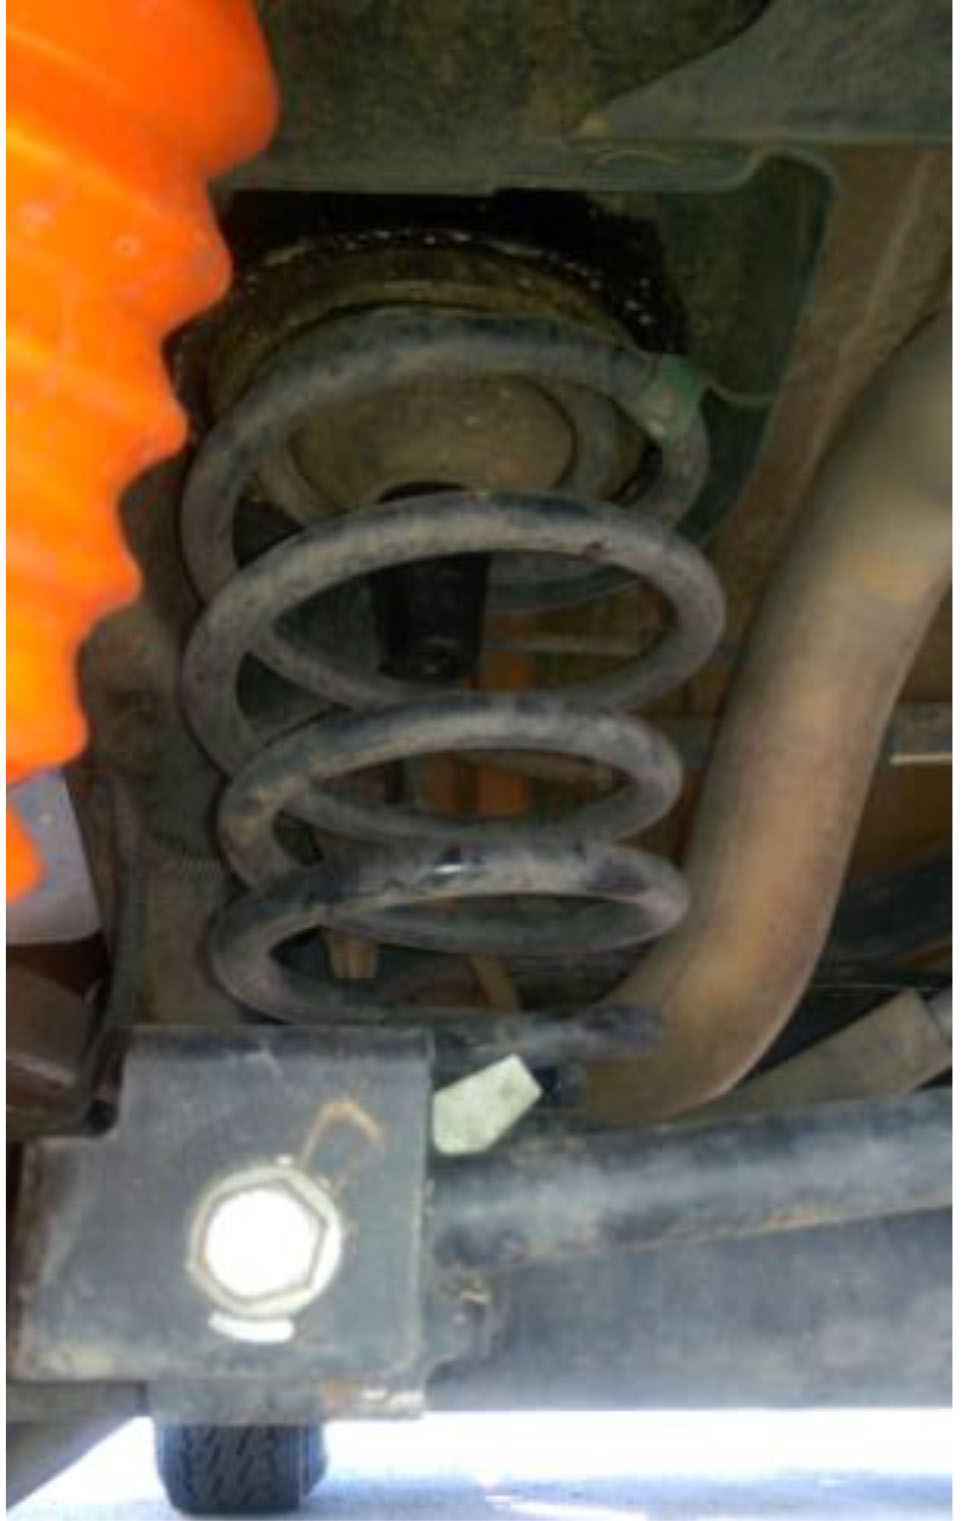
13. Reinstall the rear coil springs and ensure they are properly seated.
14. Raise the axle high enough to make the sway bar link and lower shock bolt install easy. Tighten the sway bar link bolts (18mm wrench & socket for the bottom, 19mm socket on top).
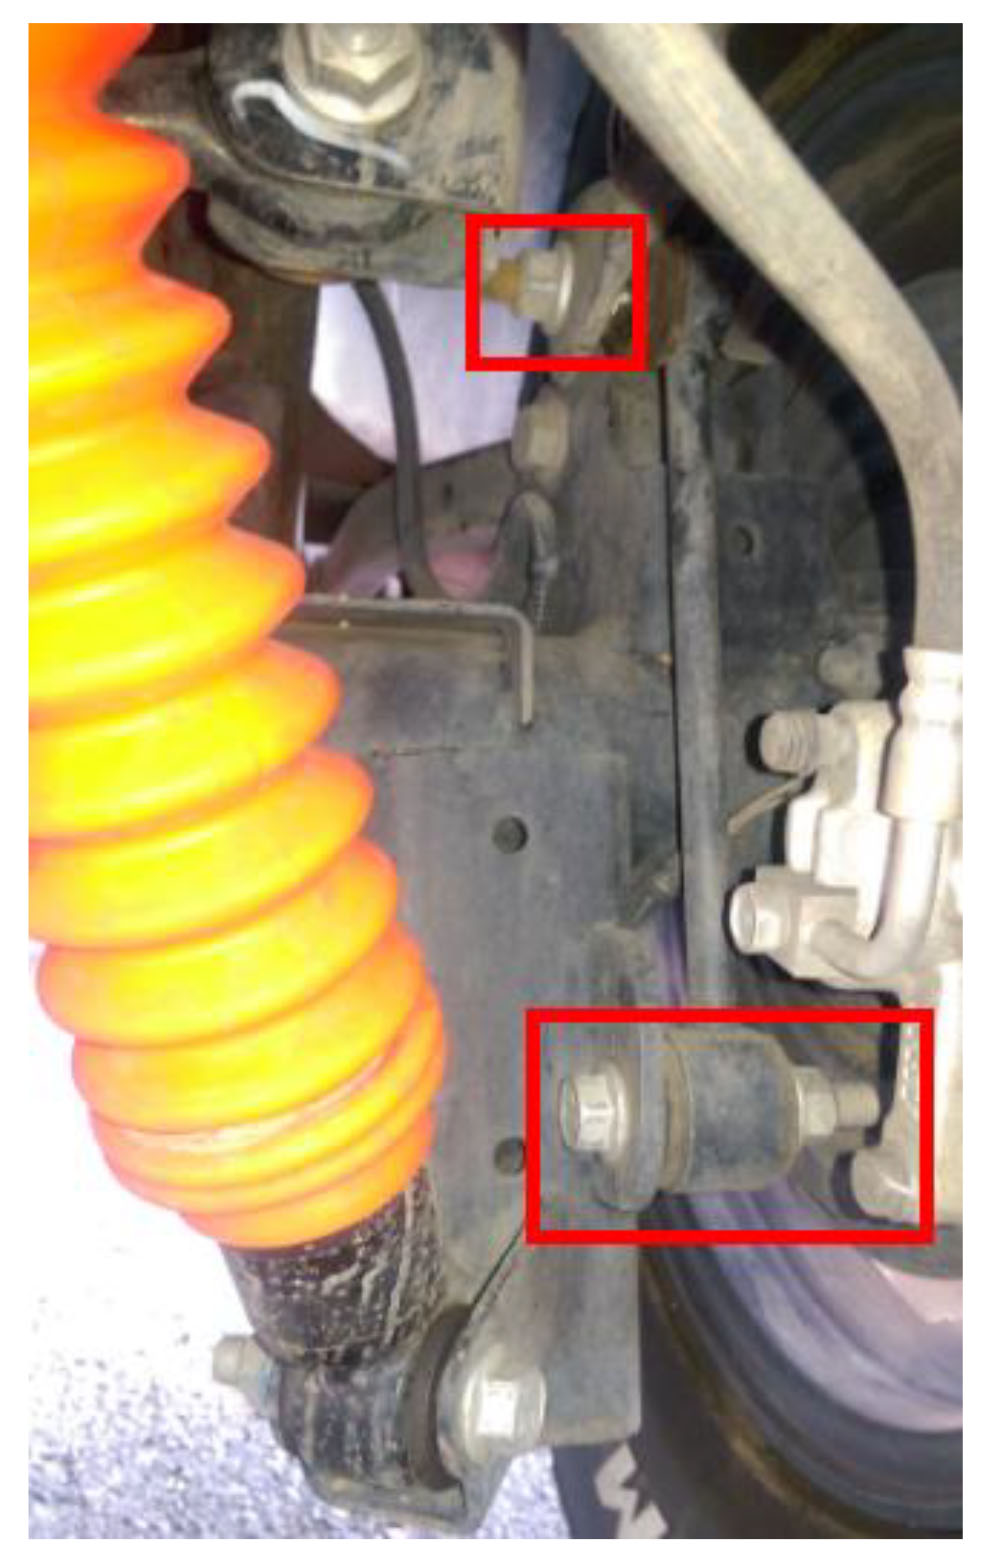
14. Reinstall the lower shock bolts (18mm wrench & socket).
15. Reinstall the brake line bracket (10mm socket), wiring harnesses, and transfer case breather tube.
16. Reinstall the parking brake cable hanger to the body of the Jeep (10mm deep socket).
17. Reinstall the track bar (21mm socket). This may be easier once the Jeep is lowered to the ground.
Once the tires are put back on and the Jeep is lowered to the ground, tighten the sway bar link bolts, track bar bolts, and control arm bolts. The bolts do not torque properly if tightened while on jack stands. This will ensure nothing comes loose while driving. An alignment may also be necessary after installation of the Teraflex leveling kit.
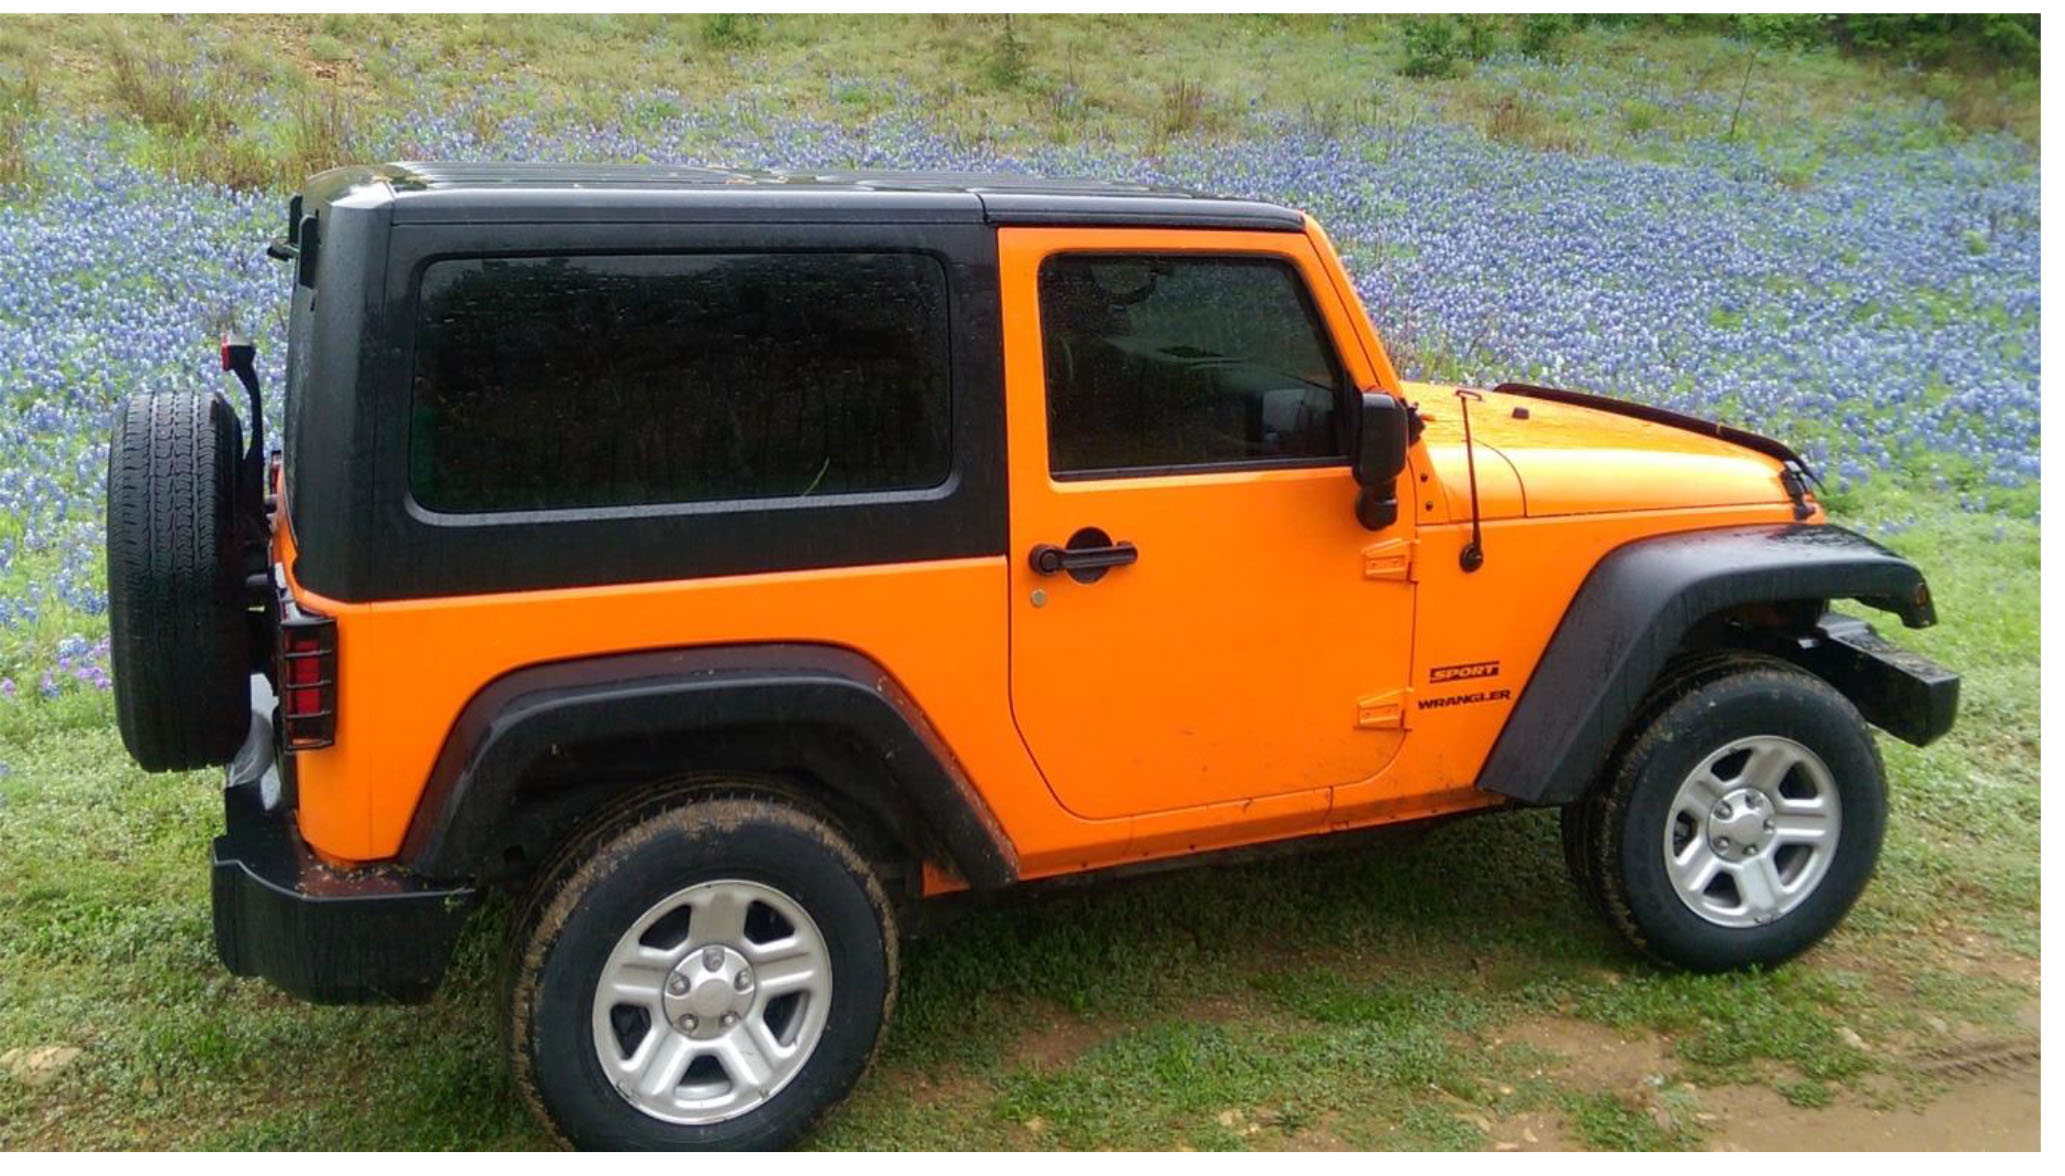
Before Picture with stock 16in wheels and 225/75/16 (29in.) tires:
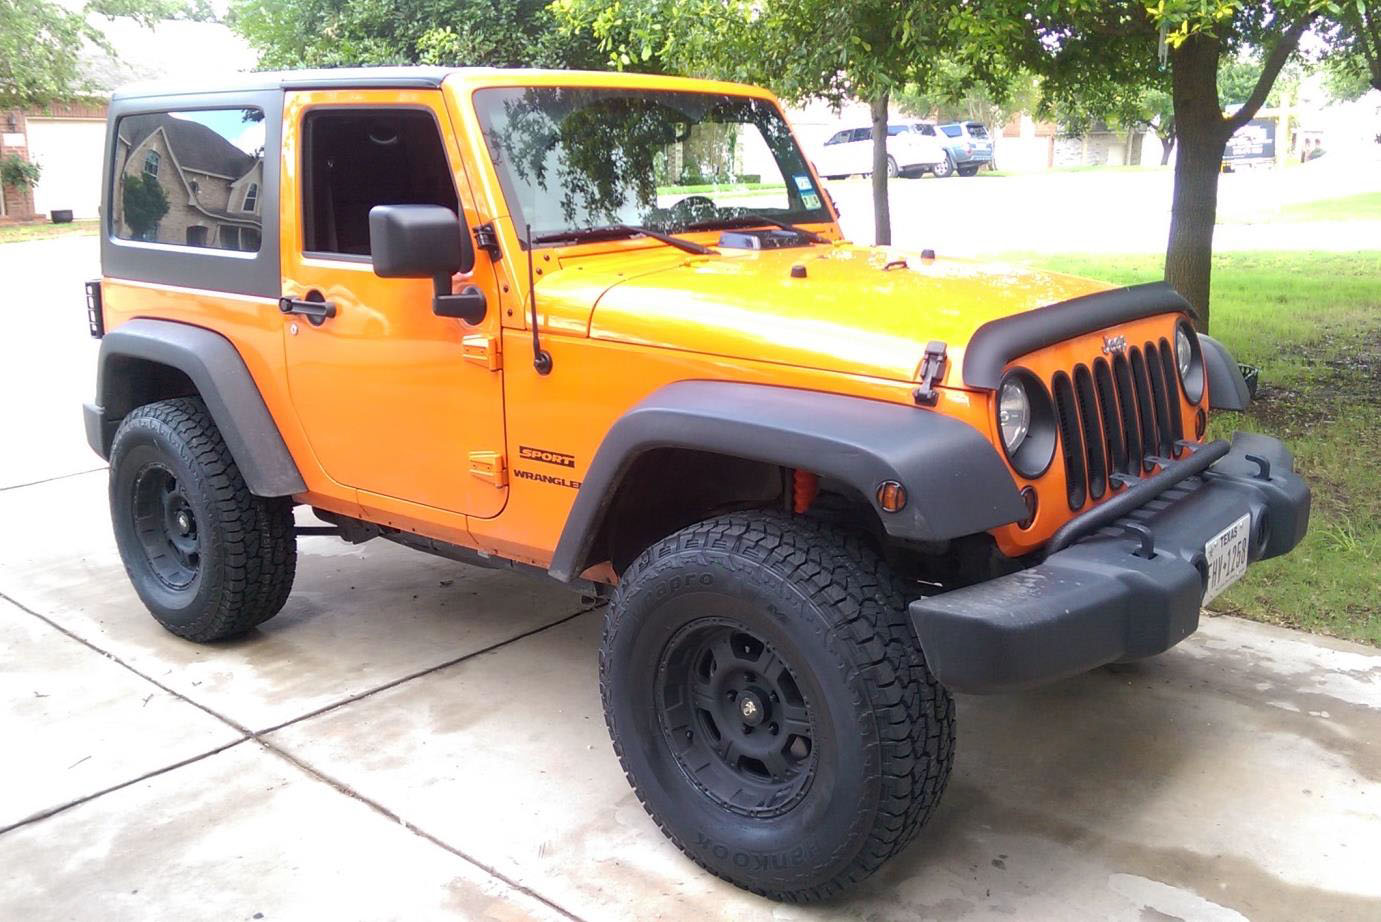
After Picture with aftermarket 16in wheels and 285/75/16 (33in.) tires:
Installation Instructions Written by ExtremeTerrain Customer Brent Stelter on 06/11/2015


