


Installation Time
(approx) 3 Hours
Difficulty Level:
Light to Moderate mechanical skill required.
Installation Guides
No guide available for this part yet.
 FREE 1 to 3-Day Delivery on Orders $149+ Details


$579.99 set
CONFIRM THIS FITS YOUR VEHICLE!
Saved - View your saved items
We're sorry. We couldn't save this product at this time.
or use


Bilstein B8 5100 Series Rear Shock for 2 to 3-Inch Lift (18-26 Jeep Wrangler JL)
 334
334

FOX Performance Series 2.0 Front IFP Shock for 2 to 3-Inch Lift (18-26 Jeep Wrangler JL)
500+

FOX Performance Series 2.0 Rear IFP Shock for 2 to 3-Inch Lift (18-26 Jeep Wrangler JL)
500+
Features, Description, Reviews, Q&A, Specs & Installation
| Brand | Teraflex |
| Lift Height | 2.50 Inch |
| Lift Kit Type | Suspension Lift |
| Lift Kit Max Tire Size | 35 Inch |
| Brand of Shocks | Teraflex |
| Shock Type | No Shock |
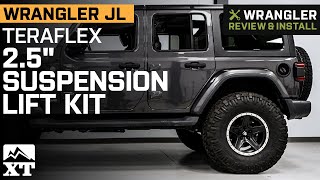
Enhanced Off-Road Capability. Teraflex 2.50-Inch Coil Spring Base Suspension Lift Kit is designed to elevate your Jeep Wrangler JL for improved ground clearance and off-road performance. This kit allows for larger tire fitment up to 37 inches while maintaining balanced ride quality. It is an ideal upgrade for enthusiasts seeking both trail capability and daily drivability.
Construction and Appearance. This suspension kit includes high-quality front and rear coil springs along with sway bar links engineered for durability and performance. The components are built to withstand rugged conditions while maintaining a clean, functional appearance. Precision manufacturing ensures proper fitment and long-lasting reliability.
Installation. Installation is moderately difficult and may require mechanical experience and proper tools. No drilling is required, as the kit features direct bolt-on components designed for factory mounting points.
Warranty. This product is backed by a limited lifetime warranty.
Application. This Teraflex 2.50-Inch Coil Spring Base Suspension Lift Kit fits the 2018-2026 Jeep Wrangler JL 4-Door with 2.0L or 3.6L engine, excluding 4xe.
Teraflex 1354200
CA Residents:  WARNING: Cancer and Reproductive Harm - www.P65Warnings.ca.gov
Installation Info
Installation Time
(approx) 3 Hours
Difficulty Level:
Light to Moderate mechanical skill required.
Installation Guides
No guide available for this part yet.
What's in the Box
Tech Guides:
