Installation Time
(approx) 1 Hour
Difficulty Level:
Simple installation for anyone.
FREE 2 or 3-Day Delivery on 10,000+ Items. Details
$369.99 (pair)
FREE ShippingSaved - View your saved items
We're sorry. We couldn't save this product at this time.
or use
Get a $30 Prepaid Visa Card!
Hey, guys. Today I'm here with the Black Super White Halo Projector Headlights, fitting all 2005 to 2009 Toyota Tacomas. If you're in the market for an upgrade as well as a replacement for your headlights, maybe if you've damaged one while you're out in the trail or just driving around, or if you've seen some of that normal wear and tear, these are going to be right up your alley. These are gonna be perfect if you're looking for some extra lighting performance out of the front end of your truck, if you're looking for some extra visibility while driving at night or even dark back roads and dark trails. These will incorporate projector HID lights that will help you out with their visibility on those dark back roads or even dark trails, and they're also going to incorporate LED Halos and an LED strip down at the bottom helping you out with some more modernized styling in comparison to your factory bulbs and your factory headlights in general.Speaking of that styling, these are gonna have a black housing which is gonna add a very sleek and stealthy look to the front end of your truck. Now, these are gonna be very affordable at roughly $250 making these one of the most affordable options for headlights on the page for an '05 to '09 Tacoma. These headlights are gonna have a pretty simplistic design to them, however they still are gonna get the job done. So the reason why they are going to be a little bit lower on the price scale is because they are still halogen bulbs even though they are an HID or high intensity discharge, and they are going to have that more basic design to the actual housing.When we take a look at more expensive options, you'll usually see that those style headlights will have a couple of extra bells and whistles including a smoked lens, or they may have different types of bulbs. So instead of an HID, they may incorporate an LED or they may incorporate a color changing bulb which is going to bump up that price point. Now, if we take a look at some more inexpensive solutions, those are usually going to consist of just changing the bulb which will not take care of the headlight housing itself. So in my personal opinion, I think if you're looking for a very affordable solution that's gonna offer you a lot of style as well as function for the front end of your truck, then this is gonna be a really good option to take a look at.So install is actually gonna be pretty easy, these are plug and play, we're just gonna have to remove a couple of trim pieces with some basic hand tools in order to get the job done. So speaking of that install, let's jump into that now. Tools that I used for my install were an impact wrench, a 10 millimeter deep socket and a 10 millimeter shallow socket, a flathead screwdriver, a trim removal tool, and a quarter inch drive ratchet. So our first step is gonna be to pop the hood and then we can take off our grille.So first, we're gonna remove the two bolts in the top of our grille with a 10 millimeter socket. Then we can move to the outside of the grille and there's gonna be two clips holding it in on either side. So you can either use a flathead or a trim removal tool, sometimes a flathead is a little bit easier with this. So now what we can do is just make sure that these top pieces are not hooked on where they were bolted in, there is a little bit of a ridge there. So we're gonna pull up and kind of wiggle it out. It's actually being held on either side of the headlight here. And if you want to you can take a flathead screwdriver and wiggle the clip with that too.So what we can do next is remove the three clips that are holding in the front of our bumper. We will have to move this back a little bit to access a bolt on either side. So I'm gonna take that same flathead screwdriver and just remove these from our bumper. So what we can do next is work on one side, we're going to take off this plastic trim piece, it's underneath our headlight, so we can access the bolt that's underneath it. So I am gonna take that same flathead screwdriver and remove this clip. So after that's removed, what we can do is separate it from our quarter fender over here. I'm gonna take a plastic trim removal tool and give it a good pry. So after we have that off we'll be able to expose that bolt and kind of pull our bumper a little bit forward. I'm gonna remove that with a 10 millimeter socket. After that's removed, we can head inside our fender well to remove another bolt behind our inner fender liner.So inside our wheel well we're gonna have a 10 millimeter bolt that's down at the bottom here. I'm gonna use a 10 millimeter socket and go ahead and remove that. So there's also one up at the front that I'm going to use the same 10 millimeter socket for and then we will be able to pull the inner fender liner in and get access for that bolt on the headlight.So once you peel the liner back there is gonna be a bolt that's connecting the bumper to the quarter fender here. I'm gonna go ahead and remove that so we can remove part of the bumper and kind of pull it back so we can access this side bolt. So I'm gonna be using that same 10 millimeter socket and it's right up at the corner here. And once that is out, what we can do is pull this back and you'll be able to see where we can access the side of the headlight. So what I'm gonna do is remove that with a 10 millimeter socket, but I did switch from a deep socket to a shallow socket just for extra clearance. Once that bolt is removed we can put it to the side and move to the top two bolts. So I'm gonna use that same 10 millimeter socket to remove these two top bolts that are holding in our headlight.So at this point, the headlight should be fully disconnected, we just have to unhook it from those two tabs up at the top, as you can tell they have a ridge on them, and then we can wiggle this out. Now, because the bumper is disconnected, we can kind of pull that forward to give us some more clearance and wiggle this out. Now, once it's pulled forward, we do have to disconnect the couple of wires. We are just going to depress the tab and pull back. All right there's one, I'm gonna go for the marker light on the side. And then last but not least, our main headlight. You can just wiggle that back. There's no clip on this. All right. Then you can take this out and start on the other side.Before we install our new headlight, I wanted to show you guys a quick side by side and tell you the benefits that you're gonna get out of this new headlight in comparison to your factory setup. Now, sitting on the table, you can tell that this is gonna be a big upgrade just within the lens. On the factory headlight, you can tell that this is going to be very clouded and that can actually obstruct your visibility while you're out in the street even if the bulb inside is fully functional. On this new headlight, you can tell that this is completely clear and that's gonna help out your lighting performance as well as the new technology inside. This new headlight will have HIDs or high intensity discharge bulbs and that is going to be paired with a projector lens which will create a better light pattern and more uniform light pattern and it is going to give you a boost in your visibility in comparison to the factory housing and the factory lighting performance.Not only is this gonna have HID and projector technology, but you're also getting an LED within this including the LED halo ring on each of the headlights and an LED strip at the bottom which will give you some extra styling and act as a daytime running. Speaking of styling, the new headlight will also have a black interior housing which will give you some extra sleekness to the front end of your Tacoma in comparison to the factory one which as you can tell, will have a chrome reflective housing to it. Now, not only is it going to be an upgrade in performance, these also are going to be pretty easy to install considering that these have all the factory mounting points and will be plug and play. So this will be a factory style headlight, however, you are gonna get a big pump in performance. So enough about these two side by side on the table, let's go ahead and install our new one.Before we can install our new headlight we do have a clip that we need to hook onto the inside and this is what our grille actually clips on to, and just press that in and once it's in place, we can move to plugging in our headlight. We wanna make sure that you're not scratching up the lens. But like I told you guys this is going to be completely plug and play. This will also have a silicone boot that goes over for a little bit of extra protection. Gonna pull our bumper out just a hair since it still is disconnected, so we can clear our headlight. And now that it's a little bit closer, you can plug in this beam here. Now, we can position this into place. That top part should snap in, then I'll line everything up. What we can do next is to secure the top of our headlight with our factory bolts. Then we can tighten them down with a 10 millimeter socket. Now, we can line up the bottom, you can stick your hand inside the fender well to line it up and we can secure down the 10 millimeter bolt that we previously took out.Once that's hand threaded in we can take our 10 millimeter shallow socket and tighten that all the way down. So what we can do next is secure our bumper back down on the inside, we're gonna take that 10 millimeter bolt that we removed and thread that into our quarter fender. Once that's threaded in my hand we can tighten it down with that 10 millimeter socket. So then we can secure our inner fender liner back on to our bumper with that same 10 millimeter screw that we took out before and that same 10 millimeter socket. So now, we can secure the inner fender liner at the bottom with the two bolts that we previously removed. Hand thread them in then we can tighten those back up with the 10 millimeter socket.So now we can secure the bottom of our headlight here with that 10 millimeter bolt that we previously removed, tightening it up with the 10 millimeter socket. Now, we can reinstall our trim, popping that back into place and securing it down with the factory clip. After we're finished up with the passenger side, we can repeat the same thing on the driver side.So now we can reinstall the three clips on our bumper. Once those are on we can grab our grille. Slide this down into place. Those clips on either side of the headlights are going to fit into our grille. Just be mindful of that. Then we can reinstall those two screws, tightening those up with a 10 millimeter socket, and then reinstall those two clips on the side into our headlights. After that, we can close up the hood and then we'll be all set to go.So that's gonna wrap it up for my review and install. Make sure like and subscribe and for more videos and products like this, always keep it right here at extremeterrain.com.
Subscribe to our YouTube Channel
Features, Description, Reviews, Q&A, Specs & Installation
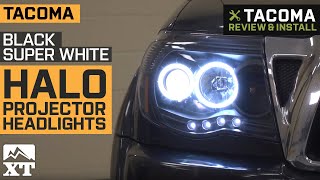
Boosts Driving Safety. These Black Super White Halo Projector Headlights help boost driving safety. With these installed, these headlights can turn night into day. Thanks to their clear projector lenses, these headlights are able to produce a straight and more focused light beam, allowing you to clearly see what’s ahead in your Toyota Tacoma.
Brilliant Lighting Performance. To help you illuminate the road at night, these Black Super White Halo Projector Headlights produce a very brilliant light. Featuring high-intensity LED bulbs, these headlights are sure to provide you with the lighting solution that you need.
Premium Construction. Built to last, these headlights guarantee you a premium construction. These headlights have been meticulously created to keep up with your truck’s light-to-moderate off-roading needs. Furthermore, these headlights are enclosed in a durable black housing construction to withstand harsh weather conditions.
Simple Installation. Setting up these headlights requires a simple installation. Geared with the right tools and some electrical skills, you can quickly install these headlights onto your vehicle’s factory mounting points.
DOT Compliant. For safety and quality assurance, these headlights are created in compliance with DOT’s strict regulations and guidelines. Furthermore, these headlights underwent a series of tests to ensure durability before releasing in the market.
Application. The Black Super White Halo Projector Headlights are tailored to fit 2005-2009 Toyota Tacoma models.
Fitment:
Raxiom TT5928
CA Residents: WARNING: Cancer and Reproductive Harm - www.P65Warnings.ca.gov
Installation Info
Installation Time
(approx) 1 Hour
Difficulty Level:
Simple installation for anyone.
What's in the Box
10 More Questions