 FREE 1 to 3-Day Delivery on Orders $149+ Details

How to Install Rugged Ridge XHD Rear Bumper, Textured Black on your 1987-2006 Wrangler

Shop Parts in this Guide

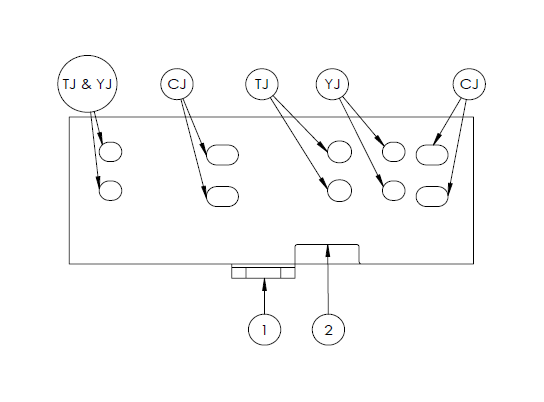
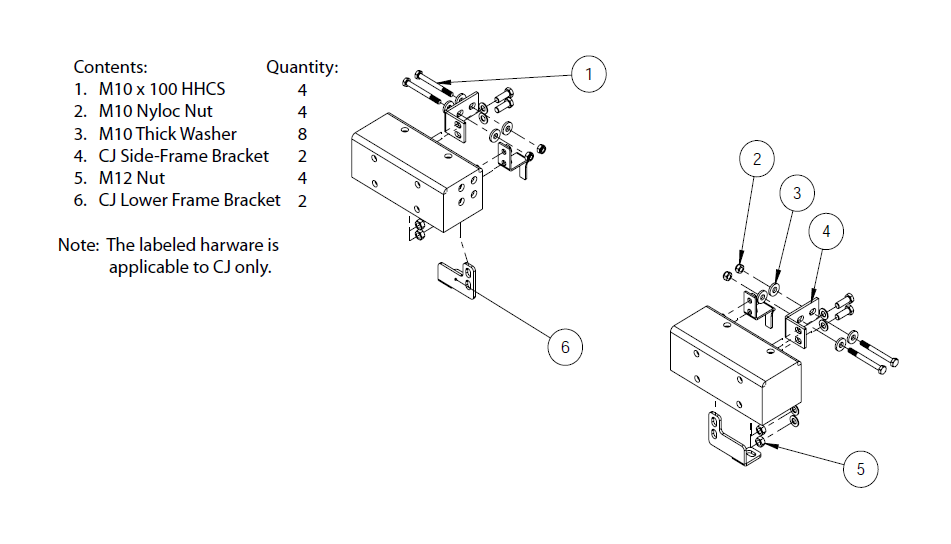
Sub-Frame Hole Callout:
Backside view of passenger side
sub-frame.
Holes are labeled according to their
uses.
1. This is the lower mounting tab for
YJ and TJ to the lower frame rail.
2. This slot is used for the CJ’s lower
frame mount.
Note: The holes labeled TJ & YJ are the outermost holes and have welded nuts for mounting.
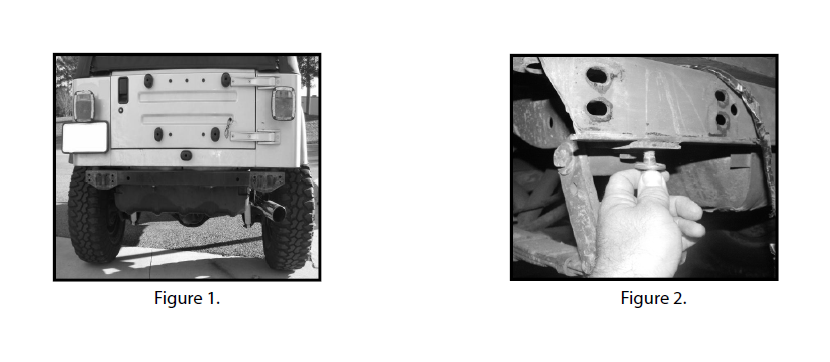
1. Remove the rear bumper from the vehicle leaving the rear crossmember exposed (Figure 1). Save the lower frame mounting bolts (Figure 2) as these will be reused in the installation of the new bumper.
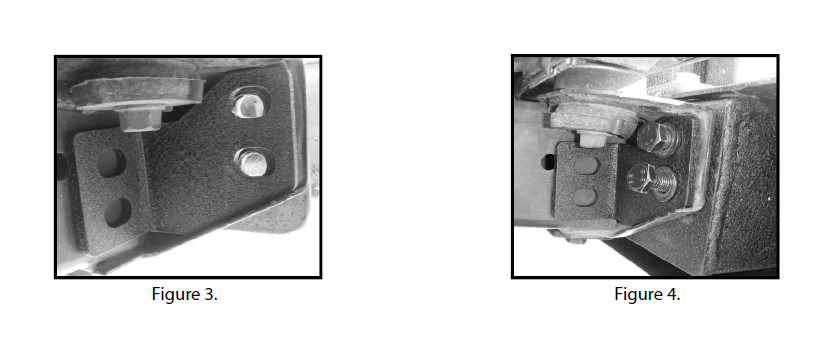
2. Place drivers’ side-frame bracket in crossmember channel and line up holes (Figure 3). Place driver’s side sub-frame against crossmember, and using the supplied M12 x 35 bolts and washers, attach the sub-frame to the vehicle (Figure 4). Do not tighten bolts at this time.
Note: YJ’s may require the the outer crossmember holes to be enlarged for a proper t. Do not exceed 5/8” or 16mm in diameter.
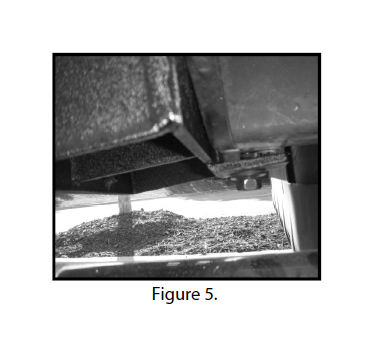
3. Support the sub-frame with your hand and line up the lower mounting tab with the hole in the bottom of the frame rail. Using the bolt saved from Step 1, insert through sub-frame tab and thread into lower frame rail (Figure 5). Do not tighten bolts at this time.
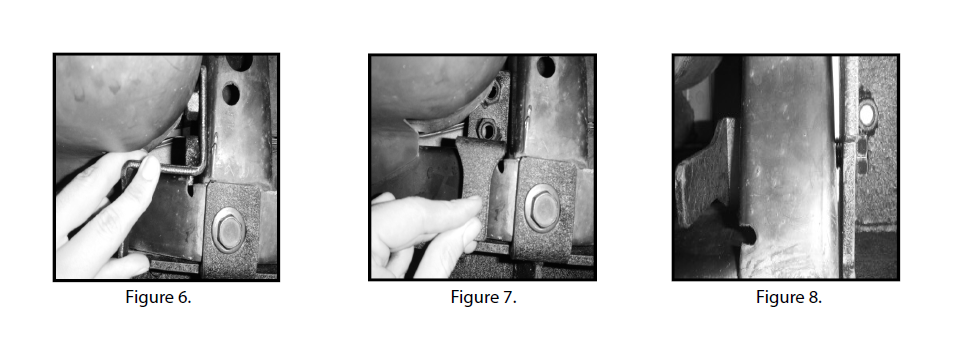
4. From under the vehicle, align the nut plate as shown in Figure 6. Rotate the nut plate to the right (Figure 7) and place in the channel on the backside of the crossmember. Line up the nut plate holes with the crossmember and sub-frame. Attach nut plate using the supplied M12 x 35 bolts and washers from inside of the sub-frame (Figure 8). Do not tighten the bolts at this time.
5. Repeat the procedures from steps 2-4 for the passenger side of the vehicle. If installing bumper on a YJ or TJ please proceed to page 5, step 12 to complete the installation of your rear XHD Bumper.
6. Remove the rear bumper from the vehicle leaving the rear crossmember exposed (Figure 9). Save the lower frame mounting bolts (Figure 10) as these will be reused in the installation of the new bumper.

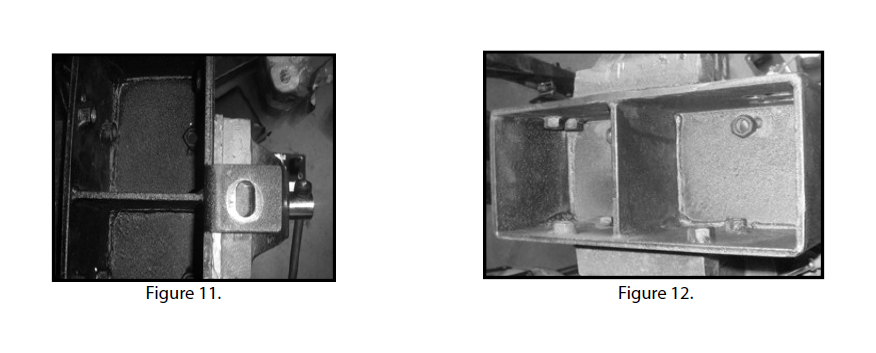
7. Using a cut-o wheel, remove the existing lower mounting tab (Figure11) from the sub-frames (Figure 12). This is necessary in order to avoid interference with the leaf spring hangers.
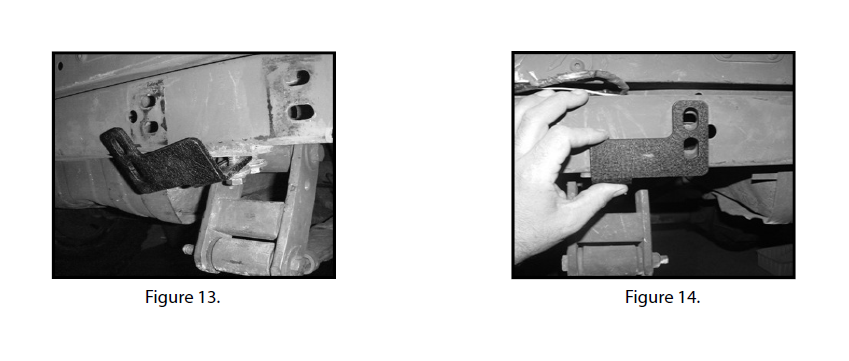
8. Attach the drivers’ side CJ lower frame bracket to the bottom of the frame rail using the bolt saved from Step 1 (Figure 13). Check for hole alignment of bracket and crossmember (Figure 14). Do not tighten bolts at this time.
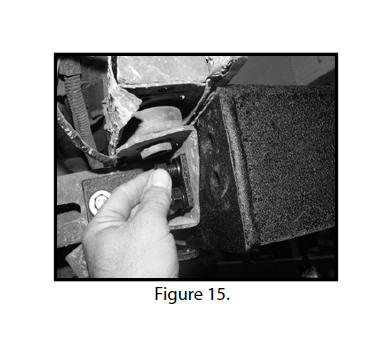
9. Place drivers’ side sub-frame against the crossmember, making sure to place the CJ lower frame bracket inside the sub-frame, and line up the outer CJ mounting holes with crossmember holes. Insert the supplied M12 x 35 bolts and washers through the sub-frame, crossmember, and CJ side-frame bracket. Place washers over bolts and thread 2 M12 nuts onto bolt (Figure 15). Do not tighten at this time.
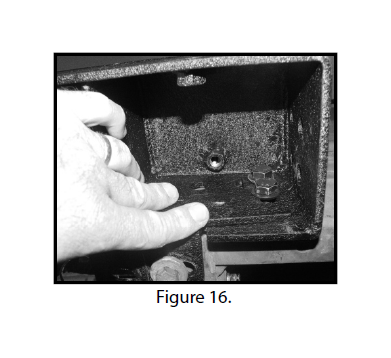
10. From under the vehicle, insert a nut plate into the back channel of the crossmember. Insert 2 of the supplied M12 x 35 bolts and washers through the CJ lower frame bracket, sub-frame, crossmember, and thread into the nut plate (Figure 16). Do not tighten bolts at this time.
11. Repeat step 8 through step 10 for the passenger side of the vehicle.
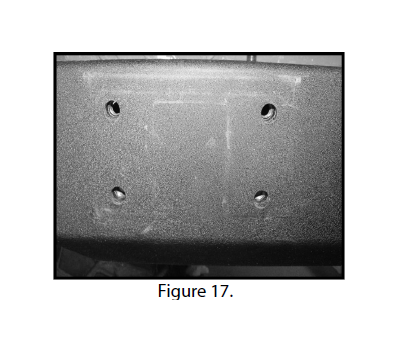
12. Place the bumper over the tops of the sub-frames, and visually line up the holes of the bumper and sub-frames (Figure 17).
If you purchased the optional XHD Tire Carrier, Part Number 11546.42, please refer to the installation instructions at this time to complete the installation of the bumper and tire carrier.
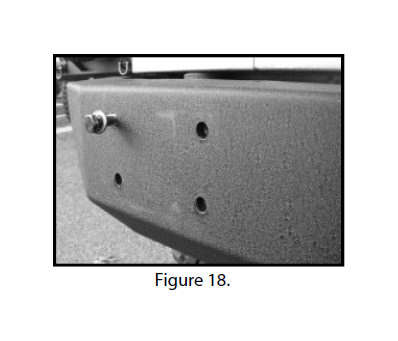
13. Using a supplied M12 x 60 bolt and washer, thread into upper left corner of the bumper and sub-frame (Figure 18). It will be necessary to lift and/or shift the sub-frame in order to line up all of the holes.
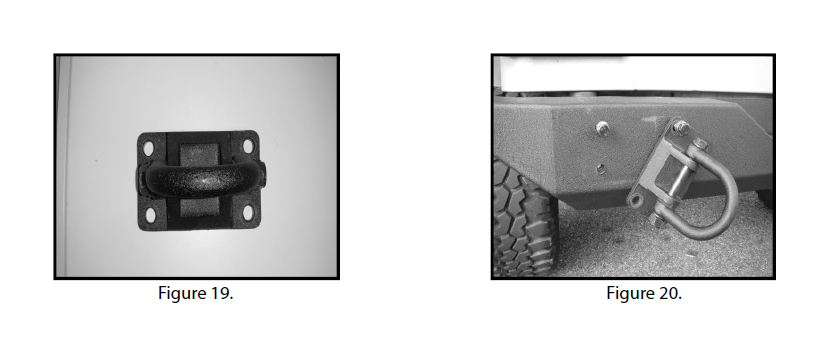
14. Attach bumper to sub-frames using D-Rings. Place a D-Ring in front of you and look at the mounting holes. The wider set of holes is the top (Figure 19). Locate the top right corner of the D-Ring and place a supplied M12 x 60 bolt and washer through the D-Ring and thread into the bumper and sub-frame (Figure 20).
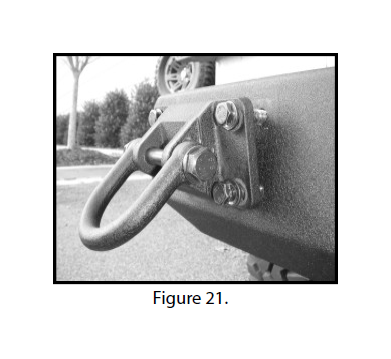
15. Remove the bolt which was insatlled in step 7. Rotate the D-Ring up and install the remaining 3 M12 x60 bolts and washers (Figure 21). Do not tighten the bolts at this time.
16. Repeat the procedures from steps 13-15 on the passenger side of the vehicle.
17. Once both D-Rings have been loosely installed, inspect the bumper to make sure it is centered on the vehicle. Adjust as necessary by sliding the sub-frames left to right.
Tighten all of the bolts of the sub-frame using an 18mm socket and ratchet.
Tighten the lower frame mounting bolt.
Tighten all of the D-ring bolts using an 18mm socket.
Note: If installing bumper onto a CJ, tighten the side-frame brackets’ M10x 100 bolts and nuts at this time.
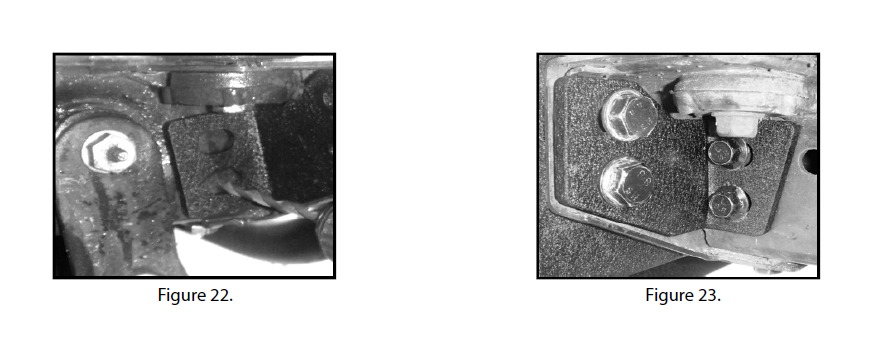
18. Mark and drill holes in the side frame rail using a 19/64” drill bit (Figure 22).
Bolt the side-frame bracket into the side frame rail using 2 of the supplied self-tapping bolts (Figure 23). Repeat on the other side of the vehicle.
Note: If installing bumper on a CJ, omit this step.
19. Install 4 M12 x 35 and M12 washers into the tire carrier mounting holes on top of the bumper.
This completes the installation of the 1976-2006 XHD Rear Bumper, Part Number 11546.10. This bumper was designed to be maintenance free; however, it is recommended that all mounting hardware be checked periodically to ensure everything is still properly fastened and secured.


