 FREE 1 to 3-Day Delivery on Orders $149+ Details

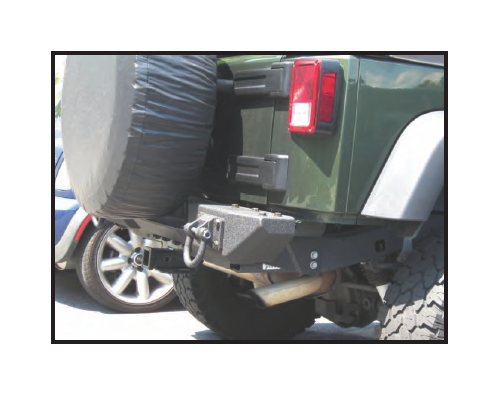
How to Install a Rugged Ridge Aluminum Rear Bumper Pods on your 2007-2014 Wrangler JK

Shop Parts in this Guide
Contents:
1. Rear LH Bumper Pod (1)
2. Rear RH Bumper Pod (1)
3. Left Bracket (1)
4. Right Bracket (1)
5. D-Ring (2)
6. 12mm Washer (8)
7. 12mm Bolt (11)
8. Plugs (6)
9. 12mm x 90 long Hex Head Bolt (2)
10. 12mm x 38mm OD Flat Washer (6)
11. Right Rear Stabilizer Bracket (1)
12. Inner Frame Nut Plate (2)
13. 12mm Short Hex Head Bolt (2)
14. 12mm Lock Nut
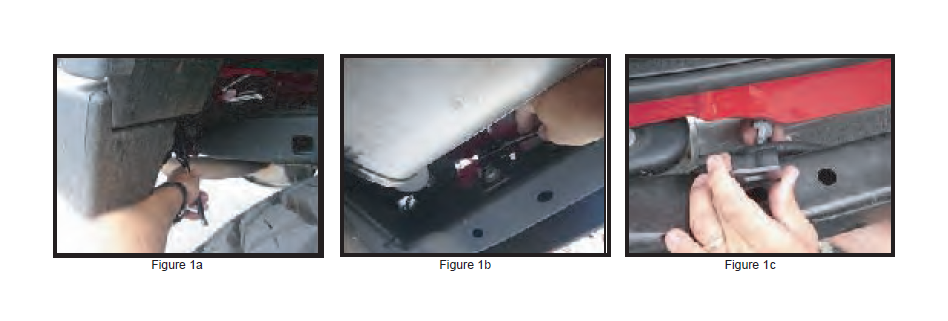
1. Remove original rear bumper. It is held in by 2 bolts on each side (Figure 1a), and 2 bolts that are attached to brackets which fasten to the rear crossmember (Figure 1b). After the bumper is removed, remove the small brackets from the rear crossmember (Figure 1c). Save the 4 bolts from the side and the 2 bolts from the crossmember, as they are to be re-used.
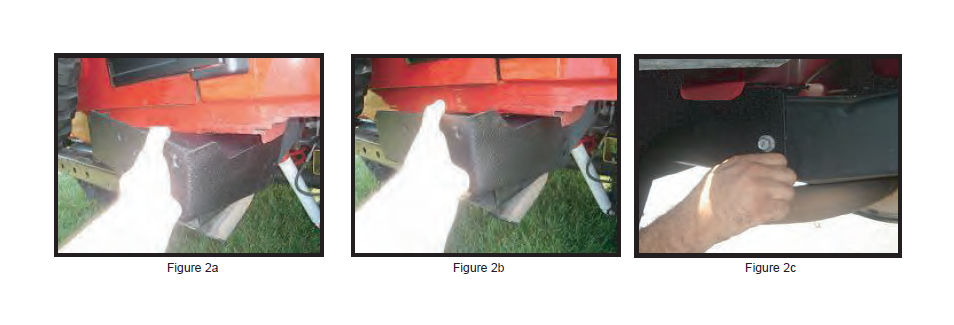
2. Place Bracket on rear frame rails. Brackets need to be angled up while sliding over frame rail (Figure 2a), and then dropped down to level once crossmember hook has been cleared (Figure 2b). Use 2 rear bolts removed in Step 1 to bolt brackets to frame (Figure 2c) and one for the rear crossmember. Secure the front using new M12 nut plate , M12 bolt and flat washer. Do not tighten.
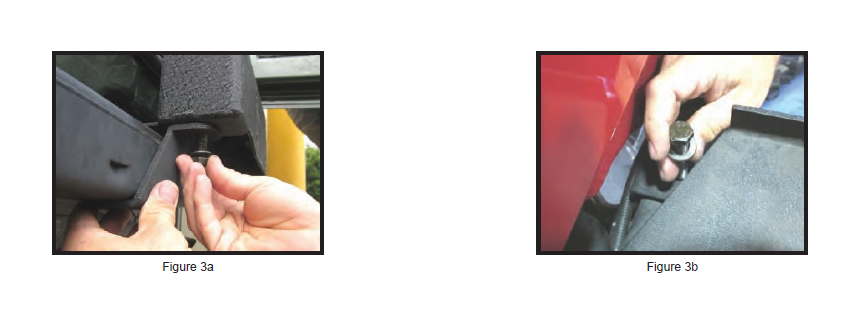
3. Bolt right rear stabilizer bracket to frame and bumper bracket (Figure 3a) Tighten all bolts. Slide smaller M12 spacing washer between frame and left bumper bracket and Insert M12 x 90 hex head bolt. Bolt will need to be placed at a slight angle through frame (Figure 3b). Secure using M12 flat washer and hex nut.
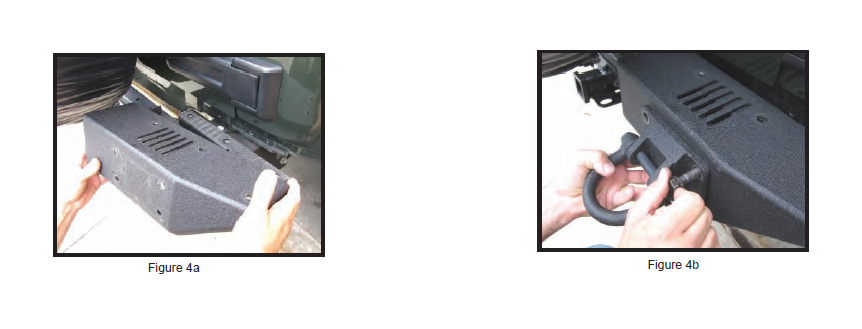
4. Set Bumper onto Brackets. It may be necessary / helpful to open the door so that the spare tire does not interfere with installation (Figure 3a). Install D-Rings using 12mm Bolts and Washers. Do not tighten bolts yet.
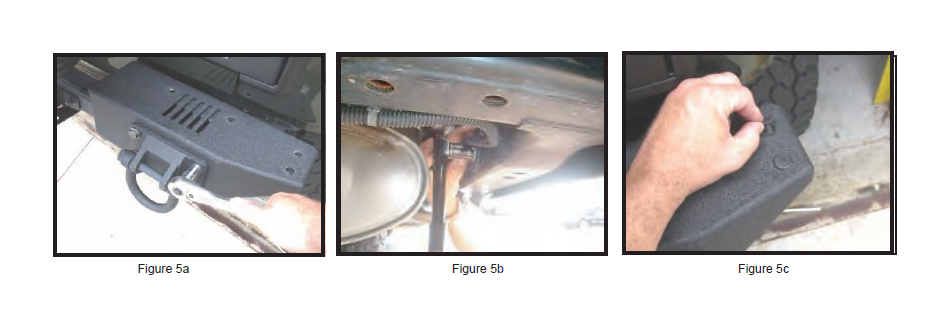
5. Tighten 8 bolts that hold D-Rings to the Bumper and Brackets (Figure 5a), then tighten 6 original and 2 nut plates bolts that hold the brackets to the vehicle (Figure 5b). Install caps in unused holes on top of bumper unless you are installing the 11546.22 Tire Carrier at the same time (Figure 5c). Installation is now complete!
Congratulations on the purchase and installation of a quality Rugged Ridge product!
