 FREE 1 to 3-Day Delivery on Orders $149+ Details

How to Install Rough Country Gas Tank Skid Plate on your Wrangler
Installation Time
2 hours
Tools Required
- Sockets: 16mm, 18mm
- Socket Wrench
- 6” Socket Extension
- Torque Wrench
- Floor Jack

Shop Parts in this Guide
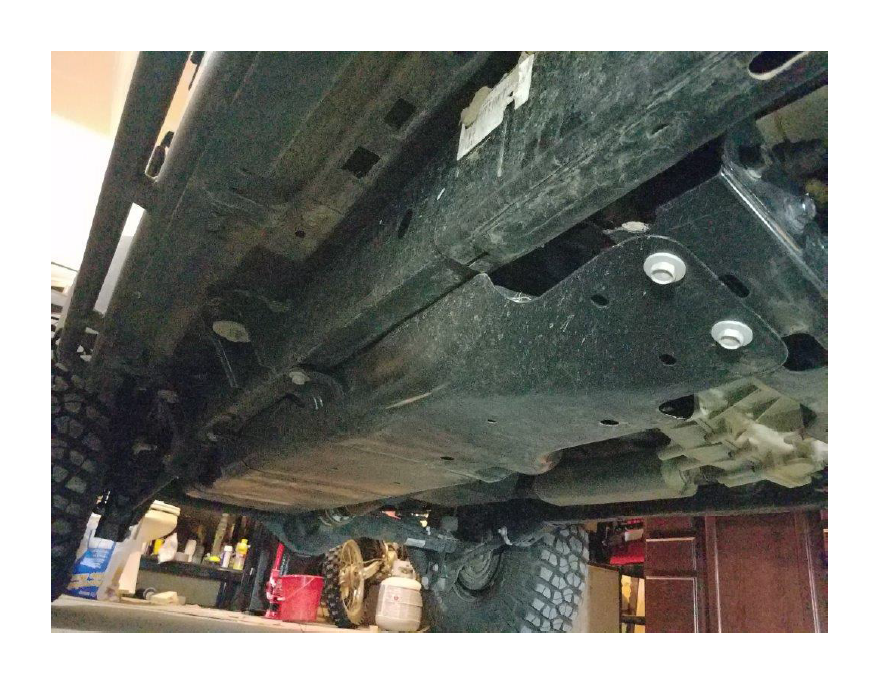
Before Picture:
Installation Instructions:
1. Using an 18mm socket, remove the 4 bolts holding on the transfer case skid plate.
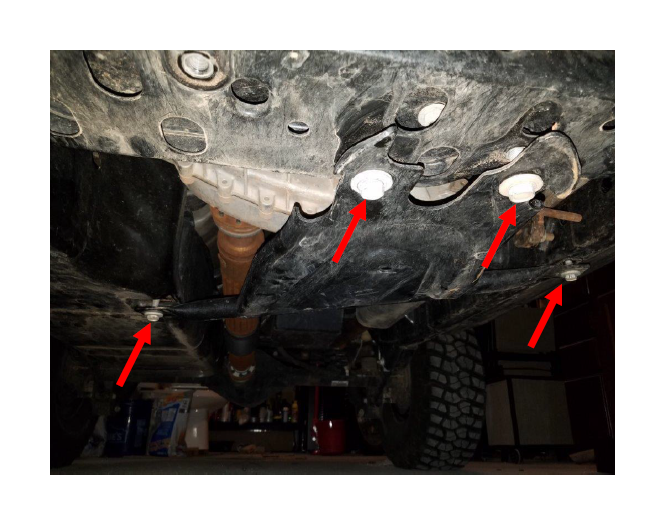
2. Using an 18mm socket, remove the 3 bolts holding on the factory gas tank skid.
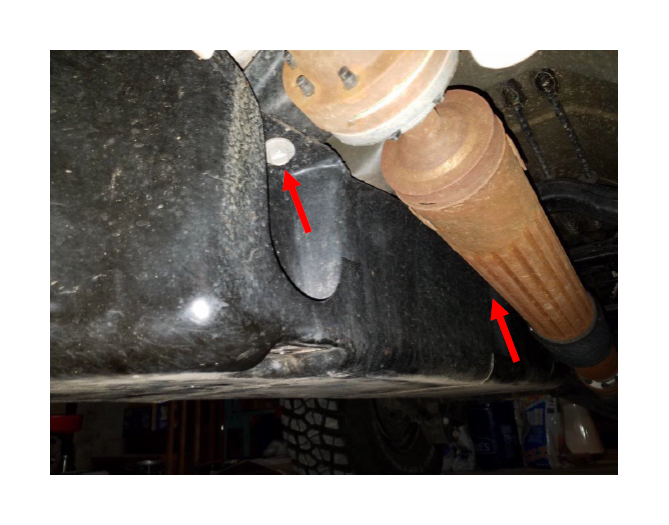
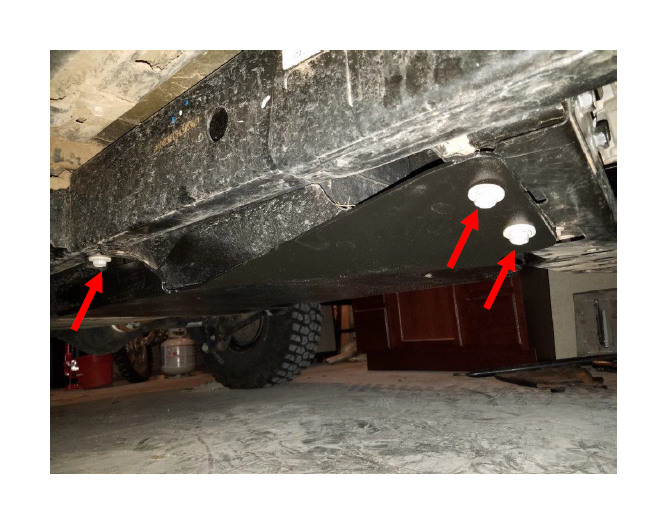
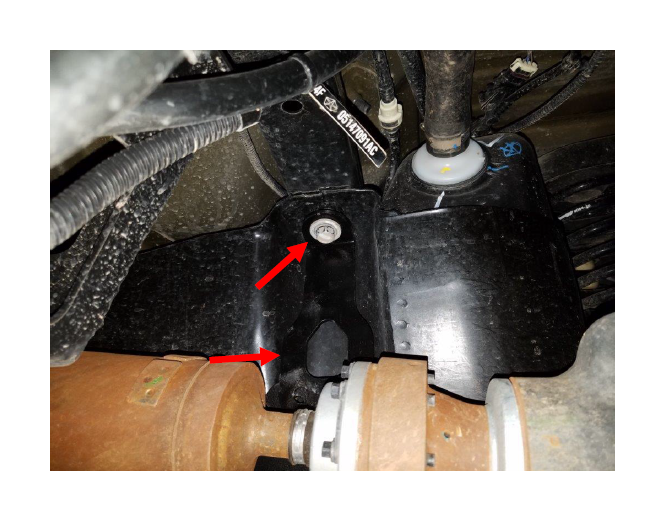
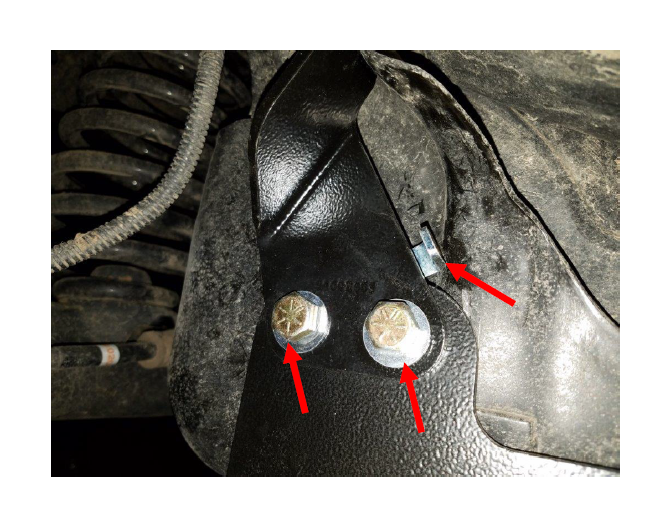
3. Using an 18mm socket, remove the 2 bolts shown. They are located on the inner side of the gas tank.
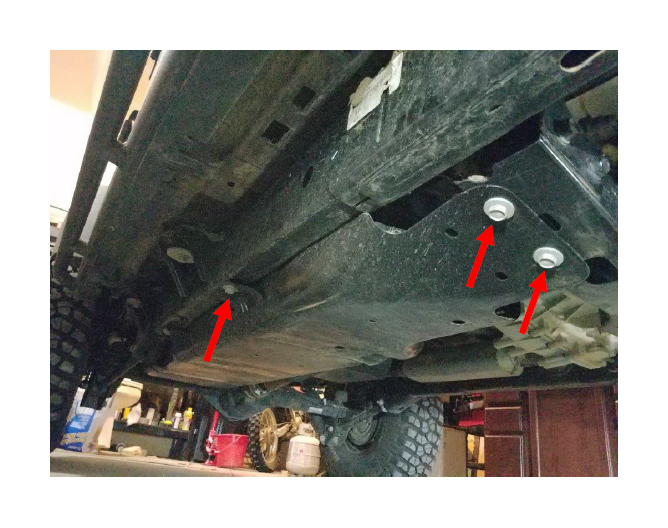
4. Now lift into place the front half of your new skid plate. To do this, you can use a floor jack to lift it into place and hold it. Then insert and hand tighten the 3 factory bolts shown below.
5. In the box with the front half of the skid plate you will find the 2 brackets shown below. The bracket on the right will go on the inner side of the gas tank in the forward most bolt location (Shown near the front of the rear driveshaft in step 3). The bracket on the left will be on the inner side of the gas tank in the middle.

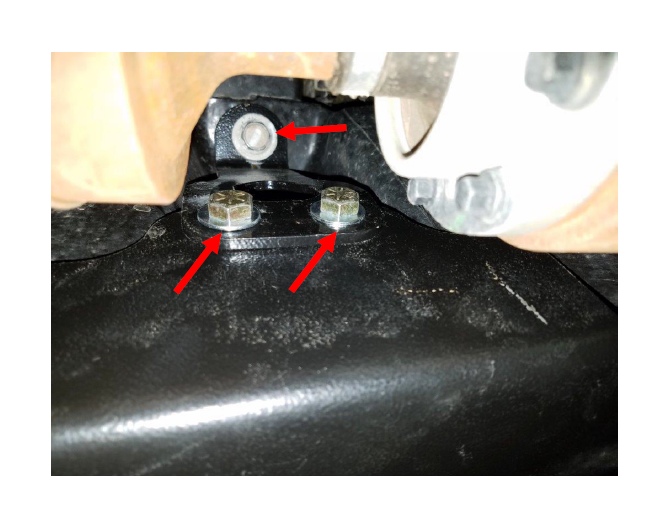
6. Using the correct bracket described in step 5, attach the inner side of the skid plate. Install the stock bolt removed in step 3, using an 18mm socket and socket extension. For now you only want to hand tighten the bolt about 1-2 turns. Then install the supplied bolts and washers as shown below. Tighten to 60ft/lbs using a 16mm socket.
7. Repeat step 6 on the inner on the inner side of the gas tank at the middle mounting location. Then use an 18mm socket with extension to tighten all 5 stock 18mm bolts that you removed. Torque to 73 ft/lbs.
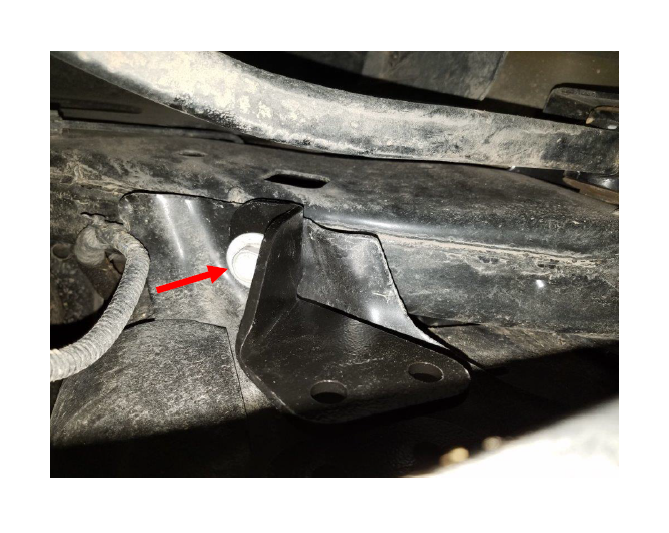
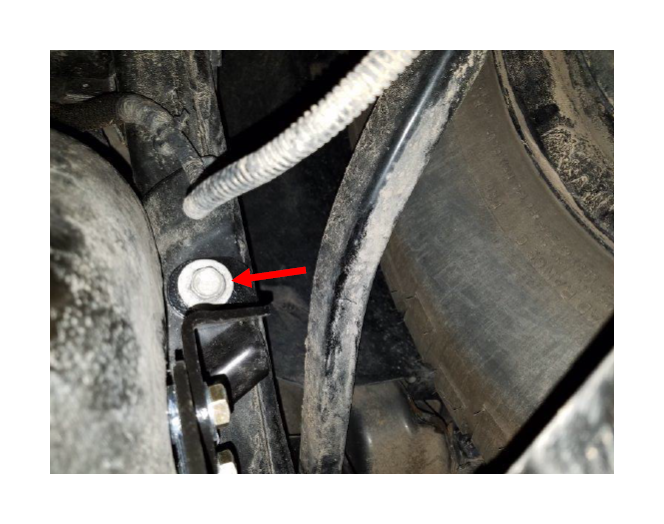
8. Use an 18mm socket to remove the 18mm bolt shown below.

9. Now lift the rear half of the skid plate into place, and hand tighten the 18mm bolt removed in step 8. You will need to lift the inner side of the skid plate into place then the outer side. At this point the skid plate should be held up on the inner side by the attached mounting bolts.
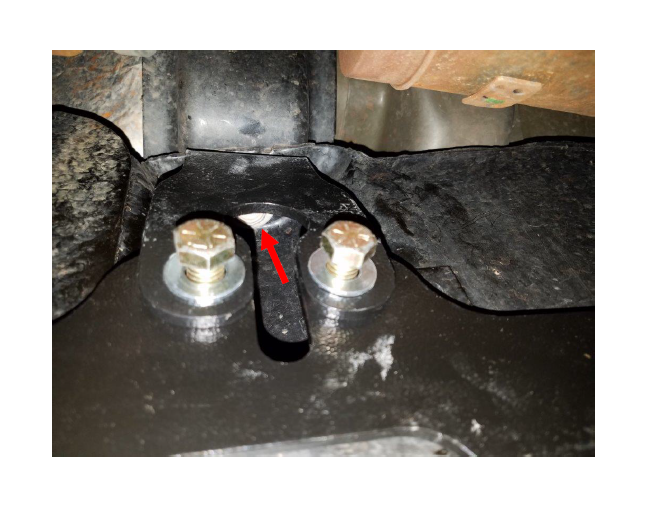
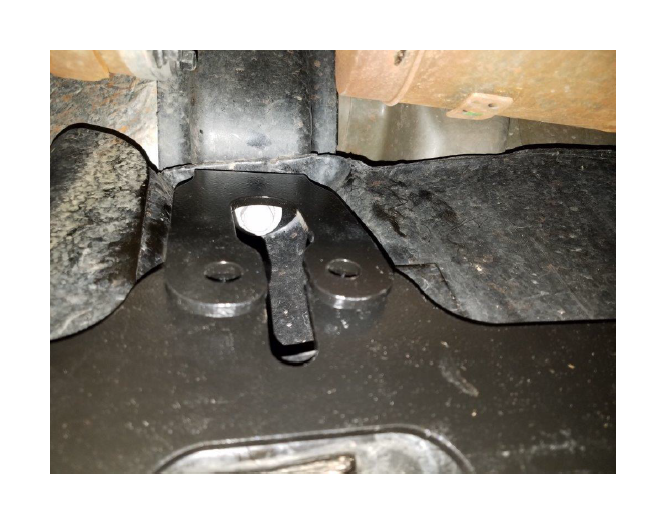
10. Using an 18mm socket, remove the inner rear mounting bolt shown below. Then install the mounting bracket as shown below. At this point only hand tighten the 18mm bolt about 1-2 turns. Note: Notice this bracket is slightly different than the other 2 inner brackets.
11. Install the supplied bolts and washers as done in step 6. Using a 16mm socket, tighten to 60ft/lbs. Then you can mostly tighten the 18mm bolt.
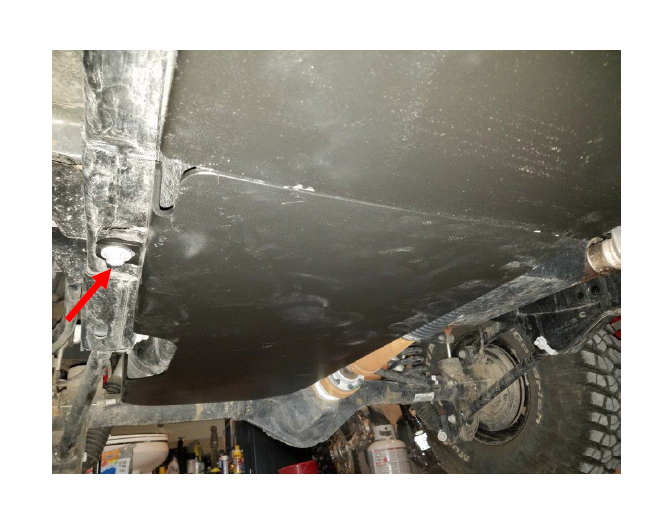
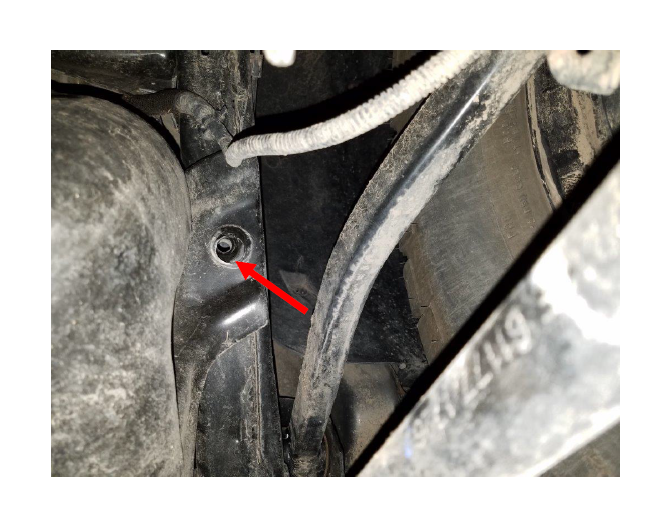
12. Remove the 18mm bolt on the outer rear corner of the gas tank. It is located behind the right rear tire.
13. Install the angled bracket as shown below using the factory 18mm bolt. Only hand tighten 1-2 turns for now.
14. Insert the supplied nut plate as shown behind the rear corner mounting location.

15. Use the tab on the nut plate, position the plate and hand tighten the supplied bolts and washers. Then using a 16mm socket, tighten to 60ft/lbs.
16. Using an 18mm socket, tighten the factory bolts from steps 9, 11, and 12 to 73ft/lbs.
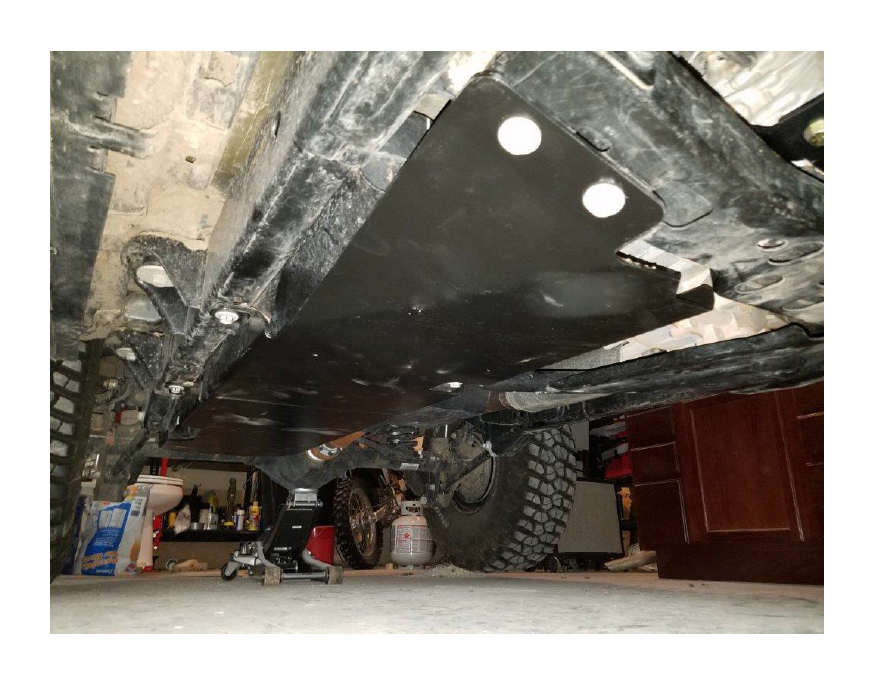
After Picture:
Installation Instructions Written by ExtremeTerrain Customer John Parker 3/24/2017

