 FREE 1 to 3-Day Delivery on Orders $149+ Details

How to Install Rough Country Front Quick Disconnects, 3.5 in.-6 in. Lift on your Wrangler
Installation Time
30 minutes
Tools Required
- Sockets: 15mm, 18mm, 19mm, ½”
- Socket Wrench
- Wrenches: 14mm, 17mm, 18mm, 19mm
- 1/4” Drill Bit
- Drill
- Torque Wrench
- Impact Wrench (Helpful, not required)
- Jack and jack stands (Helpful, not required)
- Screwdriver

Shop Parts in this Guide
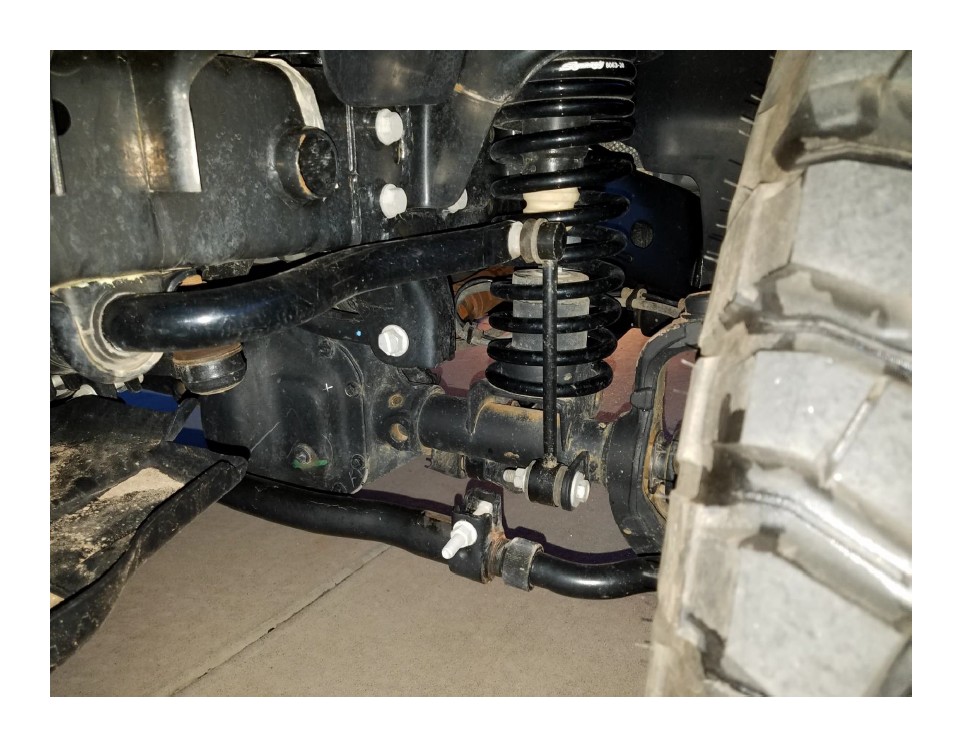
Before Picture:
Note: This before picture is shown using the stock rear sway bar link on the front sway bar.
Installation Instructions:
1. Make sure you are parked on level ground. Using an 18mm socket and 18mm wrench, remove the lower bolts from both sway bar links.
2. (Recommended, Not Required) Use a jack and jack stands to lift the driver side frame of the jeep. This will give you a lot more room to work with. You can also remove the wheel, or turn the wheel to give you even more room. I chose to leave the wheel on.
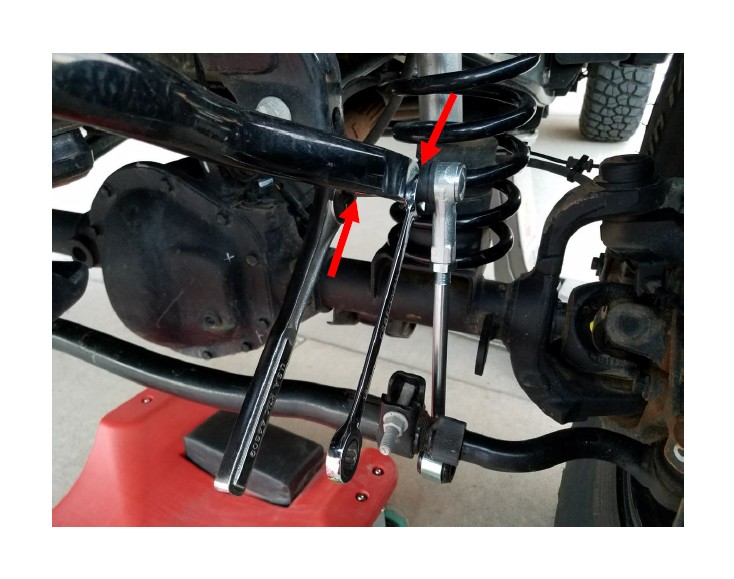
3. Rotate the sway bar down so give you easy access to the top of the sway bar link. Using an 18mm socket and 19mm wrench, remove the sway bar link.
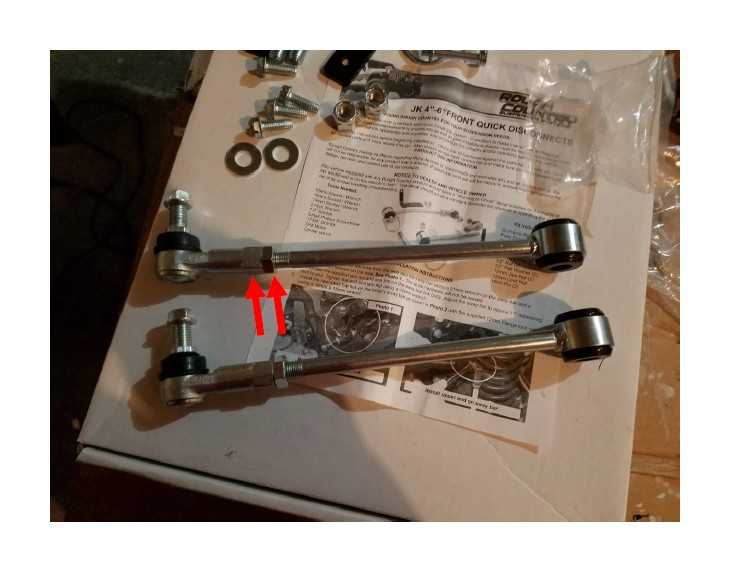
4. Assemble the new sway bar links. Frist screw on the jam nut, then the end link. Adjust the end links to the desired length based on your lift size, making sure they are both the exact same length. You want the link to be a length that makes your sway bar about parallel to the ground. You can readjust later if needed. Then tighten the jam nut against the end link using two 19mm, and 17mm wrenches.
5. Using a 15mm socket and 14mm wrench, attach the upper end link to the sway bar on the driver side. Torque to 75ft/lbs.
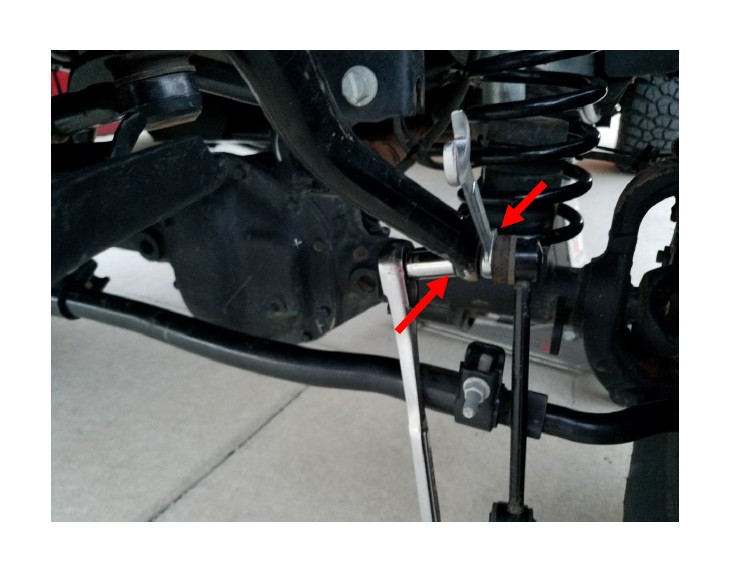
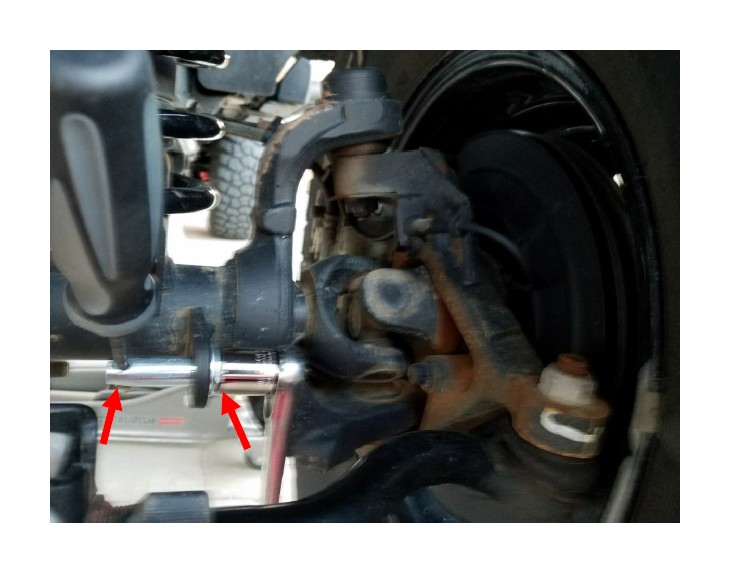
6. Using a screwdriver and 19mm socket, attach the lower mounting pin to the axle side sway bar mount as shown below.
7. Next, lower the jack to check the length of your sway bar link. Push the lower end of the sway bar link onto the lower mount post. The sway bar should be roughly parallel to the ground. Adjust the end link as needed. Make sure you make the same amount of adjustment to the other end link.
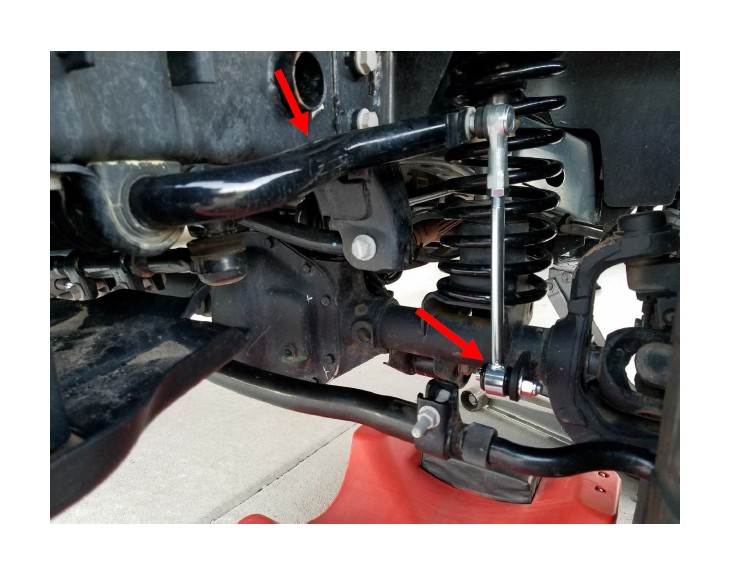
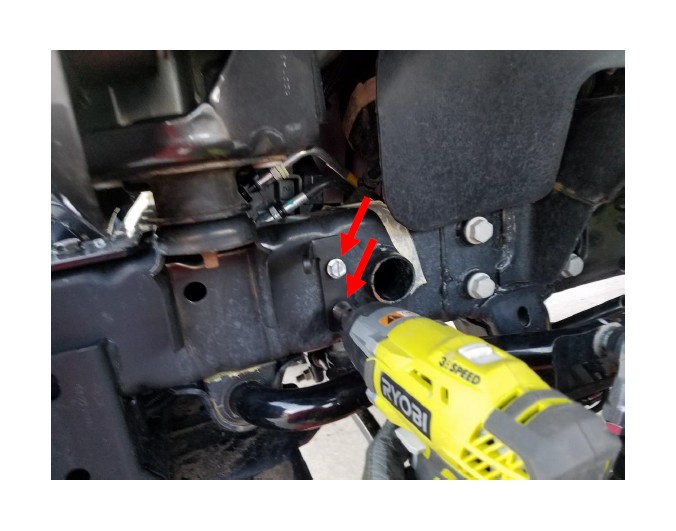
8. Swing the sway bar up towards the frame and insert the upper disconnect mount bracket as shown. Mark the 2 holes to be drilled. Then remove the bracket and drill the marked locations using a ¼” drill bit. Make sure to only drill through the outside of the frame rail.
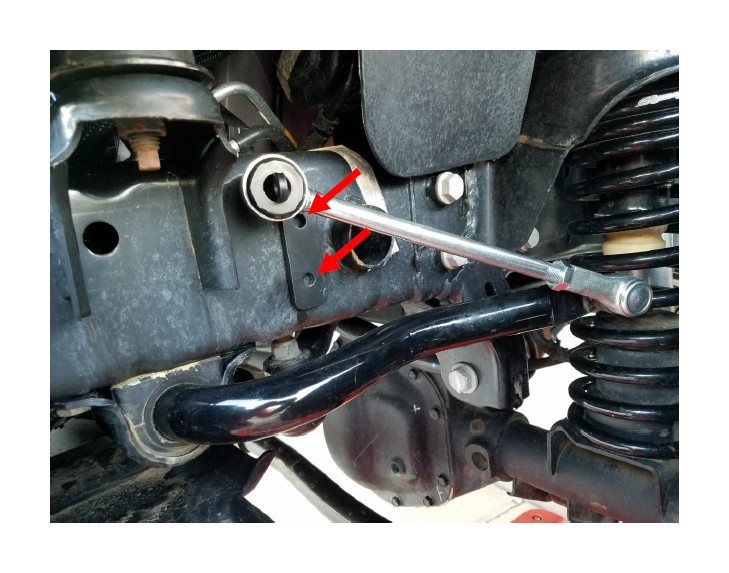
9. Using the supplied self-tapping bolts with a ½” socket, install the mount bracket. I found it easiest to use an impact wrench to get the bolts started. But then, use a normal wrench to fully tighten so that you do not strip them.
10. Repeat steps 2-8 on the passenger side.
11. Repeat step 9 on the passenger side. Make sure the driver side end link is installed on the upper disconnect mount before marking the passenger side mount holes. This will ensure that both upper disconnect mounts will match.
12. Then slide the lower end link onto the mount post, and install the supplied retainer pin. Do this on both driver and passenger side.

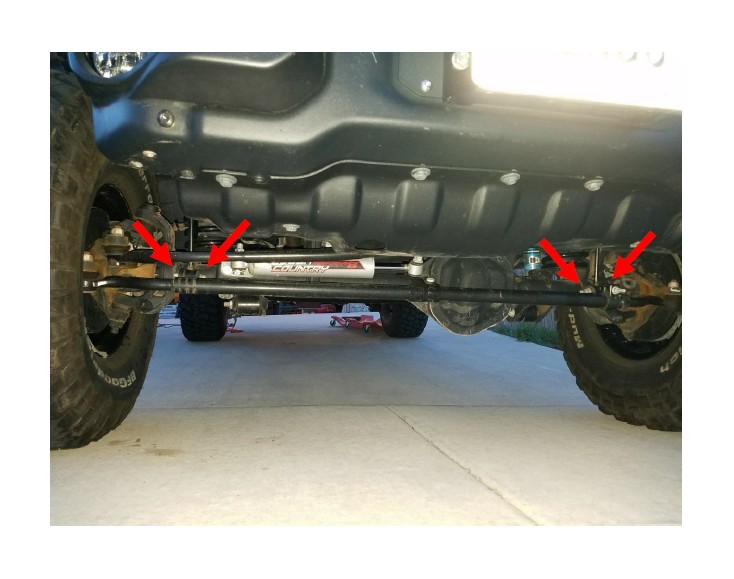
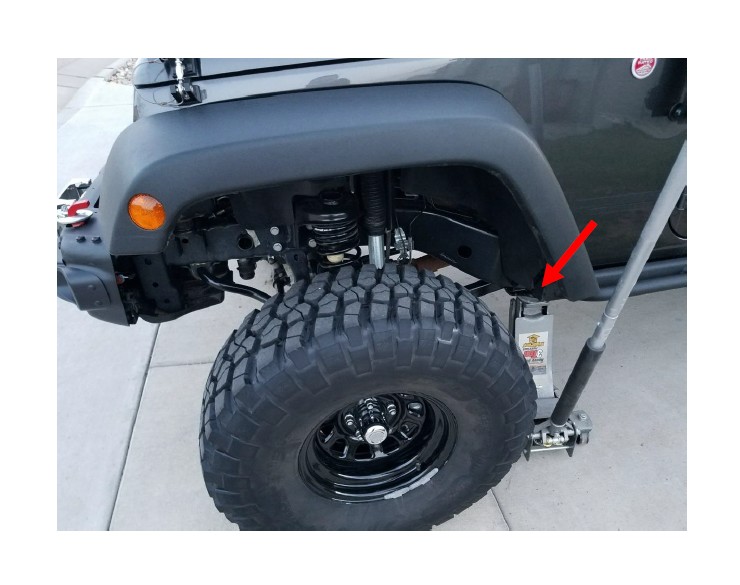
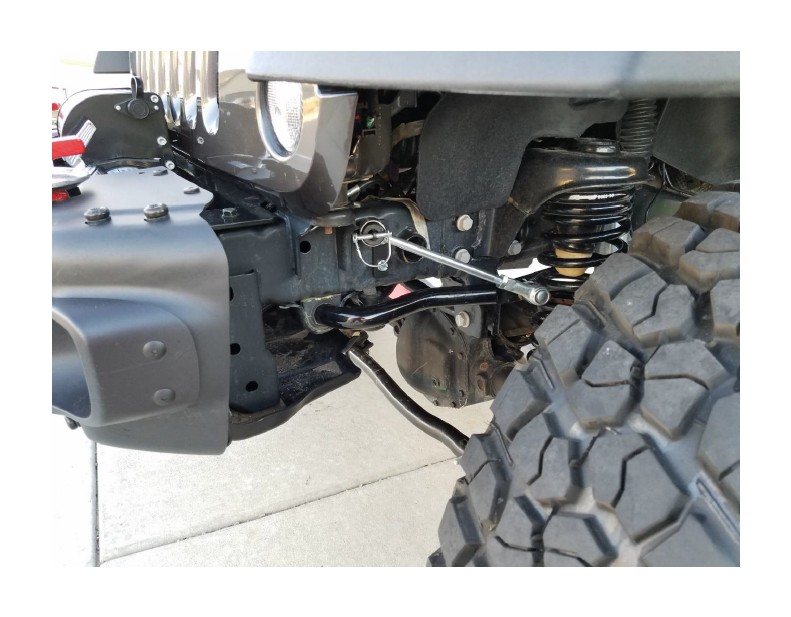
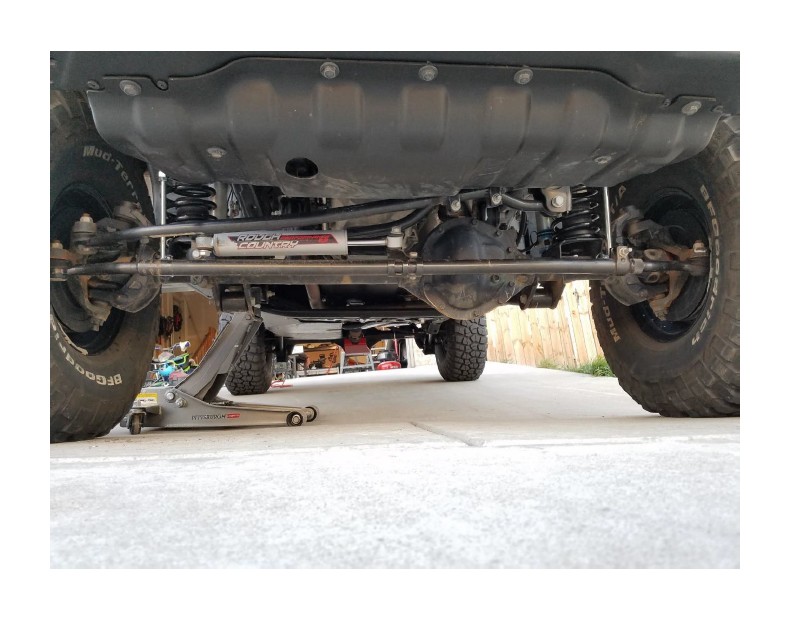
After Pictures:
Installation Instructions Written by ExtremeTerrain Customer John Parker 05/02/2017

