 FREE 1 to 3-Day Delivery on Orders $149+ Details

How to Install Rough Country Exhaust Extensions on your Jeep Wrangler

Shop Parts in this Guide
Thank you for choosing Rough Country for your suspension needs.
This Exhaust Extension kit is intended to gain clearance on the exhaust on the 2012 JK models. Changes in the this year model allow the front driveshaft to come in contact with the exhaust with the addition of most lift kits. This kit will relocate the crossover pipe on the exhaust away from the driveshaft allowing for more clearance.
Rough Country recommends a certified technician install this system. In addition to these instructions, professional knowledge of disassemble/reassembly procedures as well as post installation checks must be known. Always allow the exhaust to cool before initiating installation. Please read instructions before beginning installation. Be sure you have all needed parts and know where they go. Please review tools needed list and make sure you have needed tools.
If question exist we will be happy to answer any questions concerning the design, function, and correct use of our products by calling 1-800-222-7023.
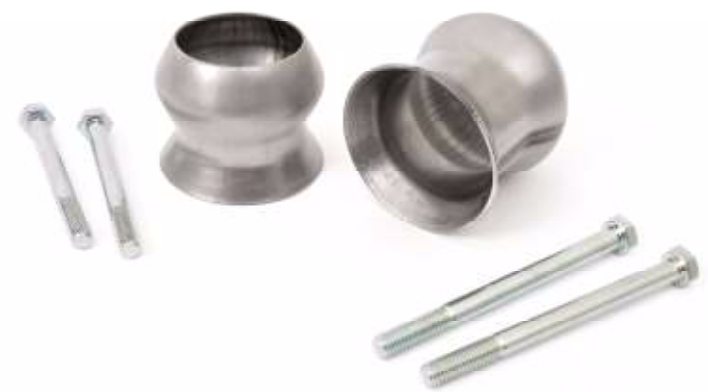
Kit Contents:
1-Driver Side Exhaust Extension
1-Pass Side Exhaust Extension
1-Poly Bag Containing:
2-8mm x 80mm Bolts
2-8mm x 100 Bolts
INSTALLATION INSTRUCTIONS
1. Loosen the exhaust clamp on the drivers side as shown using a 13mm wrench.
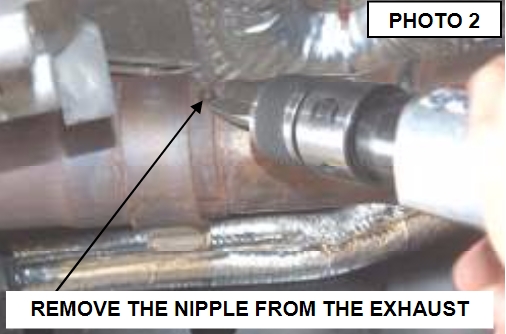
2. Remove the nipple as shown on the drivers side pipe as shown using an air chisel. See Photo 2.
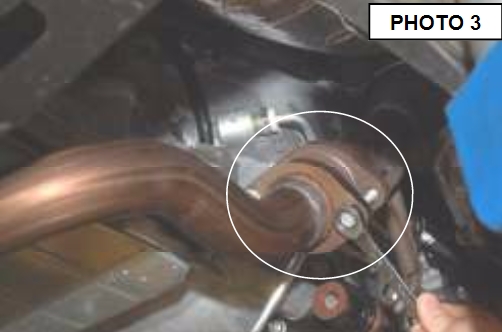
3. Remove the stock exhaust flange bolts using a 13mm socket / wrench on the Passenger Side. See Photo 3.
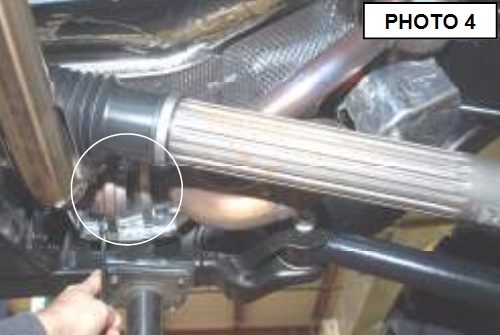
4. Remove the stock exhaust flange bolts using a 13mm socket / wrench on the Driver Side. See Photo 4.
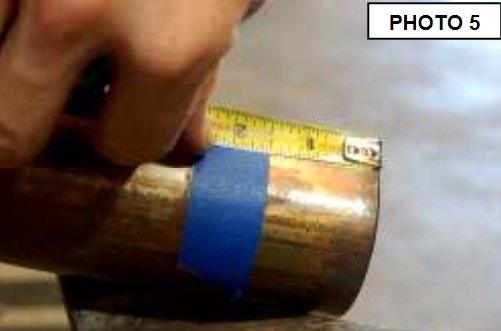
5. Slide the y-pipe forward until the pipe comes out of the rear clamp and remove from vehicle. Measure and then cut 1.5” off the end of the y-pipe. See Photo 5. This will allow the pipe to side back farther in the rear clamp to make room for the exhaust extensions.
6. Next insert y-pipe back into the rear of the exhaust clamp, then push the exhaust system rear ward.
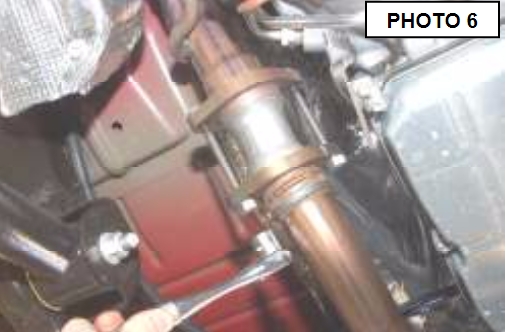
7. After the exhaust system has been moved rear ward, insert the longer exhaust extension on the Passenger side down pipe as shown in Photo 6 and reconnect the exhaust using the supplied 8mm x 100mm Bolts. Do not tighten at this time.
8. The Driver side exhaust extension will be the shorter of the two and will install on the driver side with the supplied 8mm x 80mm Bolts.
9. Tighten the exhaust flanges and extensions using a 13mm socket / wrench.
10. Check to make sure the exhaust does not come in contact with the frame or any other components after it has been relocated.
POST INSTALLATION INSTRUCTIONS
All hardware must be tightened at 500 miles after installed and then checked periodically to ensure all fasteners are tight.


