 FREE 1 to 3-Day Delivery on Orders $149+ Details

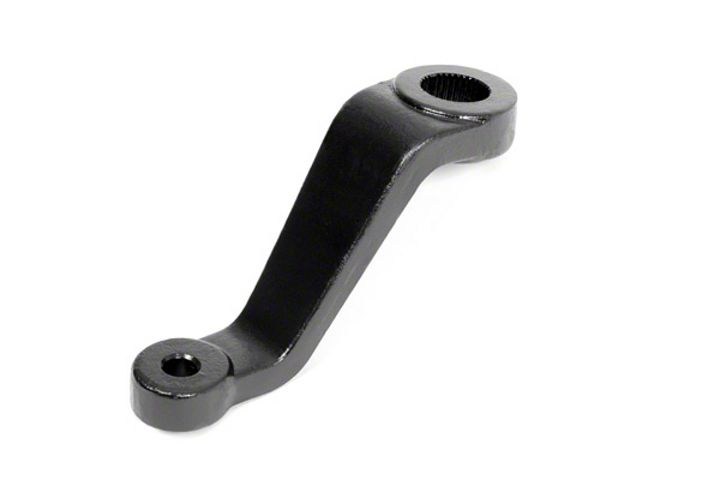
How to Install Rough Country Drop Pitman Arm for 2.5 In.-6 In. Lift on your 1987-2006 Wrangler
Tools Required
- 17/32 DRILL BIT
- 29/32" DRILL BIT
- DRILL MOTOR
- 18MM SOCKET
- 15MM SOCKET
- 5/8" WRENCH/SOCKET
- 1 1/8" Wrench
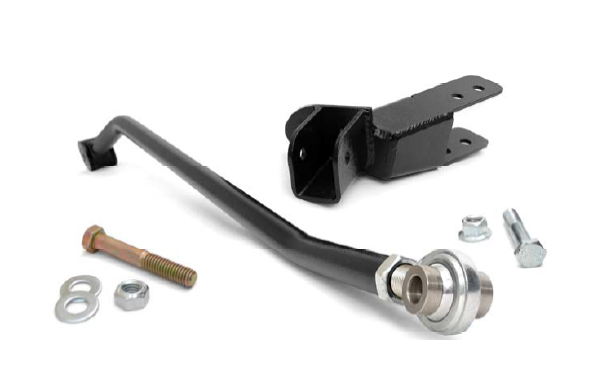
Shop Parts in this Guide
PRODUCT USE INFORMATION
We will be happy to answer any questions regarding our products by calling us @ 800-222-7023. Rough Country will not be responsible for any product that is altered. This kit is for use with vehicles lifted 2 1/2” -8” of lift. This kit will not work on a non lifted vehicle.
PLEASE NOTE A EXTENDED PITMAN ARM IS RECOMMENDED WHEN INSTALLING THIS KIT TO ENSURE THE VEHICLE DOES NOT DEVELOP BUMPSTEER. PART #6605 IS AVAILABLE FROM YOUR ROUGH COUNTRY DEALER. PLEASE CALL 1-800-222-7023 FOR DETAILS
INSTALLATION INSTRUCTIONS
1. Remove the track rod from the axle and from the frame using a 15mm (axle) & 18mm wrench (frame).
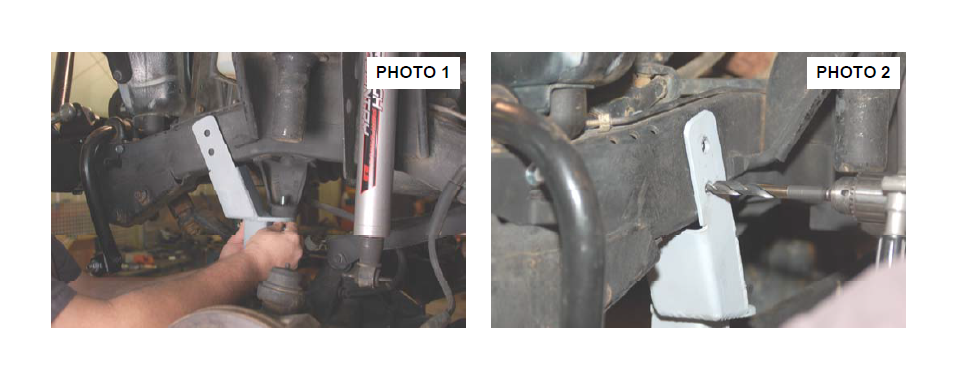
2. Install the track rod bracket as shown with the 1/2” x 1 3/4”, washer & nut in the stock track rod mount. Make sure the bracket is flat against the frame. Snug but do not fully tighten at this time. Photo 1.
3. Using the bracket as a guide, mark and drill the two side holes through the inner and outer frame as shown in Photo 2 using a 17/32” drill bit. Make sure to keep the drill level when drilling.
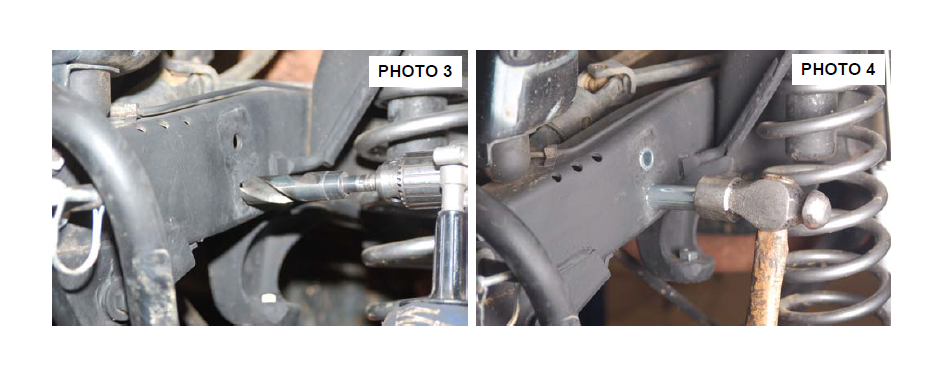
4. Remove the bracket and enlarge the outside holes using a 29/32” bit. . See Photo 3.
5. Install the supplied crush sleeves as shown in Photo 4 and reinstall the bracket.
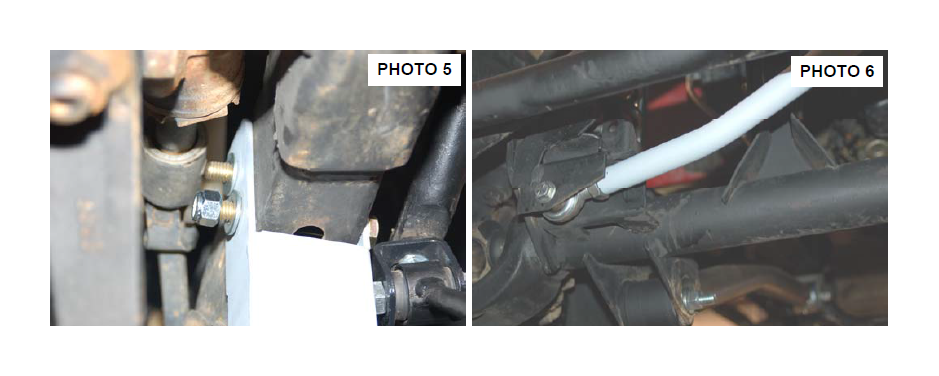
6. Secure to the frame using the supplied 1/2” x 3 1/2” bolts, washers and nuts & 1/2” x 1 3/4” bolts, washers & nuts. Tighten the 1/2” x 1 3/4” bolts to 65ft/lbs with a 19mm socket and the 1/2” x 2 3 1/2’ bolts using a 19mm wrench /socket to 80ft/lbs. See Photo 5.
7. Install the supplied heim end, spacers and jam nut on the track rod body and install the bushings and sleeves in the track rod body.
8. Install the track rod in the factory mount on the axle with the supplied 7/16” x 2 3/4” bolt, washers & nut. Do not tighten at this time. See Photo 6.
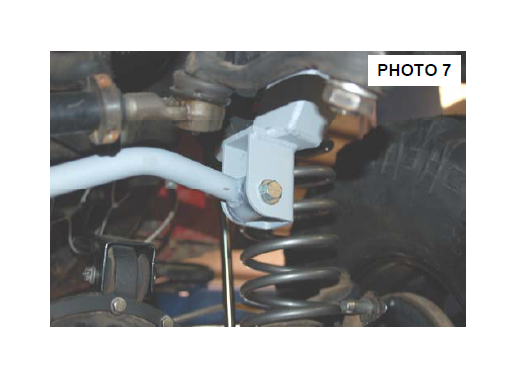
9. Swing up the track rod and adjust as necessary to center the vehicle over the axle and install in the new track rod bracket with the supplied 7/16” x 2 3/4” bolt, washer and flange nut. Tighten to 45 ft/lbs using a 15mm wrench. See Photo 7.
10. It is important to center the vehicle over the axle to ensure proper tracking and alignment. If needed, remove the axle end and adjust to center the body over the axle.
11. Tighten the axle mount to factory specifications using a 15mm wrench and the jam nut using a 1 1/2” wrench.
POST INSTALLATION
1. Check all fasteners for proper torque. Check to ensure there is adequate clearance between all rotating, mobile, fixed and heated members. Check steering for interference and proper working order.
2. Re torque all fasteners after 500 miles. Visually inspect components and re torque fasteners during routine vehicle service.

