Talk to a Tacoma Sales Tech
1-877-870-8556
M-F 8:30A-11P, Sat-Sun 8:30A-9P
Logo Image
$20K Sweeps! 10 Chances to Win! Enter Daily >

Bestop Supertop Soft Bed Topper (05-23 Tacoma)

Item TT1971
Verify parts fit and get product recommendations.
Tacoma Sales Techs: Connect Now M-F 8:30A-11P, Sat-Sun 8:30A-9P
$0.00
Our Price

$1,044.99

FREE Shipping Market Price $1,044.99 Up to 10% off for Military & First Responders! See Details

Open Box from $626.99

Will this fit your Vehicle?

Select a different vehicle Help?
Update or Change Vehicle
Ship to: Ashburn - 20149
Sorry, please enter a valid US or CA postal code
We're sorry, zip can't be updated at this time.
    Create a list
    Add to New List

    Saved - View your saved items

    We're sorry. We couldn't save this product at this time.

    or use

      Video Review & Installation

      It's Joe from Extreme Terrain. In this video, we're gonna be going over the Bestop Supertop Bed Topper fitting all '05 and newer Tacomas. Now, this is gonna be the perfect option for the Tacoma owner that's looking to basically protect the stuff in the bed from the elements with a Tonneau cover, but at the same time, they're looking for something that has a little bit more utility basically vertically, allowing you to fit something a little bit taller than what the standard Tonneau cover is going to allow you to fit back there.So, what do we have going on here with the bed topper? First things first, let's dive into what this thing is gonna be made out of, and that is gonna be Bestop's legendary heavy-duty black diamond fabric. It's UV and mildew resistant. So this thing is not gonna smell after a couple of rainstorms. It's also gonna keep that nice black coloring to it that looks right at home on the back of the Tacoma, perfectly matching the black accents that are already there.This stuff is really, really high-quality. In fact, Bestop even manufactures the OEM soft tops for the Jeep, Wrangler, and some really good stuff coming out with those. The windows on this thing are a little bit tinted, definitely not dark enough to keep anyone from seeing into the bed of your truck. If you're after security, this is gonna be a little bit too light.However, they did do a good job of cutting out a little bit of that sunlight, making sure it stays nice and cool back there and basically adding a sleek blackout sort of look to the bed topper, which I personally really like. The windows also have a little bit of functionality built in. They're completely removable. This one in the back rolls up as well. If that's what you're after, a little bit of a choice there. But the side ones all they do zip on the side, they pull right out, and that gives you a little bit more of an open-air look.This kit also includes a third brake light. It's tough to see behind that tint right there, but it is there. If you're looking to keep that, absolutely can. There's one included in the kit. One thing I do wanna make a quick note of is there is not a specific place to plug that in. It does not plug-and-play just some open-ended pigtails on the end. So, bring your electrical supplies to get that hooked up and running. This is held up by a corrosion-resistant black powder-coated frame, which is really easy to manipulate, and it makes folding this thing up and down really, really easy.Now, speaking about folding this up and down, if you do need to put something even taller in the bed of your truck, it is really easy to get this thing completely compacted up by the bulkhead, or you can completely remove this and just leave the rails on the bed of your truck to make sure there's no interference whatsoever. So this is gonna be a great option if you're looking to keep a little bit tall of an item out of the rain, out of the elements, out of the snow. And if you need to put something taller in the bed of your truck, again, this pops right off, allowing you to do so.Now, one thing I have to say about this it's going to come to security. This is very thick vinyl, very thick stuff, high-quality materials used here. However, it is only gonna take the standard pocket knife to get through this thing. So if you plan on carrying anything of value in the bed of your truck frequently, I would recommend some of the hard tri fold Tonneau cover options we have on the site. Hinged Tonneau cover options, those are gonna be a little bit more secure than this thing. But if you're looking to keep stuff out of the elements and you're looking to use that extra height that something like this will give you, this is a great option.Pricing here is gonna come in right around 750 bucks, which sort of puts it on the next level of Tonneau cover. This isn't gonna be your standard tri fold Tonneau cover option. It's gonna give you a little bit more functionality than that. And if you're looking to utilize that extra height, this is definitely money well spent. Bestop even throws in a five-year limited warranty.Before we move on to the install, one thing I wanna make a quick note about, there are two versions of this available, one for the five-foot bed, which is what we're working with today, and there's one for the six-foot bed as well. The install isn't that different. You're definitely gonna get a good idea of how this installs on your Tacoma in just a second here.The install is gonna be really easy. I'm gonna give it a two out of three wrenches on our difficulty meter. It should take you no longer than two hours. There's no drilling required. However, there are some self-tapping screws to get that third brake light installed, but they're only going into the frame of the bed topper. So without any further ado, let me show you what tools you'll need and how it's done.Tools I use for this install will include the electric ratchet, the drill with the Phillips head bit, utility knife, my pocketknife, small extension, wire cutters, 13-millimeter socket, 11-millimeter socket, and for the wiring of the third brake light, you'll need some quick disconnects, spade connectors, male and female, some extra wiring and some wire crimpers and wire strippers.I figured I'd lay this out for you guys. It can be a little bit confusing. There are a lot of different metal poles in the kit here. So, this is where we're gonna start. This is the rail set up how it's going to lay. You can see we have two front ones, two longer ones for the rear, and then in the middle here, we basically have that slotted bracket that's gonna hold those two together.At the end, we have those two basically corners right before you get to the tailgate. That's where we're gonna start. They bolt right down to that rear rail. We're gonna grab our 7/16 socket and a small extension just to make things a little bit easier, and we're gonna bolt that down with the cap nut.Now, before we do that, there are two versions of these. You can see this one has a shallower tab right there. This is for everything before 2015. So, we're not gonna use those. Our truck is a '16. We could put those aside. Everything including 2015 and newer than that, they're gonna use these with a higher tab. So, all we're gonna do [inaudible 00:05:24] come on there like that. Throw down a flat washer and then the nut. And we can do that for both sides.The next thing we're gonna work on is conjoining the two rails together. Now, in order to do that, we're gonna need this bracket here. Obviously, it's just gonna go over those studs like so. You push the two rails together, and that just slides over like that. Before you bolt it down though, one thing you wanna make sure makes its way in are these little pins, and they're just gonna drop in from the side like that.This big slot is gonna get the longer pin with the larger washer, and this slot at the back here, this is gonna get the shorter pin with the medium washer. And to lock those in place, we're just gonna throw our cotter pin in there. And then we could bolt that down as well. Now we're gonna do the same thing for the other side. Don't forget to put your pins in first. Now we can put the rails together and thread on those cap nuts.So the next thing we're gonna do is we're gonna grab that rail, flip it over so we're looking at the underside here. We're gonna grab this foam weather stripping in the kit, and we're just going to apply this along the underside. One thing I do wanna note is we're gonna do a double layer on this sort of bend near the tailgate just to make sure that gets a nice seal. That's what Bestop recommends in the instructions. And then at the end, we can just take the knife and trim that to size. And we're gonna do the same exact thing over on the other side as well.So next step, we can go ahead and take those rails. We're basically just gonna put them alongside of our bed. A couple of things to note here, you can see there's like a little bit of an accent on the top of this. We're gonna match the inside edge of that with the inside edge of the rail just like that. And then this leading-edge here, this is gonna meet up with basically the front of the bulkhead basically where the bed is going to end. So we're gonna slide that forward, match that up, and make sure at the same time, it's with that accent on top of the bed. And now we're gonna clamp it down.Now, in order to insert our clamp, we're gonna use this factory rail here on the inside. If you pop off that plastic cover, that'll open up the end of it. And then we can just slide in the clamp like so. Down here on the other side, we're gonna do the same thing. We're gonna pop off that plastic cover and grab a clamp, and that need some extra slack. And that is gonna slide in the same way.Now, positioning for these clamps, what you wanna do is put that plastic cap back on then slide that out as far as it'll go, right up snug alongside that, and then you can tighten down the bolt with a 13-millimeter socket after you double-check the positioning. I have to admit this clamp did move it inward a little bit only a couple millimeters. I don't think that's that big of a deal. And we're gonna do the same thing at the other end as well, and then we could jump to the other side and repeat that whole process.So now we're gonna repeat that whole process. Over here on the other side, we're gonna start by taking off that plastic cap, and then we can slide our clamp in, [inaudible 00:11:56] back on. And now we're up at the front. We're gonna repeat that process again. So now we're actually gonna start on the bow assembly for our supertopper.Now, a couple of things to go over here, these are the front rails. You can see they have some snaps on the bottom. Also, you wanna make sure before you do anything with these that you slide on these tie-downs. It's just an elastic strap with a little plastic tab at the end. Those need to go on first before you attach them to the brackets. Also, these two, they're just gonna slide together like so. Then you can pick this whole thing up, and we're gonna go to the brackets in the front and get these on the pins.So what we can do now to get this installed is you can kind of lay this down against the rear glass, and what we're gonna focus on is the larger of the two pins. I went ahead and pull out the cotter pin already. We're gonna follow that up by installing a larger fender washer. That's gonna go around like that. Now we can take our bow. That's gonna go on next. And then we can take the smaller washer. That's gonna go on the very end, and then we can reinstall our cotter pin and do the same thing for the other side. And out comes the cotter pin, large washer followed up by the bow, small washer, and reinstall pin.The rear bow assembly is gonna be a similar process. So you can see how I have that laid out right here. We do have to install a couple more tie-down straps. You wanna make sure that the longer solid bar is for the back of the vehicle and the bar that's on the hinge is gonna be in the middle. So, what we're gonna do is we're gonna take these straps. These are gonna go on that rearmost solid bar, and we're gonna take the smaller end and thread that over just like that, same thing goes for the other side.Just like the front, we're gonna go ahead and slide these two together and get them installed on the pins. And we're gonna start by pulling out that cotter pin, and then this is gonna slide on like that. Throw another washer on the outside and then reinstall the cotter pin. And as you guys probably could have expected, we're gonna do the same thing for the other side.Now, in the kit, you're gonna get this really nice roll of name-brand Velcro. Where this is going to install is right here along our bulkhead. It's got some adhesive on the back. It's gonna span the entire length of this. So, what we're gonna do is peel that back and press it in place. Now, the instructions do say this adhesive is gonna take a while to cure, 72 hours to be specific. So you just wanna be gentle with this for the time being. Also, this is really tough stuff. So, in order to trim it to size, I'm gonna have to break out the wire cutters here and give that a snip.So the next thing we're gonna work on is our actual top. This is gonna go over top of our frame. Right here, this is the front window. So this is gonna be pressed up against the rear glass in your truck. What you wanna do, grab the buckles. You can see these slits right here. This is where they're going to install. However, they're not cut out of the box. So, go ahead and grab a razor blade. They give you exactly where that needs to be cut, and then we're gonna feed these through. And pull that all the way down until the buckle is flush up against this line, same thing goes on the other side.Now, before we go anywhere while we're still here, I'm just gonna go ahead and thread these in and then unclip them so they're loose for later on. Now that we have those straps in place, you can sort of mark-up where this is going to sit. I have it flipped inside out just so you guys can see what's going on up at the front, and then we'll roll this back and do the rear as well. These straps you want them fed down in between the bed and the cab just like so, that little bit of Velcro behind it. And then basically all we're going to do is push that Velcro into place on the hook side. So that's looking good. We can move up to our front bow, and all we're gonna do is snap this thing in place.So now with everything lined up and eyeballed as best as we could here, I just unrolled that top. And what we're gonna do is snap down the middle and rear bow in the same manner. Now, one thing to mention here before you snap down the rear bow. These elastic tie-downs, you wanna move them all the way to the outside.Now we can attach the front to the rail, and you can see this strip right here. This is basically gonna go under this hook. And push that back as far as they can go and hit the other side as well. Now we're gonna do the same thing at the rear. You can see right here this little plastic loop is gonna meet up with this curved portion at the end of the side rail. So, pull down on the last bow and slide that underneath. And as you guys probably could have guessed, we're gonna do the same thing on the opposite side as well.At this point, we can install our third brake light. It's got some adhesive right here to hold it in place. And once you have it lined up where you want it, you can also include some self-tapping screws to secure that. Now, as far as the wiring goes, you can run this alongside. I'm just gonna undo one snap, throw it underneath, and re-snap in place. So, for now, we have our third brake light installed. We're gonna pause on that. We're gonna keep rolling with the install and we're gonna come back. Later on, we'll show you exactly how that gets wired up.Next thing we're going to handle is our rear window. There's a hook at the top of this. It gotta slide in from the side and go all the way across. The best place I've found to do this is sort of from the side right here and not from the back. From the side just makes things a little bit easier. And then on the side of that rear window, you have some zippers. Those are pretty self-explanatory. We're just gonna start at the top here and zip those down. At the very end, just a hair of Velcro to secure that in place.So the next thing we're going to install is gonna go right at the bottom of our rear window. This metal bar right here is going to be our tailgate bar. Now, right now it is just a bar. I'm not gonna seal that well. This bolt seal that comes in the kit, this is going to go along the bottom edge of that, and it's gonna make a great contact to the tailgate.And just like at the top, we're basically going to slide that into this basic hook at the bottom. It's gonna go all the way across. Now, once you have that slid on, you wanna get that mounted underneath this tab here, and then you can close the zips all the way and velcro them up one last time, same thing on the other side. Then you can shut the tailgate.Last but not least, we have our windows. You can see those are gonna slide in at the top with those J-hooks just like the rear window did, and we'll start down here. On the bottom, you have another hook here. We're just going to fold that plastic over and flip it around and run down that seal. And that's gonna give us all of our attention.So last but not least, our third brake light wiring. And you can see there's a little bit of an issue here and that this is a universal kit. These wires are a little bit short. There's also the problem of you need to be able to roll this back. So this needs to be disconnected quickly. So what we're gonna do is wire a quick disconnect into our brake light here, and we'll get that up and running. All it's gonna take to unclip it to roll your top back is to just one click, you're done. And then this can fold right away.But first things first, let's open up this brake light, and I'll show you what I'm talking about. It'll be easier to see once I open this up. We're gonna grab a 10-millimeter socket to do so. The bolts we're gonna remove is this one and this very bottom one. And that will allow you to grab the taillight and pull it off.This is the one we're gonna focus on. This is the one for our brake light. Just to make things a little bit easier, I'm just gonna disconnect the whole housing for now, and we can put that aside. So now that we have a clear shot at this middle guy right here, we're gonna take the utility knife and cut open that little shrouding there just so we can work with this a little better. All right. It should be more than enough. I'm just gonna give that a little bit of electrical tape.Now that we have that opened up, you can see we're dealing with three wires here. This blue one on the left, this is gonna be our brake light, the green one is gonna be our running light, and this one over here, this is gonna be our ground. Obviously, we're not gonna be working with the running light because this is a third brake light after all. So we're just gonna take the wire cutters and chop right through these two.Next up, wire strippers. They're just gonna give us some meat to work with. Now what we can do is roll those together. Now that we have something like that, we can install our quick disconnects on this side, and then we'll do the same thing on our new wiring harness on the other side. There we have our plug with our quick disconnects and our brake light still good to go. I'll do my best to tuck in that back in there for now, and we could work on our new harness.Now I'm just gonna install the male side of those spade connectors on the two wires, and then we could wrap these through in the bed of our truck. So we use purple for ground, and we'll use our yellow wire for positive. So, what we're gonna do now is reinstall our taillight. These are gonna come up through here like that and wrap around. We'll tape these down, and I'm gonna electrical tape these up just to make everything look nice and clean as well. Now we're gonna rebuild this whole area including our taillight, which we're gonna plug back in and bolt back down. Before we do, I just wanna talk about how we're gonna route these wires.So in our case, we're gonna come out right here, make a bend then come around like so. In your case, if you're looking for a more permanent solution and you're doing this quick disconnect way, I drill a hole right here and poke these through behind there just to come out right there. And then you can meet up like that with these wires over here. And your quick disconnects will be right here. That's the way I do it if this were my truck if this were permanent, but since we're shooting a video here, we're just gonna take this route and get them turned around right there. So now I'm just gonna go ahead and rebuild.So we're just about ready to complete our wiring. You can see we have two wires coming off of our truck, negative and a positive, and we have three wires coming off of our third brake light. Now, our black, that's gonna be negative all the time. That's gonna go to purple. But our positive wires, we have a choice between red, which is gonna be a third brake light flasher. So when you step on the brakes, this is gonna cause your brakes to flash, at least the third brake light anyways. And then this one, this is gonna be a steady continuous brake just like normal, just like a normal third brake light.Now, because we have this setup with our quick disconnects, we're gonna get three male spade connectors over here, two female spade connectors over here. And that will allow you to jump back and forth just by connecting a different wire, and you can let the other one dangle. And that basically allows you to swap over at any time you want. We're gonna get crimping and complete this install.Now all that's left for us to do is plug them in, again, black to purple, and then we'll go yellow to yellow. For now, again, if you do wanna swap over to that flasher, it'd be as simple as just changing this to the red one. We're gonna do just a tiny bit of backyard wire measuring here, not courteous job I've ever done but should do it. Again, if this were my truck, I'd break out the drill, pop a hole somewhere in this area, and have that poke out through like that. But in our case, you wanna make sure this is clear to the tailgate, and that is all set.So now we're gonna give it a test run. In this shot, you can see the continuous brake light. That's gonna be the yellow wire, and in this shot, you can see the flasher. That's gonna be the red wire. Guys, that's gonna do it for my review and install of the Bestop Supertop Bed Topper fitting all '05 and newer Tacomas. As always, thanks for watching. Keep it right here at Extreme Terrain for all things Tacoma.

      Product Information

      Features, Description, Reviews, Q&A, Specs & Installation

      Features & Specs

      • To Learn How to Measure Your Bed Click Here
      • Soft Bed Topper
      • Collapsible for Easy Truck Bed Access
      • Resistant to UV Fading and Mildew
      • Ideal for 5th Wheel and Bed-Mounted Hitches
      • Improves Truck Appearance
      • Heavy Duty Black Diamond Fabric
      • Corrosion Resistant Frames
      • Available for 5- and 6-Foot Bed
      • No Drill Installation
      • Five-Year Limited Warranty
      • Fits 2005 to 2023 Toyota Tacoma Models

      Description

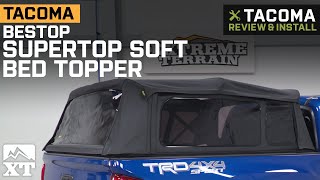
      Superior Soft Top for the Tacoma. The Bestop Supertop Soft Bed Topper is designed and made for exceptional performance. The Soft Bed Topper is engineered to be easily collapsible to allow easy access or loading of your Tacoma's bed. Additionally, its unique styling improves the look of the Tacoma.

      Utilizes Black Diamond Fabric. The Bestop Supertop Soft Bed Topper is made from Bestop’s proprietary Black Diamond fabric. The Black Diamond is a heavy-duty treated sail cloth material that’s tough and durable for long-lasting service.

      No Drill Installation. The Bestop Supertop Soft Bed Topper utilizes a quick-mount bed rail clamping system. Not only is it easy to install, it can be removed easily without leaving behind unsightly drill holes.

      Five-Year Limited Warranty. The Bestop Supertop Soft Bed Topper is warrantied to be free of defects in materials or workmanship. This warranty is only valid to the original purchaser and exclusions will apply.

      Application. The Bestop Supertop Soft Bed Topper is designed to fit 2005 to 2023 Toyota Tacoma models. It's available for either 5-, or 6-foot beds.

      Technical Note. Not sure of your bed size? Click here for an instructional video explaining how to measure your bed length.

      Fitment:

      Details

      Bestop 76308-35

      76301-35

      CA Residents: WARNING: Cancer and Reproductive Harm - www.P65Warnings.ca.gov

      Installation & What's in the Box

      Installation Info

      What's in the Box

      • (1) Supertop
      • (1) Side Panel, Right
      • (1) Side Panel, Left
      • (1) Rear Window
      • (1) Tailgate Bracket, Left
      • (1) Tailgate Bracket, Right
      • (2) Front Belt Rails
      • (2) Bow Mount Brackets
      • (2) Rear Belt Rails
      • (2) Front Bows
      • (2) Rear Bows
      • (1) Tailgate Bar
      • (1) Third Brake Light
      • Installation Hardware
      4.3

      Customer Reviews (7)

        Brand Image

        Reviews of Bestop Exterior products have an average rating of 4.5 out of 5

          Questions & Answers

          10 More Questions

          Will It Fit My Tacoma

          • 2.7L I4 - 05, 06, 07, 08, 09, 10, 11, 12, 13, 14, 15, 16, 17, 18, 19, 20, 21, 22, 23
          • 3.5L V6 - 16, 17, 18, 19, 20, 21, 22, 23
          • 4.0L V6 - 05, 06, 07, 08, 09, 10, 11, 12, 13, 14, 15