 FREE 1 to 3-Day Delivery on Orders $149+ Details

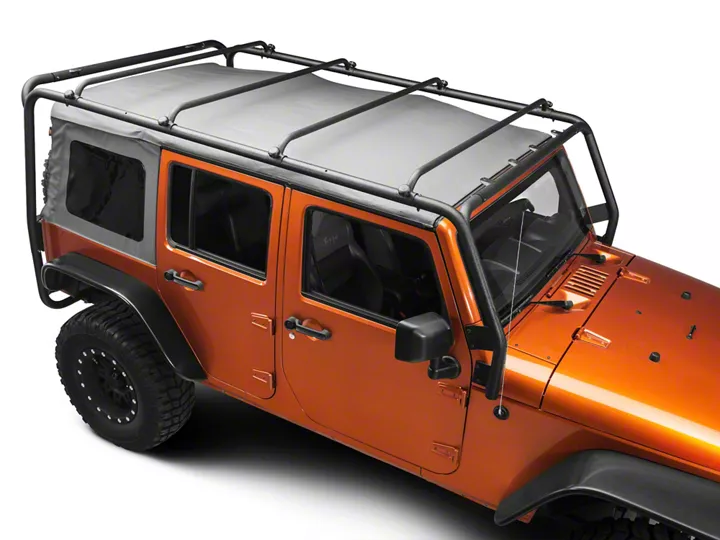
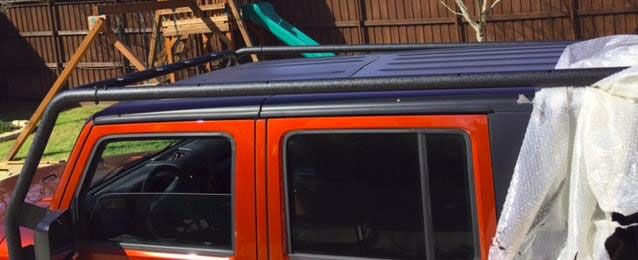
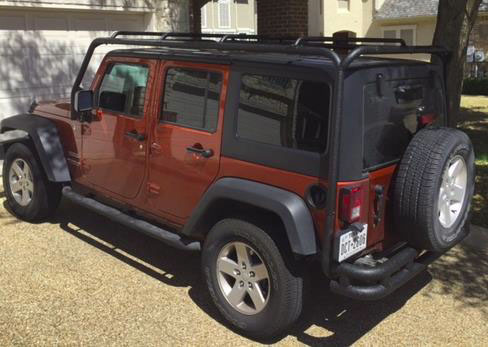
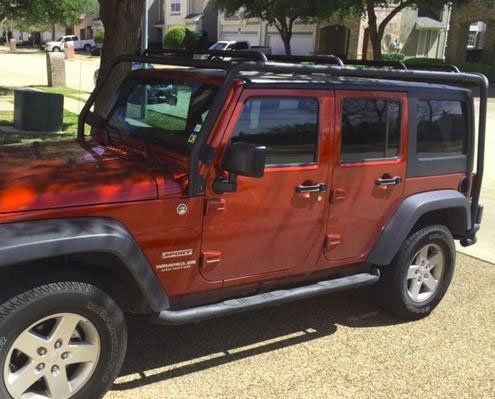
How To Install a Barricade Roof Rack - Textured Black - on your 2007-2016 Jeep Wrangler JK 4 Door
Installation Time
2 hours
Tools Required
- 3/8” Drive ratchet
- 13mm socket
- 18mm socket
- 19mm socket
- TX40 Torx bit socket
- #8 Allen key (included)
Shop Parts in this Guide
Installation Notes, Pre-Installation notes
- Cut the included foam gaskets to the shape of the contact area only for the front legs of the rack. Excess gasket is unnecessary and unsightly.
- DO NOT TIGHTEN OR TORQUE EVERYTHING UNTIL THE VERY END! This will save time and headache when attaching the final pieces that will need a little play in the entire apparatus.
- Get rid of the included hand knobs for the cross bars. Their internal is a nylon lock nut and the knob will break off with the nut inside while tightening for the first time.
- Upon Completion, you will notice an increase in road noise. This is NORMAL! The only noises that should cause concern would be that of loud, metallic rattling.
Installation Instructions:
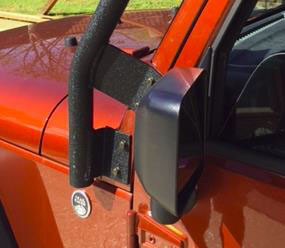
1. Using your TX40 Torx bit and socket, remove the driver side windshield hinge bolts and attach the driver side front leg using (4) 8-1.25mm x 35mm hex bolts, (4) 8mm Lock Washers and (4) 8mm x 24mm OD x 2mm Thick Flat Washers.
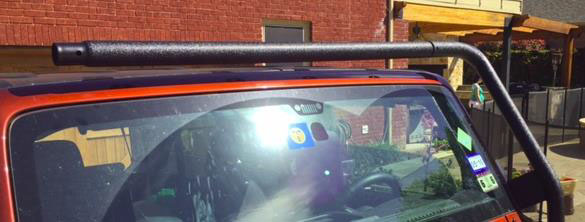
2. Slide front Cross Bar into partially installed first side Front Leg and secure it with the (1) 8mm x 65mm Allen Bolt, (2) 8mm Flat Washers and (1) 8mm Nylon Lock Nut.
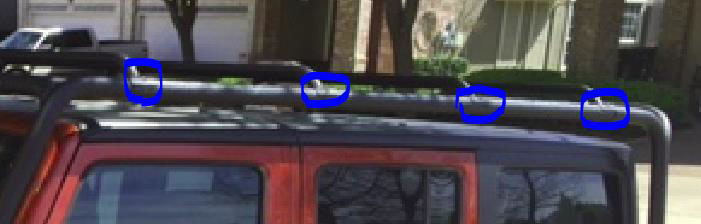
NOTE: The cross bar may be installed with the light tabs facing rearward (preferred) or forward (optional)f. If you do not have lights at this time, it looks better facing rear!
3. As in Step 1, Use your TX40 Torx bit and socket to remove the passenger side windshield hinge bolts and attach the passenger side front leg using (4) 8-1.25mm x 35mm hex bolts, (4) 8mm Lock Washers and (4) 8mm x 24mm OD x 2mm Thick Flat Washers. Proceed to secure upper section of the front leg to front Cross Bar using the included (1) 8mm x 65mm Allen Bolt, (2) 8mm Flat Washers and (1) 8mm Nylon Lock Nut.
4. Using the 19mm socket on the 3/8” drive ratchet, remove the two bolts holding the aftermarket bumper, if equipped.

5. Slide both side rails, (with top holes angled towards the outside of the vehicle), into the previously installed front legs. Secure the side rails to the front legs using the included (1) 8mm x 65mm Allen Bolt, (2) 8mm flat washers and (1) 8mm nylon lock nut. Do not tighten hardware!!
HINT: Cover the ends of the side rails with foam or tape to prevent potential damage to vehicle during install!
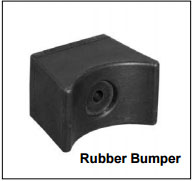
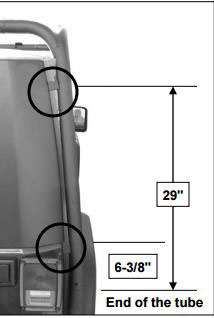
6. To better support the Roof Rack when loaded, (2) Rubber Bumpers are included in the installation kit. The Rubber Bumpers can be installed at a point 29" up from the end of the Rear Leg for vehicles with hard tops or at 6-3/8" for vehicles with hard or soft tops. You will need to measure, then drill a 1/8" hole into the Rear Leg at the desired height. Secure the Rubber Bumper to the Rear Leg with (1) #5 x 30mm Screw and (1) 5mm Flat Washer.
NOTE 1: Drill only through the side requiring the Rubber Bumper. Do not drill through both sides of the tube. NOTE 2: I didn’t do this because I will not be using the rack in such an extreme case that it should be necessary.
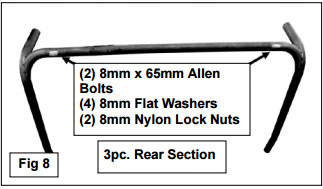
7. Assemble the rear 3 sections of the Roof Rack by attaching both Upper Rear Legs to the Rear Cross Bar. Secure this assembly together by using the included (2) 8mm x 65mm Allen Bolts, (4) 8mm Flat Washers and (2) 8mm Nylon Lock Nuts. Do not tighten hardware at this time!!
NOTE: The Rear Cross Bar can be installed with the light tabs facing forward (preferred) or rearward (optional). If you do not have lights at this time, it looks better facing front!
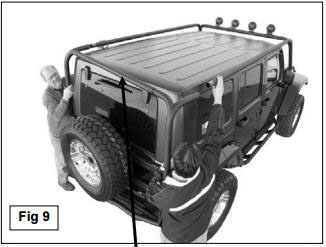
8. With assistance, attach the assembled rear top section of the Roof Rack to the already inserted Side Rails. Use the included (2) 8mm x 65mm Allen Bolts, (4) 8mm Flat Washers and (2) 8mm Nylon Lock Nuts to attach the Rear Top Legs to the Side Rails.
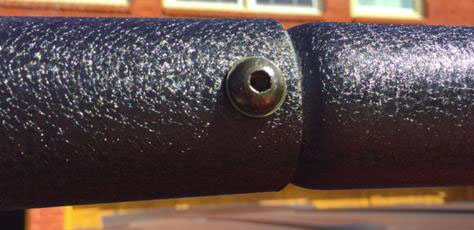
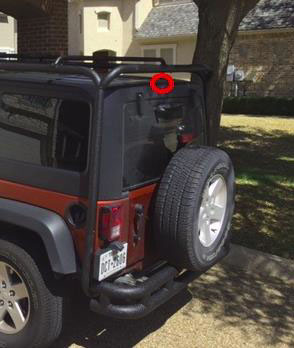
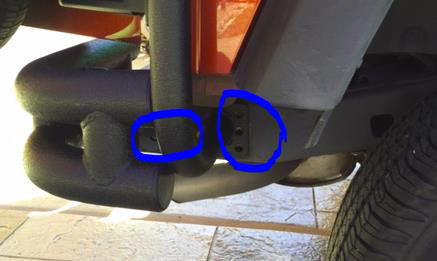
NOTE: Be careful not to damage the vehicle when attaching the top section. I used the rubber bumper centered on rear cross bar (placed where black arrow and red circle are referencing), to allow the rear piece to sit freely on the rear while attaching the rear bottom legs in the next step.
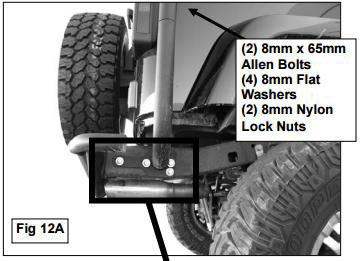
9. With assistance, hold the rear section of the Roof Rack up and attach the Rear Bottom Leg section to the Rear Top Leg sections using the included (2) 8mm x 65mm Allen Bolts, (4) 8mm Flat Washers and (2) 8mm Nylon Lock Nuts.
IMPORTANT: Again, DO NOT lay Roof Rack on your vehicle (without protection) to attach the Rear Bottom Legs at any time. Damage to the vehicle WILL occur!!

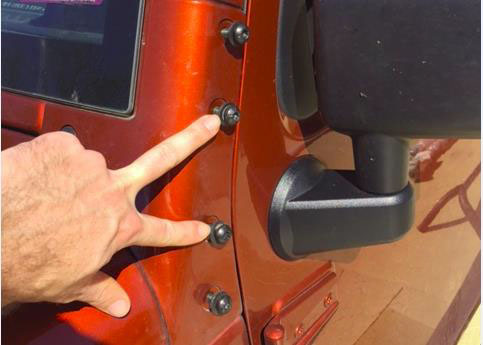
10. Position the passenger Rear Bottom Leg up to the frame and align the holes in the Bracket with holes in the frame for the bumper. Secure the rear holes in the Mounting Bracket to the bumper using the same bolts that came with your aftermarket bumper. Attach the front of the Bracket to the frame using the factory bolts or the included hardware. Repeat this step for the driver side installation.
11. Locate the shortest Cross Rail and position it over the mounting bolt holes toward the front of the Side Rails. Secure the Basket Holder Cross Rails to Side Rails by inserting (1) 8mm x 70mm Allen Bolt with (1) 8mm Flat Washer up through the bottom hole in the Side Rail and through Cross Rail and placing (1) 8mm Flat Washer over each bolt and secure it with included 8mm Nylon lock nuts.
NOTE: All Basket Holder Cross Rails are different sizes!! The shortest mounts to the front, mid length to the center and the longest to the rear.
12. Go back over and tighten all connections and snugging all bolts and screws to ensure minimal vibrations. The end result is upon you!
Installation Instructions Written by Extreme Terrain Customer Justin Thomson 03/14/2016
