 FREE 1 to 3-Day Delivery on Orders $149+ Details

How to Install a Barricade Rear Tubular Bumper on your 2007-2017 Jeep Wrangler JK
Installation Time
1.5 hours
Tools Required
- 15mm Socket
- 18mm Socket
- 19mm Wrench
- Floor Jack (Optional)
Shop Parts in this Guide
Installation Instructions:
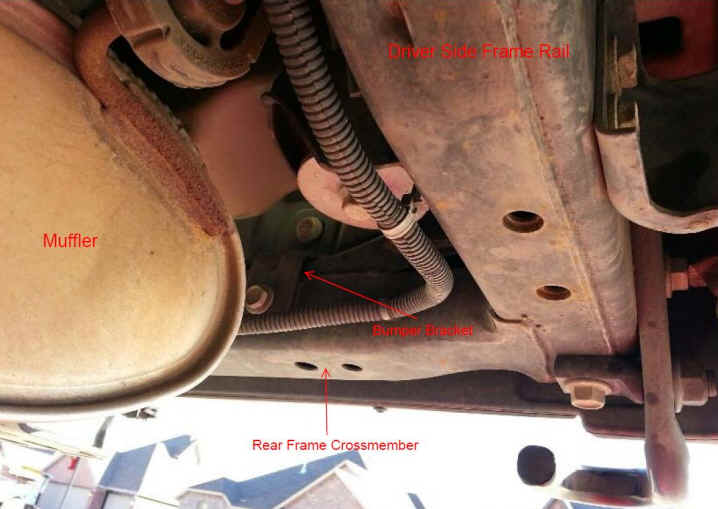
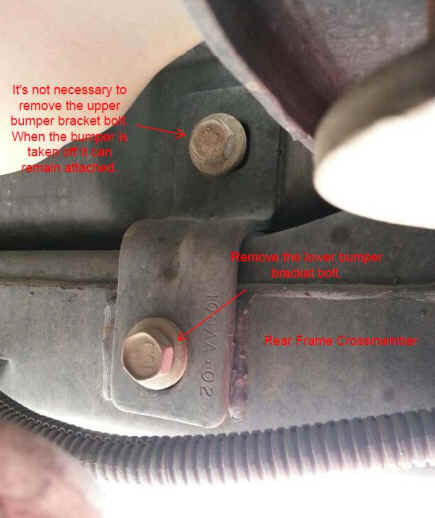
1. Remove the lower 15mm bolts connecting the bumper brackets to the rear frame crossmember on both the driver and passenger sides. The bolts are accessible from underneath the Jeep.
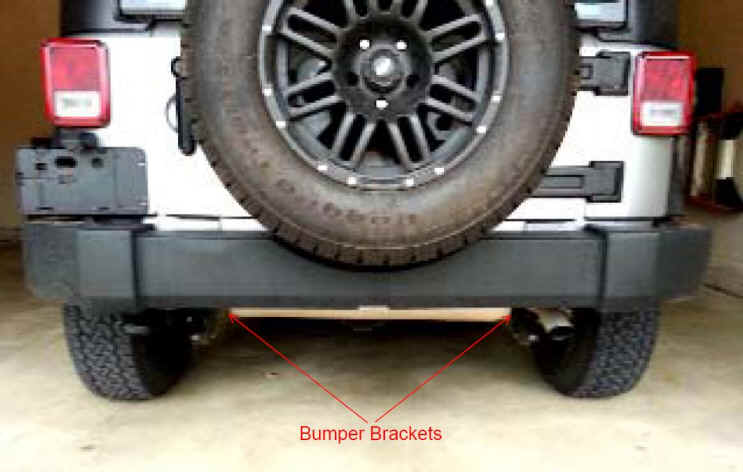
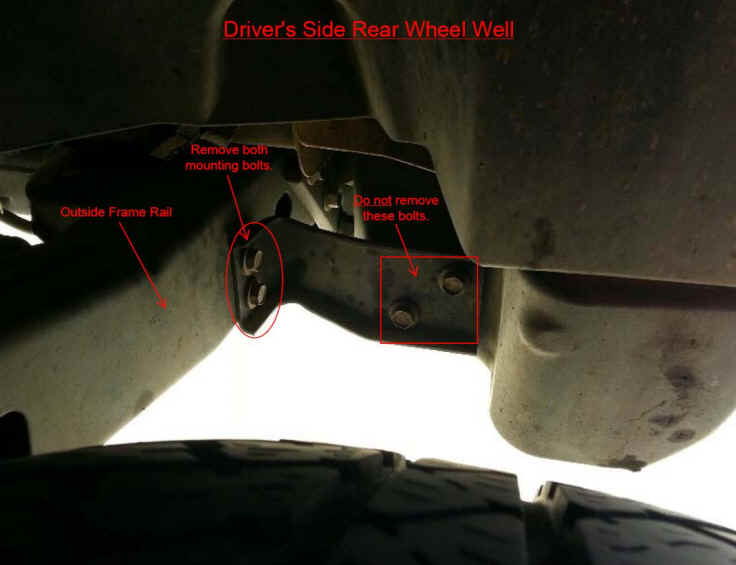
2. Remove the mounting bolts connecting the bumper to the outside frame rail on both the driver and passenger sides. There are 2- 15mm bolts on each side. The bolts are accessible from the rear wheel wells. After removing the mounting bolts the bumper is disconnected from the Jeep. Place the bumper out of the way. It won’t be reinstalled.
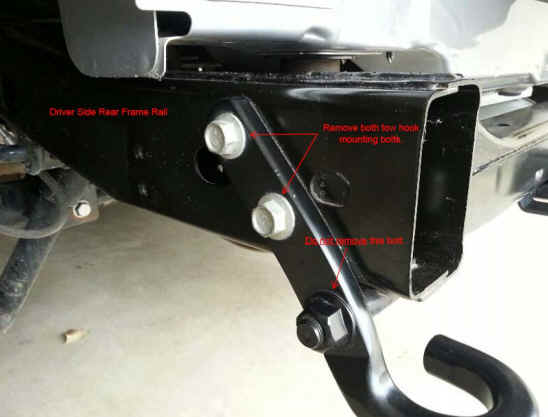
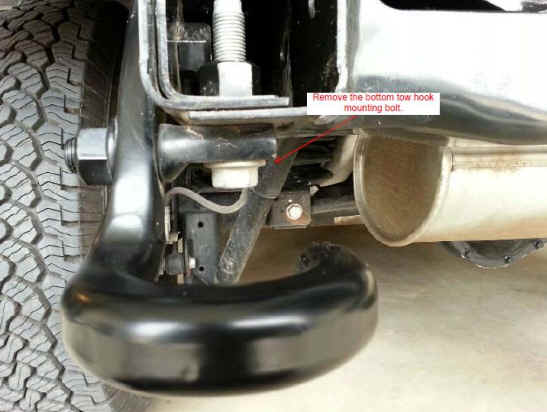
3. Remove the 3- 18mm mounting bolts connecting the tow hook to the driver side rear frame rail. There are 2 located on the side of the frame rail and 1 on the bottom. Place the tow hook out of the way. It won’t be reinstalled. The driver side bumper bracket supplied with the kit does not have predrilled holes or welded nuts to allow for the tow hook to be reinstalled.
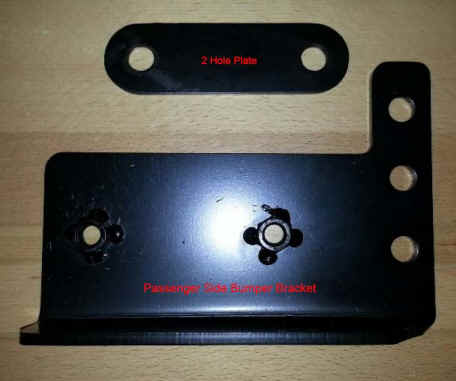
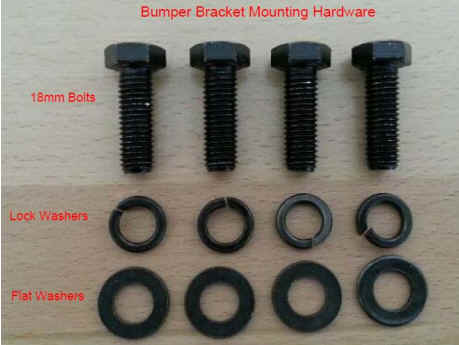
4. Locate the 2 bumper brackets and the 2 plates with 2 predrilled holes supplied with the kit. The driver side bracket is wrapped in clear plastic and the passenger side bracket is wrapped in green plastic. Locate the following hardware supplied with the kit to install the brackets and plates:
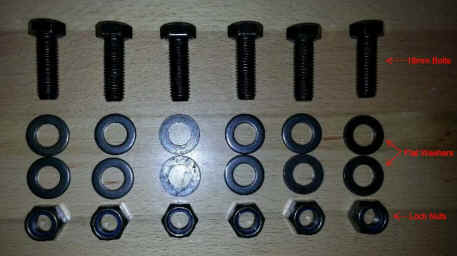
4- 18mm Bolts
4- Lock Washers
4- Flat Washers
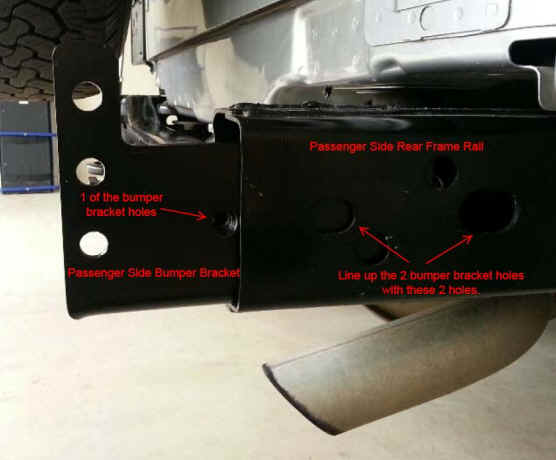
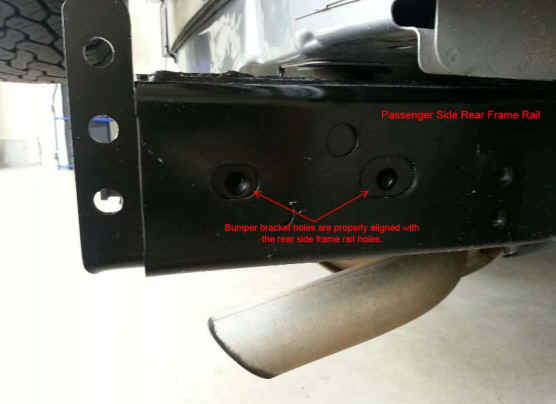
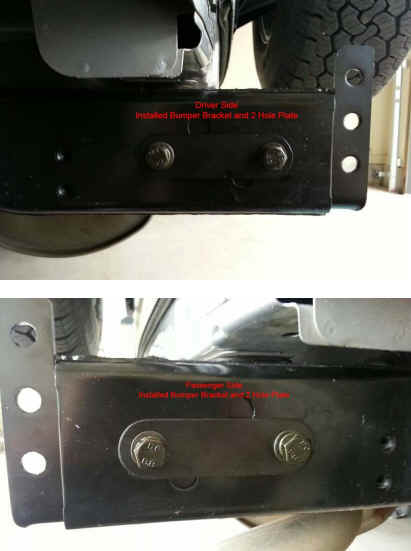
5. Insert the bumper bracket into the rear frame rail on both the driver and passenger sides. Line up the 2 holes in the bumper bracket with the 2 holes in the side of the frame rail.
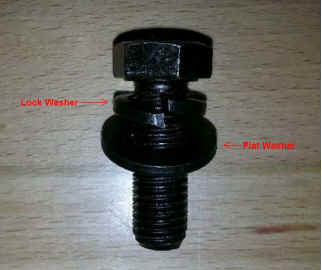
6. Install the 2 hole plates and mounting hardware on both the driver and passenger side frame rails. Place 1 of the 2 hole plates on the outside of the frame rail and align with the frame rail and bracket holes. Secure the plate to the frame rail and bumper bracket with 2 of the supplied bolts. Use lock and flat washers on the bolt head side of each mounting bolt. Do not completely tighten the bolts so adjustments can be made during final fitting.
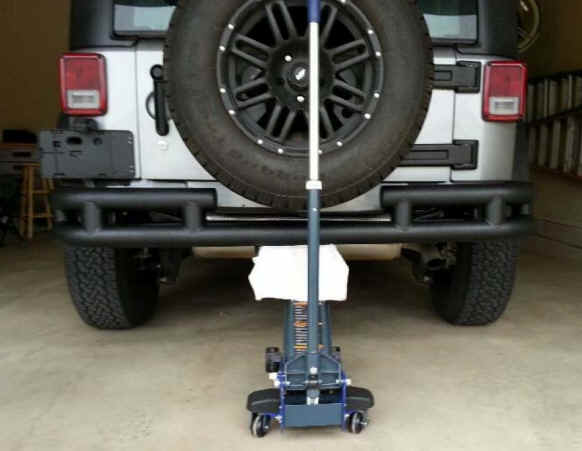
7. If a floor jack is available place the bumper on it and position the bumper behind the Jeep. Raise the bumper up till the bumper holes are roughly line up with the bumper bracket holes. If a floor jack isn’t available, position the bumper behind the Jeep. Lift each side of the bumper and line up the top bumper hole with the top bumper bracket hole. Insert one of the remaining bolts through the aligned holes to hold the bumper in place. Locate the remaining hardware supplied with the kit to mount the bumper:
6- 18mm Bolts
6- Lock Nuts
12- Flat Washers
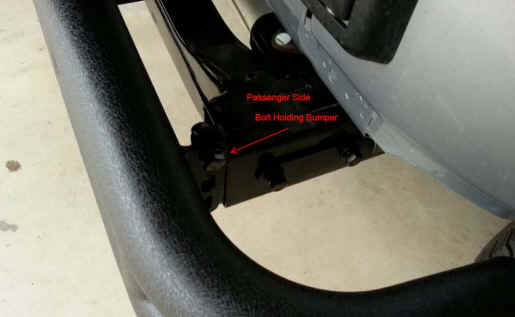
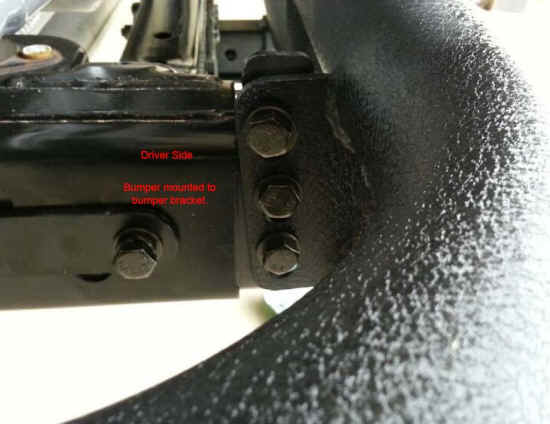
8. Secure the bumper to the bumper brackets on both the driver and passenger side. Each side will require 3 bolts, 3 nuts, and 6 flat washers. Place a washer on the bolt head side and the lock nut side of each bolt. Tighten the bolts with an 18mm socket and use a 19mm or 18mm wrench to hold the nut as the bolt is tightened. Do not completely tighten the bolts/nuts so adjustments can be made during final fitting.
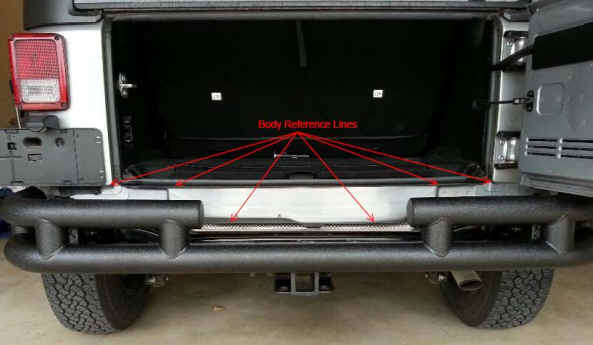
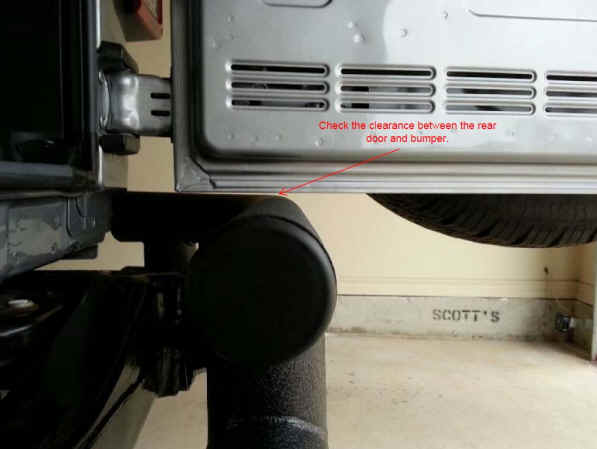
9. Complete installation by performing a final fitting of the bumper on the Jeep. Use the Jeep’s body lines as points of reference to properly align the bumper on the Jeep. Check the gaps between the Jeep’s rear end to the inside of the bumper. The gaps should be approximately the same distances. From the side of the Jeep check to determine if the bumper is level. Open and close the Jeep’s rear door to ensure it swings freely and doesn’t hit the bumper. Slowing tighten the mounting hardware as adjustments are completed. When the bumper appears to be properly aligned, recheck all of the mounting hardware and fully tighten.
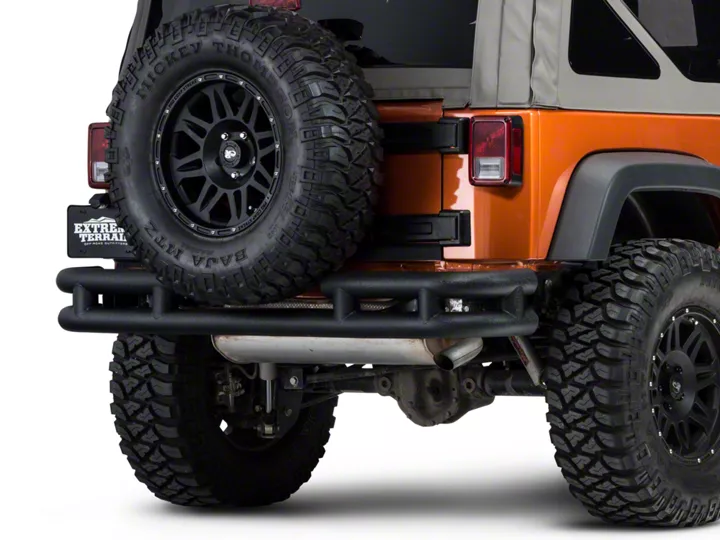
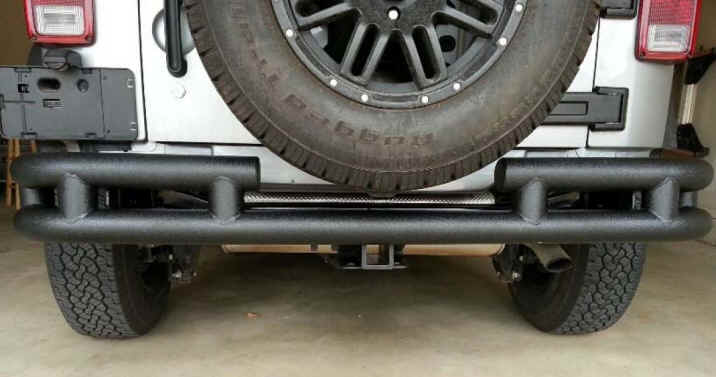
Completed Installation
Installation Instructions Written by ExtremeTerrain Customer Matt Wingard 3/12/2015

