FREE 1 to 3-Day Delivery on Orders $149+ Details

How to Install Tuffy Security Console Insert on your 2007-2013 Wrangler
Tools Required
- T-20 Torx bit
- 1/2" Sockets and Ratchet
- Plastic Body Trim tool
- Electric drill (Optional)
- Marker or pencil
Shop Parts in this Guide
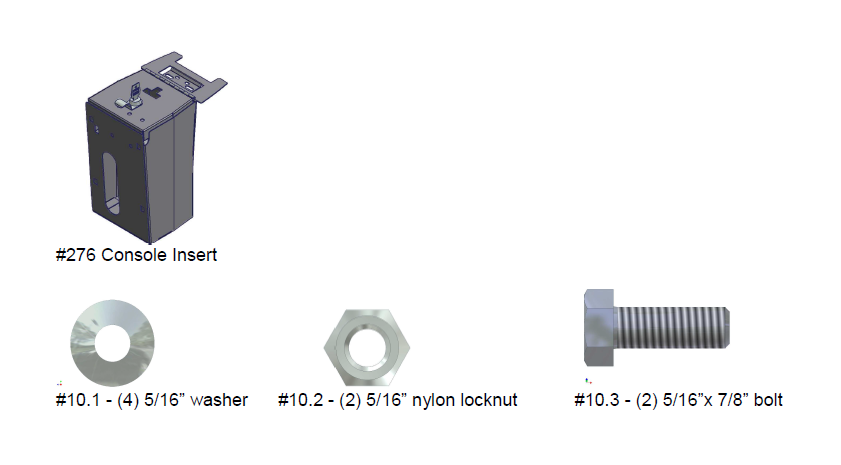
PARTS CHECKLIST
ATTENTION:
THIS CONSOLE WAS DESIGNED FOR A STOCK OEM VEHICLE, ANY MODIFICATIONS MADE MAY AFFECT THE FIT INCLUDING: CARPET REMOVAL/CHANGES, LIFT KITS, SEATS, ETC.
PLEASE READ ALL INSTRUCTIONS THOROUGHLY BEFORE STARTING INSTALLATION.
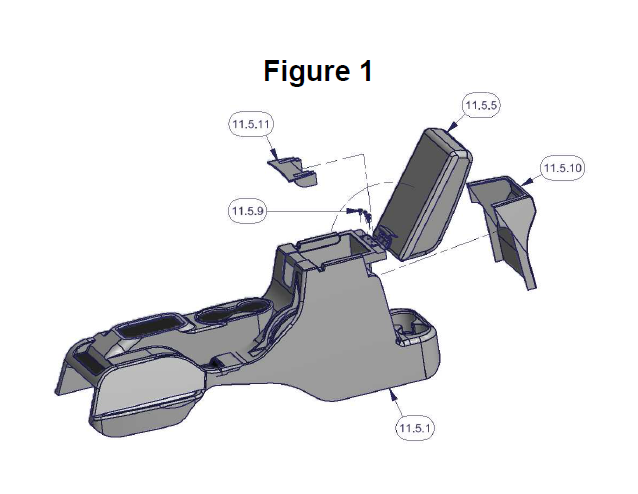
1. With the lid/armrest (#11.5.5) closed, remove the OEM rear console panel (#11.5.10) using a plastic body trim removal tool (or grip the edge and pull firmly) by pulling it free from the spring clips. (Figure 1)
2. Opening the armrest, remove the OEM inner console tray by pulling sideways where the tray clips onto pegs at the console hinge (not illustrated).
3. Remove the OEM hinge cover (#11.5.11) using a plastic body trim tool (or grip the corner and pull firmly up).
4. Using a T-20 torx bit, remove the (4) OEM hinge screws (#11.5.9). Support the lid/armrest (#11.5.5) as it will come loose by removing the screws)
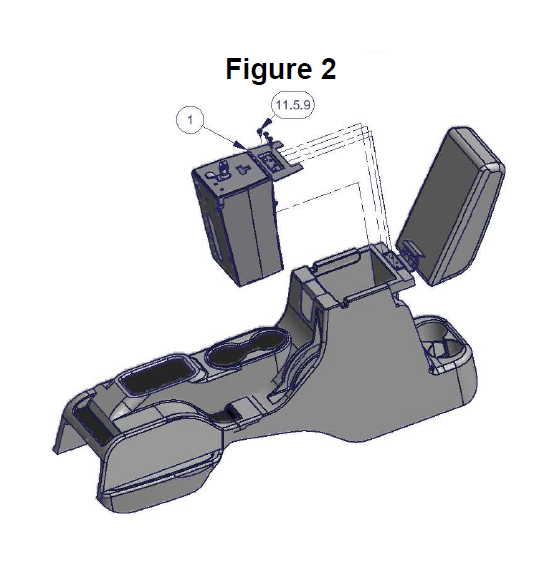
5. Position the #276 Console Insert into the OEM console and drop into the console, making sure the slot in the front of the insert fits over the OEM 12V power plug (if equipped). Making sure the Insert is centered and square, reinstall the (4) OEM hinge screws (#11.5.9) through the #276 Console insert, OEM lid/armrest hinge bracket, and then into the OEM plastic (the #276 Console Insert mounts on top of the OEM hinge bracket) (Figure 2).
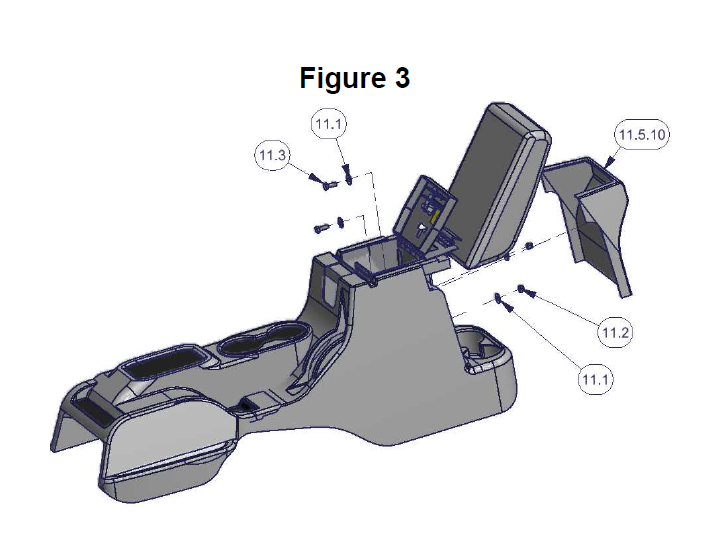
OPTIONAL SECURITY STEP
WARNING! - Make sure to remove the #276 Console Insert and any personal items from the console before drilling to avoid damage when drilling.
For additional security, mark the spot in the OEM plastic console insert under the additional holes provided in the rear of the #276 Console Insert, and drill a 3/8” hole at one or each location. Fasten using the included bolt #10.3, washers #10.1 and nut #10.2. (See Figure 3)
6. Reinstall the OEM console rear section by snapping it back into the rear of the console. (Figure 3).