 FREE 1 to 3-Day Delivery on Orders $149+ Details

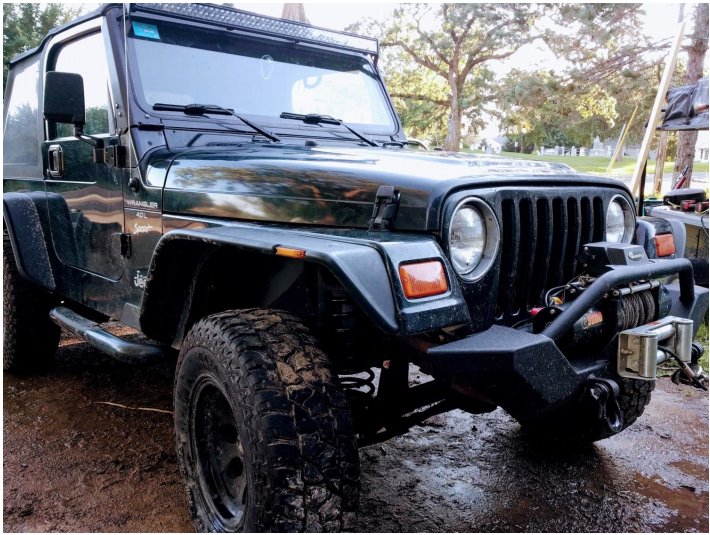
How to Install Teraflex 2 in. Front Lift Coil Springs (97-06 Jeep Wrangler TJ) on your Jeep Wrangler
Installation Time
90 minutes
Tools Required
- Metric Wrenches (13mm, 21mm)
- Metric Sockets (13mm, 21mm)
- Ratchet/Breaker Bar and extensions (Impact Gun optional but helpful)
- Prybar
- Lug Nut Wrench/socket (size may vary by vehicle)
- Hydraulic Jack and Stands
- Optional: PB Blaster (Or similar rust release formula)

Shop Parts in this Guide
Note: As with any project on a Jeep, it’s not a bad idea to give all appropriate fasteners a good shot of PB Blaster prior to install.
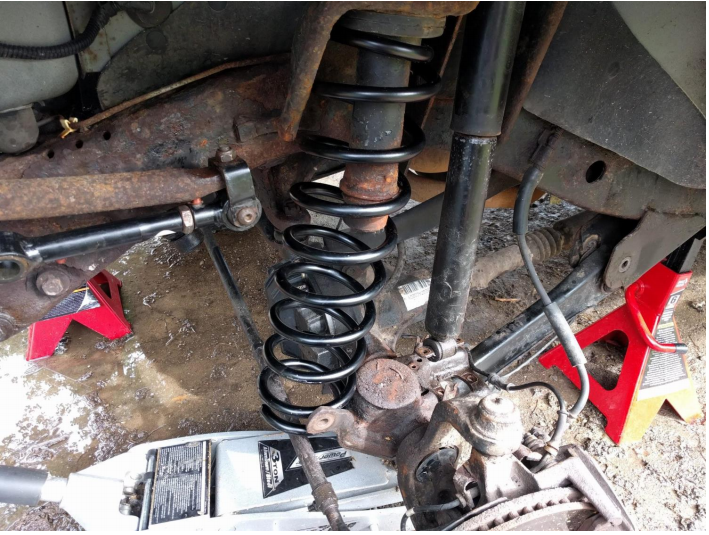
1. Raise Jeep to desired working height and secure with jack stands under frame. Relocate hydraulic jack under axle to maintain light additional support. Remove first wheel.
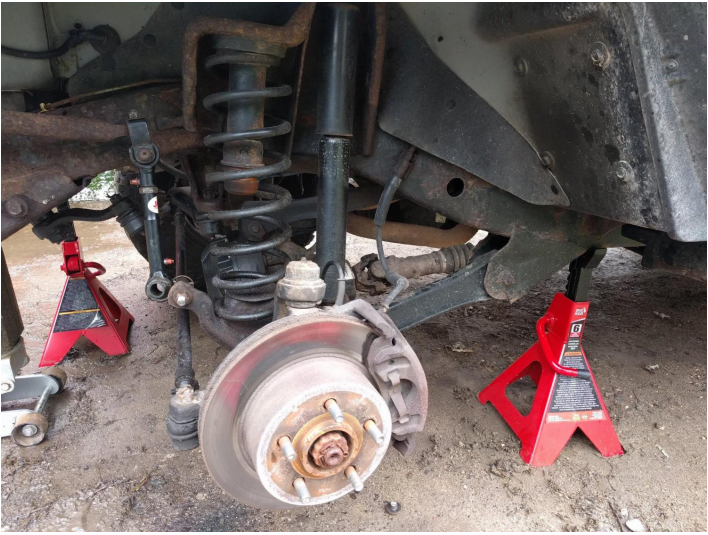
2. Locate and remove Coil Spring Retaining Clip (if present) - 13mm bolt.

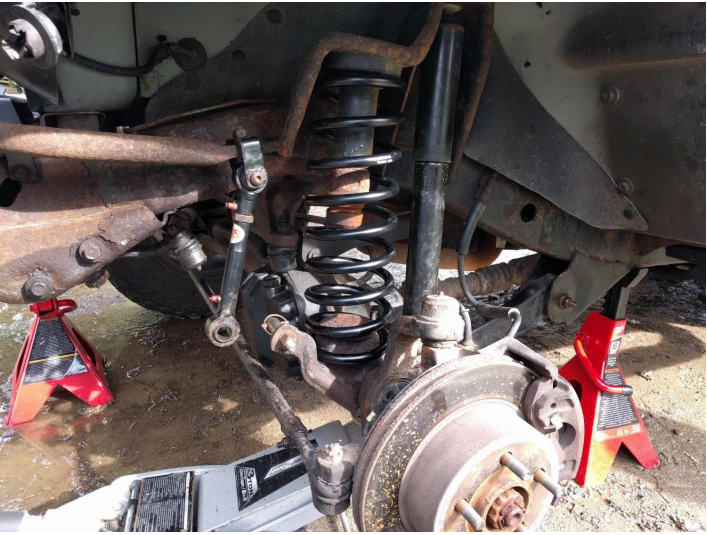
3. Locate and remove both lower shock mounting bolts - 13mm bolts and nuts - may require wrench on top and socket below. Refer to step 1 and make sure the axle is supported with the hydraulic jack prior to steps 3 and 4.
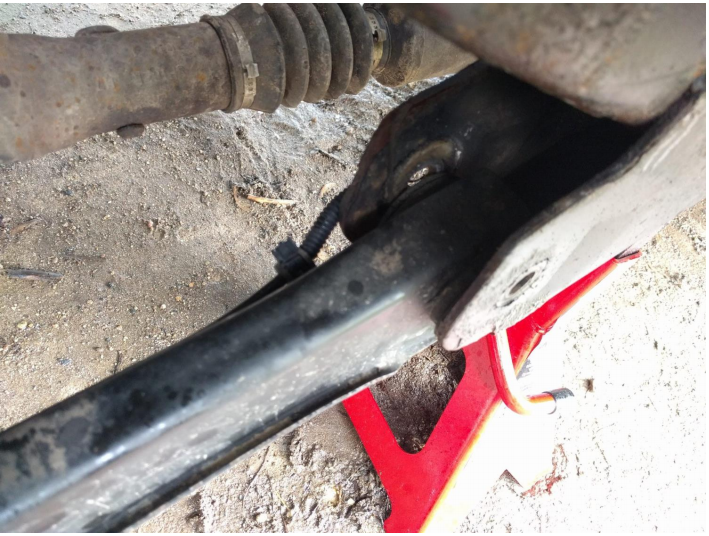
4. IMPORTANT: If your TJ has ABS and stock/OEM lower control arms, locate and release the two plastic tabs on inside of control to free ABS cable. Failure to do so may result in damage to the cable when control arm is released from frame bracket in following step.
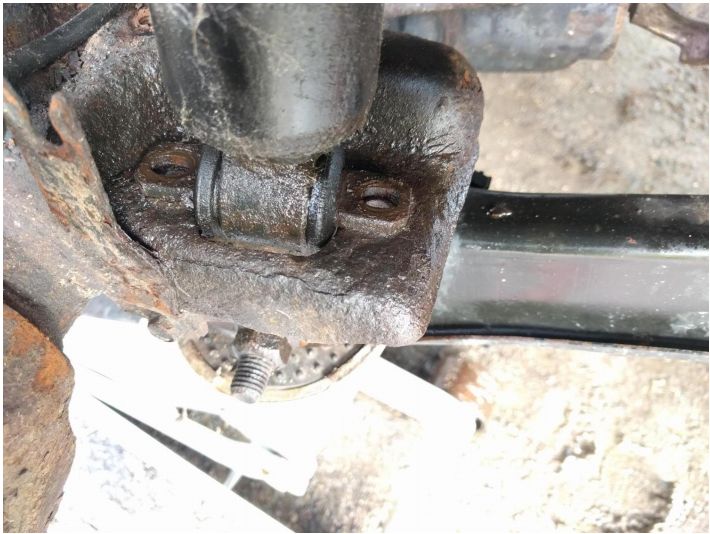
5. Locate and remove frame side mounting bolt of lower control arm with 21mm wrench and socket.
6. Lower the jack supporting the axle until coil spring is loose and then remove the spring.
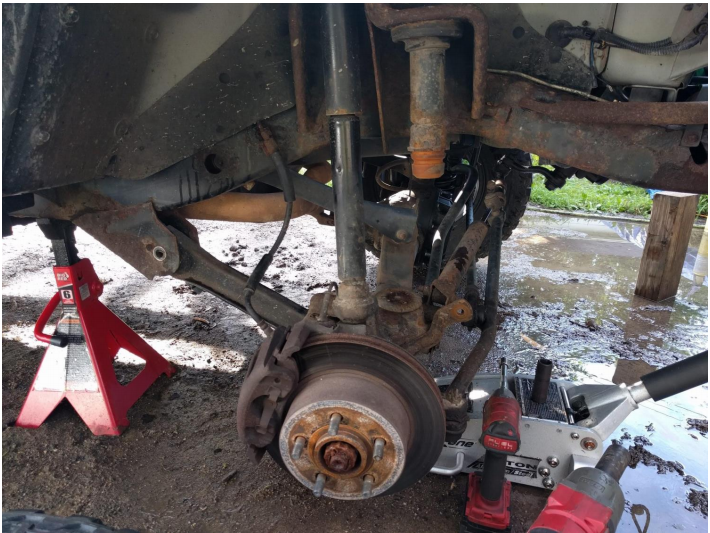
7. Insert your new spring, top end first and rotate until bottom end of coil rests in the spring perch. NOTE: Depending on suspension configuration, you may need to either slightly compress the new spring or use a prybar (or similar tool) to lever down on the axle to slide the lower end of spring into place. Applying upward pressure on opposite end of the axle may also give you slightly more clearance on your working end. In extreme cases, Sway bar link may also be removed from knuckle to allow spring additional clearance to slide into place.
8. Reinstall the spring retainer clip (if present) using a 13mm socket. Torque spec is 16 ft-lbs.
9. Reinstall the lower control arm into frame bracket. Torque Spec is 85 ft-lbs.
10. Raise the jack and align lower end of shock with mounting point. NOTE: Use caution not to crush ABS cable during this step. Reinstall bolts and nuts with 13mm wrench and socket. Torque Spec is 21 ft-lbs.
11. Reinstall Tire and proceed to repeat process on opposite side. Lug Nut Torque Spec is 110 ft-lbs.
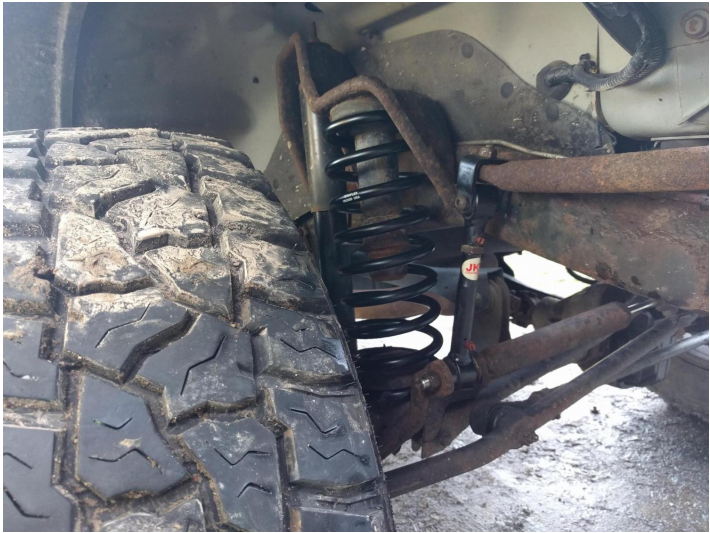
General notes: This may be a good time to consider adjustable control arms and adjustable sway bar links to fine tune your ride with your new lift. An alignment may also be necessary to restore proper tire position. Also noteworthy is that this set of 2” lift Front Springs is engineered to be installed in conjunction with the Teraflex 2” lift Rear Springs.
Installation Instructions Written by ExtremeTerrain Customer 07/17/18

