Talk to a Tacoma Sales Tech
1-877-870-8556
M-F 8:30A-11P, Sat-Sun 8:30A-9P
Logo Image
$20K Sweeps! 10 Chances to Win! Enter Daily >

Quad-Pro LED Projector Headlights; Black Housing; Clear Lens (16-23 Tacoma w/ Factory LED DRL)

Item TT10776
Verify parts fit and get product recommendations.
Tacoma Sales Techs: Connect Now M-F 8:30A-11P, Sat-Sun 8:30A-9P
$0.00
Our Price

$729.99 (pair)

FREE Shipping Market Price $840.99 You Save 13% ($111.00) Up to 10% off for Military & First Responders! See Details

Will this fit your Vehicle?

Select a different vehicle Help?
Update or Change Vehicle
Ship to: Ashburn - 20149
Sorry, please enter a valid US or CA postal code
We're sorry, zip can't be updated at this time.
Recommended Install Shops
How It Works
Install Shops are available near Ashburn - 20149

Add Local Shop Installation

Total cost of service $174.99
    Create a list
    Add to New List

    Saved - View your saved items

    We're sorry. We couldn't save this product at this time.

    or use

      Product Videos

      Hey, guys. So, today, we're checking out the Quad-Pro LED Projector Headlights with the Black Housing and the Clear Lens, fitting all 2016 and newer Toyota Tacomas with the Factory Daytime Running Lights. So, if you are in search of a big upgrade for the lighting for the front end of your Tacoma, if you're not a fan of your factory headlights and you're looking for an upgrade as well as the replacement, this option is going to be a great choice to take a look into. Now, this is gonna be great for the Tacoma owners who are looking for a premium look, but they're also looking for premium performance when it comes to the lighting out of the front end. Now, this is going to have an aggressive projector setup. As you can see, this is going to have a quad projector setup in each of the headlights, again giving you that premium look. But it's also going to drastically increase the lighting performance when it comes to your headlights. Not to mention these are going to be fully LED.So, you can ensure that not only are you getting a brighter light output, a more uniform light output, especially with that projector lens, but you're also getting a long lifespan out of these headlights in comparison to the factory one that did come with a halogen bulb that can burn out over time. These are going to hold up for a very long time, so you don't have to necessarily worry about them. And they are going to have that very modernized and again premium look, especially with that quad setup there. Now, these are also going to come out with a daytime running light, this is going to be LED as well, it's gonna switch it up from the factory styling when it comes to the daytime running light. Having it directly in the middle of the headlight, I think that adds a lot of style, especially with that black housing there, giving it a really good contrast. So, this will be great for anybody who's looking for some additional styling, and is also a fan of that blacked-out look or is looking for something that's a little bit darker and sleeker in comparison to some other headlight options.Now, overall, this is going to be a solid choice. Again, it is going to be more of a premium option in comparison to some other choices on the page. However, if that's what you're looking for, then this is gonna be right up your alley. And everything is going to be completely plug-and-play, everything's going to come assembled and in the kit for when you're ready to install it. So, overall, this is going to be a solid kit. Now, when it comes to pricing, this is gonna come in at roughly $750. And again, that's going to be more of a premium price point in comparison to the lesser expensive choices in the category. However, that's for very good reason. First of all, these are going to be fully LED, some of the less expensive options are going to integrate a projector light, however, it may be a halogen instead of the full LED setup that you see here. And, again, most of those are going to have a single projector or even a dual projector instead of the quad setup that you see inside of this headlight. Now, nonetheless, I think this is going to be a solid setup if you're looking for that drastic increase in performance, looking for a modernized look, and you're looking for a lot of style on the front end of your truck.Now, with all that being said, the install is going to be a light two out of three wrenches on the difficulty mirror. Again, this is plug-and-play but you will have to take off a little bit of the bumper in order to get these in. So, I'm gonna give it a light two out of three. But you're gonna need some pretty basic hand tools and about an hour's worth of your time to get the job done. So, speaking of the install, let's jump into that now. The tools that I used in this install were an electric ratchet and an impact wrench, soft pry tool, a trim removal tool, and a 10-millimeter socket. To kick off this install, we're gonna pop our hood and we're gonna take off our grille. Now, for this, you're gonna need a 10-millimeter socket and a trim removal tool. So, on either side of the grille, we're gonna have two clips and then we are gonna have two 10-millimeter screws that are holding on the support arms of our grille. So, I'm gonna start with this trim removal tool and the clips. All you have to do is just get underneath it there and pop it right out.Now you can use a flathead screwdriver for this. However, I find that these are a little bit easier to work with, especially if the clips are new. Then we can take that 10-millimeter socket and remove the two screws upfront. So, at this point, now that all the fasteners are removed, we can lift up on these arms up at the front off of those plastic retainers and we can just give the grille a good tug forward. Now, if you have new clips with this grille, it might be a little bit difficult but all you have to do is just give it a good pull. So, over on this side of our headlight, there's gonna be a bolt that we need to access but in order to access that we need to drop the bumper down a little bit. So, over on the left side of the headlight here or on the inside of the headlight, there's gonna be two clips that are gonna help us kind of lower that bumper. So, what I'm gonna do is take a trim removal tool and remove the two clips that are holding on the cover here.We can reinstall these after the new headlight is installed.So, in order to access that bolt and pull the bumper down, we do need to peel the fender away a little bit so we can unclip the bumper from the retainer clip on this junction here. So, in order to do that, we need to remove this 10-millimeter bolt in the fender well, and there may be another one down at the bottom, we don't have one there, we don't have a retainer clip. So, I am going to take a 10-millimeter socket and remove the one up top. Now, when that is out of the way, we'll be able to kind of peel the fender away, there is gonna be some premium tape, but there's also gonna be some clips. So, I would recommend to take a soft pry tool and depress those clips to kind of pry the fender out. So, now that the fender is pulled out, what we can do is unhook our bumper from this little retainer clip over on this side and give it a good pull out. So, once that's unclipped, we can pull the bumper down a little bit, and we can access that bolt that's holding in the part of our headlight here.So, as you can see when I pull the bumper down, there's gonna be a bolt. This holding in the retainer clip and the headlight, I'm gonna take a 10-millimeter socket and go ahead and remove that. Now, once that's out, we can remove the other bolts that are holding in our headlight. So, we're gonna have two bolts at the top of our headlight, I'm gonna continue to use that 10-millimeter socket to remove both of those. So, I'm gonna take a soft pry tool and just lightly pry on these tabs. There's little retainer clips that kind of hold them in place. So just wanna pop those off, and then we'll be able to move our headlight. Now, I'm gonna move it inward towards the center of our grille here, there's a little clip down at the bottom, and you can kind of slide it in and out. Now, the bumper may fight you little bit here, you can just pull back on it a little. While you do this, you can carefully pull out that headlight, and now we can disconnect all of our harnesses.So, on the back of our headlight, we're gonna have five plugs. Now, if you have a halogen light, it will be a little bit different. But I'm gonna start with our turn signal on the side here. All we have to do is just pull that plug out. I'm gonna pull out our high beam. I would make a note that the high beam is going to be a yellow plug, and the low beam is going to be a green plug. So, just depress that clip and pull back, we can disconnect our marker light over on the inside of our light. And then last but not least, if you do have a factory daytime running light, we can disconnect that as well. So, now that our factory headlight is out, what we can do is move on to our new headlight and we're gonna start by plugging everything in on the back. So, everything on this headlight is going to be plug-and-play. I'm gonna start with our turn signal over on the side. Then we can move on to our low beam and high beam. Our low beam is going to have one wire, this is gonna be the white wire and our high beam is going to have the two wires, it should be the black and the blue wire.Now, I would recommend to plug these in and test them beforehand. The low beam may have to have the pin swapped over into the other side of the plug here or the connector here. So, we just keep that in mind, it's not true to all circumstances, but I would just test it before we go ahead and button up the headlight. So, our low beam is going to be this green plug here, line that up, make sure you hear a click. Then our high beam is going to be the yellow plug.Then on the same connector down at the bottom, we're gonna have our daytime running light. And then last but not least over in the side, we'll have our marker light. Once those are all clipped in, what we can do is position our headline into place, making sure that the bottom lines up, that it's sitting inside the bumper there. And we can push these plastic pins into place. We can secure it down with our factory hardware. So, first, we can secure these top two screws.I'm gonna tighten those up with a 10-millimeter socket, then we can head over to the side and secure the side of our headlight.Next, we can secure the side of the headlight with the bolt that goes through our bumper retainer clip here. And using a 10-millimeter socket, I'm gonna tighten that up. Once that's tight, what we can do is take our bumper and kind of fit it around our headlight and clip it into that retainer. We can pop our fender back in and then we can secure the bolt in the inner fender well. So, we can take our factory bolt for the inner fender, and we can tighten that up with a 10-millimeter socket. So, last but not least, we can install the three pins that were holding on the front of our bumper. These are the factory pins, just pop them in.And then we can repeat that same process on the other side. So, before we go ahead and install our new lights, I did wanna step down and show you guys a little comparison of our factory light next to our new headlight, show you some of the similarities and the differences, and why this is going to be completely different and a huge upgrade from the front end of your Tacoma.Now, starting off is just a brief overview of our factory light. As you can see, this has a pretty standard setup, we're gonna have a black housing on the back, but a chrome housing in the face of the light giving it more of a classic look. We'll have a clear lens and the internals or the lighting itself is going to be a mix between halogen bulbs, as well as LEDs. Now, the LED marker light and the LED daytime running light are really gonna take up the LEDs and the rest are going to be halogen. We are going to have a factory projector for the low beam and then a standard reflector for the high beam, and then we're gonna have a halogen turn signal here. Overall, pretty standard setup when it comes to a factory light. Now, moving over to this new headlight, it's going to be completely different and a huge upgrade like I mentioned before. Now, on the back, we are going to have that standard black plastic housing. On the inside of the light, we're also going to have that black housing giving a very sleek look and a nice contrast in comparison to the factory one, especially with all the lighting that's included in this new light, especially with the styling there. Then we're gonna have a clear lens on the front for full transparency making sure that those lights are shining very bright.Now, speaking of those, this is going to be a full LED headlight. So, in comparison to our factory one that had a couple of halogen, a couple of LEDs, this is going to be full-LED making sure that not only are they gonna last a lot longer and be a lot more efficient but they also are going to be a lot brighter as well and just look overall a lot more modernized. Now, starting off with the low beam this is where we get a lot of that spice that we're getting with this headlight. We're gonna have a quad projector as where a factory one just has a single one. And they are gonna be a little bit smaller, but this is gonna give off a lot of light performance. It's gonna make the light pattern look a lot more uniform. It's gonna shine brighter down the road. And, overall, it is going to be a big style upgrade from just the single projector lens that you see on the factory one. And now moving over, there is a high beam down at the bottom that is just going to be a standard reflector just like our factory one. But where it really shines, where this headlight really shines is with the styling with not only the turn signal, but the daytime running light.Now, as you can see, the daytime running light is going to be a light bar or light strip throughout the light. Kind of similar to our factory one, however, our factory one is not as bright or as noticeable as this one is making it a lot more stylish when you're driving around on the street and a lot more noticeable in my opinion. Now, this is also going to have a light bar style turn signal as to where a factory one is just a pretty standard turn signal on the inside here. So, again, that's adding to it the being noticed on the street, being a little bit more safer on the street, and also adding to that style. And not only is it going to be an upgrade and styling, but again it is going to be that LED so it is an upgrade in performance. Not only are you getting all of that, but you're also getting an LED marker light over on the side. Overall, this is going to be a big upgrade from our factory one, it is completely plug-and-play. So, what do you say we go ahead and install our new lights?So, last but not least we can install our grille. So, you can just slide this back into place, lining up with our headlight housing, pop those two support arms in.So, we can grab our factory hardware, pop that in place, and tighten that up with a 10-millimeter socket. Last but not least, we can pop the clips into the corner of the grille on either side and we'll be all set to go. That's gonna wrap it up for my review and install. Make sure you like and subscribe for more videos and products just like this. And always keep it right here at extremeterrain.com.

      Product Information

      Features, Description, Reviews, Q&A, Specs & Installation

      Features & Specs

      • LED Projector Headlights
      • Innovative LED Technology for Excellent Illumination
      • Super White High and Low Beam
      • Features Clear Lens
      • Encased in Black Housing
      • Amber Turn Signals
      • Designed to Replace Factory OEM Halogen Style Headlights Only
      • SAE and DOT-Compliant
      • Direct Plug and Play Installation
      • Five-Year Limited Warranty
      • Sold as a Pair, Driver and Passenger Sides Included
      • Designed for All 2016-2023 Toyota Tacoma Models with Factory LED DRLs

      Description

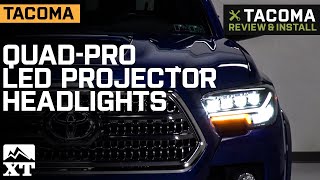
      Innovative LED Technology for Excellent Illumination. Replace your stock headlights with the Quad-Pro LED Projector Headlights; Black Housing; Clear Lens and experience the difference a powerful aftermarket LED projector headlight brings. These aftermarket upgrades directly replace your truck’s stock headlights, so they not only improve illumination but also boost the overall look of your vehicle. With this upgrade, you can attract everybody’s attention not only with bright lights but also with head-turning visuals.

      Unmatched Illumination. These Quad-Pro LED Projector Headlights produce light at 5,500 Kelvin, which is roughly the same as daylight. As a result, your eyes experience less strain even after long hours of night driving.

      High-Quality Construction. The Quad-Pro LED Headlights are made from high-quality materials. They’re carefully crafted by engineers and designers to guarantee performance and dependability.

      Direct Plug and Play Installation. Installing these Quad-Pro Headlights is pretty straightforward, thanks to their direct plug-and-play design. There’s no need for any wiring and other modifications that would eat away your time.

      DOT-Compliant. The Quad-Pro Projector Headlights strictly adhere to DOT guidelines, making them legal for street use.

      Five-Year Limited Warranty.There is a guarantee that the Quad-Pro Projector Headlights are free from materials and workmanship defects. This does not cover damage by improper installation, road hazard, accident, racing, misuse, alteration, or normal wear and tear.

      Application. The Quad-Pro LED Projector Headlights; Black Housing; Clear Lens will fit all 2016-2023 Toyota Tacoma models with Factory LED DRLs.

      Fitment:

      Details

      CA Residents: WARNING: Cancer and Reproductive Harm - www.P65Warnings.ca.gov

      Installation & What's in the Box

      Installation Info

      What's in the Box

      • (1) Driver Side Headlight Assembly
      • (1) Passenger Side Headlight Assembly
      4.2

      Customer Reviews (6)

        Reviews of similar Lights products have an average rating of 4.2 out of 5

          Questions & Answers

          10 More Questions

          Will It Fit My Tacoma