 FREE 1 to 3-Day Delivery on Orders $149+ Details

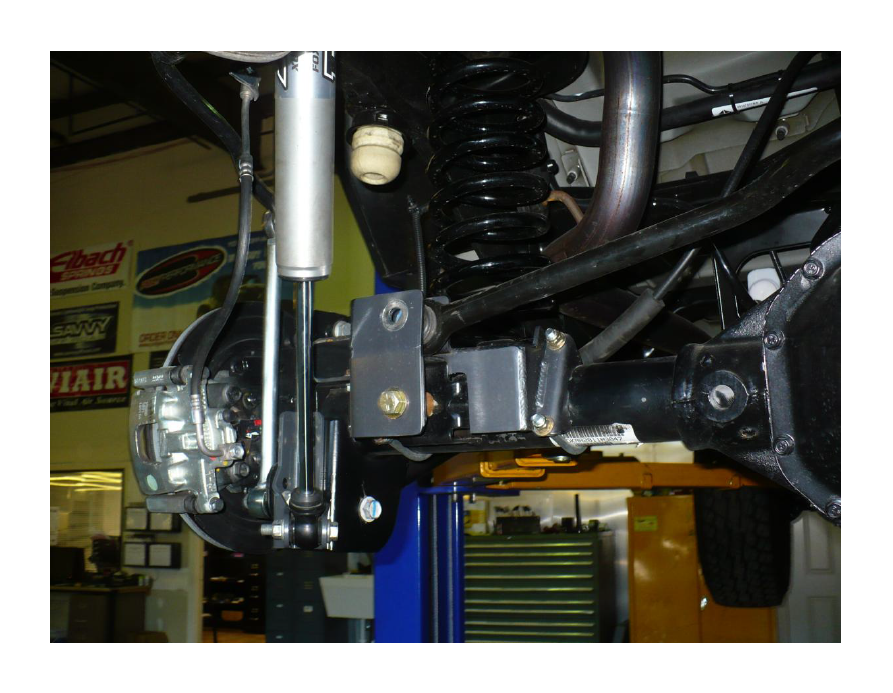
How to Install a Synergy Rear Lower Shock Mount Kit on your 2007-2014 Jeep Wrangler JK

Shop Parts in this Guide
GENERAL NOTES:
These instructions are also available on our website; www.synergymfg.com. Check the website before you begin for any updated instructions and additional photos for your reference.
These shock relocation brackets will allow you to raise the lower shock mount to match your shock length to your bumpstop length. They can also provide increased ground clearance if you cut off the bottom of the lower control arm brackets.
These shock relocation brackets are bolt on but require cutting and grinding of the factory shock bracket and lower control arm bracket. A 4.5” grinder with a cut off wheel and grinding disk are required, a sawzall helps too.
INSTALLATION
1. Remove the lower end of the shocks and anti-sway bar links from the axle brackets.
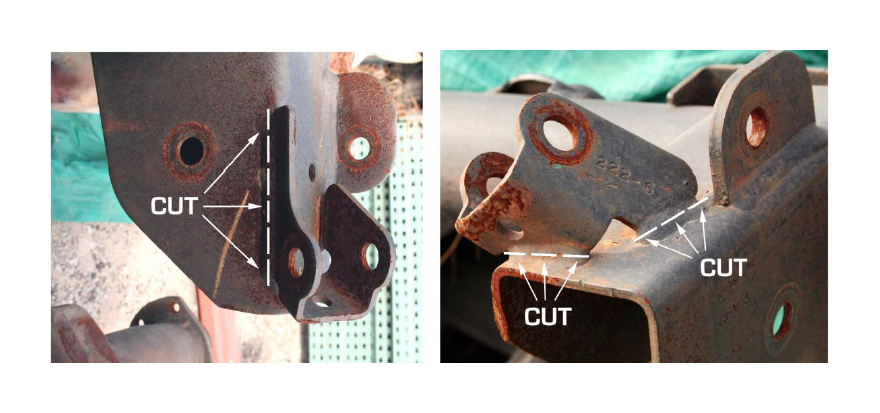
2. With a grinder and cut off wheel, cut the welds on the factory lower shock brackets as shown in the following picture. Remove the shock brackets, grind the welds clean and paint the bare metal. DO NOT CUT OFF THE SWAY BAR LINK TABS.
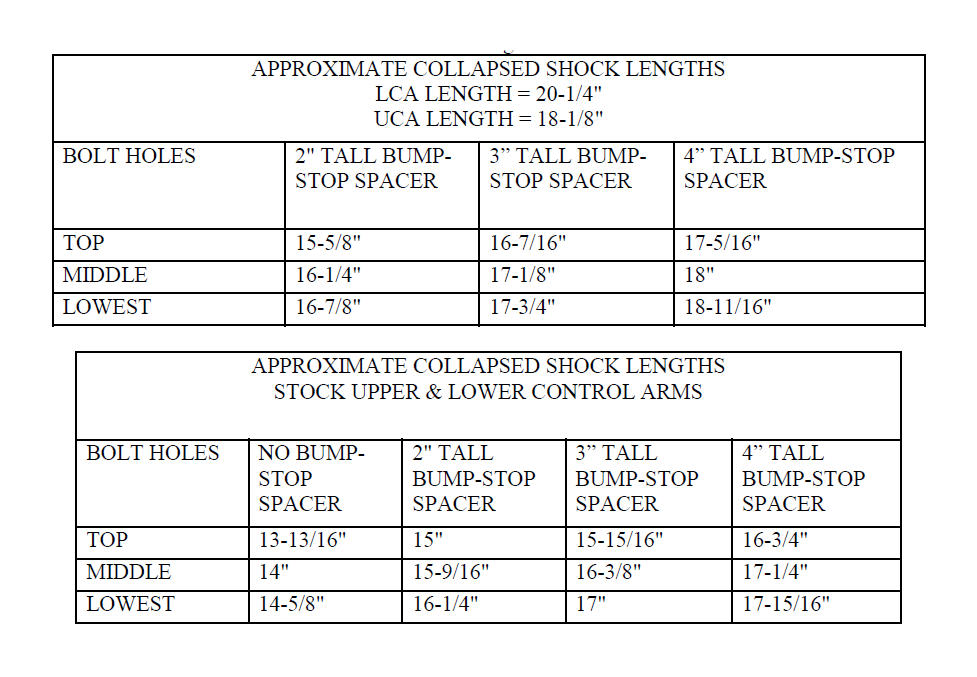
3. To optimize suspension travel, cycle the suspension to correctly position the new lower shock brackets. The following measurements are to be used as a reference in determining which hole locations to utilize. These hole positions are based on the 8058-20 (2”), 8058-30 (3”) and 8058-40 (4”) rear bump stop spacers and our recommended rear upper and lower control arm lengths. If using anything other than this combination of parts skip to step 5 to determine the correct shock relocation bracket position.
4. Use these measurements in conjunction with the collapsed shock length measurement to determine the mounting location of the 8074 shock brackets.
5. Put the rear of the chassis on jack stands. Remove the rear tires and wheels and springs.
6. Remove the jounce bumpers but leave any bump stop extension brackets you may have. Jack the rear axle up to compress the suspension until the axle bumpstop pad or bumpstop spacer hits the metal cup that holds the jounce bumpers. This should be the highest the rear axle and suspension will travel.
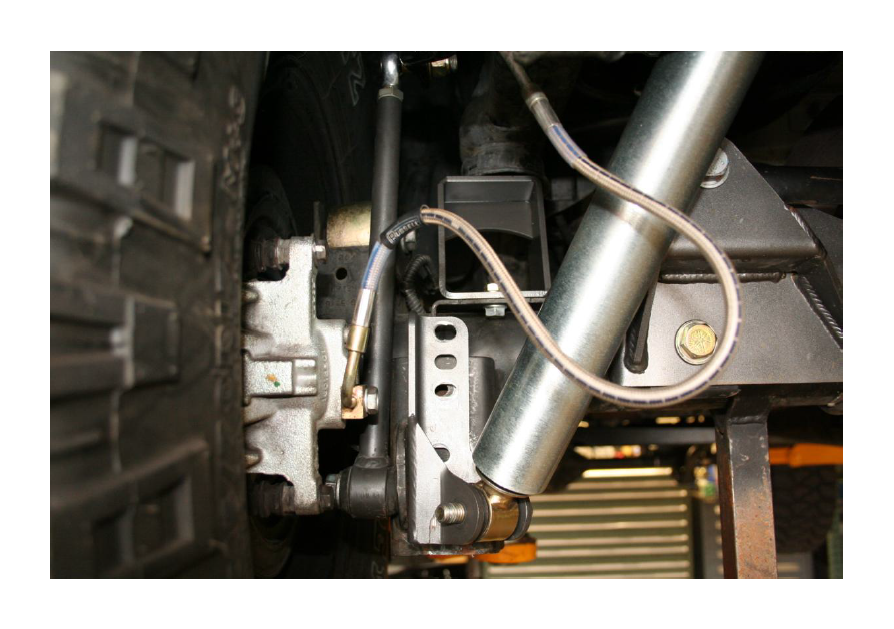
7. Using the factory shock bolts, attach the shock relocation brackets to the bottom bushing of the shock.
8. Compress the shock and position the bracket on the back of the lower control arm bracket to determine which set of holes to use.
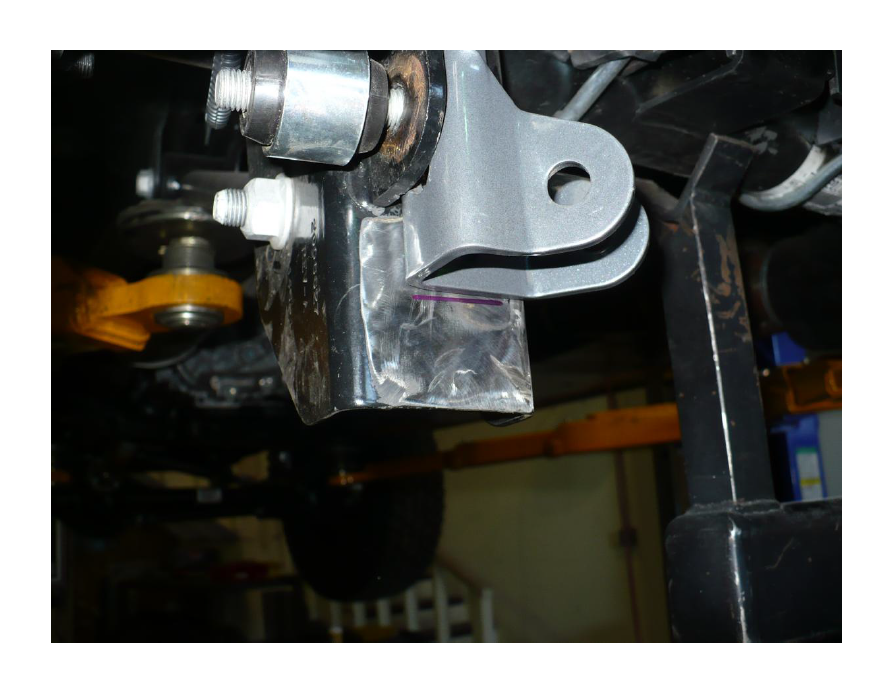
9. Once the correct shock bracket position is determined, cut the bottom of the lower control arm brackets off flush with the bottom of the shock brackets. A sawzall works well for this. The whole bracket can be cut off with one cut.
10. Use the supplied 3/8 x 1” bolts to attach the shock bracket to the lower control arm bracket. Use flat washers under the bolt heads and use flange nuts on the inside of the lower control arm bracket. The lower nuts are easy to get to but the uppers can be difficult. The easiest way is to put the flange nut in the end of a box end wrench and slide the nut up the inside of the lower control arm bracket. Align the nut with the hole. Use the factory anti-sway bar link bolts to attach the side of the bracket to the anti-sway bar link tabs. Insert these bolts from the outside so the nut is against the shock bracket.
11. Tighten the anti-sway bar link bolts first to pull the shock bracket against the anti-sway bar link tab. Torque to 90 ft-lbs.
12. Now tighten the 3/8” bolts to 40 ft-lbs.
13. Now re-install the springs and shocks. Use the factory lower shock bolts or the new ones that are included. Make sure to install the lower shock bolt from the inside out so the ends of the threads are not damaged by rocks. Torque the lower shock bolts to 90 ft-lbs
INSTALLATION IS COMPLETE

