 FREE 1 to 3-Day Delivery on Orders $149+ Details

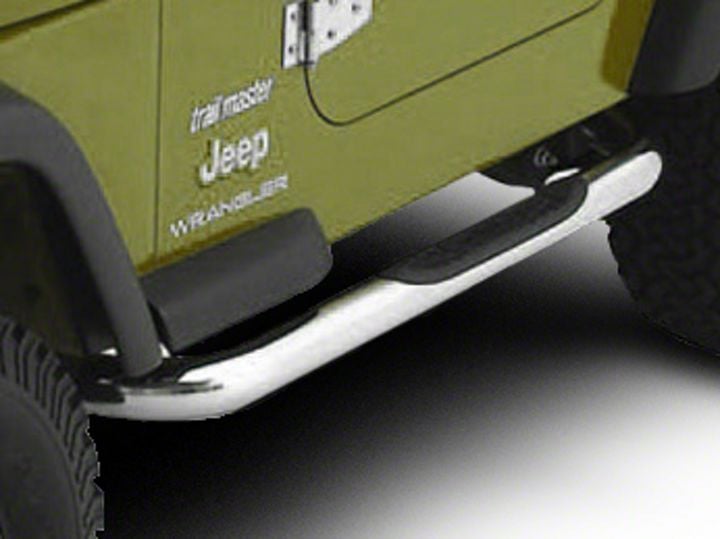
How to Install a Smittybilt Gloss Black Sure Steps 3 in. Side Bar on your 1997-2006 Wrangler TJ
Installation Time
2 hours
Tools Required
- Drill
- Drill Bit Set
- Ratchet
- Socket Set
- Wrench Set
Shop Parts in this Guide
STEP 1: Locate the Driver side bar, front support bracket, rear support bracket, tope plate and 2 plastic rings. Secure the rear bracket to the bar using (1) 12mm bolt, flat and lock washer. (Fig 1)
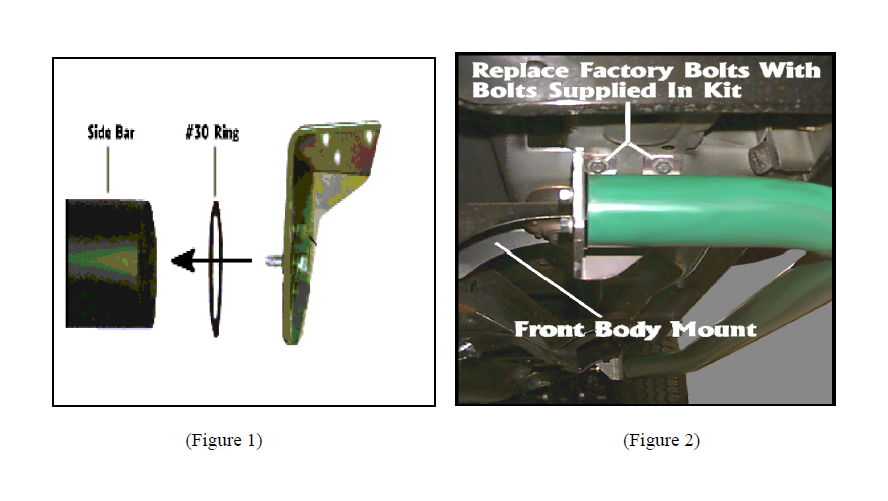
Step 2: Remove the two factory bolts located near the bottom rear of the front wheel-well. (Figure 2) Mount the front bracket to the body using two of the provided 8 x 1.25 x 35 mm bolts. (Figure 2) Attach the side bar to the front bracket using the supplied 12mm hardware.
Step 3: Detach the front lower section of the rear fender-well inner lining be removing the plastic pins that secure it. You only need to remove pins located in the area as show in (Figure 3). Hold the read of the side bar up against the bottom of the body. Align the single hole on the rear bar bracket with the hole in the bottom of the body. Mark the other two holes on the body using the holes in the bracket as a template. (Figure 4) Remove bar from front bracket and set to the side at this time.
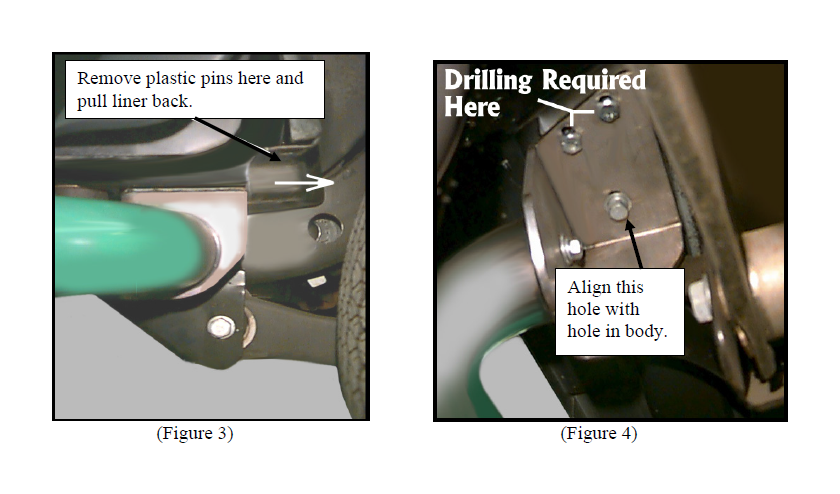
Step 4: Drill two 3/8” holes where you marked in Step 3. CAUTION: Before drilling, be sure to check the backside area for any hazards or obstructions. Identify the correct top plate for this side of the vehicle.
Step 5: Attach the front of the bar to the front bracket. Push the rear bracket up against the bottom of the vehicle lining up the 3 holes. Slide the backing plat through the fender well area. Using three 10mm bolts attach the rear bracket to the top plate going through the body. (Figure 4) Note: You may need to trim the fender-well liner in order to fit back into position around the bracket.
Step 6: Tighten all bolts at this time. Installation is now complete. Repeat the prior steps for the opposite side of the vehicle.
NOTE: For stainless bars, steel-aluminum polish may be used to polish small scratches and scuffs on the finish. Mild soap, window or glass cleaner may also be used to clean stainless steel. Do not use any type of polish/wax that contains abrasives that could damage the finish.

