 FREE 1 to 3-Day Delivery on Orders $149+ Details

How to Install a Smittybilt Black Denim Replacement Top w/ Tinted Windows on your 1997-2006 Wrangler

Shop Parts in this Guide
NOTE: Read entire instructions thoroughly before installing this product. It is recommended to install this Top when temperatures are above 70 degrees. If the Top has any wrinkles this is caused from packaging but once the top relaxes they will go away. You must have the factory bow assembly in order to install this product.
Step 1: If there is currently a soft top on the vehicle, remove it and save the screws removed from the windshield header area.
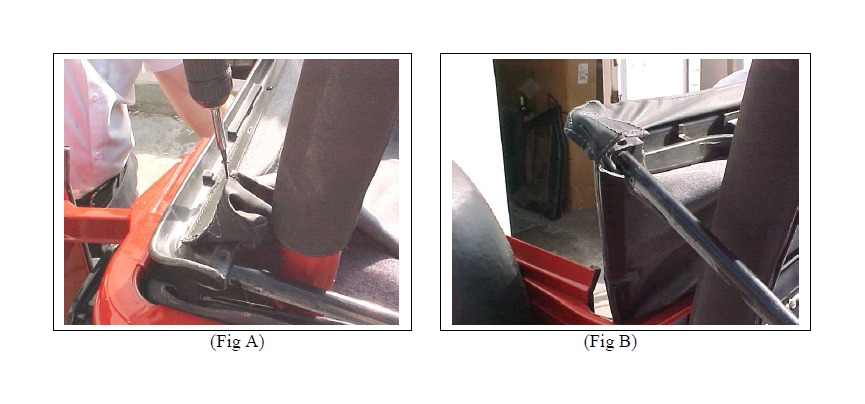
Step 2: Fold the bow assembly back down so it is laying down flat along the back of the vehicle. Lay your new top down inside the vehicle with the inside of the top facing up and the plastic strip sewn into the top (at the front) across the rear of the vehicle on top of the header portion of the bow assembly. (Fig A) Note: It is recommended before laying out top inside of vehicle to remove the windows to avoid scratching them while installing the top.
Step 3: Line up the holes in the plastic channel sewn into the top with the holes in the factory header portion of the bow assembly using the screws you removed in step 1. (Fig A)
Step 4: Take the top from the inside of the vehicle, pulling it towards the back of the vehicle and flip it over the header. Fold the front corners out over the ends of the header. (Fig B)
Step 5: Pull the bow assembly back up over the Jeep lining up the header on top of the windshield frame and attaché the two clamps on the inner part of your windshield.(Do not clamp fully down at this time)
Step 6: Attach the snaps in the rear of the top to the snaps on the rear bow.
Step 7: Connect the rear corners of the top to by sliding the plastic channel on the top into the channels on the body. (Fig C) If detached, attach the rear side windows using the zippers.
Step 8: Starting at the top rear of either door opening on either side, insert the edge of the Top into the groove on the door surround. (Fig D) Work your way down the door surround and the back along the side of the vehicle pushing the channel into the channel on the body-tub. (Fig E) Repeat on other side of vehicle.
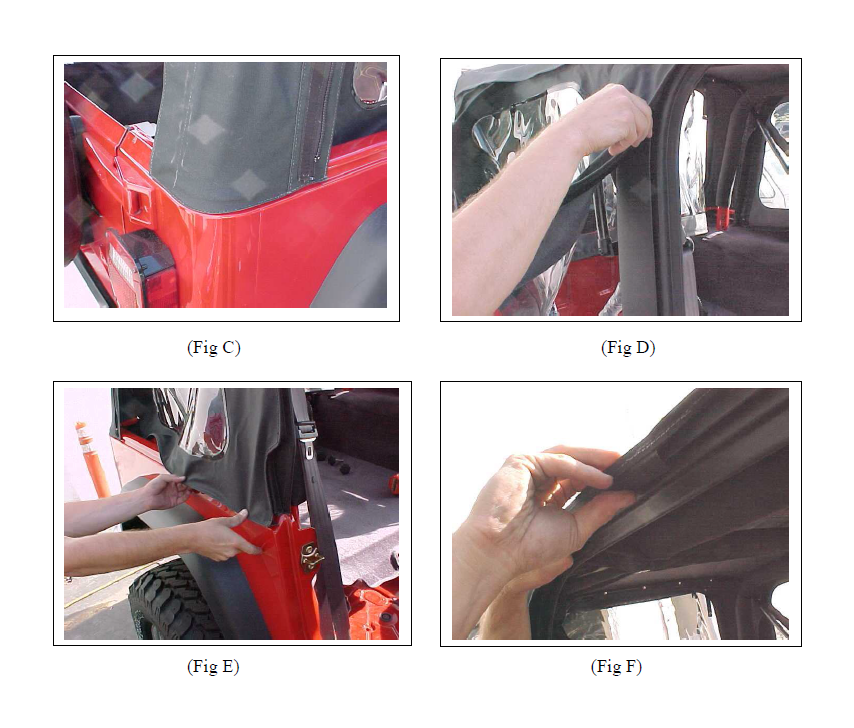
Step 9: Slide the channel on the top above each door into the top channel of the door surround.(Fig F)
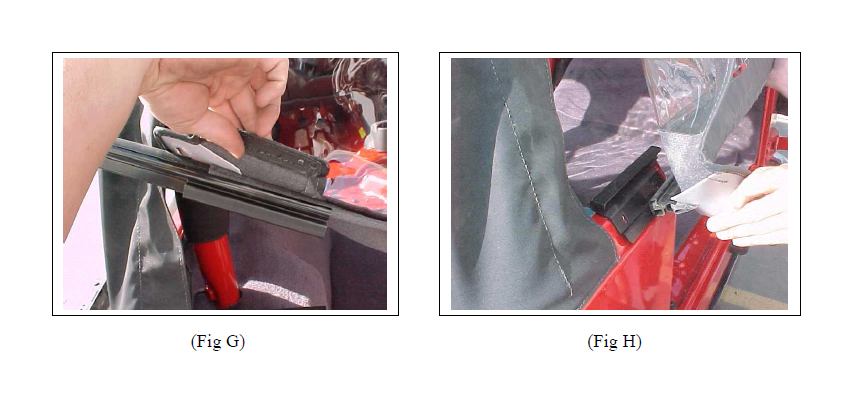
Step 10: Attach rear window with zippers if not already attached. Insert sewn in channel on the bottom of the rear window into the factory tail gate retaining bar. (Fig G)
Step 11: Rotate the tailgate bar downward and toward the vehicle until the rubber gasket on the bar is on the top. Insert the end of the bar into the factory retaining brackets on the vehicle. (Fig H) Make sure bar is secure. Now pull zipper down the rear window completely.
Step 12: Close and secure the front to windshield latches now completely. Installation of Top is now complete. If you are installing the door skins proceed to the next step.
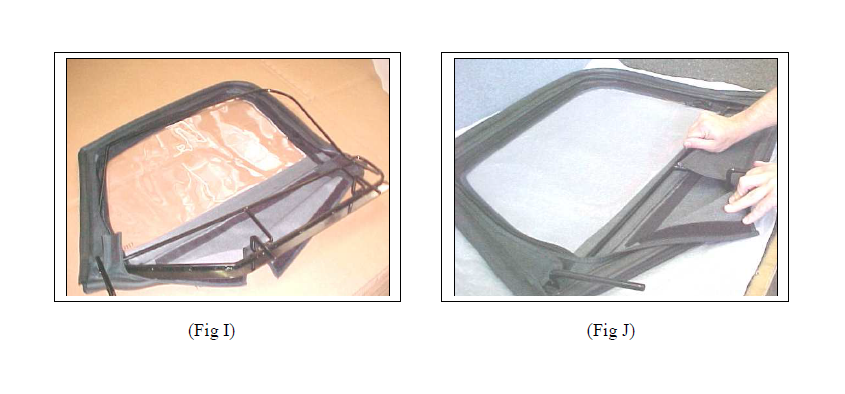
Step 13: Remove old door skin from frame if needed. (This may involve cutting it off) Lay down new door skin on clean flat surface. Release the Velcro around the door skin. Insert the front corner of the frame in the door skin first, and then proceed to insert the frame clockwise along the door skin. (Fig I)The door skin is designed to fit tightly. It may help to unzip window while inserting frame into door skin.
Step 14: Pull long flap on inside of door skin over the top door frame bar and then pull bottom flaps up and secure to Velcro on the top long flap. (Fig J)
Step 15: You may now install upper doors onto the vehicles door.
Step 16: Installation is now complete.
