 FREE 1 to 3-Day Delivery on Orders $149+ Details

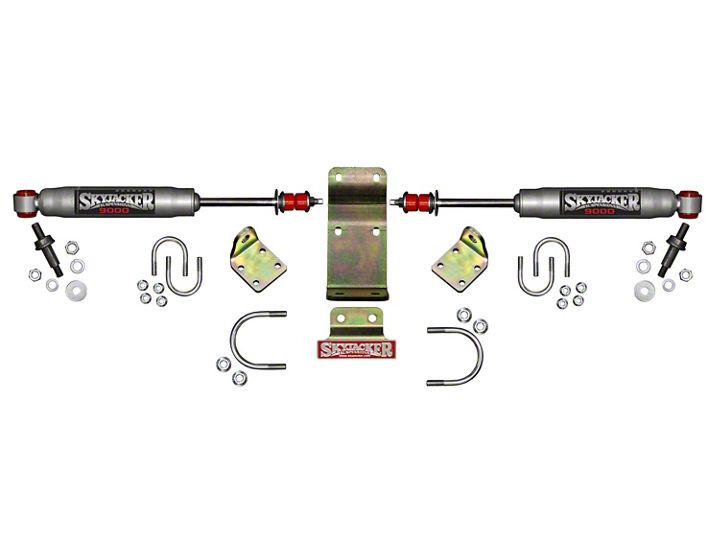
How to Install SkyJacker Silver 9000 High Clearance Dual Steering Stabilizer Kit (07-17 Wrangler JK) on your Jeep Wrangler
Tools Required
- Safety Glasses
- Metric / Standard Wrenches & Sockets
- Measuring Tape
- Torque Wrench
Shop Parts in this Guide
Before beginning the installation, thoroughly & completely read these instructions & the enclosed driver’s WARNING NOTICE. Affix the WARNING decal in the passenger compartment in clear view of all occupants. Please refer to the Parts List to insure that all parts & hardware are received prior to the disassembly of the vehicle. If any parts are found to be missing, contact SKYJACKER® Customer Service at 318-388-0816 to obtain the needed items. If you have any questions or reservations about the installation of this product, contact SKYJACKER® Technical Assistance at 318-388-0816.
Important Note:
Steering stabilizer boots are not included with this dual stabilizer kit to maintain proper clearances.
Component Box Breakdown:
Installation:
1. Park the vehicle on a level concrete or asphalt surface with the front tires / wheels pointing straight forward.
2. Set the emergency brake & block the rear tires / wheels.
3. Remove the OEM steering stabilizer from the OEM mount on the axle & OEM drag link.
4. Install the two new Skyjacker straight studs to the new Skyjacker axle bracket using a 3/4" socket & adjustable pliers. (See Photo # 1)
5. Measure from the differential housing 1 1/4" & install the new axle bracket under the axle using the supplied 3/8" x 2 3/4" x 3" u-bolts, nuts, & a 9/16" socket. Note: Do not tighten at this time. (See Photo # 2)
6. Install the eyelet end of each new Skyjacker stabilizer to a stud on the new axle bracket & install the supplied 1/2" flat washers. (See Photo # 3)
7. Install the new Skyjacker front plate using the supplied 1/2" lock washers, nuts, & a 3/4" socket. (See Photo # 4)
8. Extend the new steering stabilizers 3 1/4", (exactly halfway). The center to center length will be 13 1/2" when the steering stabilizers are half way out. (See Photo # 5)
9. Install the new Skyjacker driver & passenger side tie rod brackets using the supplied polyurethane stem bushings, stem washers, 5/16" x 1 1/2" x 2" u-bolts, nuts, & a 1/2" socket. Note: The new tie rod brackets are to be installed with the curved portion of the bracket facing toward the front of the vehicle. (See Photo # 6 & 7)
10. With the OEM tie rod assembly rolled up, tighten the new axle bracket so there is 1/4" clearance between the new steering stabilizer bodies & the OEM tie rod assembly.
11. Turn the front tires / wheels of the vehicle to the left & right to check that the new steering stabilizers & all brackets are adjusted properly & tightened securely.
Final Notes:
• Cycle the steering of the vehicle left to right & check all parts for adequate clearance.
• After the first 100 miles, check all of the hardware for the proper torque.
