 FREE 1 to 3-Day Delivery on Orders $149+ Details

How to Install SkyJacker Black MAX Rear Shock Absorber for Stock Height (07-18 Jeep Wrangler JK) on your Jeep Wrangler
Installation Time
60 minutes
Tools Required
- Safety Glasses
- Breaker Bar with 3” Extension and 3/4 Socket
- Socket Wrench with 16mm, 18mm Socket and 6” Extension
- Torque Wrench
- Hammer
- Wheel Chocks
- Floor Jack and Jack Stands (A 2-1/2 Ton Floor Jack with 3 Ton Jack Stands were used for this install.)
- Grease, Vaseline or other lubricant (Used for new shock bushing assembly.)
- PB Blaster or other rust penetrating spray (Optional)

Shop Parts in this Guide
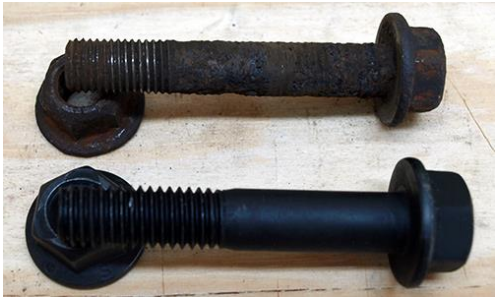
Important Note: Inspect all bolts and replace any that are damaged or heavily rusted.
Before Install
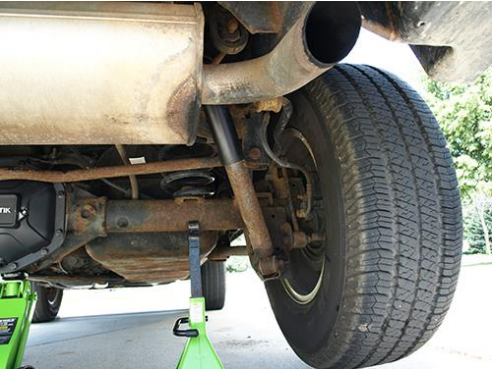
1. Prop your wheel chucks in front of the front wheels to keep the vehicle from moving. Loosen the lug nuts with a breaker bar or a wrench with a 3” extension and 3/4 socket before the vehicle is off the ground.

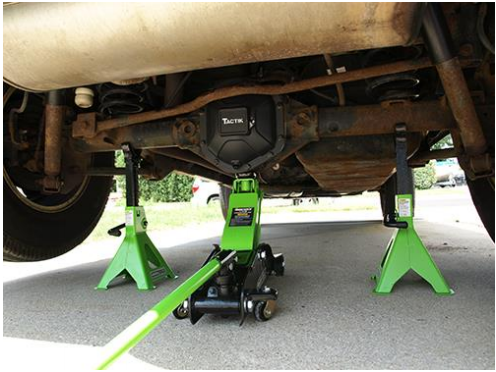
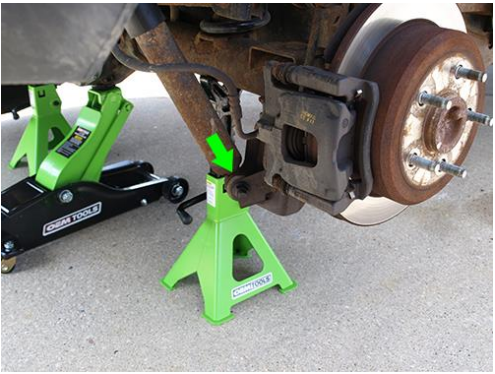
2. Place your jack on the bottom of the front diff and raise the vehicle. Insert your jack stands under the rear axles to secure the vehicle from moving and remove the wheel.
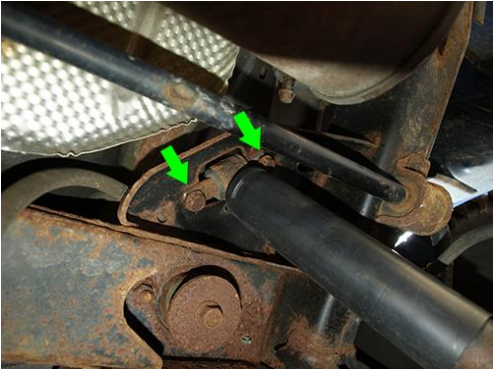
3. Loosen the bottom shock bolt with a 18mm socket wrench and a 18mm wrench. If the bolt wont slide out, you may need to use a hammer to punch out the side with the nut. Move the nut to the edge of the bolt making it flush with the bolt end and then hit the bolt until it breaks free.
4. Loosen both top 16mm bolts securing the factory shock bar pin using a stock wrench with 16mm socket and a 6” extension. Only completely remove of the of 16mm blots. This will help hold the new shock absorber when securing it.
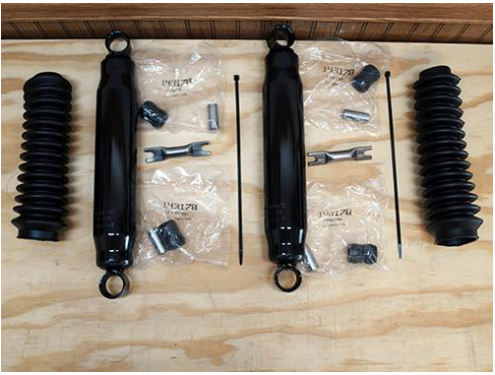
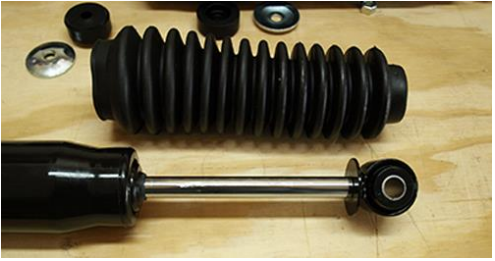
5. Layout all the hardware parts for your new SkyJacker Black MAX Shock Absorber. Note: You will need both rubber bushings, one metal collar and one bar pin.
6. Place grease, Vaseline or other lubricant within the mount hole of the shock, and on the black rubber bushing. NOTE: You do not need to use a lot of lubricant.

7. Slide the rubber bushing through the mount hole on the shock. Lightly lubricate the inner hole of the rubber bushing. Its recommended to place the bushing on the side of the shock piston as it will be much easier to place the shock boot over this end then the bar pin end.
8. Slide the metal collar through the rubber bushing.
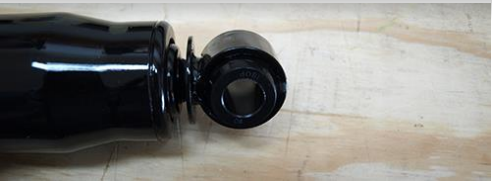
9. Pull the piston out of the shock absorber as shown in the image below.
10. Place the piston through the supplied black rubber shock boot cover and secure with the supplied zip tie. Cut the excess of the zip tie.

Note that an aftermarket green shock boot was used to complete this install.
Important Note: There are different ways to insert a rubber bushing and bar pin into a shock absorber. The instructions below will demonstrate how the bar pin was installed for this installation guide. ** Contact a mechanic for assistance if you do not feel comfortable with this step. **
11. Place grease, Vaseline or other lubricant within the mount hole of the shock on the opposite end, and on the black rubber bushing and on the bar pin. NOTE: You do not need to use a lot of lubricate. Slide a bar pin only a quarter of the way into the rubber bushing as shown below.
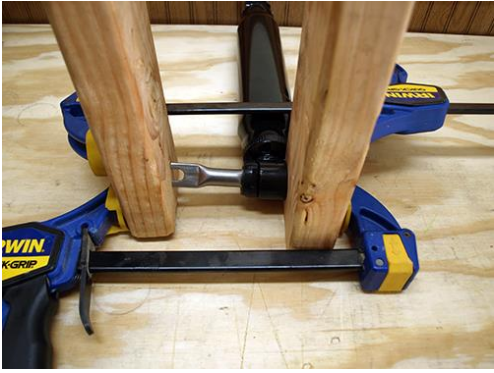
12. Place the rubber bushing end into the sock mount with the bar pin. Using two 2x4 blocks of wood. Place one of the blocks on the side of the shock making it flush with the shock hole mount. Then place the other block of would on the side of the bar pin. Secure the bottoms of the 2x4 blocks of wood with a clamp and then place another clamp 2 to 3 inches above as shown below.
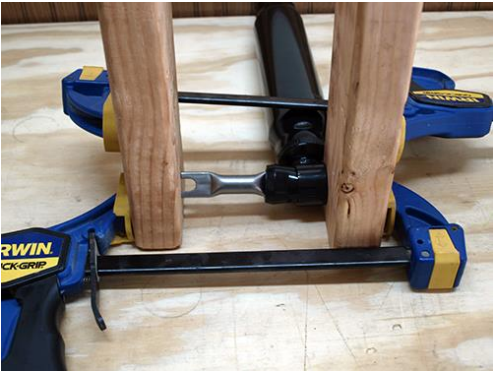
Place the other end of the shock absorber firmly against another sold object so the shock will not move. Slowly compress the clamps evenly until you start to see the rubber bushing slide into the shock mounting hole.
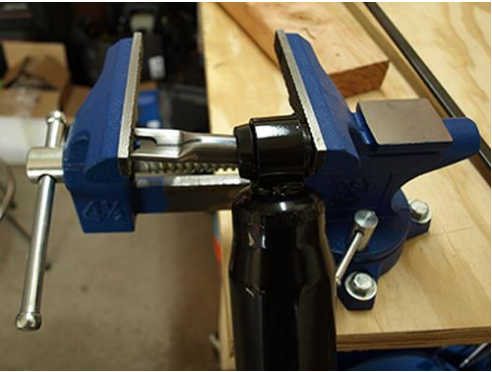
You may need to place the shock into a vise to completely slide the bar pin through the rubber bushing. Note that bar pin opened end that is being pushed through may cut through the rubber bushing. This cut will close firmly once the bar pin has been pushed into position.
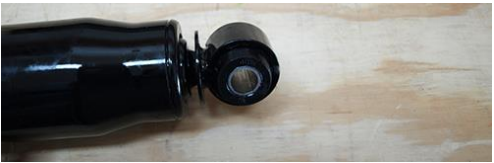
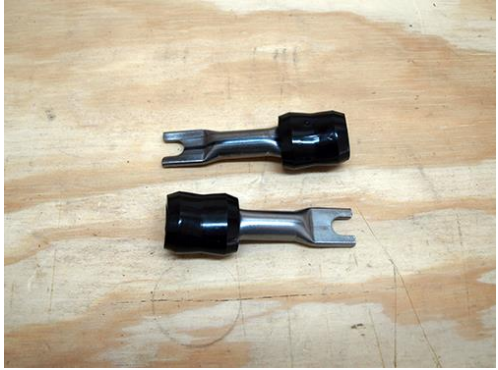
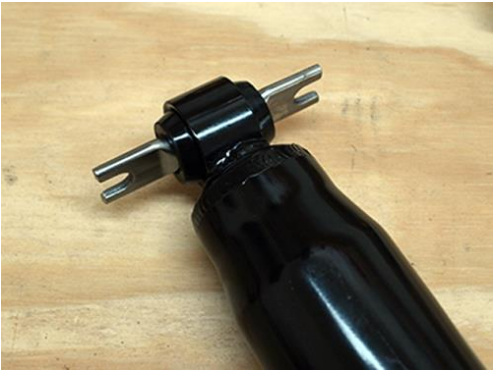
The bar pin should look like the image below when finished.
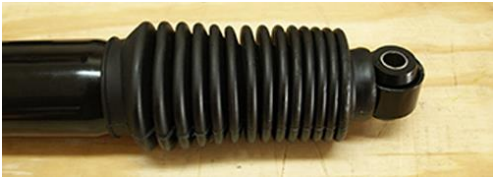
13. Slide the bar pin onto the loosened 16mm bolt that was left during step 4. Screw in the second bolt and torque both bolts to 37-foot pounds.
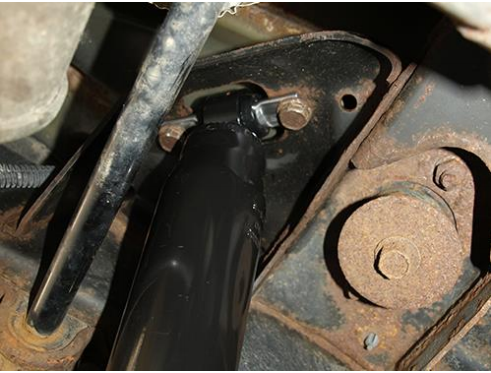
14. Place the other end of the shock into the bottom Jeep® shock mount and slide the factory 18mm bolt and secure with factory nut. Torque bottom nut/bolt to 56-foot pounds.
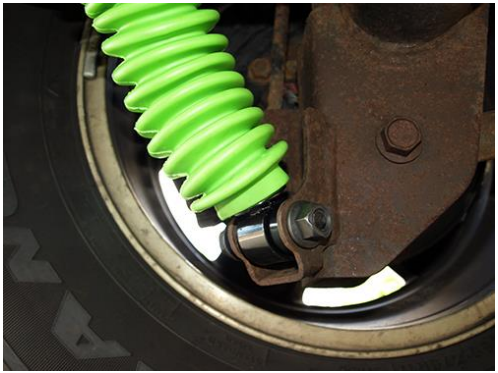
Important Note: If you removed the tires from the Jeep®. You will need to torque the lug nuts down to factory spec of 95-foot pounds per the factory manual.
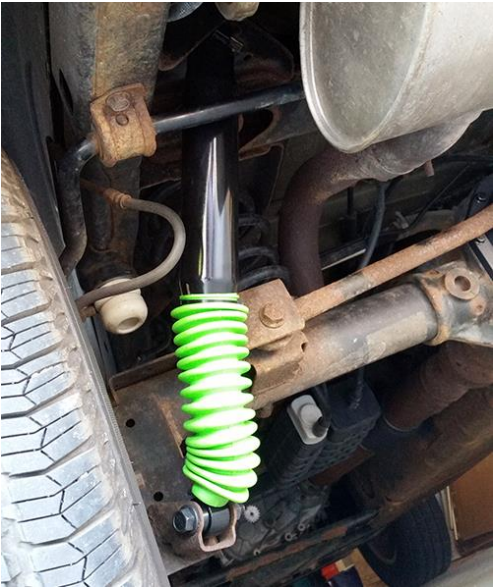
After Install
Installation Instructions Written by ExtremeTerrain Customer Brian Voelzke 09/01/2018

