 FREE 1 to 3-Day Delivery on Orders $149+ Details

How to Install Rugged Ridge Rear Tube Bumper, Textured Black on your 2007-2013 Wrangler

Shop Parts in this Guide
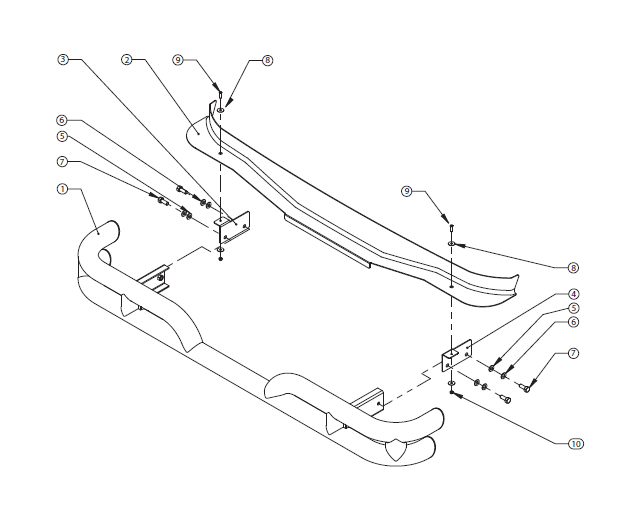
Contents:
1. Bumper* (1)
2. Filler Panel (1)
3. Left Plate (1)
4. Right Plate (1)
5. 12mm Washer (4)
6. Lock Washer (4)
7. 12mm Bolt (4)
8. 6mm Washer (4)
9. 6mm Hex Head Screw (2)
10. 6mm Lock Nut (2)
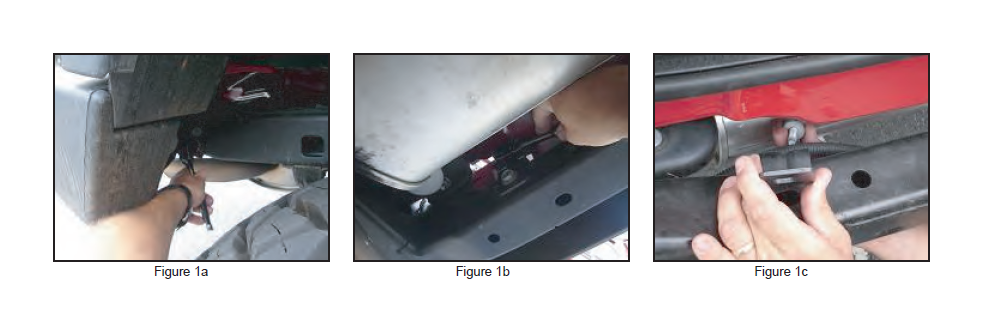
1. Remove original rear bumper. It is held in by 2 bolts on each side (Figure 1a), and 2 bolts that are attached to brackets which fasten to the rear crossmember (Figure 1b). After the bumper is removed, remove the small brackets from the rear crossmember (Figure 1c).
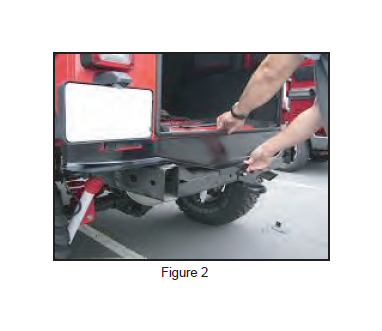
2. Place Filler Panel on rear frame rails (Figure 2). No fasteners are to be installed yet.
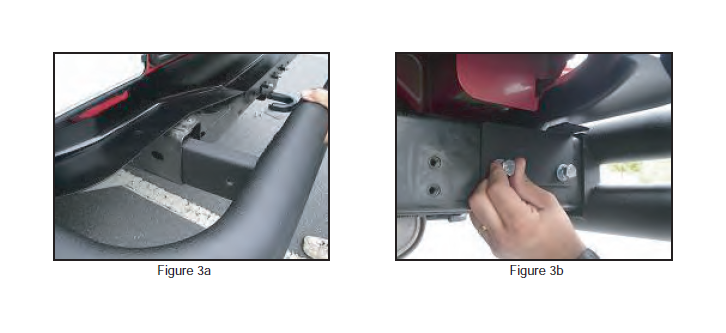
3. Insert Bumper into frame rails (Figure 3a). Install left plate and right plate on the outside of the frame rails with the 12mm bolt and washer (Figure 3b). Leave bolts loose until all 4 are started. Bumper can adjust forward to achieve a tight fit to the body, or adjust rearward to provide clearance for the optional reciver hitch or tow hook. Once position of the bumper is finalized, tighten bolts.
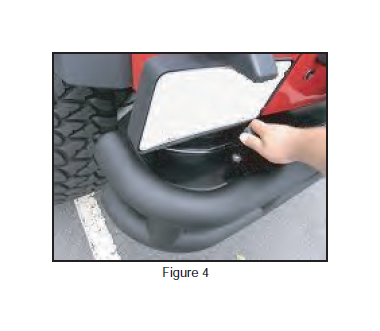
4. Attach Filler Panel to the horizontal tabs in the Left Plate and Right Plate using the 6mm Hex Head Screws, 6mm Washers, and 6mm Lock Nuts. Leave Fasteners Loose until both sides are installed. Adjust placement of Filler Panel until desired look is achieved, then tighten screws (Figure 4).
Congratulations on the purchase and installation of a quality Rugged Ridge product!

