FREE 1 to 3-Day Delivery on Orders $149+ Details

How to Install the Rugged Ridge Hurricane Flat Fender Flares on your 2007-2014 Wrangler JK

Shop Parts in this Guide
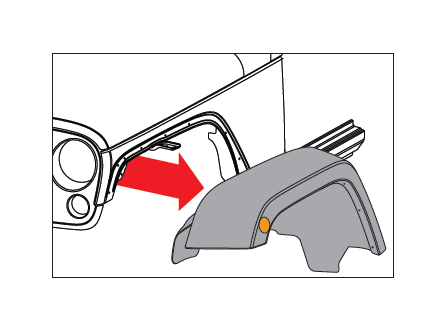
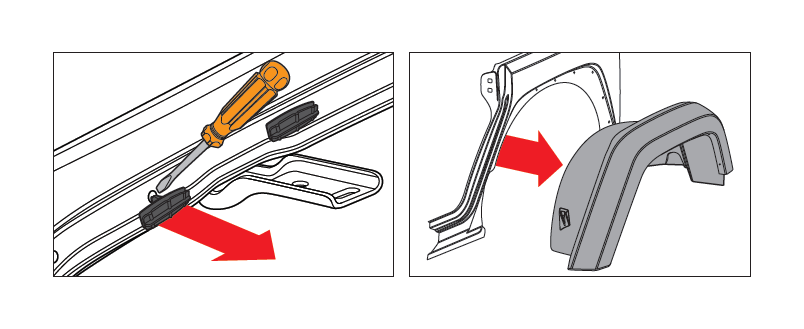
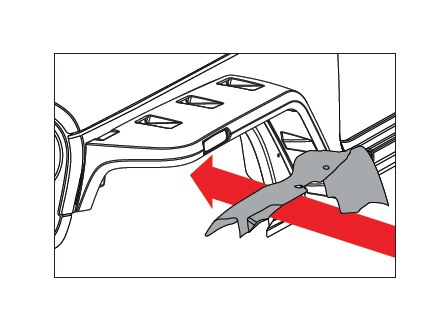
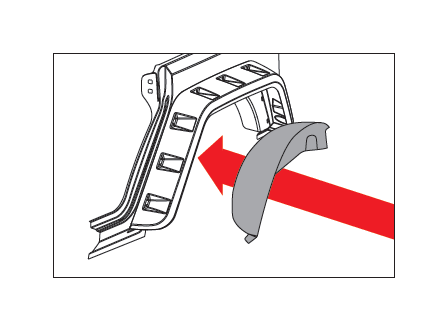
1. Remove the front & rear factory fender flare, flare support and wheel liner.
Remove factory fasteners with a flat head screw driver or similar.
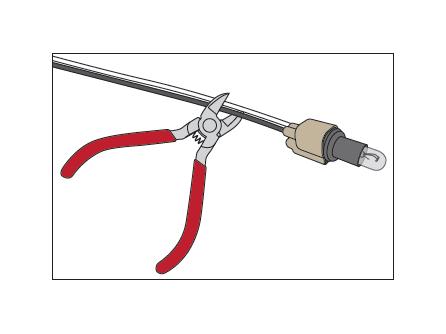
2. Cut side marker off 2 inches from the base of light fixture.
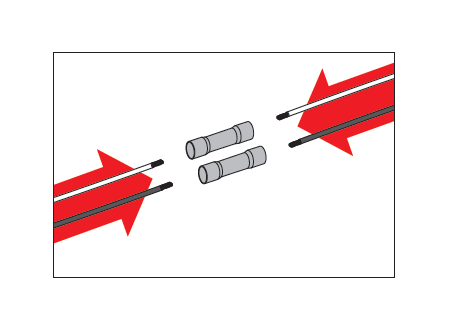
3. Strip 1/4” from wires previously cut. Strip 1/4” from both ends from wires supplied in hardware kit.
Splice wires cut using the butt connectors and wires supplied.
4. Attach and crimp female terminals to wires.
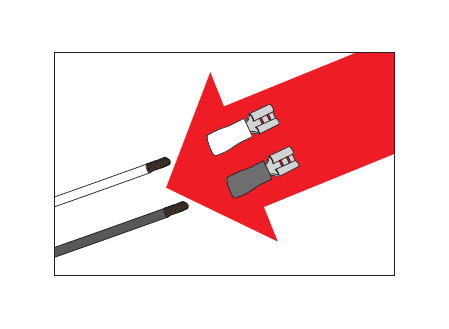
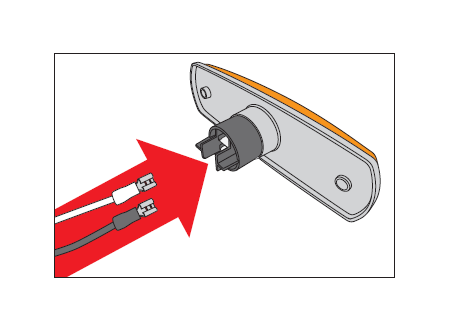
5. Insert female terminals into side marker lights supplied.
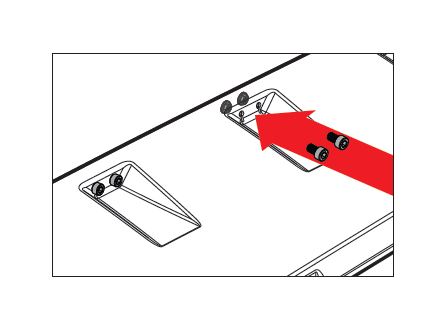
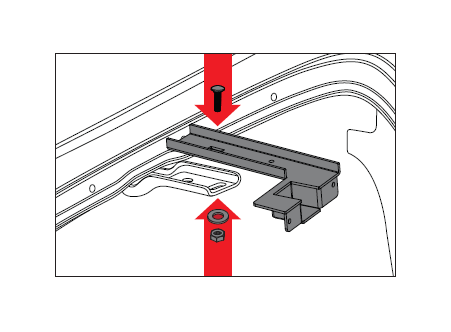
6. Attach support arm to fender with M8 carriage bolt, 16mm washer and M8 nut..
NOTICE Do not tighten. Support Arm should point forward.
7. Attach side marker light to support arm with M4 bolt, 9mm washer and M4 nut.
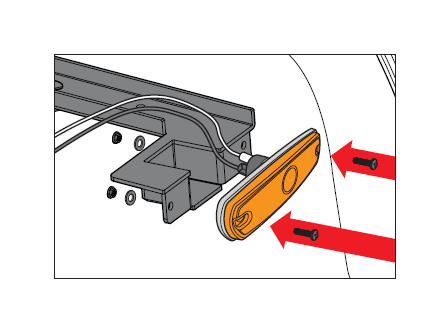
8. Secure wires to support arm with zip tie.

9. Loosely fasten flare to the side of the fender using 2 M6 flange bolts and M6 nuts.
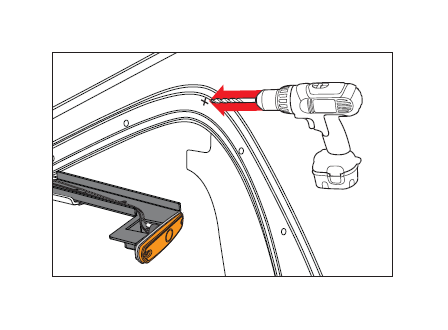
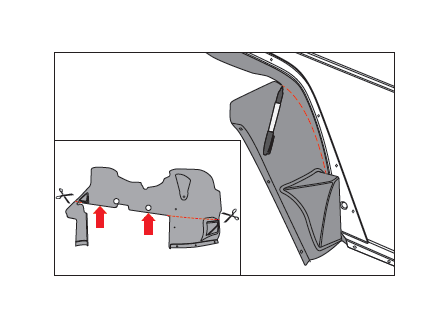
10. Mark your fender using the hole shown as a guide. Remove fender flare after fender is marked.
11. Using an 11/32 drill bit, drill into the fender where you previously marked.
NOTICE Paint edge of hole cut to prevent rust.
CAUTION Cutting/Sharp Edge Hazard: Cut carefully using gloves and eye protection.
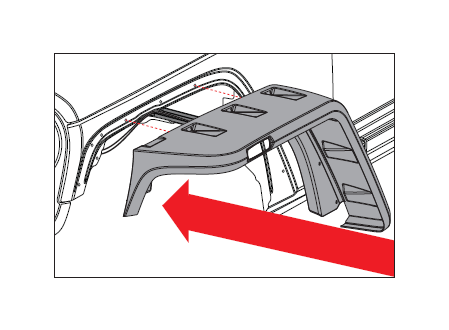
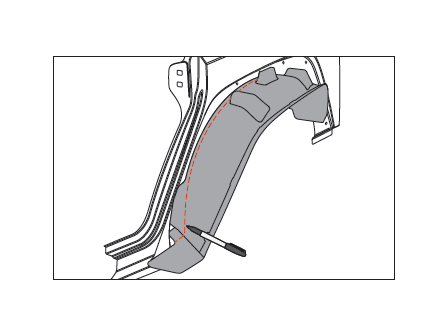
12. Attach front wheel liner, mark a line that follows the edge of the fender. Cut the line marked. If you do not have a Rugged Ridge Snorkel skip to Step 14.
CAUTION Cutting/Sharp Edge Hazard: Cut carefully using gloves and eye protection.
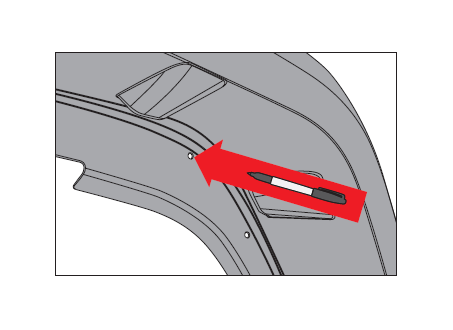
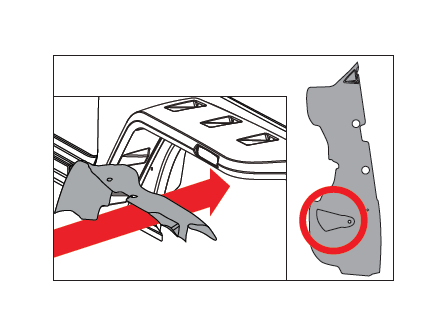
13. If you have a Rugged Ridge Snorkel, mark passenger side wheel liner where indicated. Carefully cut area marked.
CAUTION Cutting/Sharp Edge Hazard: Cut carefully using gloves and eye protection.
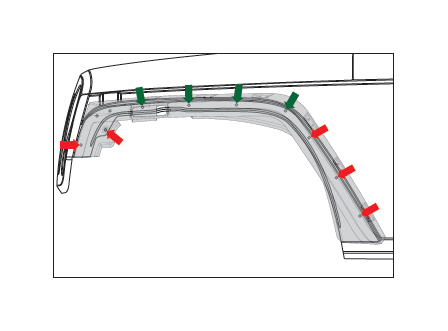
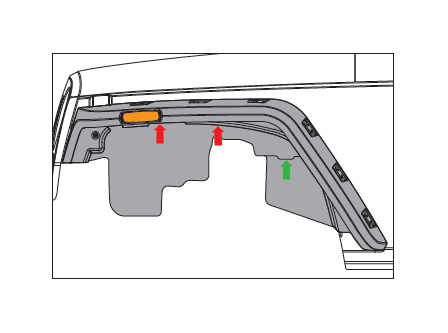
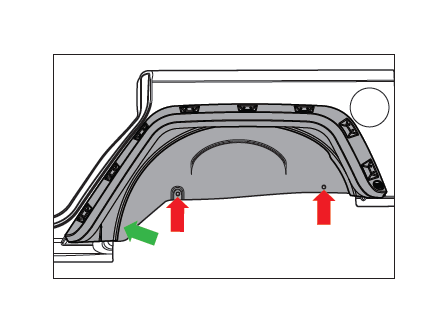
14. Secure flare with M6 flange bolts, 45mm washers and M6 nuts
where Green Arrows indicate.
Secure M6 flange bolts, 16mm washers and M6 nuts where the Red Arrows indicate.
15. Place and position cut front liner in wheel well.
16. Use factory screws previously removed and 45mm washers to secure wheel liner where Red Arrows indicate.
Replace factory nut where Green Arrow indicates.
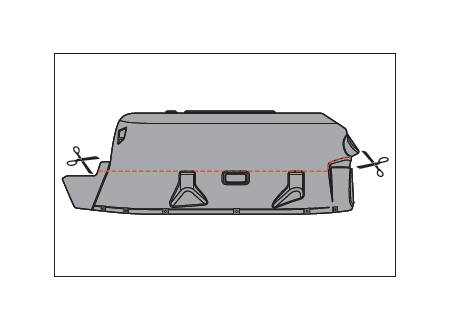
17. Attach rear wheel liner, mark a line that follows the edge of the fender. Cut the line marked. 2 Door JK Owners Skip to Step 19
CAUTION Cutting/Sharp Edge Hazard: Cut carefully using gloves and eye protection.
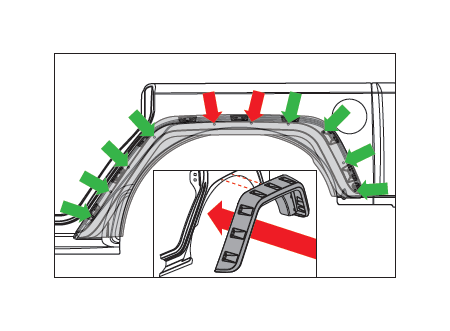
18. Attach and tighten Hurricane flare with M6 flange bolts, 16mm washers and M6 nuts where the Red Arrows indicate.
Secure rest of the flare with large push fasteners where Green Arrows indicate. Skip to Step 20
NOTICE If 10mm shield retainers don’t go into designated holes, use a 3/8 drill bit to widen the holes designated by the Green Arrows. Paint edge of hole cut to prevent rust.
CAUTION Cutting/Sharp Edge Hazard: Cut carefully using gloves and eye protection.
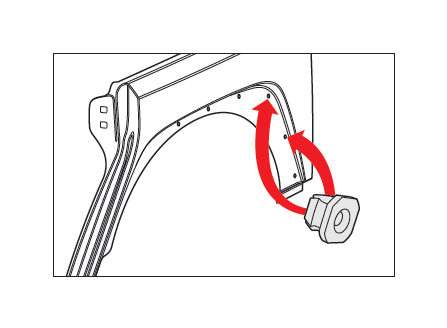
19. Insert nylon nuts in two holes indicated.
Attach Hurricane Flare with M6 flange bolts, 16mm washers and M6 nuts where Red Arrows indicate.
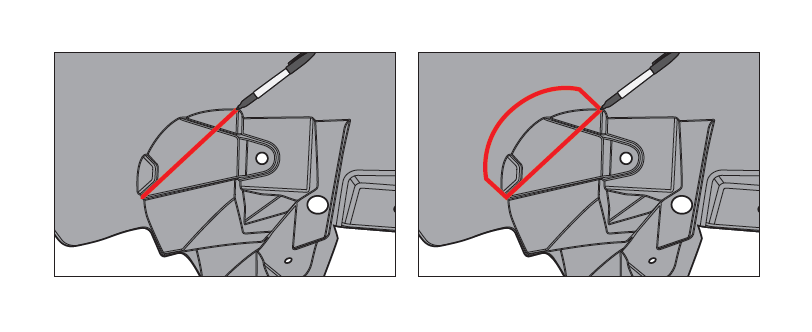
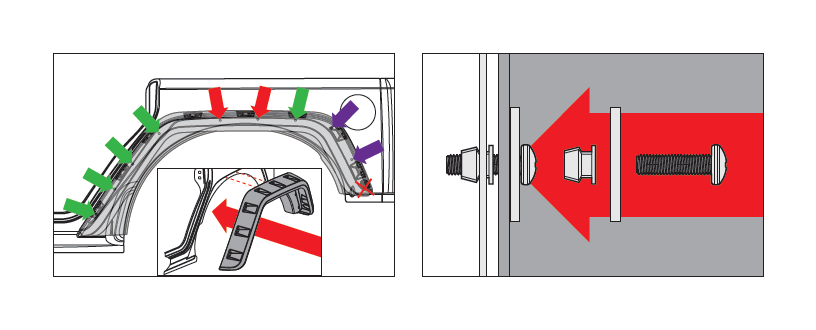
Figure 2 shows how to secure flare with M4 bolts, 20mm washers, and
nylon nuts indicated by Purple Arrows found in Figure 1.
Secure remaining flare with 10mm shield retainers indicated by Green Arrows.
NOTICE If 10mm shield retainers don’t go into designated holes, use a 3/8 drill bit to widen the holes designated by the Green Arrows. Paint edge of hole cut to prevent rust.
CAUTION Cutting/Sharp Edge Hazard: Cut carefully using gloves and eye protection.
20. Place rear wheel liner into wheel well.
21. Secure wheel liner using M6 flange bolts, 16mm washers and
M6 nuts in locations indicated by Red Arrows.
Secure wheel liner with 8mm shield retainer indicated by Green Arrow.
22. Attach your choice of either black or stainless steel decorative bolts into the double pockets.