 FREE 1 to 3-Day Delivery on Orders $149+ Details

How to Install Rugged Ridge Front Seat Adapter RH on your 1997-2006 Wrangler

Shop Parts in this Guide
IMPORTANT NOTICE:
Carefully read the instructions before attempting to install this product. Rugged Ridge is in no way responsible for any damage to the vehicle or personal injury that may occur during the installation or use of this product.
IMPORTANT NOTE: IF YOU ARE INSTALLING BOTH A PASSENGER AND A DRIVER'S SIDE SEAT, START WITH THE DRIVER'S SIDE
INSTALLATION INSTRUCTIONS
1) Remove the four bolts attaching your old driver's side seat with old seat risers (seat riser pictured in Figure 2) to the vehicle's floor. NOTE: Save the bolts for later usage.
2) Remove the old seat with seat riser from vehicle and place it on a working area.
3) Locate the four bolts that mount the seat riser to your old seat and remove these bolts. NOTE: Save these bolts for later use.
4) Remove the old seat from the seat riser
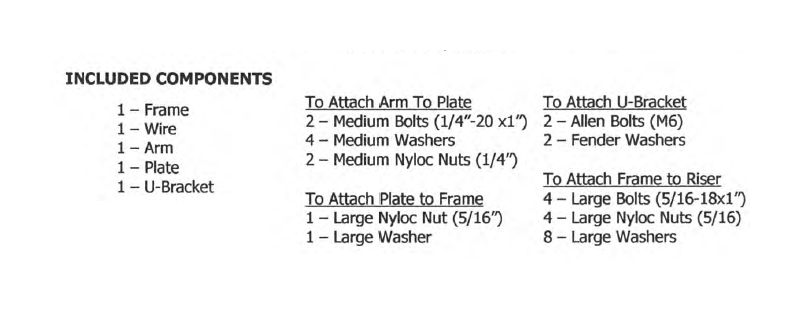
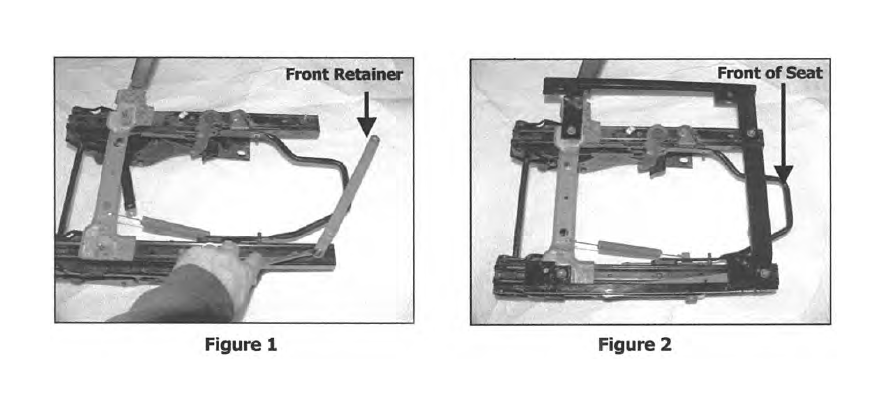
5) Remove front retainer from seat riser by chiseling off round fasteners (Figure 1).
6) Once the front retainer is removed, loosely mount Frame to seat riser using the included Large Bolts, Nuts and Washers (Figure 2).
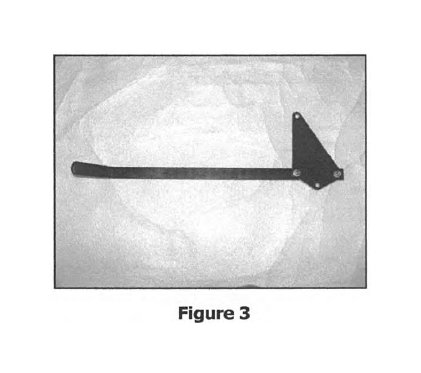
7) Loosely attach the Arm to the Plate using the Medium Bolts, Medium Nuts and Medium Washers provided (Figure 3).
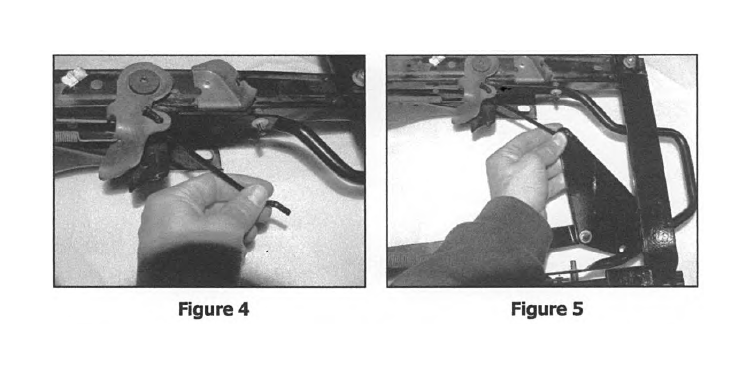
8) Attach the Wire to the seat riser (Figure 4).
9) Attach the Wire to the Plate (Figure 5).
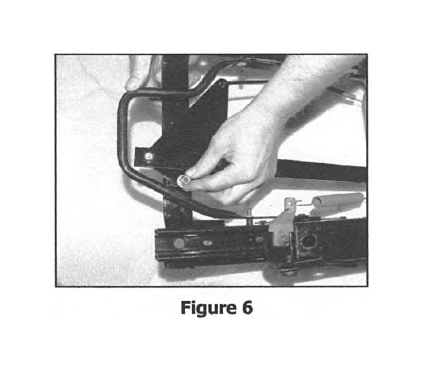
10) Once the wire is attached to the plate, loosely attach the Plate to the Frame using a Large Nut and Large Washer. Turn seat riser upside down to ease the install of the Plate to the seat riser (Figure 6).
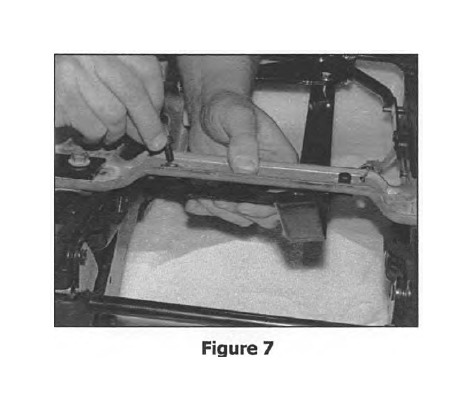
11) Attach the U-Bracket to the seat riser by using the two Allen Bolts two Fender washers included (Figure 7). NOTE: Route the Arm under the U-Bracket, assuring the bend is curved up towards the back of the seat.
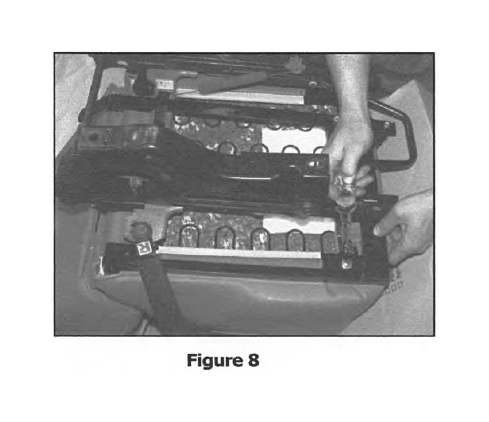
12) Once the installation of the Frame to factory bracket is complete, attach your new seat to Frame using the four bolts removed in Step 3 (Figure 8). NOTE: Make sure you keep the original seat bracket orientation.
13) Securely tighten all hardware using wrenches.
14) Mount your new seat into your vehicle by attaching the bracket to the floor using the factory bolts from Step 1.
For access to the rear seat when installed: Move the Arm sideways and push the seat forward in an upward mo
