 FREE 1 to 3-Day Delivery on Orders $149+ Details

How to Install Rubicon Express Control Arm Drop Brackets (07-18 Jeep Wrangler JK) on your Jeep Wrangler
Installation Time
2 hours
Tools Required
- Full Socket and ratchet Set
- Tape Measure
- Metric/Standard Wrench Set
TO GUARANTEE A QUALITY INSTALLATION, IT IS RECOMMENDED TO READ THESE INSTRUCTIONS THOROUGHLY BEFORE BEGINNING ANY WORK. THESE INSTRUCTIONS ASSUME A CERTAIN AMOUNT OF MECHANICAL ABILITY AND ARE NOT WRITTEN NOR INTENDED FOR SOMEONE NOT FAMILIAR WITH AUTO REPAIR. IT IS ALSO HIGHLY RECOMMENDED TO GET A PROFESSIONAL ALIGNMENT AFTER INSTALLATION OF THESE BRACKETS.
Installation Instructions:
These drop brackets are engineered to work with Rubicon Express 2.5”, 3.5”, and 4.5” suspensions. They will also work with other suspension brands, however, it is important your vehicle’s ride height falls within the specified range. If you are installing these brackets with a Non-Rubicon Express suspension, proceed to Section B for instructions on measuring ride height.
** NOTE: This installation is best performed with all four wheels on the ground **
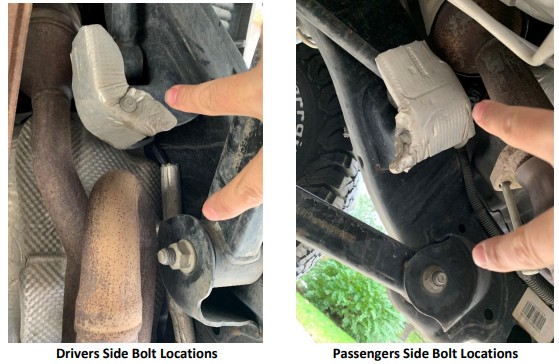
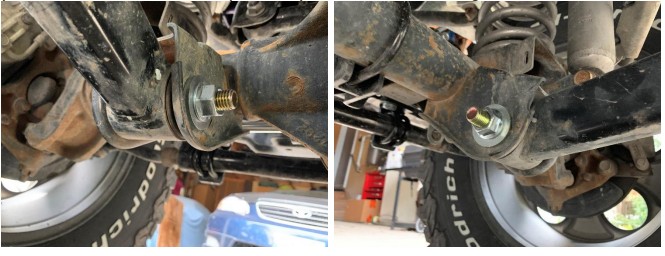
1. WORK ON ONE SIDE AT A TIME! Remove the upper and lower control arm bolts at the frame end and save the factory hardware. NOTE: Depending on the build of your vehicle you will need to remove the exhaust heat shields to remove and install the upper control arm bolts. (Two 10mm bolts per side holding them on place).
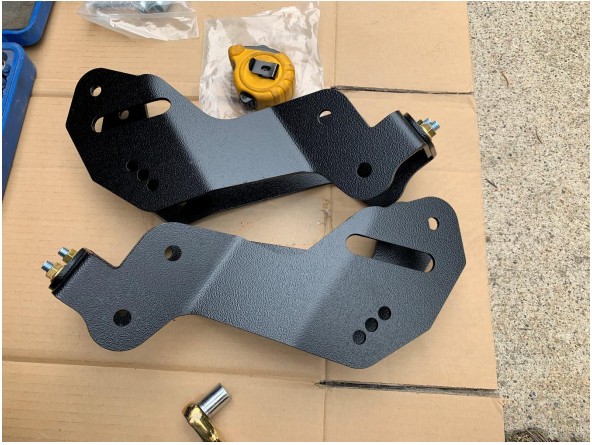
2. Assemble the brackets as shown using the FOUR carriage bolts and nuts. Do not tighten at this time.
3. Use the factory hardware and supplied spacers (which will fill the void for the control arms) in the original control arm mounting locations and install the brackets on the appropriate sides of the frame.
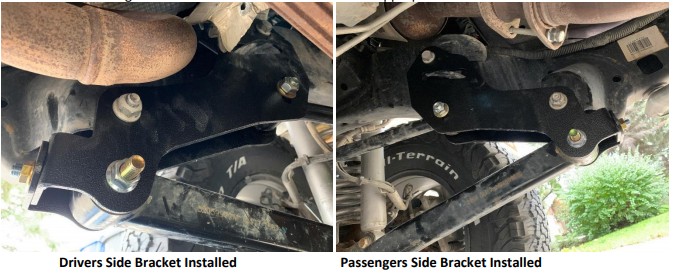
4. Use the supplied bolts, nuts, and washers to mount the control arms in the new dropped locations. Use M12
fasteners for the upper control arms and M14 for the lower control arms.(see photos above) NOTE: Use Red
Loctite on M14 Bolts.
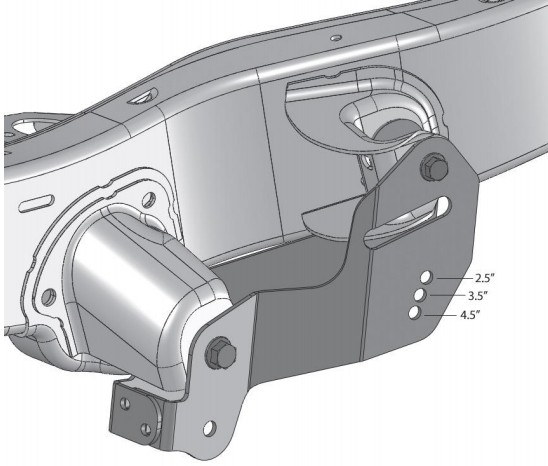
***NOTE: There are three relocation holes in the brackets for mounting the upper control arms. For the Rubicon
Express 2.5” Suspension Kit use the upper hole location, the Rubicon Express 3.5” Suspension Kit use the middle
hole location, and for the Rubicon Express 4.5” Suspension Kit use the bottom hole.
5. Torque All hardware to the following specs:

SECTION B
IMPORTANT: If you are installing this kit to a previously installed suspension system that utilized cam bolts,
you’ll want to remove and install the provided replacement bolts and four large thick washers.
1. You’ll first need to get a measurement from your vehicle to determine whether or not you should be using the drop brackets. Measure from the bottom of the frame to the top of the spring seat.
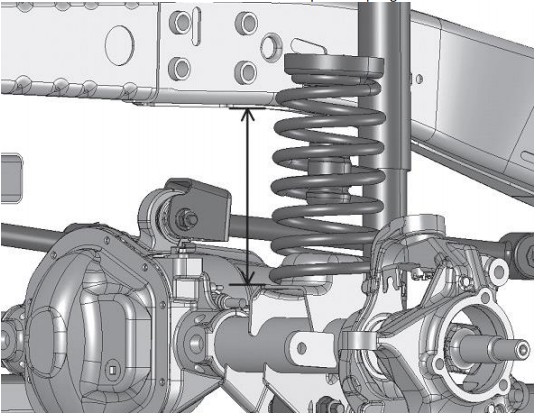
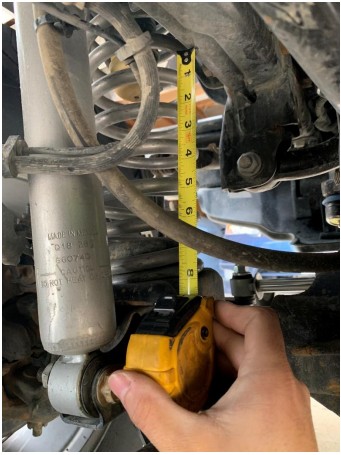
NOTE: If your measurement is less than 5 ½ inches we do not recommend these brackets. If your measurement is
greater than 9 inches adjustable control arms may be required to achieve the proper caster angle.
2. If your measurement is from 5 ½ to 6 ½ inches you’ll install the upper control arm in the upper hole location.
3. If your measurement is from 6 ½ to 8 inches you’ll install the upper control arm in the middle hole location.
4. If your measurement is from 8 to 9 inches you’ll install the upper control arm in the lower hole location.
5. You can now proceed to part A to finish the installation of the drop brackets!
Installation Instructions Written by ExtremeTerrain Customer Paul Smyrski 03/10/2019
