FREE 1 to 3-Day Delivery on Orders $149+ Details

How to Install a Rugged Ridge A-Pillar Light Mount Kit on your 2007-2017 Jeep Wrangler

Shop Parts in this Guide
NOTICE LED lights not included. This JK lightbar is compatible with many 13.5 inch LED designs, however, we recommend using Rugged Ridge® LED SKU: 15209.11 for best results
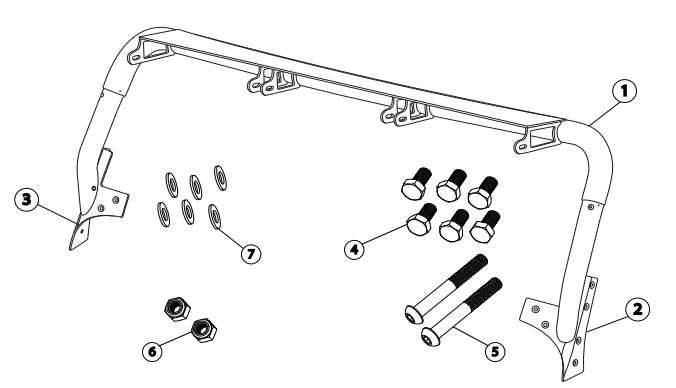
| Components | Qty |
|---|---|
| 1. Crossbar | 1 |
| 2. Bracket LH | 1 |
| 3. Bracket RH | 1 |
| Hardware | Qty |
|---|---|
| 4. Hex Head Cap Screw M8x16 | 6 |
| 5. Button Head Socket Cap Screw | 2 |
| 6. Hex Lock Nut M8 | 2 |
| 7. Washer M8 | 6 |
NOTICE
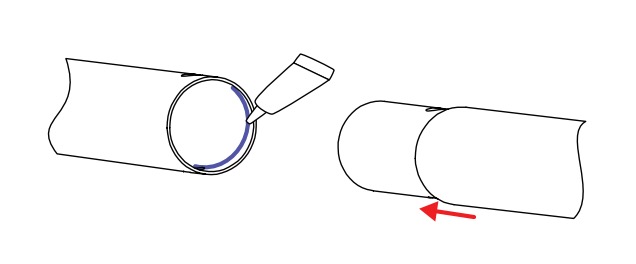
Installer is responsible for ensuring adequate silicone is used and applied correctly to all tubing joints, bolt locations and wire grommets. Apply an even bead of silicone on the inside of the female end. Insert the male end into tube. Silicone may also be used under bolt heads and nuts for additional weatherproofing. The following symbol is a reminder:
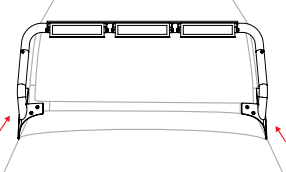
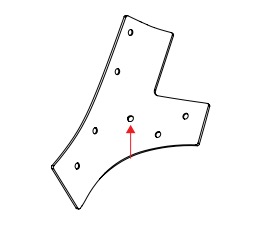
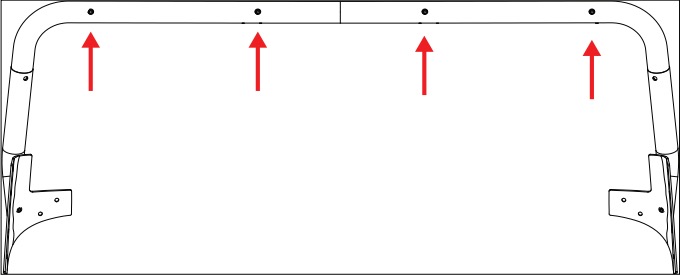
NOTICE When running wire leads during steps 1-3, use pre-drilled holes in the left windshield bracket and front crossbar, shown in red below. Use the three holes that work best with your LEDs.
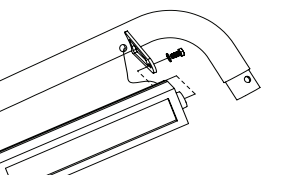
1. Attach 13.5 inch LED bars to the crossbar. M8x16mm hex bolts with washer are supplied for mounting Rugged Ridge® LEDs. Use holes in front of crossbar and underside of LH widshield bracket for routing wires.
NOTICE: If other manufacturers’ lights are used, additonal hardware may be required.
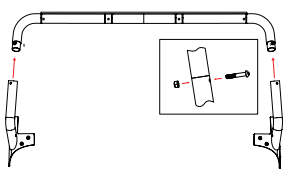
2. Attach left and right brackets to front crossbar with supplied M10x60 bolt and nylon lock nut. Do not tighten completely to allow for adjustment.
3. Remove the factory left and right windshield brackets. Retain factory hardware for later use.
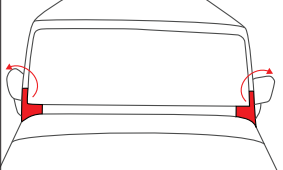
4. Install front crossbar assembly to vehicle using factory hardware. Adjust fitment if necessary and securely tighten all bolts.
CAUTION: Use of tape on the a-piillar, cowl, and fender is recommended to prevent damage to vehicle’s finish.
Two people are also recommended for this step: One on each side.