FREE 1 to 3-Day Delivery on Orders $149+ Details

How to Install a Rough Country Gas Tank Skid Plate on your 2007-2014 Wrangler JK 2 Door

Shop Parts in this Guide
Thank you for choosing Rough Country for your suspension needs.
Rough Country recommends a certified technician install this system. In addition to these instructions, professional knowledge of disassemble/reassembly procedures as well as post installation checks must be known. Attempts to install this system without this knowledge and expertise may jeopardize the integrity and/or operating safety of the vehicle.
Please read instructions before beginning installation. Check the kit hardware against the parts list. Be sure you have all needed parts and know where they go. Also please review tools needed list and make sure you have needed tools.
PRODUCT USE INFORMATION
As a general rule, the taller a vehicle is, the easier it will roll. Seat belts and shoulder harnesses should be worn at all times. Avoid situations where a side rollover may occur. Generally, braking performance and capability are decreased when larger/heavier tires and wheels are used. Take this into consideration while driving. Do not add, alter, or fabricate any factory or after-market parts to increase vehicle height over the intended height of the Rough Country product purchased. Mixing component brands is not recommended. Rough Country makes no claims regarding lifting devices and excludes any and all implied claims. We will not be responsible for any product that is altered. If question exist we will be happy to answer any questions concerning the design, function, and correct use of our products by calling 1-800-222-7023.
NOTICE TO DEALER AND VEHICLE OWNER
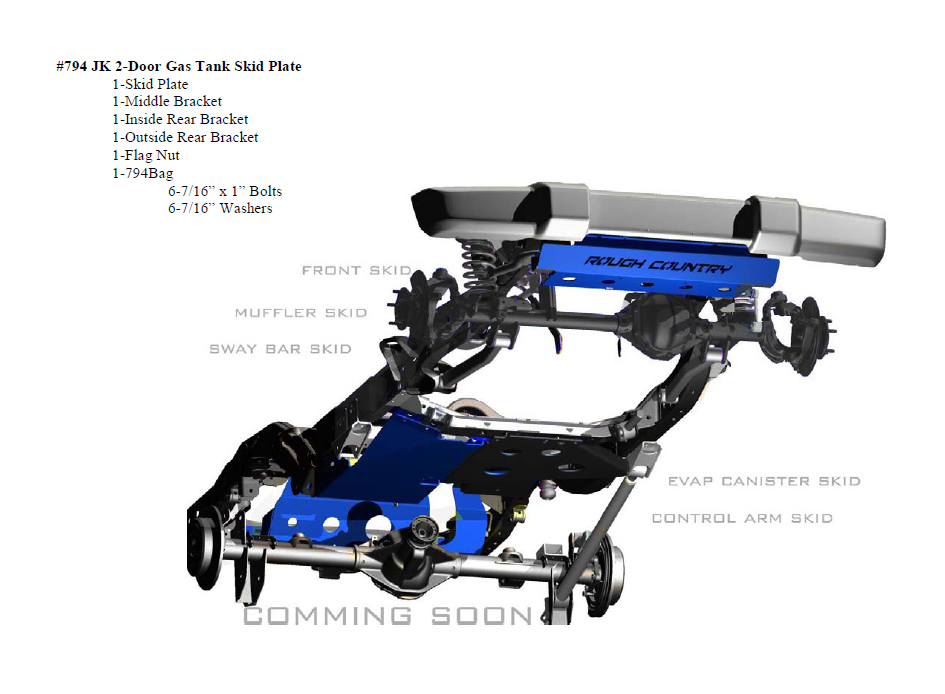
Any vehicle equipped with any Rough Country product should have a “Warning to Driver” decal installed on the inside of the windshield or on the vehicle’s dash. The decal should act as a constant reminder for whoever is operating the vehicle of its unique handling characteristics. INSTALLING DEALER - it is your responsibility to install the warning decal and forward these installation instructions on to the vehicle owner for review. These instructions should be kept in the vehicle for its service life. This JK 2-door gas tank skid plate is designed to work with any 2-door JK with stock suspension, a short arm lift kit, or a Rough Country long-arm lift kit.
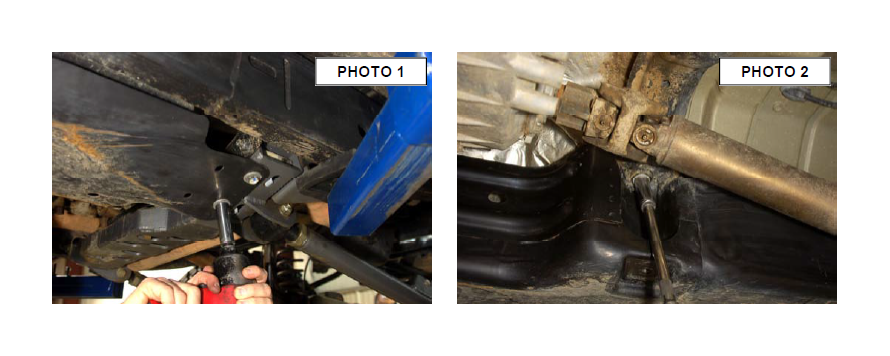
1. Remove the 2 bolts in the front of the gas tank skid plate 18mm. See Photo 1.
2. Remove the bolt from the side of the frame 18mm. See Photo 2.
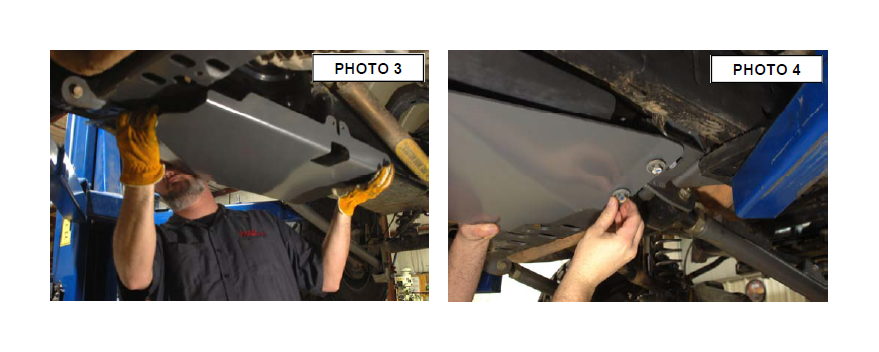
3. Remove the bolt from the inside of the of the gas tank pocket 18mm and remove the factory skid plate.
4. Raise the new Rough Country skid plate up and support with jack stands. See Photo
3. Install the 2 bolts in the front of the skid plate and the stock bolt in the outer frame mount. See Photo 4.
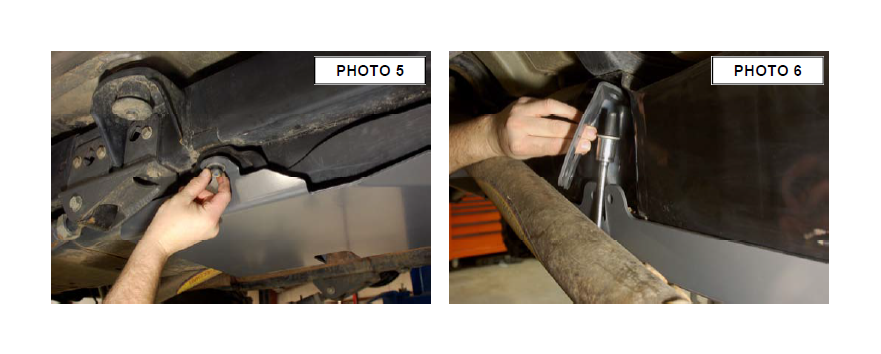
5. Insert the stock bolt on the frame side of the skid plate and tighten with a 18mm socket. See Photo 5.
6. Remove the inside gas tank bolt from the jeep with a 18mm socket and install the correct mounting bracket. Hand tighten stock bolt. See Photo 6.
7. Use two of the supplied 7/16” x 1” bolts and washers to attach the skid plate to the bracket. Tighten with a 5/8” socket. Tighten the factory bolt holding the bracket with a 18mm socket. See Photo 7.
8. Remove the rear inner factory bolt using a 18mm socket. See Photo 8.

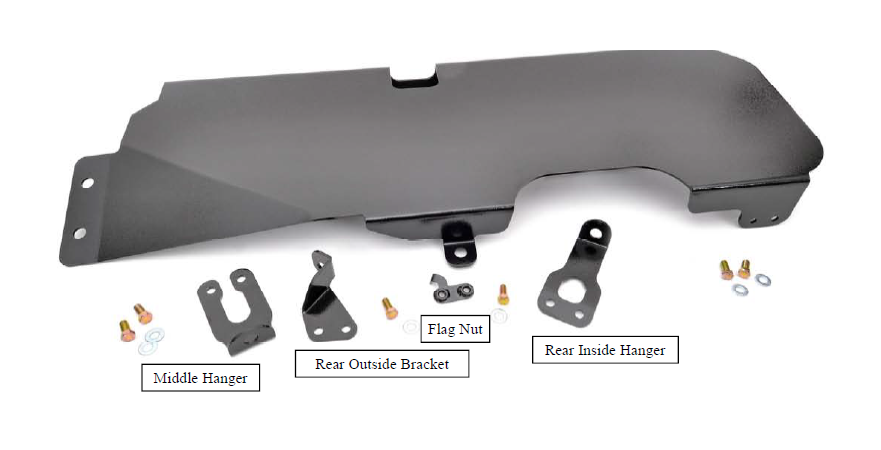
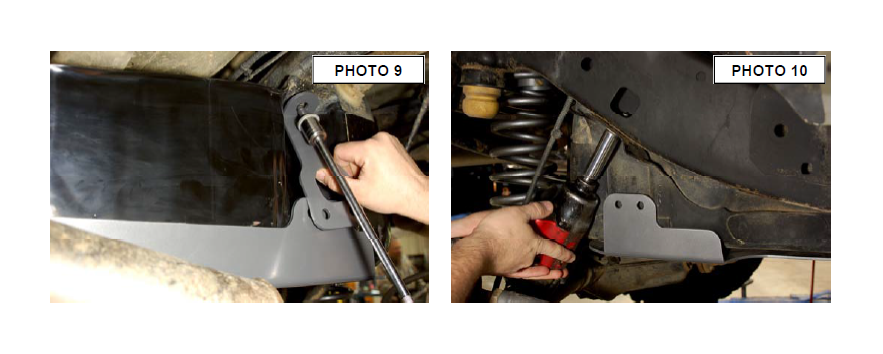
9. Locate the correct mounting bracket and insert factory bolt in the top of the bracket. Hand tighten. Use two of the supplied 7/16” x 1” bolts and washers to attach the skid plate to the bracket. Tighten with a 5/8” socket. Tighten the factory bolt holding the
bracket with a 18mm socket. See Photo 9.
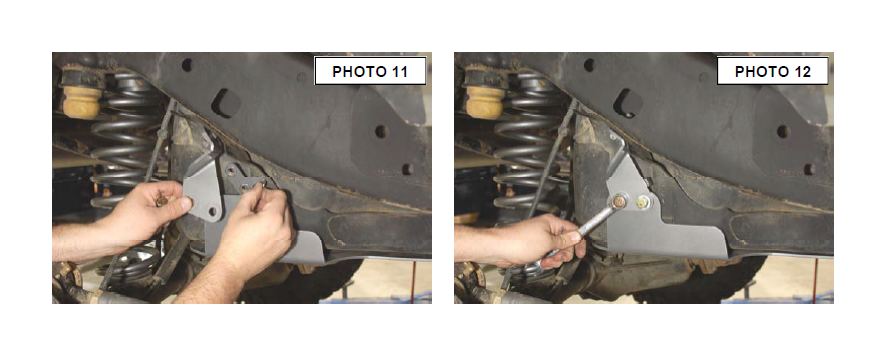
10. Remove the rear outside factory bolt using a 18mm socket. See Photo 10.
11. Locate the rear outside mounting bracket and insert factory bolt in the top of the bracket. Hand tighten. See Photo 11.
12. Place the flag nut on the back side of the skid plate and insert the two supplied 7/16” x 1” bolts and washers. See Photo 11 & 12. Tighten with a 5/8” socket. Tighten the factory bolt holding the bracket with a 18mm socket.