 FREE 1 to 3-Day Delivery on Orders $149+ Details

How to Install Rough Country Front Quick Disconnects on your 1997-2006 Wrangler
Tools Required
- 7/16" Socket / Wrench
- 9/16" Socket / Wrench
- 3/4" Socket / Wrench
- 3/4" Socket / Wrench
- 5/8" Socket / Wrench

Shop Parts in this Guide
Thank you for choosing Rough Country for your suspension needs.
Rough Country recommends a certified technician installs this system. In addition to these instructions, professional knowledge of disassemble/reassembly procedures as well as post installation checks must be known. Attempts to install this system without this knowledge and expertise may jeopardize the integrity and/or operating safety of the vehicle.
Please read all the instructions before beginning the installation. Check the kit hardware against the kit contents. Be sure you have all the needed parts and understand where they go. Also please review the tools needed list and make sure you have needed tools. If you have any questions please call us at 800-222-7023..
NOTICE TO DEALER AND VECHICLE OWNER
Any vehicle equipped with any Rough country product must have the “Warning to Driver” decal installed on the sun visor or dash. The decal is to act as a constant reminder for whoever is operating the vehicle of its unique handling characteristics. INSTALLING DEALER—It is your responsibility to install the warning decal and to forward these installation instructions on to the vehicle owner for review and to be kept in the vehicle for its service life.
INSTALLATION INSTRUCTIONS
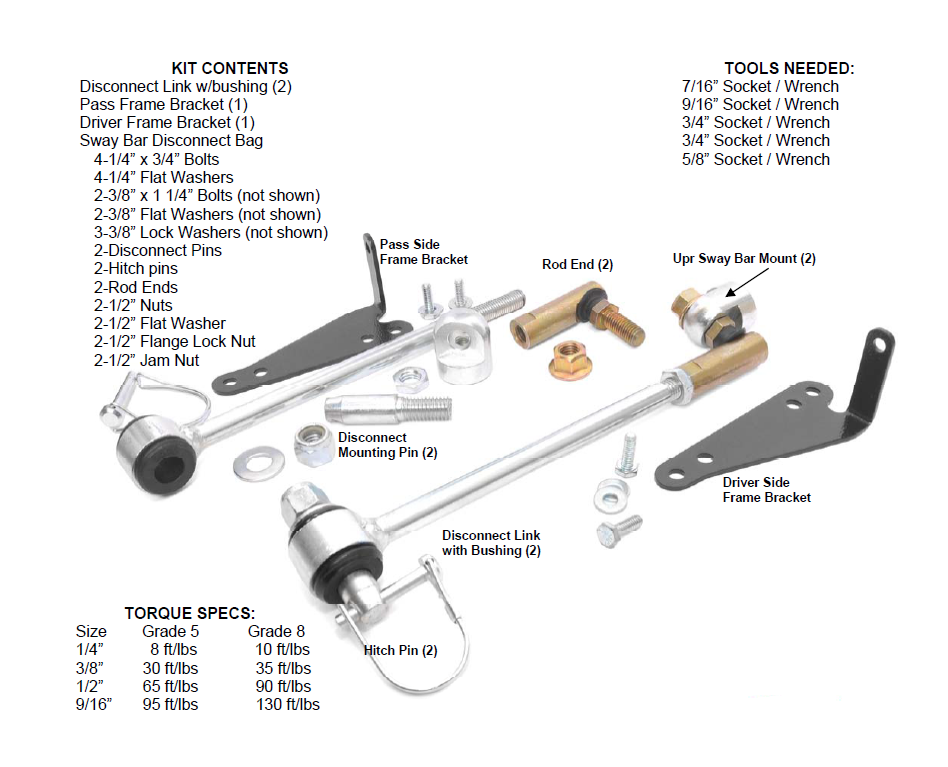
1. Install the upper sway bar mount on the top of front sway bar where the stock link was secured, using the supplied 3/8” x 1.25” bolt, lock washer, and washer. Tighten using a 9/16” wrench making sure the mount is straight. Note that washer will conform to sway bar surface and be pulled in. See Photo 1.
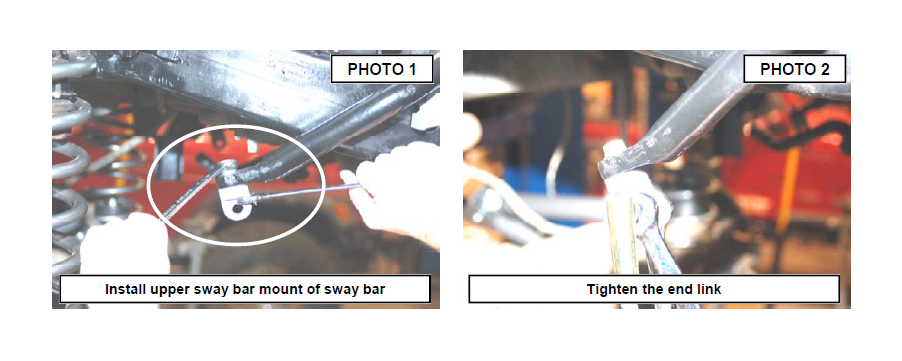
2. Assemble the sway bar link with the link body, the jam nut and rod end Adjust the sway bar to a length of 11 1/4” from top to bottom. Tighten the jam nut against the rod end using a 5/8” & 3/4” wrench.
3. Install the link on the upper sway bar mount with the supplied 1/2” flange lock nut as shown in Photo 2. Tighten using a 5/8” & 3/4” wrench.
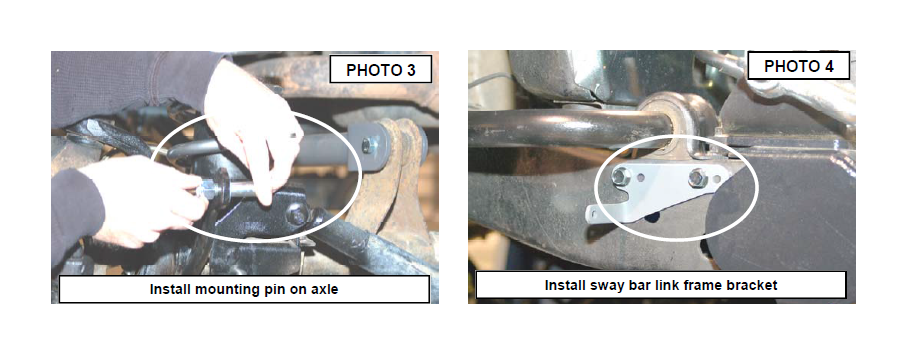
4. Install the supplied pin on the axle as shown in Photo 3. Tighten using a 3/4” wrench.
5. Remove the bolts securing the plastic shroud to the frame and install the driver and passenger side frame mount brackets in the holes shown for the 4” disconnect kit using the factory holes and the supplied 1/4” x 3/4” bolts & washers. See Photo 4. Tighten using a 7/16” wrench, be careful to not over tighten. Please note there is a passenger and driver side bracket.
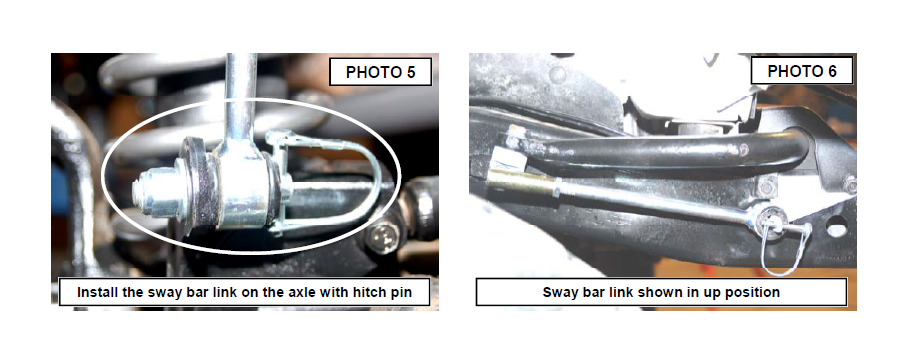
6. Swing the sway bar link down and install on the lower axle mounting pin. Install the disconnect pin. See Photo 5. It may be necessary to install the link on the axle after the vehicle is on the ground.
7. When disconnecting the sway bar, remove the sway bar link and place it on the frame mount as shown in Photo 6 to keep the sway bar link from interfering with front end components.
POST INSTALLATION
• All components must be retightened after 500 miles, and every three thousand miles after installation.
