Installation Time
(approx) 2 Hours
Difficulty Level:
Light to Moderate mechanical skill required.
FREE 2 or 3-Day Delivery on 10,000+ Items. Details
$159.99 (pair)
FREE ShippingSaved - View your saved items
We're sorry. We couldn't save this product at this time.
or use
Get a $30 Prepaid Visa Card!
Merideth: If you need to stay more noticeable on the street or just want to up the style of your 2007 to 2018 JK Wrangler, these RedRock Roof-mounted LED Tail Light spoilers will be a mount that you'll want to look at. Now, these will be a great addition for the JK owner who wants some extra LED lighting on the back to make you more obvious on the road, especially if you have any large cargo on the back that may obstruct your other lighting. Now, the lighting here will have a dynamic approach when it comes to the style and compliment the hard top quite nicely if you prefer more of a unique and non-traditional approach when it comes to third brake lighting.This kit will feature two wide, yet low profile spoilers that'll mount to either side of the hard top and look pretty inconspicuous with a fully black construction and similar body lines on the top to the hard top. Now, when you hit the brake pedal, a large contoured strip of bright LEDs will illuminate notifying other drivers more than just the factory third brake light, especially if it's covered from a larger tire or rear-mounted cargo. Now, I think one of the most notable features though is the location of the lighting, which compared to other third brake lights being mounted high up will only make you more noticeable when it comes to safety.Now, these lights and the housings will be strong able to hold up to whatever situation no matter where you take your Jeep made of a tough AVS plastic material. Now, the lenses on the front will be made of an automotive-grade plastic and will have a fully sealed construction to protect the LEDs from any dust or water that they could come in contact with. Now, I think the best of all is that these are going to be incredibly easy to install with no modification or additional wiring thanks to the auto-grade adhesive on the bottom and the included brackets to mount to the hard top as well as the fully plug-and-play wiring harnesses.Now, getting into prices will come in at about $200 for the entire kit. And I think for what's included in the build that that's a very fair price point. Now, what I like most about this set is that it's super eye-catching, which helps in the safety and style department. And it will also be plug-and-play with no modification required. So, this is an easy mod that anybody could do. Now, when looking at other third brake light solutions, a lot of them will usually relocate the factory option, elevate it over the spare. Or, they may be integrated into the spare, which could potentially be blocked, again, if you have that large cargo on the back. Now, I think if you like the extra style points that you're getting in addition to the functionality that this kit brings to the table, then this is gonna be a good set for you.Now, install will be straightforward, but I am still gonna give it a light two out of three wrenches on the difficulty meter just because you are gonna be routing some wires here. And it may take you a little bit of time, roughly two hours to get the job done with some basic hand tools. However, that is going to wrap it up for me. Let's go ahead and head over to the shop and check out a detailed breakdown of what the install looks step-by-step right now.Man: Tools used for this install, a Phillips-head screwdriver, a 5-millimeter Allen wrench, a plastic pry tool, a 10-millimeter socket, and a 3/8 electric ratchet. Hey, guys. I'm gonna show you how to install a spoiler here on our Wrangler. So let's get started. So the first thing we're gonna do before we try to install our lights on our vehicle is we have some brackets here and some Phillips-head screws that we're going to have to use. They're gonna be in this slide here, that's what's gonna hold it in place. So, we have two of them, one on this one, and one on this one. I'm gonna show you how to put these on right now.So, what we're gonna do is take this bracket right here, which is supplied in the kit. We'll stick it down in place and get it started. And they give you these Phillips-heads with a locking washer and a flat washer. I'm gonna start these. Same with this one here. And now, I'm gonna take my Phillips screwdriver, tighten them up. And now, you're gonna wanna repeat that same process on the other light. Now, we have our brackets on our light. Now, what we're gonna do is remove this plastic cover. I'm gonna take my plastic pry tool here. Pop the cover off.So, now we're gonna remove these two 10-millimeters right here. Now, we're only gonna do one side at a time. That way, our glass doesn't really move. I'm gonna take my 10-millimeter on my 3/8 gun, remove these. Okay. So, now, we're gonna install this bracket. I'm gonna take it like that and get it in place. Put in our two 10-millimeters that we took out previously. Get these started. And then I'm gonna take my 10-millimeter again, my gun, and run them in. And now, you're gonna wanna repeat this procedure on the opposite side.So, now that we have our brackets on, we're gonna install our light. And as you can see, we have double-sided tape here. You're gonna want to remove yours. We're not because we're gonna be removing this. In the kit, they give us some adhesive promoter. And what you're gonna wanna do with that is this whole upper area here, you're gonna want to clean with that and make sure this is all dirt free. You get all the grease off of it. And then what you're going to do after you do all that, you remove your double-sided tape.You're gonna put your light in place like this and get this so it's ready to bolt down. And you're gonna run your cord down like this for now. And then what we're gonna do is we're gonna start our two five-millimeter Allen-head bolts here and get them started. And you're just gonna wanna push down as hard as you can. I'm gonna take my five-millimeter Allen-head wrench here, and I'm going to tighten these up. And then you're gonna want to push down all along the top of it to make sure that the double-sided tape sticks and holds it in place.So, now we're gonna install our cover back in place. And now, you're gonna want to repeat this whole install procedure on the opposite side. So, now, I opened our back tailgate up. And what I'm gonna do is lift up our glass here and feed our wire down behind here. I'm gonna let this open up and reach up in here, grab our wire, and pull it down through. So, now, what you're gonna do is I'm just gonna pull a rubber here out a little bit like so. And I'm gonna get a wire back behind it and run it along the back here. And we'll fish it down. I'm gonna do the same back here. Just pull it out a little bit like that and tuck our wire down inside.And then when we get down here, we're just gonna lift and move it out of the way and feed this wire inside the vehicle. Like I said, you gotta just pull the rubber out a little bit like that and it'll go right behind it. And now, we have it inside the vehicle. I'm gonna show you how to drop it down into where our tail light is. So, now, what we're gonna do is I'm gonna remove my tail light. That way, I can see when I drop my wire down inside. And take my Phillips screwdriver here, remove these two screws.And on the bottom one here, I'm just gonna take these two out. Once we get those loose, just move our tail light outta the way away. I'm going to disconnect the electrical connector here and pop it outta place. Now, we'll drop our wire down inside. So, now, what we're gonna do is take this wire. And you're gonna see these other wires here that drop down inside here. There's a plug that's down in here. We're gonna take this and, as you can see, fish it down in. And it'll go down into the socket. And then we're just gonna pull it through the tail light. So, now, we're gonna pull that little harness that we just fed down through there. We're gonna get all our wire pulled through and drop the excess wire down back inside. Leave this part hanging out.Now, in the kit, they give us this adapter harness here. We're just gonna plug this in like that. And as you can see, this is the connector for the roof light right there. Plug that one in, plug that. Tuck these back inside. And we're going to take our factory tail light, plug that in, get everything back inside. Reinstall our light. Put in our two Phillips screws. And I'll run these in with my Phillips screwdriver here. And now that we have those two tight, you're gonna wanna repeat this whole install procedure on the opposite side. That wraps up this review and install of our RedRock Roof-mounted LED Tail Light Spoiler for 7 to 18 Jeep Wrangler JKs. Thanks for watching. And for all things Wrangler, keep it right here at extremeterrain.com.
Subscribe to our YouTube Channel
Features, Description, Reviews, Q&A, Specs & Installation
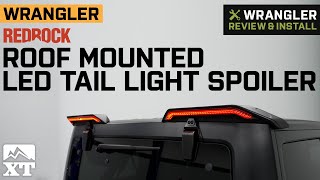
Radical Lighting for Improved Driving Safety. Improve your Wrangler JK’s safety factor when you install this RedRock 4x4 Roof Mounted LED Tail Light Spoiler. This spoiler kit is designed to generate vivid red light out of its high-quality LED light chips. This factor helps enhance rear-facing conspicuity, thus helping improve safety whether on or off-road. What’s more, the assemblies included in this kit feature a radical wing spoiler style, giving your rear-end an equally bold style accent that’s sure to turn heads.
Vivid LED Lighting. This kit utilizes high-quality LED chips arranged in a single row, offering a more linear response when activated. Moreover, these chips are engineered to generate red-colored light that’s similar in hue and intensity to your Jeep’s third brake light. This helps maintain consistent illumination which helps with conspicuity.
Tough Build Quality. This kit’s included lenses are molded from scratch-resistant clear automotive-grade plastic, offering exceptional resistance to deterioration and fading. The housings for their part are molded from high-quality ABS plastic, making them extremely tough. The lenses and housings are then fully sealed for reliable lighting performance in any weather. Finally, this kit’s components are available in black to give your ride a slick look.
Straightforward Install Procedure. This tail light spoiler is designed to install into factory locations on your Wrangler using the included hardware. No additional drilling or other modifications are needed in most applications although you will need to perform some wiring work to properly power the light up. Also, installation is completed using just standard hand tools.
Application. The RedRock 4x4 Roof Mounted LED Tail Light Spoiler fits all 2007 to 2018 Jeep Wrangler JK models.
Fitment:
RedRock J157931
CA Residents: WARNING: Cancer and Reproductive Harm - www.P65Warnings.ca.gov
Installation Info
Installation Time
(approx) 2 Hours
Difficulty Level:
Light to Moderate mechanical skill required.
What's in the Box
10 More Questions