 FREE 1 to 3-Day Delivery on Orders $149+ Details

How to Install RedRock 4x4 HD Tailgate Reinforcement Panel (18-19 Jeep Wrangler JL) on your Jeep Wrangler
Installation Time
60 minutes
Tools Required
- 3/8 Ratchet
- 13mm Socket
- 14mm Socket
- T-30 Torx Bit
- T-55 Torx Bit
- Small Extension
- Included Hex Wrench

Shop Parts in this Guide
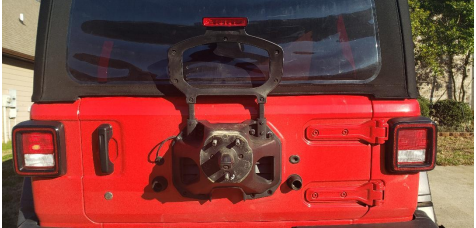
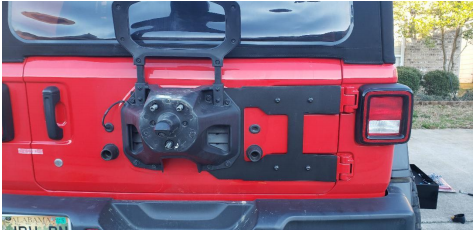
This is the tailgate before the application
Installation Instructions:
- Begin by removing your spare tire, if you haven’t already done so. To do this simply take the T-30 torx bit and remove the protective cover from the backup camera. Then remove your lug nuts (14mm for stock lugs) and slide the tire off and set aside.
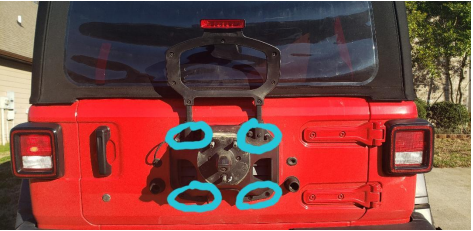
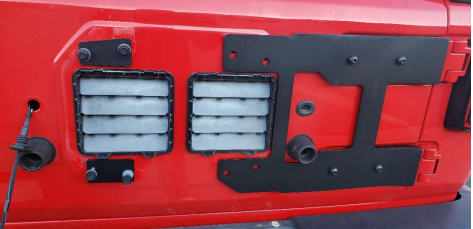
- Next, you will go around and remove the 8 (13mm) sockets that hold the tire carrier to the bumper. There are 2 bolts in each of the circles I have pictured. This is where the extension comes in handy. I would suggest leaving one of the top bolts until last so that the carrier does not fall off on you. After removing these the carrier will still be held on by the electric wires running from the inside of the jeep. This is fine to let it hang for the short period that it takes to get everything back on.
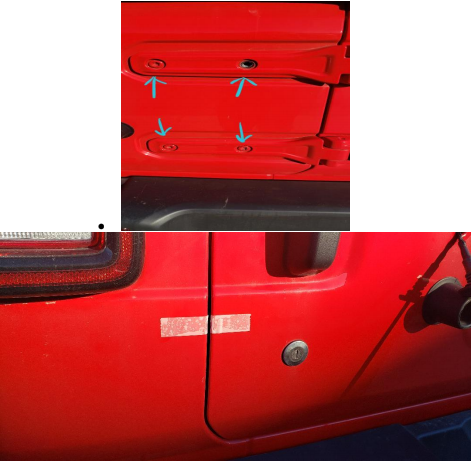
- The next step is to remove the 4 bolts on the hinges, each hinge has 2. To remove these you will need the T-55 torx bit. If you have any issues here it helps to tap the bit in a little to help loosen the factory paint that is around them. Before removing the last bolt I would use tape or something (Pictured) similar and mark where the tailgate lines up with the body so you know that it does not get out of line while installing.
- Now you will need to apply the provided cushioning to the tailgate bracket before putting it on the jeep. Simply peel the backing from the adhesive and align with the bolt holes on the rear of the bracket to stick on.
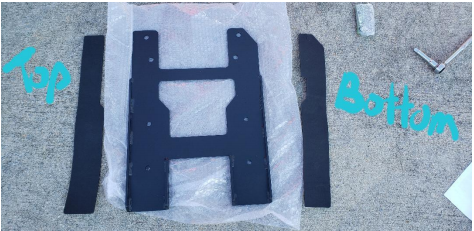
Next you will place the tailgate bracket over the factory hinges and align the holes to
insert the provided bolt through. Note there are 4 provided bolts that will be used in place of the 4 T-55 torx bolts you removed from the factory hinges, the spacers provided use the stock bolts for installation. The spacers go on the top and bottom left holes from where you removed the tire carrier. I would not tighten the hinge bolts completely until you have everything aligned just how you need them to be. These 4 bolts you the inculded hex wrench.
- Now all you need to do is out the tire holder back in place. I started with the top left spacer bolts. Simply put the 2 bolts through their holes and align the spaces with them. Then hand tighten the bolts to hold the carrier in place until you can get the other 6 bolts in place. Do the same for the bottom spacer that you did for the top. Once all 8 bolts are in place, tighten everything up tightly. I waited until last to tighten the 4 hinge bolts all the way to make sure everything was lined up correctly with the tape I had placed earlier.
- Now just put your tire back on and it is ready to go.
Installation Instructions Written by ExtremeTerrain Customer Jordan Wade 01/027/2018
