 FREE 1 to 3-Day Delivery on Orders $149+ Details

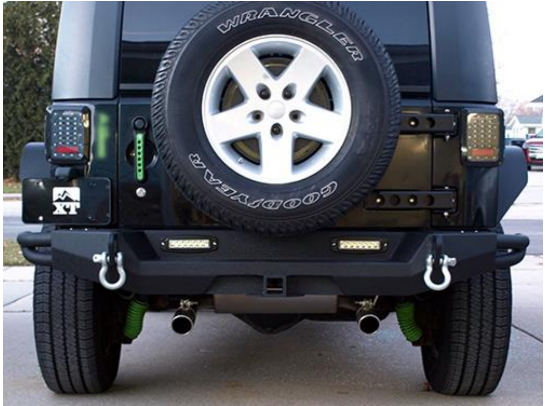
How to Install RedRock 4x4 Crawler Rear Bumper w/ LED Fog Lights (07-18 Jeep Wrangler JK) on your Jeep Wrangler
Installation Time
75 minutes
Tools Required
- Socket Wrench with 16mm and 18mm Socket
- Wrench: 19mm or Standard 3/4
- Breaker Bar (Optional)
- PB Blaster or other Rust Penetrating Spray (Optional)

Shop Parts in this Guide
Installation Notes: Because there are multiple ways the LED Lights can be connected for use. This installation guide will only cover the install of the RedRock 4x4 Rear Bumper.
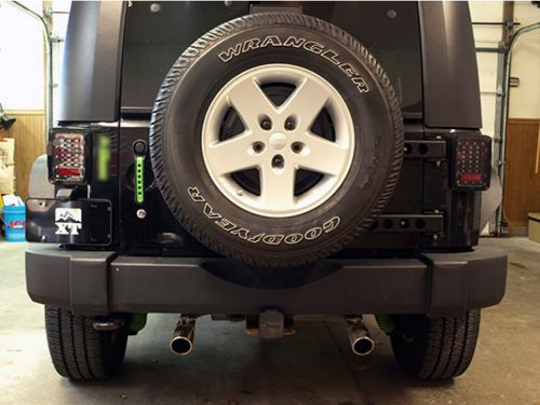
Before Install
Installation Instructions:
1. Remove to the two (2) factory 16mm bolts holding the factory rear bumper to the frame with a Socket Wrench and a 16mm socket on the driver and passenger side. Keep these bolts as they will be used to install the RedRock 4x4 Crawler Rear Bumper.
2. Remove the top 16mm bolt that is securing the middle of the factory bumper on the driver and passenger side with a Socket Wrench and a 16mm socket. Then remove the bottom 16mm bolt holding the factory bracket to the frame.
3. Remove the rear factory bumper and place to the side. Note: It is not required to remove the factory spare tire to install the RedRock 4x4 Crawler Rear Bumper.
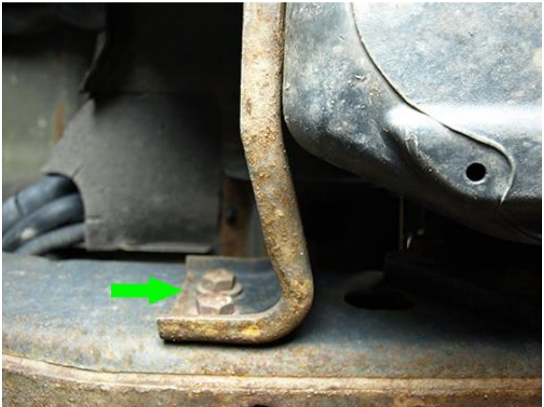
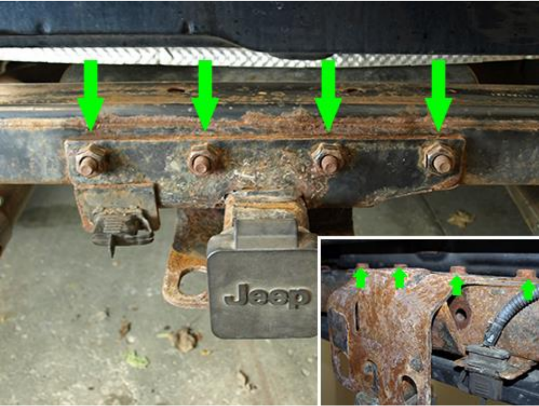
4. Remove the three (3) factory 18mm bolts holding the factory tow hook on the driver side. These bolts may require the use of a breaker bar to break them free. It’s recommended to spray these bolts with a rust penetrating spray if the bolts are extremely rusted.
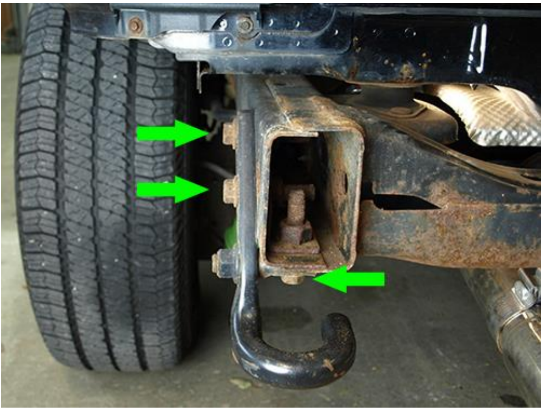
5. Factory Tow Hitch: Remove the four (4) 18mm bolts holding the factory tow hitch with a Socket Wrench and a 18mm socket. It’s recommended to spray these bolts with a rust penetrating spray if the bolts are extremely rusted.
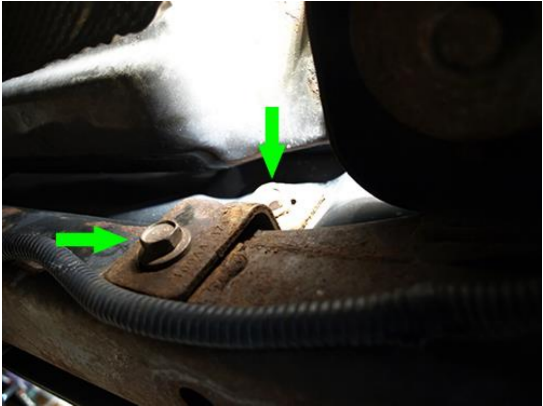
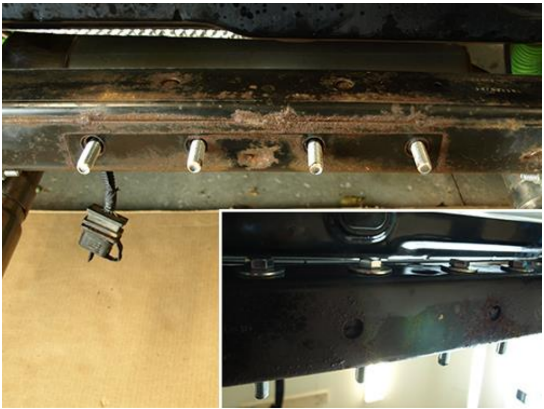
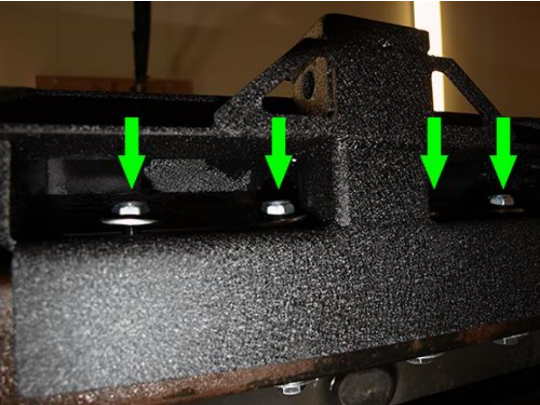
6. Place a M12 flat washer on each of the four (4) M12x110x30 bolts and then slide each bolt through the factory hole from the backside where the factory tow hitch attaches.
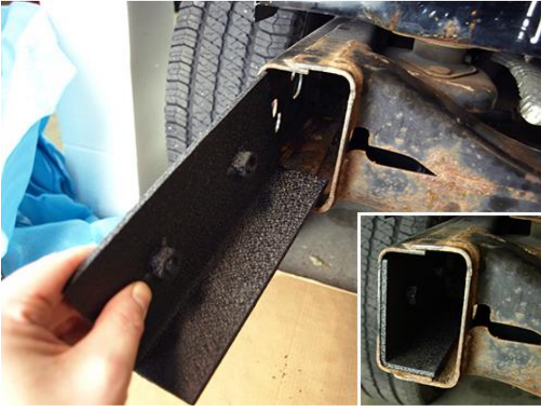
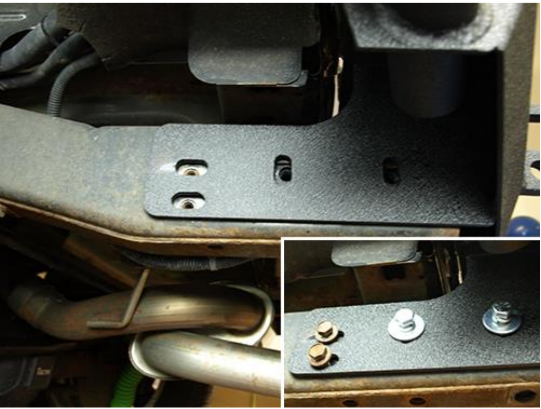
7. Slide the large L bracket into the factory frame on the driver and passenger side as shown below.
8. With the assistance of another person. Slide the bumper into place making sure the four (4) M12x110x30 bolts slide through the four (4) middle holes of the RedRock 4x4 Crawler Rear Bumper. Place a M12 flat washer, a M12 lock washer and an M12 lock nut on to each bolt. Do Not tighten the lock nuts and bolts yet.
9. Align The outer brackets of the RedRock 4x4 Crawler Rear Bumper to the frame and place the two (2) factory 16mm bolts in the back of the bracket. Then slide a M12 lock washer, a M12 flat washer onto a 18mm M12x40 bolt. Slide this bolt through the outer bracket and secure to the L bracket. Tighten all bolts and repeat the process on the other side.
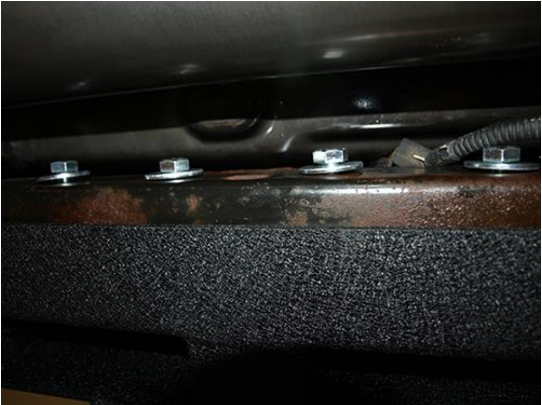
10. Tighten all four (4) middle 18mm M12x110x30 bolts with a Socket Wrench and a 18mm socket along with a 19mm (or standard 3/4) wrench on the lock nut.
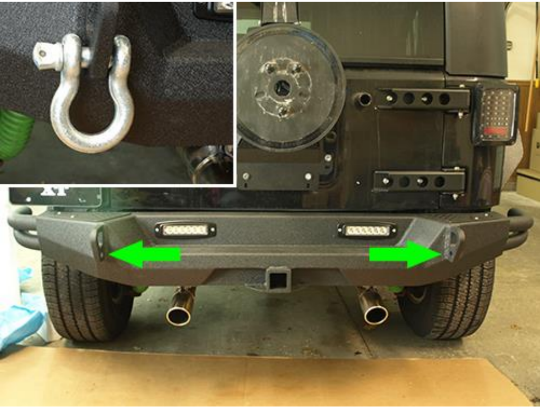
11. Unscrew and attach a D-Ring Shackle through the bottom round hole on each side of the RedRock 4x4 Crawler Rear Bumper.
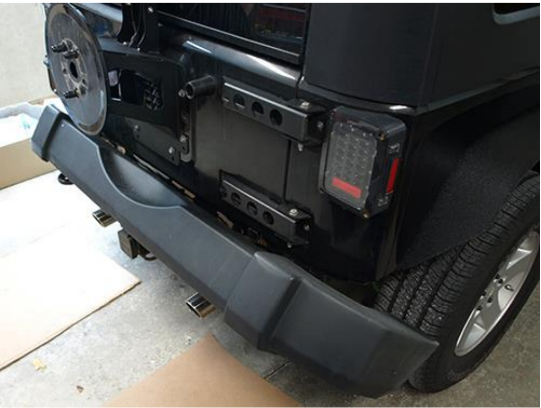
After Install
Installation Instructions Written by ExtremeTerrain Customer Brian Voelzke 11/20/2018

