 FREE 1 to 3-Day Delivery on Orders $149+ Details

How to install RedRock 4x4 7 in. Fender Flare Kit, 6 Piece on your Wrangler
Thank you for purchasing this highquality fender flare kit. This kit is designed to provide 7” of coverage for wider tire and wheel combinations on all 1987-95 YJ Wrangler Jeeps. The front flares are wider versions of the stock YJ flare, while the rear flares are an updated design based upon Jeep TJ flares. These TJ-style flares will also provide more room for taller tires.
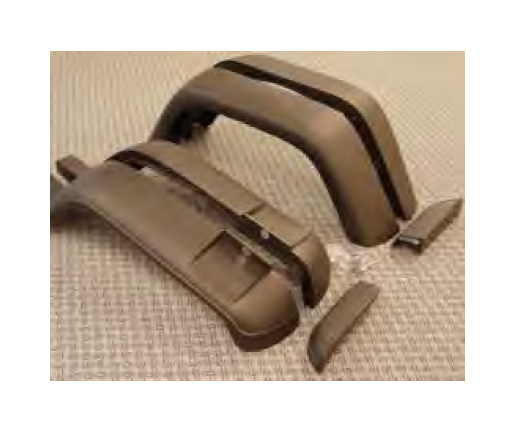
The flare kit includes: 1 each of Left and Right front flares (2 front extensions if ordered), Left and Right rear flares, and the required hardware to install the flares.
STEP ONE: Read this ENTIRE instruction sheet before starting the project. A complete understanding of the project and the required efforts will make the process easier.
STEP TWO: Remove the existing flares from the vehicle if so equipped. Although removal of the tires and wheels is not necessary it makes for easier accessibility.
STEP THREE: The front flares in this kit will use the same existing mounting holes as the OE flares and extensions. Simply bolt the new flares in place using the included hardware.
The new flare bolts in place easily and quickly utilizing the existing holes from the OE flare. This is the left front. Simply repeat the process on the right side and you’re halfway finished.
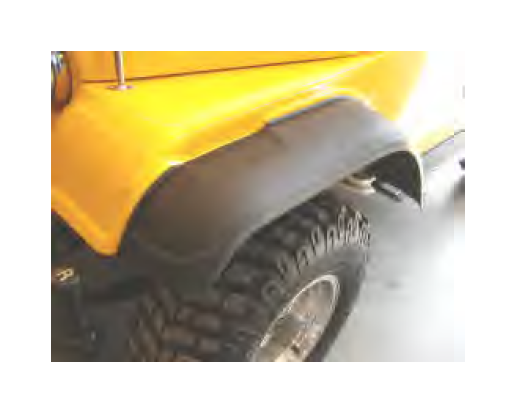
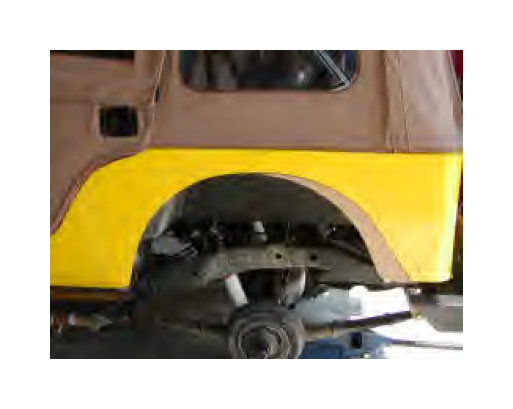
STEP FOUR: The rear flares in this kit not only provide additional coverage for wider tires, they also provide more room for taller tires. A slight amount of trimming will be necessary to provide a proper fit.
It is necessary to remove the two (2) locating studs from the rear flares. The studs are only used on TJs, and are not used on YJs. Carefully remove these studs.
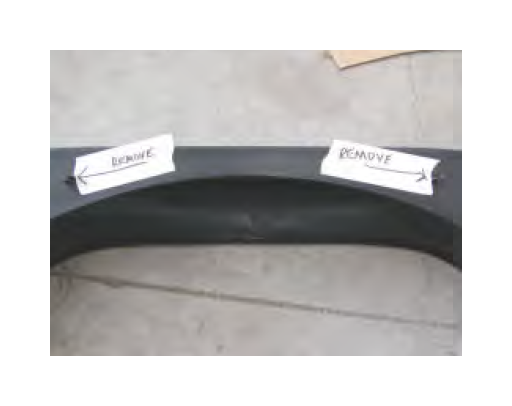
STEP FIVE: Make a cardboard pattern. This pattern will help you determine and mark the area that needs to be trimmed in order for the rear flares to fit.
This cardboard pattern provides an outline of how the YJ rear wheel opening needs to be modified. Just be sure to properly mark the front and back and the proper orientation (left and right) before making any cuts.

Only the rear half of the YJ wheel opening needs to be enlarged. Notice the large amount of added clearance the new flare will provide. Mark the area and cut as required.
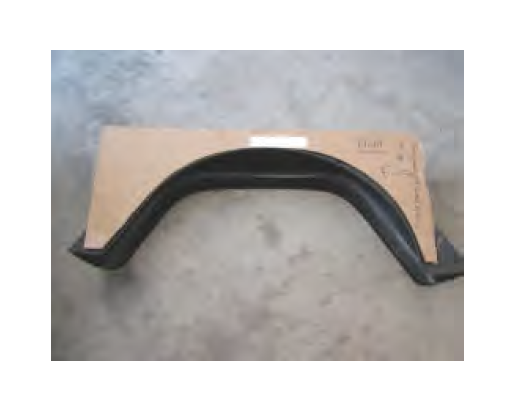
Some kits may include a pre-made template that will make the process quicker and easier. Simply install the template, trace, and make the cut.
STEP SIX: Once the opening has been modified locate the flare and mark the required mounting holes. Drill the mounting holes to the proper size and install the rear flare. Repeat for the opposite side.
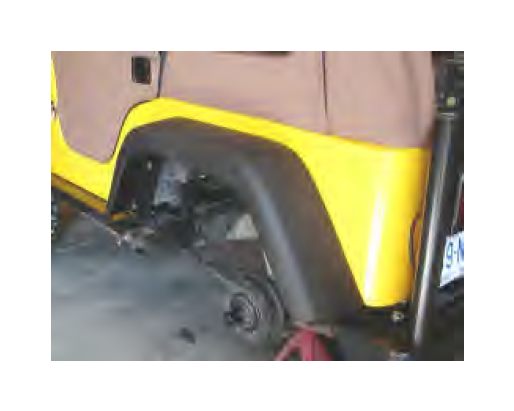
The flares fits great, look good, and provides much more room for the larger tires. Although it is not necessary to remove the tire it makes the job much easier.
