 FREE 1 to 3-Day Delivery on Orders $149+ Details

How to Install a Rugged Ridge Stereo Security Console on your 1987-1995 Jeep Wrangler YJ

Shop Parts in this Guide
IMPORTANT NOTICE:
Carefully read instructions before attempting to install this product. Rugged Ridge in no way responsible for any damage to the vehicle or personal injury that may occur during the installation or use of this product. DRILLING REQUIRED.
INCLUDED COMPONENTS
1 – Security Floor Console
1 – 5/16” x 1 ¾” Hex Head Bolt
1 – Mounting Bracket
3 – 5/16” Lock Nuts
2 – Keys
6 – 5/16” Flat Washers
1 – Neoprene Gasket
6 – 10-32 x ½” Hex Washer Phillips Screws
2 – 5/16” x 5 ½” Hex Head Bolts
4 – 10-32 Cap Nuts
2 – Seat Belt Straps
3 – 10-32 Lock Nuts
1 – Stereo Support Strap
7 – 10-32 Flat Washers
INSTALLATION INSTRUCTION
1. Apply Neoprene Gasket to the bottom of the main compartment.
2. Locate (4)-Cap Nuts, (4)-10-32 x ½” Hex Washer Phillips Screws, (4)-10-32 Flat Washers, and (2)-Seat Belt Straps. Attach Seat Belt Straps to the side of the Security Console by using the hardware listed in this step (Figure 1).
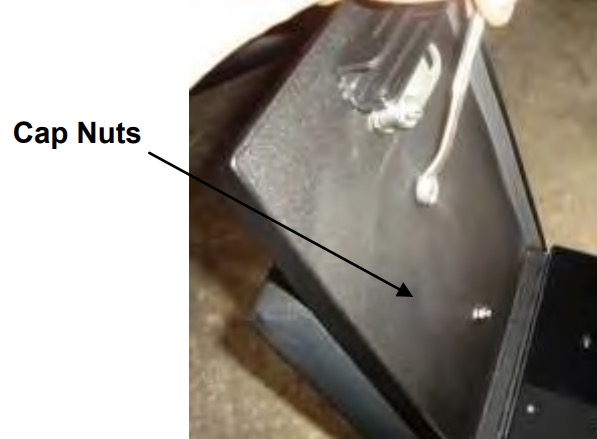
3. If not already install, locate console padded arm rest. Attach to top of security console by using (2)-Cap Nuts. If already installed skip to step #4. (Figure 2).
Figure 1
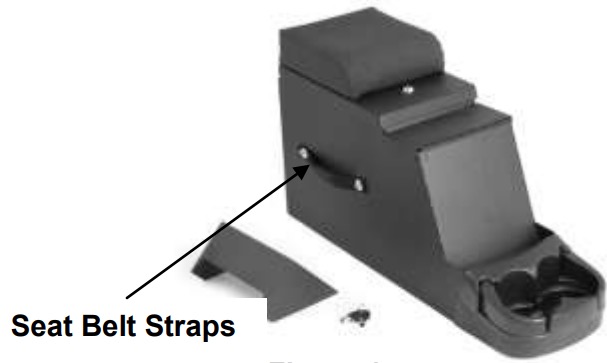
Figure 2
Locate (2)-10-32 x ½” Hex Washer Phillips Screws, (2)-10-32 Flat Washers, and (2)-10-32 Lock Nuts. Attach Mounting Bracket to the two small center holes on the bottom of the console by using the hardware listed in this step (Figure 3).
4. Position Security Floor Console between the seats and mark the floor directly under the three mounting holes on the bottom of the Console (Figure 3). NOTE: Check to make sure that the shift lever will not interfere with console.
Figure 3
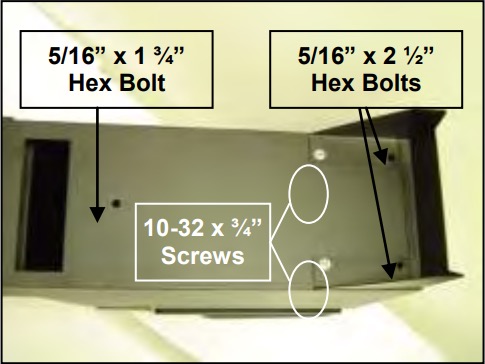
Figure 4
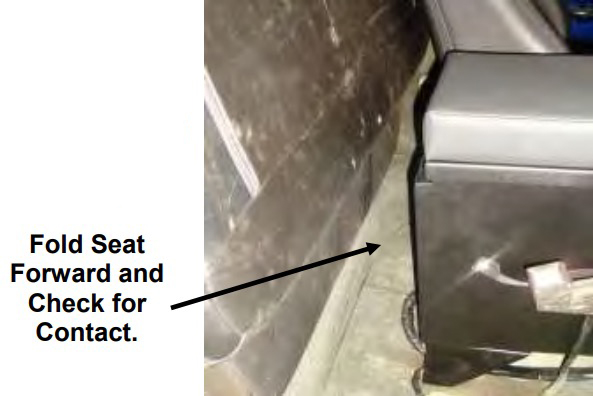
NOTE: When installing the console it is important to make sure that there is no interference with both the transmission and transfer case shift levers. Move console around until a position is found that allows the operation of these levers with no contact during use. If your vehicle is equipped with a fold and tumble rear seat also check for proper function of seat with minimum contact to the back of console. Seat should stay in upright position when folded forward. (Figures 5 – 6)
NOTE: This console has been designed to be used in a stock Jeep application. Some fitment issues may arise if installed in a vehicle that has been modified with a body lift, different transmission, different transfer case, and different aftermarket seats. It is the owner’s responsibility to modify these products if fitment issues arise. If vehicle is equipped with a body lift the transmission and transfer case shift levers may need to be bent to allow for proper fitment of console.
Figure 5
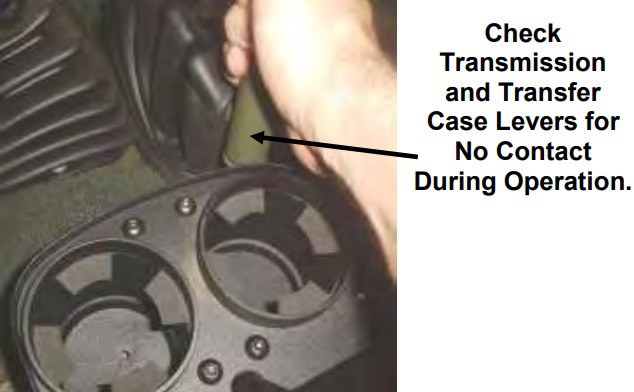
Figure 6
WARNING! Before you proceed to the next step, make sure that there is nothing under the vehicle that will be damaged by the drill bit when drilling.
WARNING! Console must be secured and tightened down before driving. Injury may result if not properly mounted.
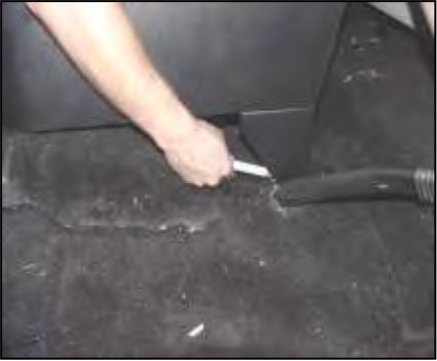
5. Remove the Security Floor Console, cut holes in the carpet where the marks are and drill a 5/16” hole on each marked spot (Figure 4). Use touch up paint or silicone sealant (not included) in any drilled holes to prevent rusting.
NOTE: If you are not installing a stereo proceed to Step 12.
NOTE: If a stereo is to be mounted in the console, an antenna extension wire will be required and is available at most stereo equipment stores.
6. Run all required stereo and speaker wires to the console mounting location. Rugged Ridge recommends running wires in a protective wire loom and using rubber grommets when passing through any drilled holes.
7. Fasten the included Stereo Support Strap to the back of the stereo.
8. Insert stereo into the front of the Security Console. Follow stereo manufactures instructions (Figure 7).
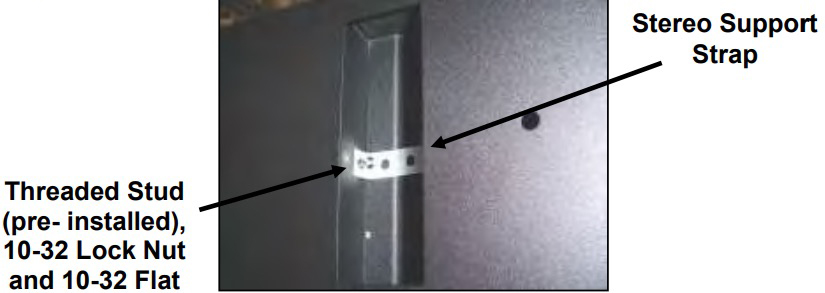
9. Locate (1)-10-32 Lock Nut, and (1)-10-32 Flat Washer. Attach the other end of the Stereo Support Strap to the threaded stud located on the bottom of the console by using the hardware listed in this step (Figure 8).
Figure 7
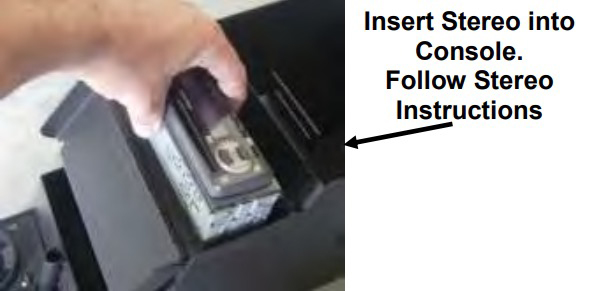
Figure 8
10. Connect all wires to the stereo according to your stereo owner’s manual.
11. Locate (2)-5/16” x 2/12” Hex Head Bolts, (4)-5/16’” Flat Washers, and (2)-5/16” Lock Nuts. Fasten down the rear of the console through rear holes in the Security Console and holes in Mounting Bracket by using the location and holes listed in step #5 (Figure 4).
12. Locate (1)-5/16 x 1 ¾” Hex Head Bolt, (2)-5/16” Flat Washers, and (1)-5/16” Lock Nut. With rear bolts in place fasten down the front of the Security Console to hole previously drilled in step #5.
Figure 9

To lock and unlock Security Console; insert key, push down and turn.

