 FREE 1 to 3-Day Delivery on Orders $149+ Details

How to Install Omix-ADA Exhaust Manifold Kit w/ Gasket (91-99 4.0L Wrangler YJ & TJ) on your Jeep Wrangler
Installation Time
2 hours
Tools Required
- 3/8 ratchet
- 3/8 3” extension
- 10 mm socket
- 13mm socket
- 9/16 socket
- Flashlight
- 9/16 box end wrench
- Pocket screw driver
- Can of brake clean recommended

Shop Parts in this Guide
Installation Instructions:
1. I recommend painting the exhaust manifold bare metal before you install it, with high heat rated spray paint to prevent rust corrosion.

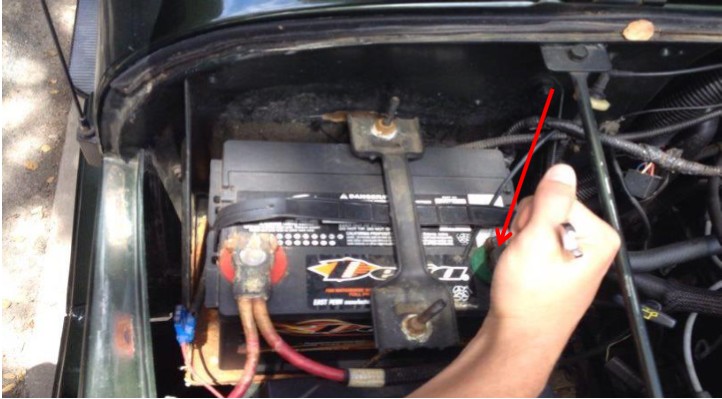
2. Disconnect negative battery cable using a 10mm box end wrench or ratchet.
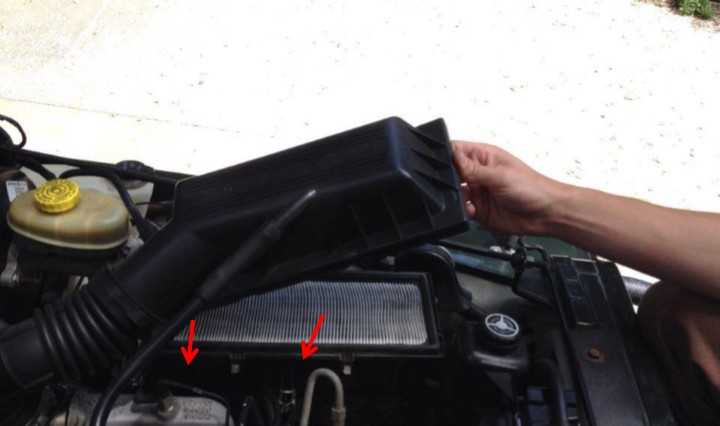
3. Remove air box lid by pulling the tabs marked by the red arrows. (There’s more than one tab on the air box)
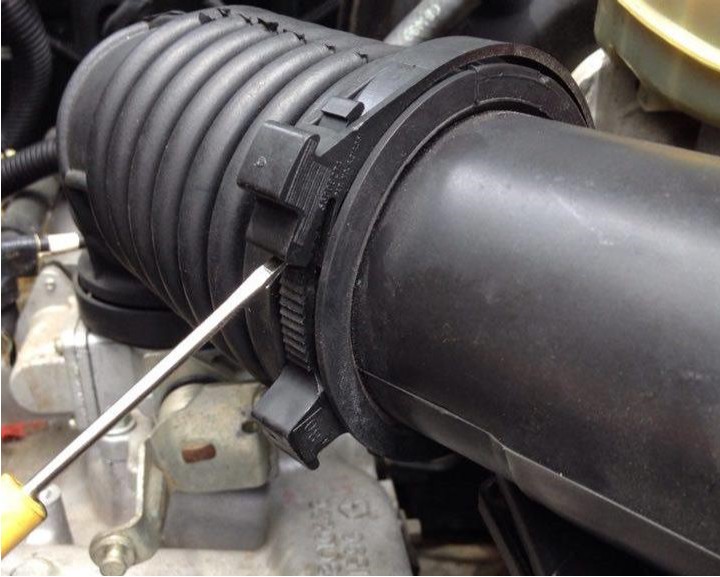
4. Use a pocket screwdriver to pry upwards to loosen air hose clamp. After it has been loosened, remove it from vehicle.
5. There are five tabs on the bottom side of the air box holding it in place. Pull down on the tabs to loosen air box container. Then remove it from the vehicle.
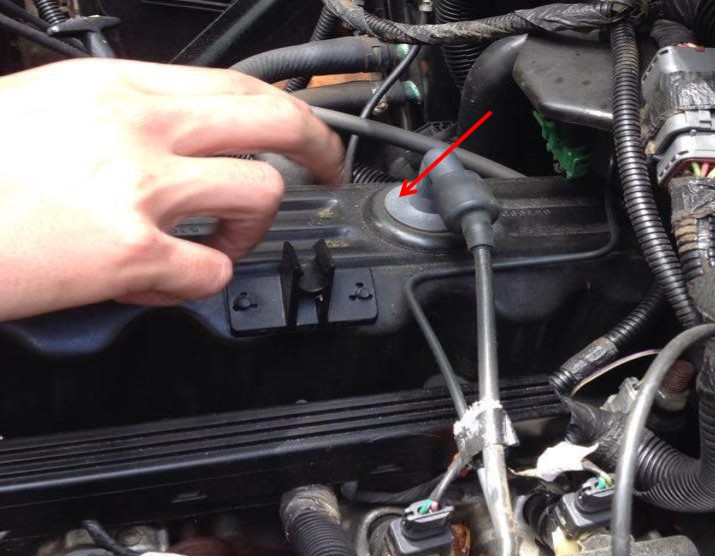
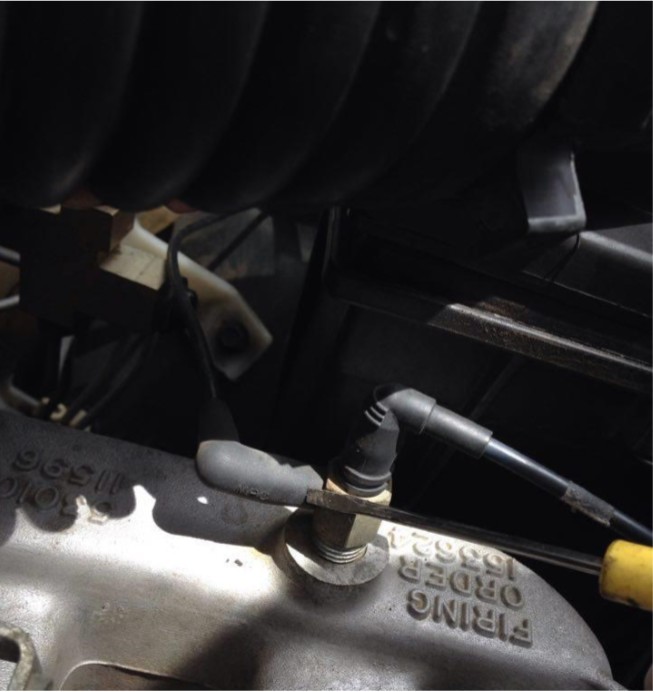
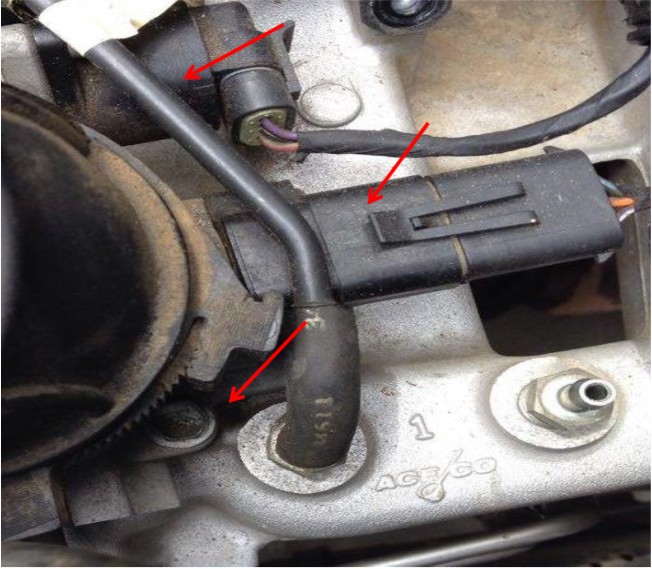
6. Remove hose marked with the red arrow from the valve cover. Twist to loosen it.
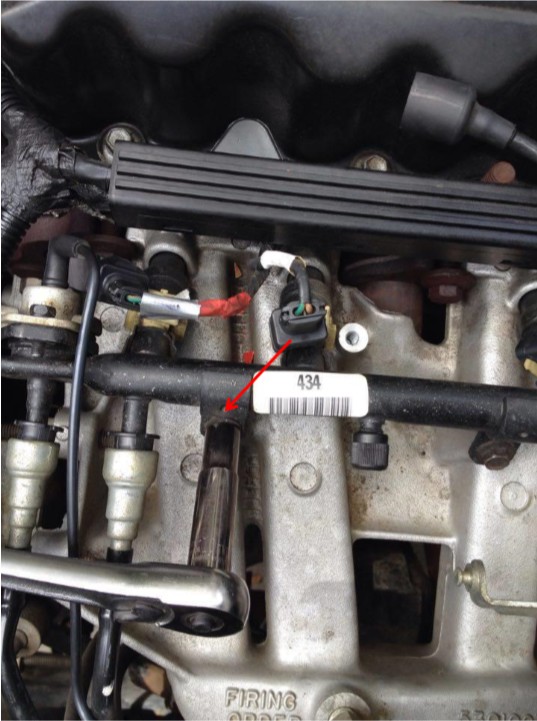
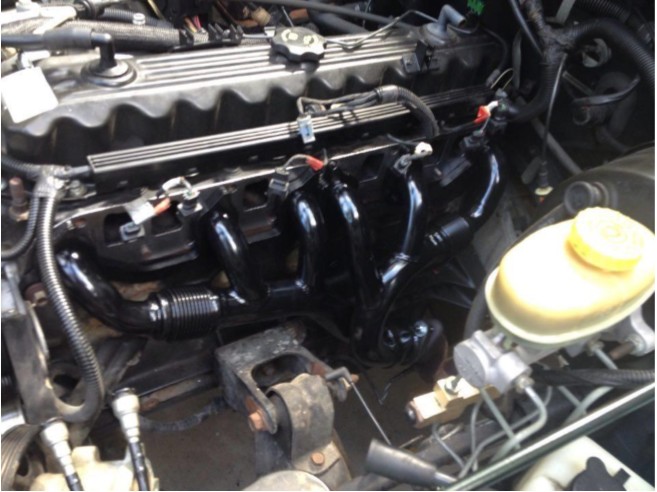
7. This area, marked with the red box is what you will be focusing on removing parts from to get to the exhaust manifold. The exhaust manifold is directly under the intake manifold. (Intake manifold marked with blue arrow).
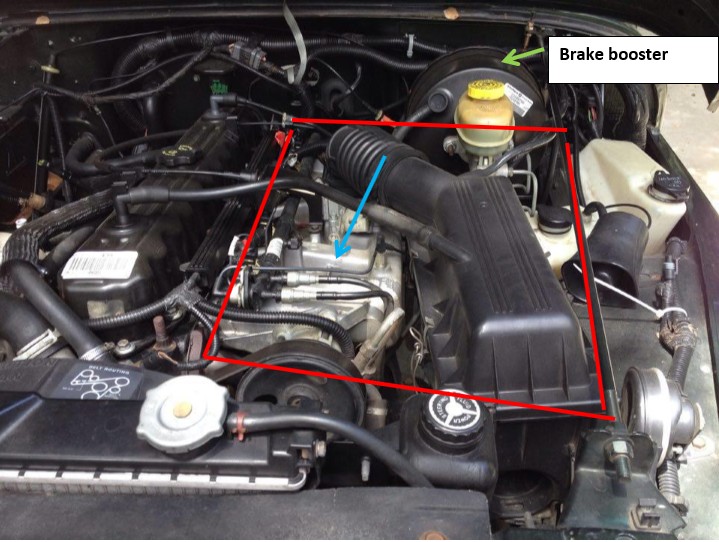
The image below is a bird’s eye view for user reference.
8. Disconnect the two rubber hoses marked with red arrows. Hoses are located on intake manifold near brake booster.
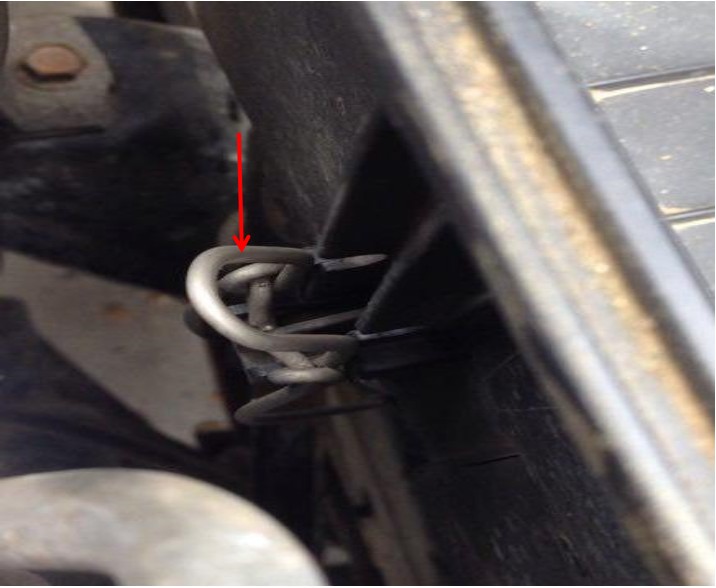
9. Disconnect throttle linkage by twisting the metal coupling.
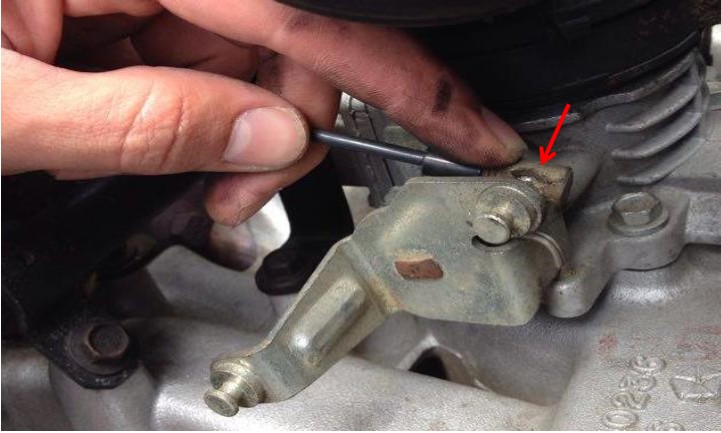
10. Use a pocket screwdriver to push inwards on either side to pry out the throttle cable clip. Once clip is removed set the cable off to the side of the engine so it’s not in the way of you working.
11. Using a 10mm socket and 3/8” ratchet, remove the three bolts securing the throttle cable bracket.

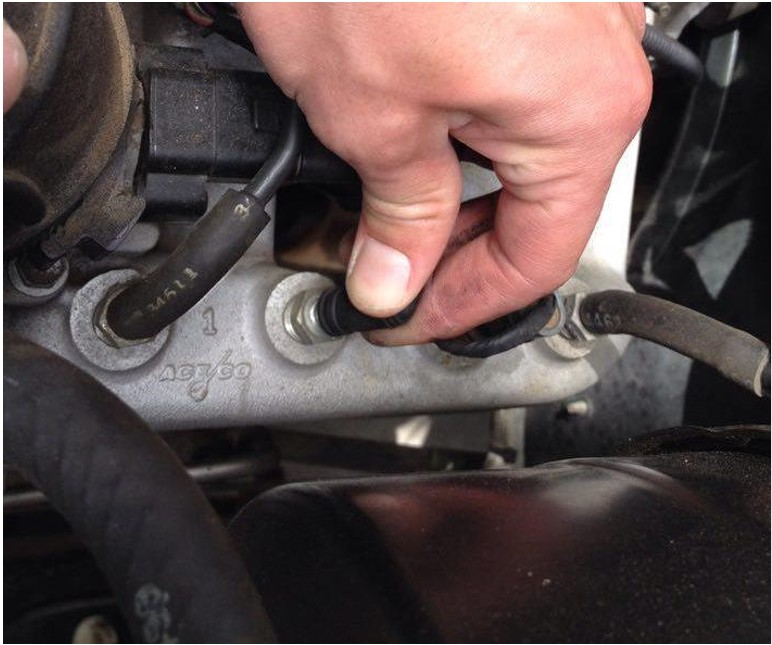
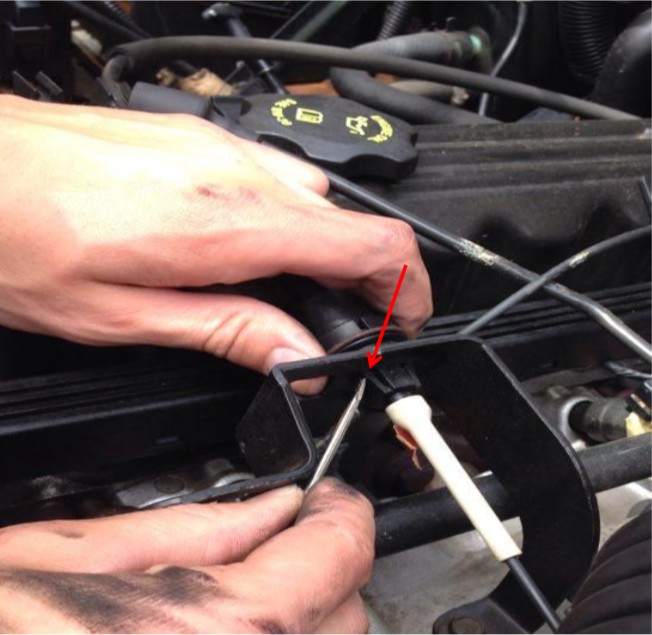
12. Label or mark each injector before you unplug each clip. I used a permanent marker.
13. Unplug the plastic clip connecting to all six injectors and also the metal clip connecting to the fuel rail.
14. Unplug the two hoses located on the intake manifold (near the air box).
15. Next using a 10mm socket and 3/8” ratchet, take off the fasteners holding the fuel rail. Once the fasteners are removed and everything disconnected from the fuel rail, grab it with a two hand grip in the center of the rail and pull upwards (you might have to pull hard). Make sure when your pulling, you pull up using the same angle that the fuel rail is pointing into the holes.
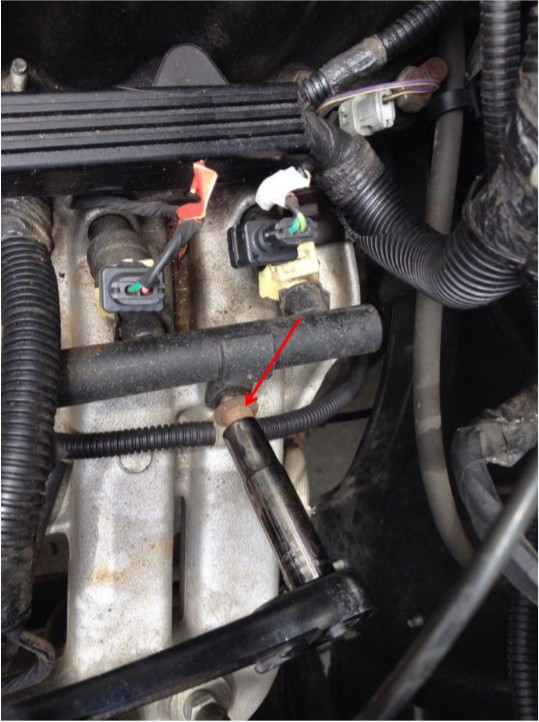
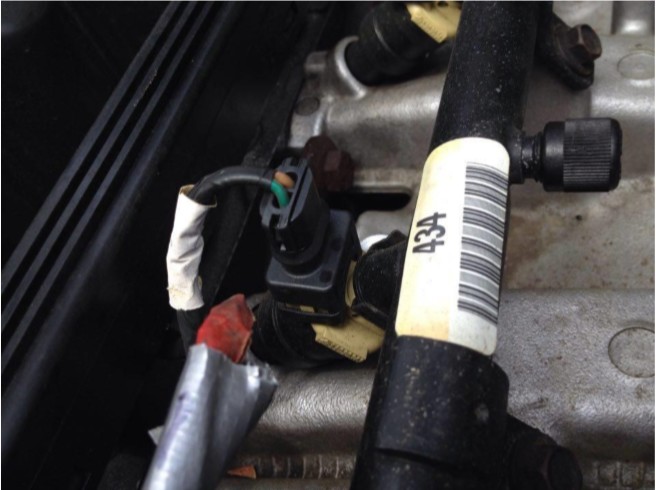
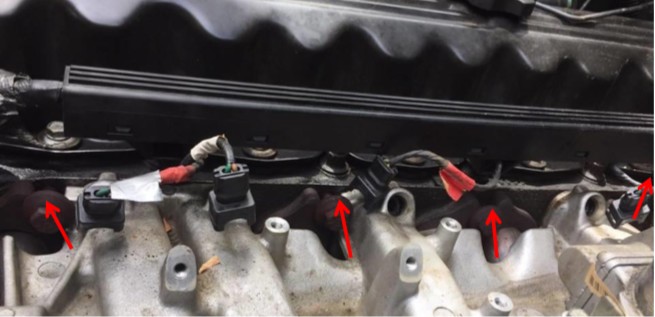
16. Unplug connectors and hoses marked with red arrows.
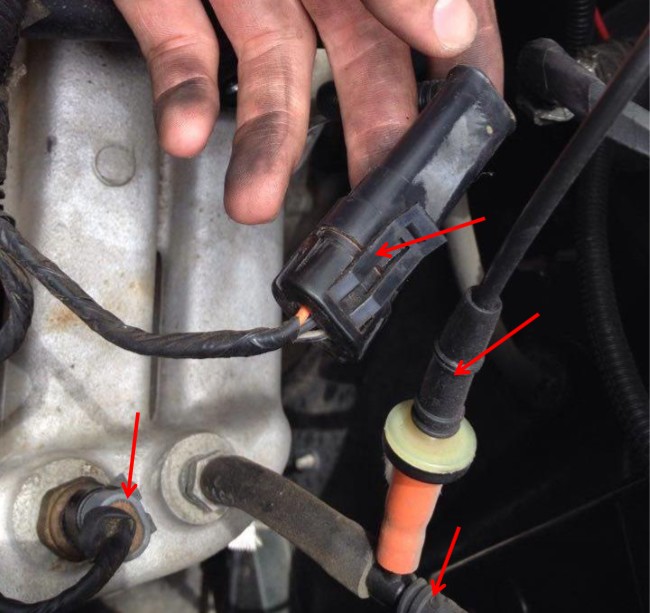
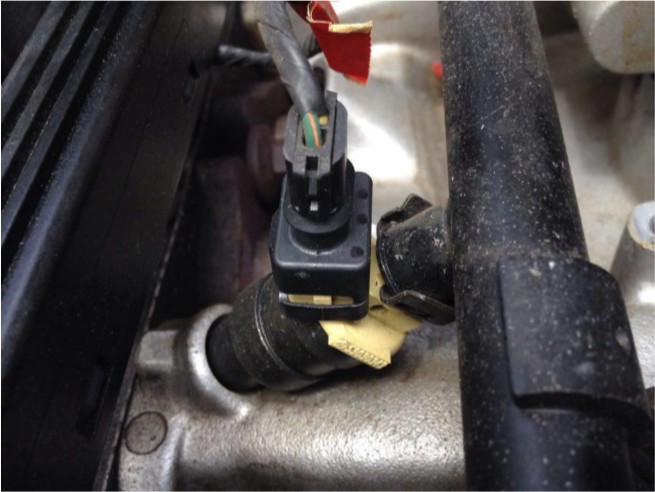
17. Unplug connectors and hose.
18. Located on the right hand side of the intake manifold near the air box and brake booster, remove the two 10mm bolts holding in the bracket and using a box end wrench, remove the brake booster hose.
19. Loosen idler pulley using 13mm socket.
20. Next loosen bolt just above idler pulley to relieve tension on the serpentine belt (drive belt).

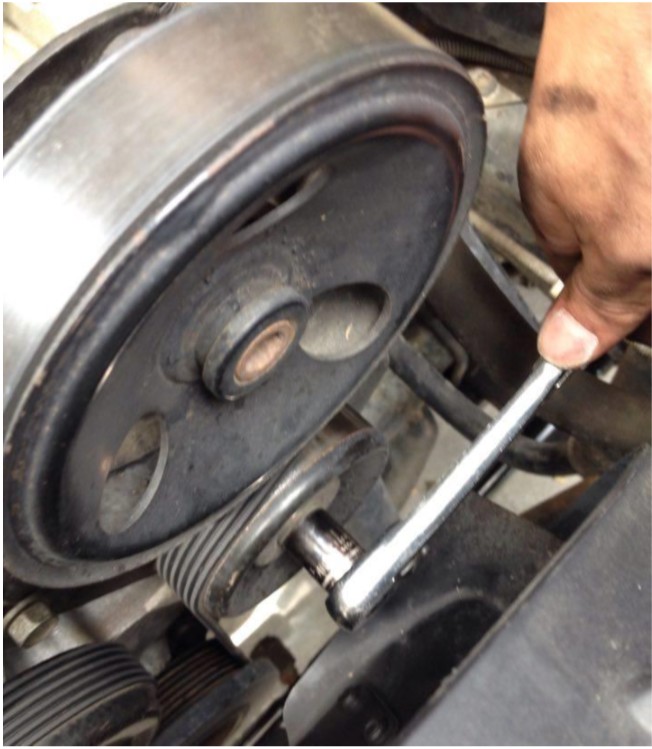
21. Remove drive belt from power steering pump pulley. Loosen 3 bolts holding in power steering pump. There’s 1 bolt on the bottom of the pump and 2 on top.
22. There are holes already in the power steering pump pulley that you can put your ratchet through to loosen bolts.

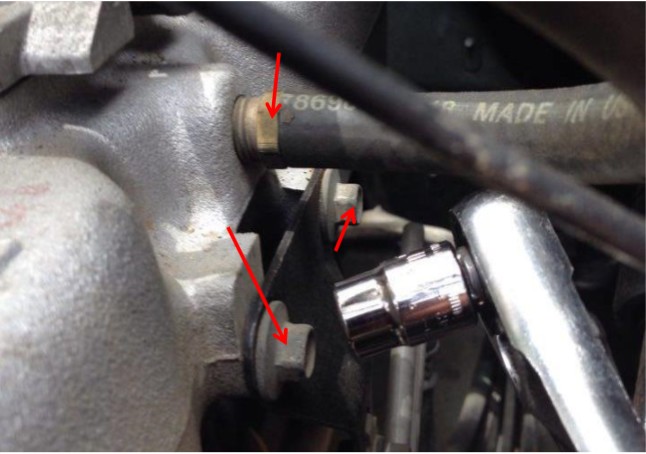
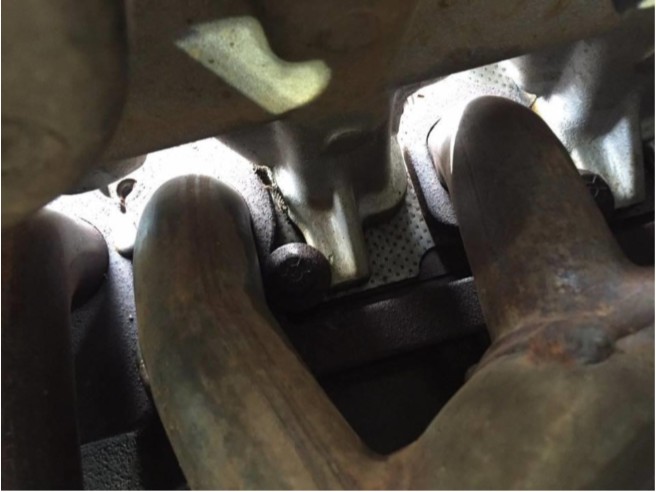
23. Remove bolts holding intake/exhaust manifold, using a 9/16” box end wrench. There are 4 bolts on top and 4 on the bottom and also 2 nuts on the bottom.
24. Bottom view of the bolts
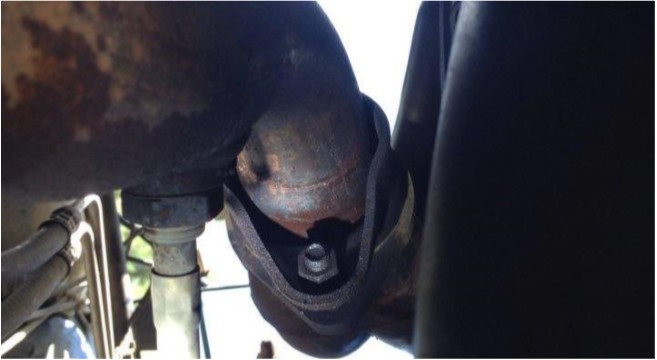
25. Underneath are 2 more nuts you need to remove. The other nut is on the other side of the pipe.
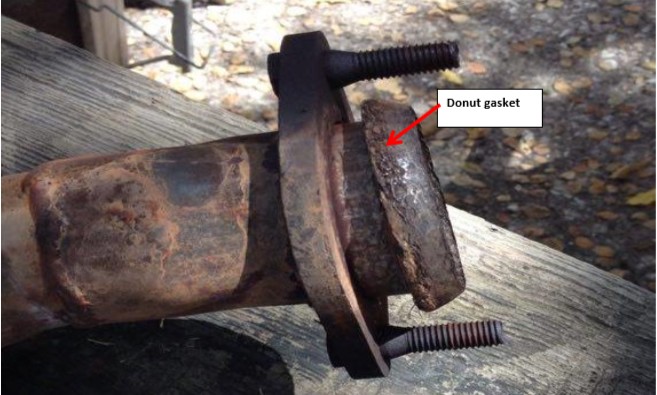
26. Remove exhaust manifold. Transfer the new donut gasket onto new manifold. Make sure you observe how it comes off and install it facing the correct direction.
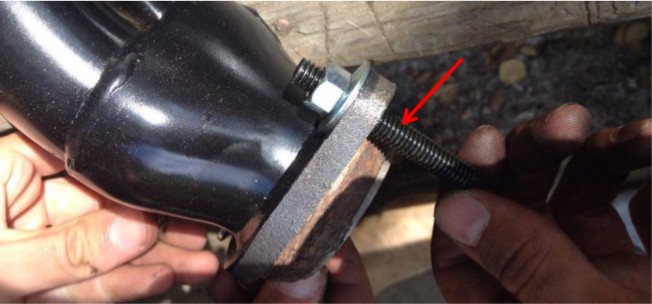
27. The new manifold will come with a new stud kit. Install stud kit before installing the new exhaust manifold.
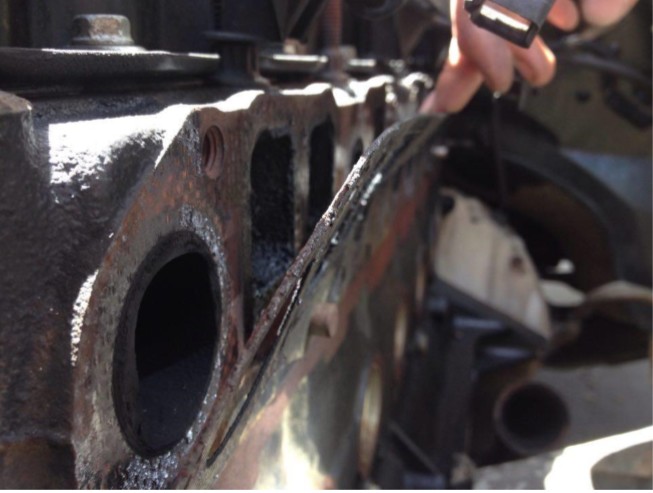
28. Remove old exhaust manifold gasket (make sure you observe how it comes off and match the new one in the correct position). Be sure to clean mating surface before installing new gasket (brake clean recommended for cleaning).
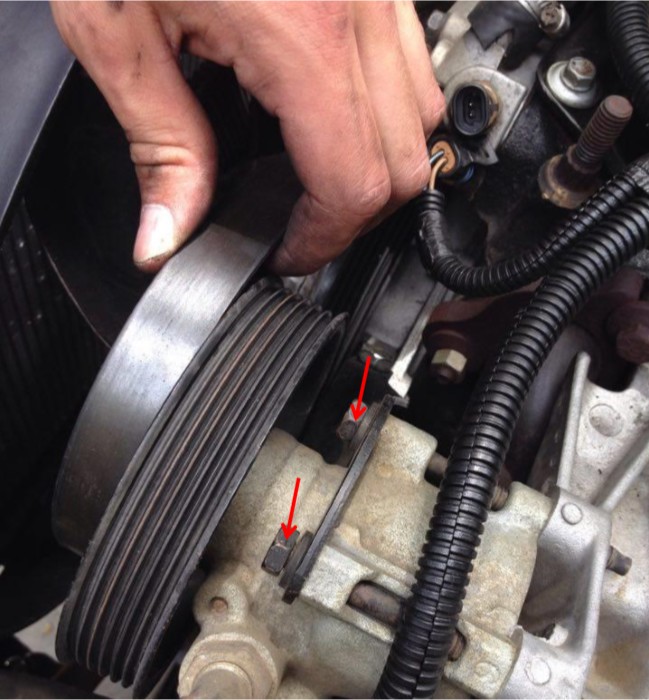
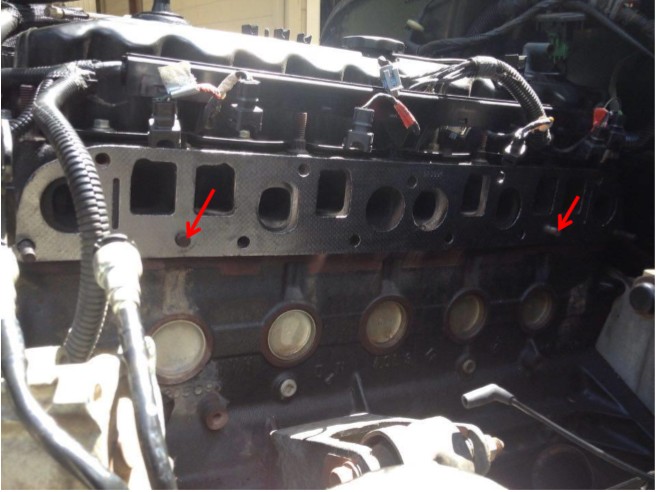
29. Install new gasket. When installing new exhaust manifold, be sure that the dowel pins are lined up and the manifold sits flat against the cylinder head. Dowel pins marked with red arrows.
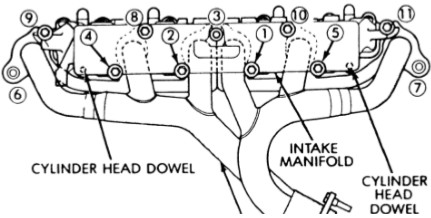
30. Install new exhaust manifold in reverse order of the steps listed above. When tightening new manifold bolts, be sure to start tightening bolts in the middle and then work your way to the left and right (illustration below). This is to prevent gasket from kinking and causing an exhaust leak or cracking the gasket. Tighten the bolts with ratchet to very snug (you can’t get a torque wrench on every bolt). Just keep in mind how tight they were when they came off and copy that.
Installation Instructions Written by Extreme Terrain Customer Payton Hays 6/27/2016

