Talk to a Tacoma Sales Tech
1-877-870-8556
M-F 8:30A-11P, Sat-Sun 8:30A-9P
Logo Image
$20K Sweeps! 10 Chances to Win! Enter Daily >

Old Man Emu 2-Inch Medium Load Suspension Lift Kit (16-23 Tacoma)

Item TT5858
Verify parts fit and get product recommendations.
Tacoma Sales Techs: Connect Now M-F 8:30A-11P, Sat-Sun 8:30A-9P
$0.00
Our Price

$1,628.00 (kit)

FREE Shipping + $199.00 Oversized Item Fee Market Price $1,872.99 You Save 13% ($244.99) Up to 10% off for Military & First Responders! See Details

Will this fit your Vehicle?

Select a different vehicle Help?
Update or Change Vehicle
Out of Stock

Ship to: Ashburn - 20149
Sorry, please enter a valid US or CA postal code
We're sorry, zip can't be updated at this time.
    Create a list
    Add to New List

    Saved - View your saved items

    We're sorry. We couldn't save this product at this time.

      Product Videos

      Merideth: If you're looking to revamp your suspension and gain some extra ground clearance in the meantime, this Old Man Emu 2-Inch Medium Load Suspension Lift Kit will be a good option to take a look into for your 2016 and newer Tacoma. Now, this full suspension kit will be a great choice if you want a full replacement to all the main components of your suspension, including your shocks and your springs to not only update some older components, but also to gain some better performance for your off and on-road adventures. Now, not to mention, if you are looking for a lift that will accommodate up to a 32-inch tire or a more aggressive 31-inch tire, this kit will do just that to help when it comes to performance and aesthetics.Now, when it comes to the kit here, this will feature front struts and springs, as well as rear leaf springs and shocks, being more than just the average suspension lift without going over the top like a coil over or an adjustable setup. Now, these components combined, will also gain you some better clearance to get over obstacles a little bit easier, a better stance to your truck aesthetically, and a more responsive ride while remaining very comfortable for day-to-day driving.Now, when it comes to the components of this kit in the build of them, you can tell that they're tough and made to last. Now, this kit will feature Old Man Emu's Nitrocharger Sport shocks and struts that will include a durable monotube design and velocity sensor valving for better handling and comfort. Now, they'll also have a steel shock body and a bright yellow powder coat to protect the steel underneath and also just add some style points. How could you miss that yellow there?Now, the springs will also have a durable build while helping out with the quality of the ride and offering an increased low capacity, great for any heavier cargo or overlanding trips. Now, there is one thing I would be aware of, and that's your upper control arms. I would recommend taking a look at a set to accommodate for that added height. However, the rest of this kit will come with everything that you need in order to install it on your truck.Now, when it comes to price, this kit is gonna come in at around the $2,000 mark. Now compared to other 2-inch options available in the category, this will come with a full suspension for the front and rear with high-quality components. Now, others that you may see may be for spacer or hybrid options that will include struts and coils in addition to the rear spacers, but most will not come with a replacement set of leaf springs if that's something that you need to replace or prefer when it comes to your suspension. Now, more expensive choices, on the other hand, will usually include coilover setups or reservoir kits. So I think if you don't necessarily need every single bell and whistle but you are looking for a complete replacement to your entire suspension with quality components, then this option is gonna be for you.Now, install, as you can assume, is probably gonna be a little bit more challenging than most at a three outta three wrenches on the difficulty meter, taking you about a day to get the job done. However, that is going to wrap it up for my review. Let's go ahead and head over to the shop and check out a detailed breakdown of the install and what it looks like step by step. So let's get into it.Man: The tools you'll need for this project are a 1/2-inch drive impact gun or a 1/2-inch drive ratchet, a 22, a 21, a 19, a 17, a 14, a 13, and a 12-millimeter deep socket, a 19-millimeter shallow socket, a 19, a 17, a 14, a 12, an 8, a 7, and a 5-millimeter wrench, a pair of pliers, a ball-peen hammer, a dead-blow hammer, a permanent marker, some lubricant, and a pry bar.Hi, everyone. Today we're installing a lift kit on our Tacoma. So let's get started with the uninstall of the old system first. All right. Now, you can see that we're on a lift here, but you can definitely do this on the ground with a jack and some jack stands. Just make sure that your truck is supported on the frame properly with the jack stands.So, the first thing we wanna do is take off this skid plate here, and there's four bolts, two in the front, two in the back. We're gonna use our 12-millimeter socket to take that off. Now, our next step is gonna be to loosen these two bolts at the bottom of our ball joint with our 21-millimeter socket. Now we're not gonna remove 'em just yet, just gonna loosen them up. So now we're gonna loosen up our lower strut mount bolt using our 21-millimeter socket and a 19-millimeter wrench on the nut. Now you can go ahead and remove the nut and the washer at this point. Just leave the bolt in for right now. Now we can go ahead and loosen the nuts at the top of our strut using our 14-millimeter wrench. Now we're not gonna take these off just yet, just loosen them up real good. There's three nuts, two of 'em are right visible in the front and the third one is in the back.Our next step is gonna be to loosen our lower control arm bolt here in the front, and then there's a nut on the backside on the second arm. So we'll just go ahead and loosen these up right now with our 22-millimeter socket. Now we'll loosen up this nut on the backside, again with our 22-millimeter socket. All right. Now we can go ahead and finish removing the lower control arm bolts that we loosened up earlier. All right. Now we'll go ahead and remove our lower strut mount bolt by pulling it out, and then push our lower control arm out of the way. Once that's out of the way, then you can go ahead and finish removing those three nuts at the top of the strut and let it pop right out. All right. So we'll go ahead and take off our three nuts at the top, and just go ahead and slide our strut down from the top.Now since we're going to be replacing the rear springs on our Toyota, the first thing we're gonna have to do is remove the spare tire. Now as you can see on our truck, we've already taken that out, but just so you know ahead of time, that's gotta come out first before we can take the springs out. So the first thing we're gonna do since we're on a lift, we're using a pole jack to support the differential. You can do the same thing on the ground using just a floor jack, but you wanna make sure that you take a little bit of tension off of that suspension system in the back before you start dismantling things. So let's go ahead and take our lower shock mount out using our 17-millimeter socket and a 17-millimeter wrench.All right. With our lower shock mount bolt removed, now we can go ahead and do the top one using our 14-millimeter wrench and a pair of pliers. You may need to use a set of vice grips to hold that stud to keep it from spinning when you take the nut off. Now we're gonna go ahead and remove the bolt that holds the bracket for our parking brake cable to the springs using our 13-millimeter wrench.All right. Now our next step with our differential properly supported is to remove the four nuts on the bottom of our U-bolt. So we'll go ahead and take those off using our 21-millimeter socket. Now with those four bolts removed, we can go ahead and remove our lower bracket. Now, what you might wanna consider doing is marking the front of this bottom brace. Now we've marked ours. It says which one is the front and it's for the left side. That way you know when you go to put it back together, it goes back on the same way it came off.All right. Now with that lower bracket removed, we can go ahead and remove our U-bolts and our bump stop. Now once we've got all this removed, we can go ahead and lower our differential probably about 2 to 3 inches after it separates from the spring itself. And that should be fine right there. Now we can remove the two nuts off of our shackle using our 21-millimeter socket, and you may need a 19-millimeter wrench to hold the other side. Now with that done, we should be able to lift up on this a little bit and remove this lower bolt.Now we can move and remove the front bolt and lift our spring out of the way. All right. And again, we're gonna be using our 21-millimeter socket and our 19-millimeter wrench. Now we can just lift up on our spring to relieve the tension on the bolt, and it should come right out. But you may need a screwdriver or a pry bar to help it out. Now if you've got an extra pair of hands, it comes in real handy because these springs are not light. But we're gonna just go ahead and take this out and get ready to install our new ones. And now that we've got everything uninstalled on the driver's side, you can go ahead and repeat that whole process for the passenger side.All right. For our next step, we're gonna need a spring compressor. So if you don't have access to one, you maybe wanna take it to a professional shop and ask them to take care of it for you. But we're gonna have to remove this top hat of our original strut and transfer it over to our new one. So we're gonna go ahead and just put this in our spring compressor and get that removed. So we're just gonna compress the spring a little bit, take some of that tension off. And then we're gonna need a 17-millimeter wrench for the nut and a 7-millimeter wrench to hold the top of the stud while we loosen it. Now we can go ahead and take our top hat off, like so, and we'll transfer this over to our new strut.All right. Now we can go ahead and put our new spring into the spring compressor. Now, you wanna make sure that when you do this that the round edge of the coil, not the flat edge, goes on the bottom. That's gonna fit into our spring seat on the new strut. So now we can go ahead and put our top hat onto the new spring. As you can tell, this spring is a lot taller than what the original spring was. So we're gonna go ahead and compress this.Now, this next step only applies to the driver's side. There is a trim ring that is provided in the kit that's going to go over the strut and it's gonna slide down and sit right on top of this ring. Now, the reason for this trim ring is to adjust for the driver being in the driver's seat. So the ring goes on first, and like I said, it's only for the driver's side. Then we'll put our coil seat spring on and insert it up into our spring. And there is a notch in the bottom of the spring seat for the end of the coil spring to fit. All right. We can replace our rubber bushing, our washer, and the new nut, and we can start tightening it down with our 19-millimeter socket. Now, if the stud starts to spin on top, you can use an 8-millimeter wrench to hold it still, like it is now. All right. And now we're ready to actually install it on the truck.Now we can go ahead and install our new strut using the original hardware. And we'll just loosely attach the top nuts for the time being. Now we'll go ahead and raise our lower control arm and position our strut in place. Reinsert the lower bolt and loosely attach the nut. Now we can go ahead and reattach our lower ball joint mounts using the original hardware as well. Then we'll go ahead and tighten those down using our 21-millimeter socket. Now we'll tighten our lower strut mount with our 21-millimeter socket and our 19-millimeter wrench. And we'll tighten our upper strut mount using our 14-millimeter wrench. And you can repeat that whole process for the other side as well.Now let's move on to the rear. Now the kit does come with new bushings for the front and rear of your springs along with the sleeve to go in the center of 'em. So you wanna make sure that you go ahead and press these in first. And then use some sort of lube on the sleeve and go ahead and just slide that in the middle. And you do that for front and rear, but you'll also need to transfer over the shackle.Now, the kit does not come with new bushings for the shackle, so you'll have to reuse the old ones or source another set for the shackle. We'll just put this back on the same way it came off and we'll reinsert our bolt. Now we'll go ahead and put the bushings in the front. Now, you also wanna take note that there is a difference between the front and rear of these springs. The front has, like, a ski hook on the front and there is none on the rear. So let's go ahead and get this installed.All right. As we stated earlier, when we remove the rear springs, if you've got an extra set of hands, now's the time to grab 'em and use them to lift these up into place because they are quite heavy. But let's go ahead and get these installed. Now, you wanna install the front first using the original hardware. You may also want to consider using a dead-blow hammer just to help put everything through, and go ahead and reattach your washer and your nut on the other side.All right. Now you can go ahead and start raising up your differential. And you'll notice on the bottom of the spring there's an alignment pin and it matches the hole in the center of the bracket on top of the differential. So we're just gonna raise up the differential until that pin lines up with that hole. There you go, it's just dropped into place. Now we can go ahead and set our shackle in place and get it reattached using the original hardware as well. Now we can go ahead and line up our shackle and slide our bolt through and reattach our washer and our nut. Now, remember to do this on both of the bolts on the shackle. Now we'll go ahead and tighten them down with our 21-millimeter socket and our 19-millimeter wrench. Now we'll tighten up the front bolt as well.All right. Now we can go ahead and reinstall our original bump stop bracket and our new U-bolts. And we'll also reuse our lower bracket as well. And remember, we marked this earlier so we know which is front and which is rear. So we'll go ahead and put that on. The kit does provide new washers and bolts as well. Then we'll go ahead and get those started, and we'll tighten those down with our 22-millimeter socket. Now we can go ahead and remove our pole jack or your floor jack, as it may be, and reinstall the new shock.Now, the new shock does come with all hardware except for the lower shock mount bolt. So to install this new shock, you're gonna put one of the thicker washers, there are two of these, on the bottom, insert a bushing, and then there's a third washer here, and you see it's got a lip on the top of it. That goes on next. Then we can go ahead and insert this into the upper shock mount and put the other bushing and a washer on top of that. And we'll also put the new nut on it. You wanna make sure that that is centered in that upper hole. Now we can put our pole jack back in there and raise the differential up so that we can put the lower shock mount bolt in.All right. Now that we've got our differential raised back up and our lower shock placed in the mount itself, we can go ahead and insert our bolt, get everything lined up. And you may need to use a dead-blow hammer to help push that through. Now we'll go ahead and reattach our washer and our nut. Then we'll go ahead and tighten those down with our 17-millimeter socket and 17-millimeter wrench. And you can repeat that process for the other side.All right. Now that we've got the lower installed, we can go ahead and tighten that top nut with our 17-millimeter. Now, just keep an eye on when you start tightening this down. You just wanna tighten it down to where the bushings expand to about the size of the washer. Once you get to that point, you can stop. Now, once you start tightening this down, you may notice that this stud starts to spin. If it does, you can use either a pair of pliers or a 5-millimeter wrench to hold that stud while you tighten the nut down. Now that we've got that tight, let's go ahead and reinstall our parking brake bracket. Now we'll go ahead and reinstall our parking brake bracket using the original hardware, and we'll tighten that down with our 13-millimeter wrench.Now, the last thing we need to do before we start buttoning everything up is this center bearing on the drive shaft. We need to loosen the two bolts that are up here, lower this down, and put in a spacer to make sure that the drive shaft angle stays in alignment. So we're gonna use our 14-millimeter socket to loosen these up. Now that we've got it loose, we can go ahead and do one side at a time. So we're gonna take out one bolt and we're going to insert this spacer on top of the bracket right here on the bearing. Go ahead and put our new bolt through. Secure that side. Then we can remove the other side and put the spacer in here. Now that you've got both bolts in, we can go ahead and tighten them up with our 17-millimeter socket.All right. So now that we've got everything installed on this, you can go through and make sure that you tighten everything down to factory-recommended torque specifications. And then as always, anytime you do any kind of suspension work, make sure you go get an alignment done on your vehicle before you drive it too far on the road. With that being said, now we can go ahead and reinstall our spare tire and our front skid plate and call it a day.Merideth: So that's gonna wrap it up for my review and the install of the Emu 2-Inch Medium Load Suspension Lift Kit, fitting all 2016 and newer Toyota Tacomas. And remember, for all things Tacoma, keep it right here at extremeterrain.com.

      Product Information

      Features, Description, Reviews, Q&A, Specs & Installation

      Features & Specs

      • Two Inch Medium Load Suspension Lift Kit
      • Increases the Ground Clearance by 2 Inches
      • Enhances the Vehicle’s Off-Roading Performance and Style
      • Features Old Man Emu’s Shocks and Struts
      • Utilizes (2) Coil Springs and (2) Rear Leaf Springs
      • Can Accommodate Larger Tires
      • Three Year Warranty/60,000km Warranty Is Included
      • Fits 2016-2023 Toyota Tacoma Models

      Description

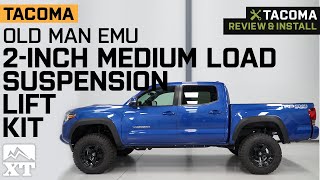
      Conquer Any Off-Road Trail With Ease. Give your Toyota Tacoma an incredible upgrade by installing Old Man Emu’s 2-Inch Medium Load Suspension Lift Kit. With this product, you’ll gain enough ground clearance to crawl over various off-road obstacles like large rocks and fallen trees. What’s more, the added ride height gives your truck a more powerful stance, which helps increase the truck’s off-road presence.

      Old Man Emu’s Struts and Shocks. Even if you’re powering through rocky and rough terrain, you can rest assured that your drives will remain comfortable. This is because this product features Old Man Emu’s struts and shocks. The struts and shocks are made to adapt to the terrain you’re on, so they can easily cushion any bump or blow you meet on the trail.

      Coil and Leaf Springs Included. This suspension lift kit utilizes two types of springs: coil springs and rear leaf springs. As a result, the Medium Load Suspension Lift Kit is able to enhance your vehicle’s ride quality and deliver excellent lift for a good long time.

      Moderate Level of Installation. Everything you need to secure the suspension lift kit onto your vehicle is provided. However, the entire installation procedure will take a day to complete. For this reason, you need to have at least a moderate mechanical skill level or hire a qualified mechanic to ensure that each of its components is properly installed.

      A 3-Year/60,000km Warranty Is Included. This Medium Load Suspension Lift Kit is backed by Old Man Emu’s 3-year/60,000km warranty. To know more about the warranty’s terms and conditions, as well as its exclusions, please visit the manufacturer’s website.

      Application. The Old Man Emu 2-Inch Medium Load Suspension Lift Kit fits all 2016-2023 Toyota Tacoma models.

      Fitment:

      Details

      Old Man Emu OMETAC16MKSB

      CA Residents: WARNING: Cancer and Reproductive Harm - www.P65Warnings.ca.gov

      Installation & What's in the Box

      Installation Info

      What's in the Box

      • (2) Coil Springs
      • (2) Rear Leaf Springs
      • (2) Front Shocks
      • (2) Front Struts
      • (2) Rear Shocks
      • (2) Rear Struts
      • Installation Hardware
      4.7

      Customer Reviews (50)

        Questions & Answers

        10 More Questions

        Will It Fit My Tacoma