Talk to a Tundra Sales Tech
1-877-870-8556
M-F 8:30A-11P, Sat-Sun 8:30A-9P
Logo Image
$20K Sweeps! 10 Chances to Win! Enter Daily >

K&N Series 77 High Flow Performance Cold Air Intake (12-21 5.7L Tundra)

Item TU1438
Verify parts fit and get product recommendations.
Tundra Sales Techs: Connect Now M-F 8:30A-11P, Sat-Sun 8:30A-9P
$0.00
On Sale

$349.99 (kit)

FREE Shipping Market Price $459.99 You Save 24% ($110.00) Up to 10% off for Military & First Responders! See Details

Will this fit your Vehicle?

Select a different vehicle Help?
Update or Change Vehicle
Ship to: Ashburn - 20149
Sorry, please enter a valid US or CA postal code
We're sorry, zip can't be updated at this time.
Recommended Install Shops
How It Works
Install Shops are available near Ashburn - 20149

Add Local Shop Installation

Total cost of service $175.00
    Create a list
    Add to New List

    Saved - View your saved items

    We're sorry. We couldn't save this product at this time.

      Video Review & Installation

      Merideth: If you're in search of some better performance for your 5.7-liter, this K&N Series 77 High Flow Performance Cold Air Intake will be a great addition to your 2012 to 2021 5.7-liter Toyota Tundra. Now, this intake will do a great job at getting rid of the restriction that your factory air box brought to the table, replacing it with a high-flow setup. It's gonna help your engine breathe a lot better. Not to mention, this is gonna be a great addition if you're tired of swapping out your factory filter every couple thousand miles and you're looking for a filter that's going to be reusable for the lifetime of your truck and a quality intake and offer better filtration for longevity of your motor, then this is going to be a great pick for you.Now by increasing the airflow and streamlining it, this is gonna get you some better horsepower, torque, and even some better fuel efficiency from this intake without needing a tune. Now, this specific kit will also have a heat shield application to prevent any hot engine bay air from getting to the filter, but I would like to mention if you do go off-road in a wetter climate where you come into contact with mud or water often, just keep in mind that this is not as protected as the factory air box or a closed box system. Now, in addition to the performance that you'll see, you'll also be getting a sporty appearance underneath the hood with a polished look and the red filter.Now, breaking down the construction of this kit, this is gonna come with a high-quality oiled filter that will trap all the contaminants before getting into the intake system and be reusable up to 100,000 miles for your Tundra. Now, the heat shield is gonna be made of a tough steel material. It is gonna be flexible in order to fit that inside your engine bay, and the intake tube here is gonna be made of an aluminum material. Now, the intake tube, obviously, is going to take on that classic polished appearance with the coating on top that's going to protect that aluminum underneath. And on the heat shield, there's gonna be a textured black powder coat finish to prevent any rusting there.Now, this kit is also gonna come with everything that you need in order to install it on your truck, including all of the clamps, seals, and hardware, and does not, again, require a tune in order to be installed, making it very straightforward. Now, I would also like to mention that this is not going to be CARB-certified, so I would keep that in mind as well.When it comes to price, this will come in at roughly $525, putting this at a pretty average price point for a high-quality intake system. Now, compared to others on the page, this is going to have a straightforward design, yet a high-quality and well-fitting component to offer the function and the polished appearance that you may need for your truck. So, I think if you're willing to spend a couple of extra bucks to get a system that you can rely on and reuse for, again, a long period of time on your Tundra, then this is going to be a great one to pick.Install is gonna be a one out of three wrenches on the difficulty meter, taking you about an hour to get the job done with some pretty basic hand tools. At this point, we can head over to the shop and check out a detailed breakdown of the install and what it looks like step by step. So, that's gonna wrap it up for me. Let's go ahead and get into it.Man 1: For this install, you will need an impact, a ratchet, 8 and 10-millimeter sockets, an extension, 10 and 14-millimeter wrenches, 3 and 4-millimeter Allen wrenches, Phillips head screwdriver, and a pair of angle cutters. What's up, guys? Today we're going to be installing a new intake on our Tundra, but before we get started, we're going to send you to watch a short video on how to uninstall your factory intake and we'll see you when you get back.Man 2: Step number one, guys, of course, pop your hood. We're gonna pop our engine cover off. Just lift straight up and set it aside. Next step, let's disconnect our factory sensor here. You're just gonna pinch and disconnect that factory harness. Now, as you can see, there is a retainer clip here, so we're gonna pop that guy off. If you need to, you can grab a panel tool, so let's do that. All right. With a panel removal tool, we'll be able to easily pop that guy off.Next, let's disconnect our two hoses here. We have one with a hose clamp and one smaller one. Now what you wanna do for these hoses is pinch this hose clamp. I'm gonna shuffle it back and off of that fitting and pull the hose straight back. For this little guy, we're just gonna pull straight off, just like that. Next, let's loosen up the clamp on our throttle body connecting it to the tubing. Grab a 10 socket and loosen that guy up.Next, we have two 10-millimeter bolts holding on our factory heat shield to the engine bay. We have one 10 right down here and then on the opposite corner of the intake, which you can't see from here. We'll get that off in a second. Let's start here with this one. I'm gonna use a longer extension on my impact and get the 10 off.All right. Now, you don't have to pull it all the way off because, obviously, you can see it has this retainer washer. You just wanna make sure it's loose, and then repeat that for the other one on the other corner. Opposite corner, same thing. Next, you're just gonna pop the entire factory intake off, starting at the throttle body, then feed that guy out.Man 1: Alrighty, guys, welcome back. Now that we've shown you how to remove your factory intake, there's a few things we need to do to get our new system ready before we can go on to the truck, first of which is going to be to remove our mass airflow sensor from the factory intake tube and swap it over to our new one. So, we're going to remove our two Phillips head screws here holding it in place with our Phillips head screwdriver. We'll set these aside. We'll very carefully pull our mass airflow sensor out of the intake tube. You definitely want to take special care not to damage the sensor because it's very important for your vehicle running right and also they tend to be a little expensive if they need to be replaced. So, we'll pull that out, set that aside, and we can go ahead and set our factory intake aside.So, now we can install our mass air flow sensor into our new intake tube, again, very carefully. Slide it into place. And you're going to want to orient your connector facing down as opposed to these bungs here for our lines that are going to come off. So, if these lines are facing towards you, your connector should be facing down and away. And we'll secure this with our provided 3-millimeter Allen bolts. The first one, run in a couple of threads. Get our other one in place here. We'll run these down with our 3-millimeter Allen wrench.Next, we can go ahead and install our fittings for our 1/8-inch vacuum line going from our fuel rail. Go ahead and get that threaded in first here, followed by our 1/2-inch line for our PCV system. So, now that we've got these run in a little bit, we're going to grab our 14-millimeter wrench and very gently tighten these down. There's no need to put any excess force on these as they are plastic and tapered. So, once they start feeling good and snug we'll just let them be. About right there That feels good. Now our intake tube is ready.So, now we're ready to start prepping our heat shield. So, first, we're going to install our adapter for our intake tube to our air filter. We'll go ahead and slide that into place. You'll notice it has these two openings here for bolt holes. We'll grab our two 4-millimeter Allen bolts along with a lock washer and flat washer for each bolt. We'll get this started here. Run it in. And we'll grab our other 4-millimeter Allen bolt, again with lock washer and flat washer. Go ahead and put that one in place. Then we'll grab our 4-millimeter Allen wrench and we'll go ahead and tighten these down. Now you do want to try to keep this as centered as possible.Next up, we can go ahead and install our seal onto the edges of our heat shield here. It has this groove in it, so it just rides right along the edge here. We'll go ahead and start at a corner just for nice and easy fitment. Push that down into the groove. And then we're just going to work our way around the entire perimeter here. Now this will do corners so there's no need to cut and refit. Take your time, shape it to the corner. Work it down into place. Once you reach the end here, you can go ahead and trim off the excess. We'll go ahead and do that next. So, now we can see where we need to trim back our seal. Get a good mark on that with our hand. We can take our angle cutters or whatever you may have lying around and go ahead and trim this back. There we go.So, now we're ready to begin installing our mounting brackets onto our heat shield here. So, for our first one, this is gonna be on the same side as your intake and air filter adapter. It's gonna face down towards the arch here. That's gonna be your bottom side. So, we'll take our bracket and we're going to grab our 10-millimeter bolts, lock washers, and flat washers. There's two for this one. I'm going to sneak those up through the backside here. We're going to add a spacer. We'll do that for both of these. We'll add our spacer, then we can add our bracket, another flat washer, and a 10-millimeter nut. And we'll go ahead and add our 10-millimeter locknut again here. Then we'll go ahead and get this tightened down. For that, we'll use our 10-millimeter wrench, 10-millimeter socket, and our ratchet. Then we can move on to our other brackets.Next, we can go ahead and add our inner bracket here. And that is the one that has multiple bends in it. So, we'll again grab our 10-millimeter bolt, lock washer, and flat washer. This one's gonna come from the outside to the inside, followed by a spacer again, and our bracket, then a flat washer and our 10-millimeter locknut. Then again, we'll tighten that down with our 10-millimeter socket and our 10-millimeter wrench. You do want to try to keep this facing pretty much parallel with your heat shield here.Now for our last bracket here, that's going to face outward this way away from your intake tube adapter. Again, another 10-millimeter bolt, lock washer, and flat washer. On the inside here, we will actually need to install one more spacer. We'll get our bracket on, followed by a flat washer, and finally our 10-millimeter locknut. Then we'll tighten it down with our 10-millimeter wrench and 10-millimeter socket. And again, you want this to be oriented out and away from your heat shield.So, now we're getting ready to mount everything up in our engine bay. And first, we're going to have to remove this 10-millimeter bolt here that is holding our ground wire in place. So, we'll go ahead and use our 10-mil socket and extension on our impact to run this out real quick. Pull that out. Then we will also need to remove our horn mounting bracket bolt as well, which is also a 10-mil.So, now we can go ahead and get our heat shield installed into the truck. So, we'll go ahead and drop it in place. lining up with our mounting points here, then we can go ahead and get our hardware installed. So, now we can go ahead and start installing our hardware. We're gonna start here back with our ground wire mounting point just as a central spot. We'll go ahead and run that in. I'm not gonna fully tighten that down yet, just to allow for room to move for the other ones.Now we can install our next 10-millimeter mounting bolt along with our flat washer up here in our front mounting position. Now we can get our last bracket along with our horn mount back into place. So, we'll slide our 10-millimeter bolt into our bracket along with our horn mounting bracket. We can line that back up. And we'll go ahead and tighten these down with our 10-millimeter socket. I'm just going to reach back here behind with my extension and tighten this bolt down. Now we can get our ground wire mounting bolt tightened down here, followed by our front mounting bolt here.Now we can go ahead and get our filter in place. So, we've got our clamp slid over our filter already. We'll go ahead and set that on there. Then we can tighten down our clamp. And to tighten this down, you can either use a flat head or we can use our 8-millimeter socket. Now we can go ahead and get our first coupler in place on our intake filter adapter here. And we've got our clamp on here, but we're not gonna tighten it down just yet to allow for any adjustments we need to make.So, next, we're gonna get our boot installed onto our intake tube here for the throttle body side. And we're just slipping it on right now. We're not tightening anything just yet. We'll get this partially set here. We'll go ahead and throw our clamp onto our filter side here. And you can work your intake tube down onto our throttle body. Work it into our adapter here. So, once you have your intake tube in place, we can go ahead and plug in our MAF sensor connector. And then we'll reinstall our two lines over there. And we'll start with our fuel rail vacuum line here. And then we'll need to install our union here for our PCB extension hose. We'll go ahead and get that onto here. Slide that into place on our fitting. And then we can work our clamp up from our factory line to our extended line and put that on our fitting.Now we can go ahead and use our 8-millimeter socket on our impact to gently tighten down all of our fittings on our couplers. So, now we can go ahead and remove our factory beauty cover locator here up front of our engine using our 10-millimeter wrench. We'll go ahead and pop that loose. Unscrew it. We're gonna install this extension stud here. We'll get that run down into place, followed by our extended nut here. Then we'll reinstall our factory locator on top of that. And then we can just use our 10-millimeter wrench to go ahead and tighten everything back down all at once. Now we can just go ahead and reinstall our beauty cover.Alrighty, guys, that about wraps up our review and install of our K&N Series 77 High Flow Performance Cold Air Intake for your '12 to '21 5.7-liter Tundra. Thanks for watching. And as always, for everything Tundra, keep it right here at extremeterrain.com.

      Product Information

      Features, Description, Reviews, Q&A, Specs & Installation

      Features & Specs

      • Provides an Increase in Horsepower and Torque
      • Offers Better Engine Acceleration Response
      • Washable and Reusable Air Filter
      • Red Cotton Gauze Filter Media
      • Polished Aluminum Intake Tube
      • Can Last Up To 100,000 Miles Before Servicing
      • No Tuning Is Required
      • Bolt-On Installation
      • Supported by a 1,000,000-Mile/10-Year Warranty
      • Not CARB-Certified
      • Tailored to Fit 2012-2021 5.7L Toyota Tundra Models

      Description

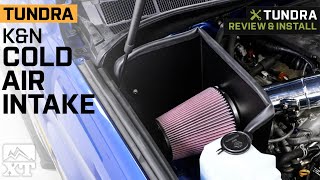
      Better Driving Performance. If you want to experience better driving performance, consider installing this K&N Series 77 High Flow Performance Cold Air Intake. This cold air intake provides cleaner and cooler air to your Tundra's engine, resulting in a boost in horsepower, torque, as well as throttle response. Be it on the streets or the rugged trail, your truck is guaranteed to deliver a better driving performance.

      No Tuning Is Required. Compared to other cold air intakes in the market, this K&N air intake doesn’t require any ECU tuning. Once installed, it is ready for use.

      Washable and Reusable Air Filter. For excellent filtration performance, this cold air intake system features a washable and reusable air filter. This air filter is composed of a red cotton gauze media that is used for trapping dirt and other particles.

      Superior Construction. Built to last, this cold air intake is constructed using high-quality materials. Featuring a polished aluminum intake tube, this cold air intake is able to handle extreme underhood conditions without failing or breaking. Moreover, this cold air intake can last for up to 100,000 miles before service is required.

      Bolt-On Installation. This cold air intake offers a bolt-on installation. Using the supplied hardware, you can directly mount this cold air intake to your vehicle’s factory mounting points.

      Warranty. To cover any manufacturer defects, K&N is supporting this product with a 1,000,000-mile/10-year warranty. To learn about the full warranty coverage, terms, and conditions, please visit the K&N website.

      Not CARB-Certified. Currently, this cold air intake is not CARB-certified. This means that you can’t drive your truck with this product installed in the streets of California.

      Application. The K&N Series 77 High Flow Performance Cold Air Intake is tailored to fit 2012-2021 5.7L Toyota Tundra models.

      Fitment:

      Details

      K&N 77-9036KP

      CA Residents: WARNING: Cancer and Reproductive Harm - www.P65Warnings.ca.gov

      Installation & What's in the Box

      Installation Info

      What's in the Box

      • (1) Air Filter
      • (1) Intake Tube
      • (1) Heat Shield
      • (1) Adaptor
      • (1) Edge Trim
      • (2) Vents
      • (5) Hose Clamps
      • (3) Hoses
      • (1) Hose Mender
      • (11) Bolts
      • (18) Washers
      • (4) Nuts
      • (1) Nut Extension
      • (3) Brackets
      • (4) Spacers
      • (1) Stud
      4.8

      Customer Reviews (286)

        Questions & Answers

        10 More Questions

        Will It Fit My Tundra

        • 5.7L V8 - 12, 13, 14, 15, 16, 17, 18, 19, 20, 21