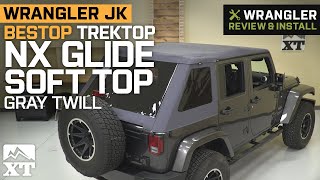
FREE 2 or 3-Day Delivery on 10,000+ Items. Details

Talk to Wrangler Enthusiasts
1-877-870-8556
M-F 8:30A-11P, Sat-Sun 8:30A-9P
Logo Image
$20K Sweeps! 10 Chances to Win! Enter Daily >
The ExtremeTerrain Show is Back! Register Now >

Bestop Trektop NX Glide Soft Top; Gray Twill (07-18 Jeep Wrangler JK 4-Door)

Item J120255
Call a Wrangler Enthusiast at 1-877-870-8556
M-F 8:30A-11P, Sat-Sun 8:30A-9P
$0.00
Market Price $2,051.99 You Save 12% ($252.00)
Our Price

$1,799.99 (each)

FREE Shipping + $40.00 Oversized Item Fee

Will this fit your Vehicle?

Select a different vehicle Help?
Update or Change Vehicle
Out of Stock

Ship to: Ashburn - 20149
Sorry, please enter a valid US or CA postal code
We're sorry, zip can't be updated at this time.
    Create a list
    Add to New List

    Saved - View your saved items

    We're sorry. We couldn't save this product at this time.

    or use

      Video Review & Installation

      Hey, guys. So today I'm here with the Bestop Trektop NX Glide in Gray Twill fitting all 2007 to 2018 four door JK Wranglers. So this is for the JKU owner who is looking for a complete soft top with high quality construction, very functional features but also wants to stand out while you're on the street or even on the trail. So this is perfect for the soft top owners who need to replace any damaged or warn out hardware or even some faded or worn out fabric or they're just looking for an upgraded design with the features and the functionality of their soft top. This is also perfect for the hard top owners that are looking to make the switch but need all of the hardware to install this on their Wrangler like the door surrounds, header, tailgate bar or even just the full frame system. So this is gonna have some very functional features. This is gonna feature the fast back design with the tinted windows giving you a little bit more of an aggressive and off-road feel to your Wrangler. This is also gonna be a zipperless design and that's why they call it the NX Glide. You can very easily take off the windows, put the top down or even run this as a bikini top. Not to mention you are getting a high quality twill material with this that is gonna give you a custom look especially with the gray color. There's not many others like it on the market.So with all of those features you can expect it to be a little bit more expensive, a little bit higher price at roughly $1,600 but you do have to think about the brand that is behind this. Bestop has been in the game for a long time and as we all know they do make very high quality soft tops. So in comparison to a lot of other options on the page this is gonna be upgraded material. A lot of those other choices that are a little bit more budget friendly are usually gonna be that standard black diamond vinyl material which is gonna be a little bit lighter weight so if you are looking for something that is a little bit more premium giving you a luxury feel, a luxury look and is gonna last a little bit longer than those black diamond vinyl materials this is going to be a great option to take a look at.This is also gonna have those upgraded features, like I mentioned, the zipperless design and even over some of the other premium choices like the Bestop Trektop NX. This is gonna be able to go all the way down. So this does have some upgraded features even over some of those premium options. So if you are looking for the...all of the bells and whistles, you're looking for a very functional and premium soft top this is gonna be a great choice to take a look at. I personally think that Bestop did a really good job with this soft top. It's very easy to function and it's also very easy to install.So speaking of that install, it is gonna be two out of three wrenches on the difficulty meter. It is gonna be a little bit longer of an install. However, everything is very easy to do with a couple of basic hand tools. So speaking of that install, let's jump into it now. The tools that I used for my install were a drill with a Philips bit, an impact wrench, a three-eighths inch drive and quarter inch drive ratchet, a 5.5 millimeter wrench, an 8 millimeter deep socket, an assortment of Philips head screwdrivers and a T30 Torx bit.So the first step of our install is to install brackets on our rear door surrounds. So you're gonna need an eight millimeter socket as well as a Philips head screwdriver to do this. Now they are gonna be side specific so once you have your door surround extended you're gonna take the bracket with the notch facing the inside and put it where our rear bow is gonna be attached. There are gonna be holes at the bottom. But before we go ahead and tighten down our bracket we wanna get both sets of hardware in and threaded on. Then we can go ahead and take our Philips head screwdriver, put that at the head of the bolt. Then we can take our eight millimeter socket and tighten that down. We can do the same thing for the other rear door surround. So again you wanna make sure that this notch is facing the inside here. Take our hardware, go underneath, thread that. It's a little bit easier to flip it on its side here.So now we can go ahead and install our rear door surround. We're gonna try to line up this clamp with our roll bar up top and then also insert this knob down here into our body. So that should just clamp right around the roll bar. Then we can take our longer knob and go ahead and thread that through the top. So you may have to pull the roll bar cover out of the way. Then you'll be able to thread that through and into the base of your door surround. Now we can do the same thing on the other side.So our next step is to grab our front door surround and we can do the same process. However, we're gonna have two attachment points with this. So we're gonna insert our shorter knob down here and then our longer one up through our roll bar just like the rear. So this should just pop into place around your roll bar and we can take the longer knob, thread that into the bottom. Then we can move to the rear attachment point. This is actually gonna go through your front and your rear door surround. So once that's tightened up we can move to the other side. If you're having trouble lining up the bottom you can always just roll this a little bit back. If you tilt it back the bottom part will line up with the bottom. So we can move to the back.So after we have our door surrounds in we can install our arches or our puddle bars. What these are gonna do is create an arch on your soft top so no rain or water is gonna puddle up and potentially damage your fabric. So the shorter one's gonna be installed in the front and they're gonna go into the cutout on either side of your door surround. So you do have to give them a little bit of a bend to get them in. And then this is just a protective peel so you can just peel that off. Then we can move to the back. So like I said, the longer one is gonna go in the rear, the shorter one will go up front. You do have to give it a little push in order to get it in place. We can peel off that protective leather.So now we can install our rear bow brackets on the back of our roll bar. Now if you open up your roll bar cover you'll expose two threaded holes in your roll bar. So these are gonna be side specific. Make sure that you are facing this upwards. We can go ahead line this up and thread in our provided Torx head screws. So after those are hand threaded in we can take a T30 Torx and go ahead and tighten that up. Then we do the same thing on the other side. You'll see if I pull the roll bar cover back a little bit that there are those two threaded holes, then go ahead and thread in our hardware. Once you have those threaded in we can take the T30 Torx socket and tighten those up.So as you can tell we did move to the table. We do need to install our bow system in our header but I wanted to tell you guys a little bit more about this soft top while I had it here. So in comparison to your black diamond vinyl material that comes out of the factory this is gonna be a little bit more heavy duty and last a longer time and that's because of the material used. So this is a 30 ounce acrylic twill material. It is a triple layer material and it's going to be very durable and stand up to the elements very well. Now this also is the same material that they use on premium or luxury convertible tops so you do know that you're getting a premium and a very high quality material when purchasing this soft top. Now this also does have full perimeter heat sealing. That's going to ensure insulation and make this very effective. What I do really like about this top in comparison to some other options is that it does have some storage pockets up front that are very accessible to you as the driver or your passenger, give you a little bit of extra storage up front in your cab area because we all know that that is very limited. So you're gonna need a Philips head bit and a drill or a Philips head screwdriver and we're gonna go ahead and remove the cable tabs and then insert our bows and then reinstall that.So we are just going to remove this cable here. This is gonna be our spring cable. We just wanna get this out of the way for a second while we install our bow into our header here. So when installing your bows you wanna make sure that the tab is facing the inside. We can go ahead and reinstall or install the bow there and line up our holes with the holes in our header. We can go ahead and install our self-tapping screws into our header through our bow. And then we can reinstall this cable. You wanna make sure that the actual cable part is lining up with that fabric there. You can pull that over. What I like to do is actually put the screw through that first so we can make it easier to line up. And we'll do that with both of them. All right. Now we can do the same thing on the other side.So now we can install our weatherstripping. This is just gonna ensure that our top is not going to leak. [inaudible 00:11:42] it down around that bow. They are gonna be side specific. You wanna make sure that this notch is facing outwards. Then we can take our smaller strip and put that on the inside of our header here. Then we're gonna do the same thing on the other side.So next step, we're gonna be in the Jeep. You wanna grab your number three bow assembly and we can go ahead and put that in place. We're gonna clip it into the brackets that we installed previously. So what we can do is just pull this pin and line it up and attach it to our bracket. We can do the same thing on the other side.So now we can take our bow stop and pop that into place over our bow. Should click in but we are gonna secure it down with two self-tapping screws on either side. I'm gonna thread that in with a Philips head bit. You're gonna put one on one side and one on the other. Then we can do the same thing on the other side.Now what we can do is take our number four bow assembly and pull the pin and attach it to our number three bow assembly. And do that on either side. And then what that's gonna do is pop into that bow stop. So what we're gonna do next is attach our soft top fabric to our Wrangler. I would recommend to grab a friend for this step because it does have a little bit of weight to it.So what we can do next is take our bow assembly three and meet it with our bows that are attached to our header. There's gonna be a tab and we're gonna push that into our bow that's attached to our header, line that up and instead of a pull pin like our others we are going to attach this with a pivot screw. We can take a T30 Torx socket and just tighten that up. Then you can do the same thing on the other side.So at this point you're gonna grab your number two bow assembly. It's going to have these straps attached to it and we're going to attach the back as well as the front to our main bow assembly that's attached to our header and our fabric up front. So you're gonna have two Philips head bolts for this. You're gonna have a shorter one and a longer one. We're gonna use the longer one and start at the back. You're also gonna have these little grommets that you need to insert in the bow two assembly. So once those are inserted through there we can grab our longer bolt, stick that through and then we can stick that through our main bow. And then thread the nut on the other side and tighten that down with an eight millimeter socket and a Philips head screwdriver. Then we can move up to the front. So when we first installed these main bows I said to keep the tab on the inside and that's exactly what we're gonna attach our number two bow assembly to. So again we're gonna install our grommets on our number two bow assembly. You may need to maneuver the actual bow to get it to get in place. But once that's through we can thread the bolt on the other side or the nut on the other side should I say. And then again tighten that down with the same tools. Now we can repeat that process on the other side. After you get it in place then we can put the bolt through.So before we go ahead and flip our fabric back we do need to make sure that our bows are in place. There is a lever here and this is for when you actually take your top down but we are going to flip the Sunrider feature back so we can attach these straps but you wanna make sure that both sides are attached with that lever. So now we can go ahead and flip our soft top back.So now we can go ahead and flip our fabric back. If you just went to grab it and then kind of shift it back. Just going to pull this over our frame. Now we're not attaching anything yet. We're just gonna flip our Sunrider feature back so when we attach the straps to the rear bow it's going to sit taut.So what we're gonna do now is raise up our header and push our Sunrider feature back but we wanna make sure that our soft top is layering properly. So what's gonna happen is we wanna make sure that this and this are inside while we push this back. You don't wanna let that slam down. So making sure your flap is flat, you want to take the flap and wrap this around. As you can see there's three holes in our bow number four assembly and we wanna line that up with the pre-punched holes in our flap here. So you can see that there is some Velcro here that's gonna attach to the underneath of our top soft top fabric. So we wanna make sure we have that in the correct position. This is gonna be pretty thin. You can kinda work the screw through before like I mentioned up at the top when we did the header. That's gonna help us line it up a little bit better on the actual bow. And I'm just threading those in with a Philips head and then we can line those up with our bow. So once you get one started the rest should be pretty easy. So once you have them started you can just go ahead and thread them all the way into the bow. And we can repeat that process on the other side.Now we're gonna grab our cable that's attached to our soft top fabric, hook that through this cover here and then we're just gonna get that cover out of the way. We just wanna make sure that that's there when we need it but then we are going to hook our cable onto our rear bow. So once that's hooked on there we can clamp that down with a pair of pliers. Now this isn't gonna live on our Wranglers. I'm not going to crimp that down but you will need to crimp that down in order for it to stay. So after that we can wiggle this down into place and line up the holes on the rubber cover with our bow bracket and secure that down with the provided hardware.We're gonna take the smallest hardware that we have provided in this kit and thread that through. Attach the nut on the other side. You can take a Philips head screwdriver just to get that threaded on. And then we can take a 5.5 millimeter wrench or you can take a 5.5 millimeter socket and we can just fully tighten that down. You do also wanna make sure that the other hole's lining up. So before we fully crank this down we're gonna get that other bolt through. All right. At this point we can do the same thing on the other side. So this is actually gonna act as your spring assist so when you put up your Sunrider feature, you wanna put your Sunrider feature back this is going to give you a little bit of help instead of having to push it all the way up. This is gonna kinda spring up for you. Also don't forget to clamp this down with a pair of pliers before you attach your cover here. Like I said, ours isn't gonna live on our Wrangler so we are not going to clamp that down.So now we can flip our Sunrider feature forward. So now that the cable's attached you can see that it's pretty taut and it's sitting up in the air by itself. So when you were to open the Sunrider feature it would pop to this level so you don't have to do the whole full back yourself. So it is very helpful in that aspect. And then it'll close on its own as well. So what we can do next is attach our soft top fabric to our bow. So I'm gonna push up on this to give ourselves a little bit of slack. Now the front needs to be closed to kind of make it a little bit more taut but we do need a little bit of slack in order to attach this correctly. So if you flip this up you'll see that you have a channel here. This is what your rear window is going to attach to and then underneath that you have a fabric flap and it's gonna have little pre-poked holes in it. That's what we're going to be attaching to our bow. So as you can see from the bow assembly here, this is gonna have multiple holes. It's actually gonna have eight holes in the bow and we can go ahead and take our self-tapping screws and go ahead and attach those.So again we're going to send our self-tapping screw through the fabric first, make it a little bit easier to line up with our bow. And then we're gonna wrap that around and line that up with the hole in the bow. So this is why you may want a little bit more slack. And then when we actually close up the soft top correctly it's gonna sit very tight. All right, so we can move to the next one. And then we can just work our way out the sides.So that last one is gonna be a little bit of a pain. You do have to kinda stretch this fabric out. What I would recommend is to put it through the fabric first and then reach the bolt over and get it in. Now they are self-tapping screws so if it does go in a little bit sideways that's okay as long as it's attached on this outer end. So let's move to the other side. Like I said, this one's gonna be a little bit tricky. If you get the point of your screw in the hole then you kinda pull the fabric over with the drill or the Philips head, whatever you're using, you can get it in. So what we're gonna do next, we're in the inside of the Jeep at the rear bow, not the one that we just put our screws in, the one in front of that but what we have to do is wrap our Velcro around. Now there's gonna be one at the rear over the cargo area and there's gonna be one at the front as well. And this is just gonna help out with keeping the soft top taut and tight. So now for the front one, if you want to pop your Sunrider feature open that'll give you a little bit more slack, make this a little bit easier to do. But we're just gonna do the same thing that we did for the rear one. Just wrap that Velcro around and secure it.So our next step is to install our tailgate retainer brackets. All we have to do is clip them on the back of our tailgate here. So what I like to do is just hook it on the back there and then roll it forward and it'll snap into place. And do the same thing for the other side. Now they are side specific. We are on the left-hand side right now which is the driver side but it does have a little ridge on the outside to make sure that tailgate bar stays in place. So like I said, roll it forward and it'll snap in place.So our next step is to install our quarter windows. Now this does follow a specific process in order to install them and that's gonna be the easiest way in order to get these on because they are very different from the traditional soft top window. So because this is called the NX Glide these windows are gonna glide in. These are completely zipperless making them very easy to install as well as take off whenever you wanna put your soft top down. So there is a C-channel here and we are going to slide that into this track up here. Very easily slide that on. Once that's in place there is a pin on the side and on our back bow there's a grommet so we're going to pop that into place. All right. So once that's in place there is gonna be a button on this strap. We're going to clip that to the back of our tailgate retainer. And then we're going to loop our finger through this nylon strap, pull down on our window and get this bottom plastic tab in our belt row retainer on the back.So what I do is I kinda just roll down and it should just pop into place. Then we can move to the side. This one's gonna be for your side tabs. So once you get it started it is pretty easy to get in the rest of the way. And then once we reach the end there's gonna be another plastic tab integrated into the side of the window and we're gonna tuck that into our door surround. After that we can just clean up the look of this so we can tuck our top fabric over and you'll have some Velcro here. We can cover that up. And we can do the same thing on the other side.These windows are also gonna be very durable. So they do have a DOT approved tint on them and they are gonna be 40 mil thick which is pretty thick for a soft top window so they're gonna help out a lot with insulation and also last a very long time. Now I do like the fact that Bestop incorporates these pull downs on the side. It makes it really easy to install the windows even though I'm putting my whole body weight into it. That's just because the fabric is not stretched out yet. Once you have it on for a little bit it's not gonna be as difficult to install the windows. It's just because the fabric doesn't have any give to it yet. But once you get it started it will be fairly simple. Then we can tuck this last part into the door surround here.So what we're gonna do next, we have the same type of C-channel up at the top of our rear window and we're gonna slide that into the back of our soft top here. All right. So once that's pretty centered what we have to do now is get these side tabs inserted into the side of our quarter windows. So the one side's gonna be pretty easy, the other side's gonna be a little bit more difficult just because we do have to stretch this window out a little bit. Once that's in we can move to the other side and start to get this side tucked in to our quarter window. All right. So our next step is to install our tailgate bar and this is gonna pop into the retainers to make sure that our back glass or our back rear window is going to seal to our tailgate. So after you have your tailgate bar on we can just pop it into place. You're gonna roll it out and under. And you'll kinda hear a little click. If you're having some difficulty with this I would recommend to open up your soft...or your Sunrider feature. It's gonna give you a little bit more extra slack back here, not too much but enough to get that tailgate bar in and once it's in the fabric's gonna stretch out so it shouldn't be as tough the first time. So we can take our tabs and tuck them into our belt row retainer in the back. So whether or not you've opened up your Sunrider feature to get our back window installed we're gonna head up front anyway because we have to latch that up.So what we can do now is close up our Sunrider feature making sure that our clips are out of the way. Then we'll hook our clip onto our front footman loop and then we can press this down and seal it to our top. We're gonna do the same thing on the other side. And we're just gonna latch the other one in place.That's gonna wrap it up for my review and install. Make sure you like and subscribe and for more videos like this always keep it right here at extremeterrain.com.

      Product Information

      Features, Description, Reviews, Q&A, Specs & Installation

      Features

      • Should Be Installed at a Temperature Above 72°F Since Fabric May Contract an Inch or More at Colder Temperature
      • Shipping Can Cause Contraction or Wrinkling, but Will Resolve Itself a Few Days After Installation
      • High-Quality Trektop NX Glide Soft Top
      • Boasts a Convertible, Fastback Design
      • Comes with a Sleek Gray Finish
      • Made with 30 oz. Triple-Layer Acrylic Twill Fabric
      • Includes a Flip-Back Sunrider Panel
      • Features 40 mil Tinted Window Panels
      • DOT Approved Full Perimeter Heat-Sealing
      • Easily Offers an Enjoyable Open-Air Ride
      • Straightforward Installation
      • Limited Lifetime Warranty
      • Fits All 2007-2018 Jeep Wrangler JKs with 4 Doors

      Description

      High-Quality Soft Top. Give your 2007-2018 Jeep Wrangler JK the upgrade it needs by taking the time to install Bestop's Gray Twill Trektop NX Glide Soft Top. Specifically created for easy operation, this top boasts several patent-pending technologies that create a perfect experience for both on and off road driving, protecting you from less than ideal conditions while allowing you to enjoy pleasant days on the road.

      Open-Air Ride. Featuring an innovative design that allows it to function as a convertible top, you'll be able to easily slide the window panels out and fold the top down behind the rear seat, opening up your Jeep to the enjoyable spring and summer weather. You can also quickly convert the top back to full coverage by sliding the zipperless side and rear panels in, making the top's fastback styling similar to the ultra-premium Trektop Pro Soft Top.

      Twill Fabric. This top is created with 30 oz. triple-layer acrylic twill fabric for unbeatable durability and features DOT approved full perimeter heat sealing for unbeatable strength and reliability. With a flip-back sunrider panel with an integrated storage pocket as well as high-quality 40 mil tinted window panels, this soft top is guaranteed to give you the performance you've been seeking.

      Installation. Featuring a simplified bow system for quick installation, this top can be secured by those with light mechanical skills. Simply set aside about 1 hour for the installation.

      Warranty. This top comes with a limited lifetime warranty to protect against defects in materials and craftsmanship. Some limitations apply, so see the full warranty for details.

      Application. Bestop's Gray Twill Trektop NX Glide Soft Top fits all 2007-2018 Jeep Wrangler JKs with 4 doors.

      Installation Note.This soft top should be installed at a temperature of 72°F since the fabric may contract an inch or more at colder temperatures. The top will contract and wrinkle during shipping, but have no fear. A few days after installation, the fabric should look fine.

      Fitment:

      Details

      Bestop 54923-70

      CA Residents: WARNING: Cancer and Reproductive Harm - www.P65Warnings.ca.gov

      Installation & What's in the Box

      Installation Info

      What's in the Box

      • (1) Glide Soft Top
      • Installation Hardware
      4.6

      Customer Reviews (174)

        Questions & Answers

        10 More Questions

        Will It Fit My Wrangler

        • JK Rubicon 4 Door - 07, 08, 09, 10, 11, 12, 13, 14, 15, 16, 17, 18
        • JK Wrangler 4 Door - 07, 08, 09, 10, 11, 12, 13, 14, 15, 16, 17, 18