Installation Time
(approx) 2 Hours
Difficulty Level:
Light to Moderate mechanical skill required.
Installation Guides
FREE 2 or 3-Day Delivery on 10,000+ Items. Details
$314.99 (pair)
FREE Shipping Market Price $358.99 You Save 12% ($44.00)Saved - View your saved items
We're sorry. We couldn't save this product at this time.
or use
Buy 2 or more Barricade items of $500+, Get $50
Hey, what's up, guys? Ryan here from ExtremeTerrain. And today I'm here with the Barricade rocker guards with step, fitting your 1987 to 1995 Jeep Wrangler YJ. Now, these are going to be for the YJ owner that's looking for some affordable side protection to give you some confidence when you're out there on the trails. So as Jeep owners and as an off-roading enthusiast, we love changing up the look of our Wrangler as well as increasing the capability. We add a lift to get it additional ground clearance. We throw larger tires on there, which allow us to travel over larger objects. Ultimately, we can get further into those trails and tackle those harder obstacles.A lot of times we overlook armor and this is that's going to give us some peace of mind when we're going through those trails. Now, the tub of your Jeep is made from pretty thin sheet metal and especially the rocker panel, this side of the Jeep is going to be a very vulnerable spot. If you were to go over an obstacle, come down on that such as root or a rock, that rock and go right up through there, cause a lot of damage to the side of your Jeep. Of course, there's going to be a ton of options for side armor in the aftermarket. And they're going to come in all different shapes and sizes. Some are going to attach directly to the frame rail. Some are going to mount to the body mounts. And then you're going to have an option like this that mounts directly to the tub.Now, one of the things I like to mention going into this, that this requires drilling directly into your tub. So if this is something that you're not a fan of, if you're not looking to do that, I would recommend looking at another option. And one thing you want to keep in mind when buying an option like this, when going with these rocker steps, we are permanently drilling holes into our Wrangler. So if you were ever to take these off, you're going to have holes in your tub. Now, there's other options, they're going to provide a good amount of protection but this is going to be your ultimate option for protection.Now options such as this aftermarket is going to cost anywhere from $200, all the way up to $500. Some of those more expensive options, they're going to come in bare steel that's going to add to the cost cause you need to get those painted. Barricade offers a very affordable option coming in right around $200. And this is really for the budget mind enthusiast. Those of you on a budget, maybe you're not looking to spend that much money. Maybe you want to save money, you want to buy other Jeep parts, this is a great option to go with.This is going to be your strongest option like I previously mentioned for protection. And if you come down on a rock, you can know full well that this is going to bear that full impact, and it's not going to cause any damage to your Jeep. Now, like I said, these bolt directly to the body and they also slide into a body mount in between the tub. And that's going to give you a ton of strength. This is going to make this a very solid design and a very solid piece of armor.As far as installation goes, I'm going to give us a two out of three wrenches on the difficulty meter. You can get both of these steps installed in about two hours. And not only is this a great way to change up the appearance of your Jeep, add a ton of protection, but, of course, you have any damage that's previously there, if you have any scratches, marks, this is a great way to cover that up as well. These are made of heavy-duty steel plating and tubing. This steel plate right here is 3/16-inch thick, and this is going to travel down and underneath of the Jeep. That's going to give you that wrap-around protection and some underneath protection as well.Now, this has a welded tube on it, this is a 2-inch tube, and you also have a welded-in step plate. That's going to add structure and strength to this tube. If you happen to brush up against any obstacle or something on the trail, or if you're reflecting a shopping cart in a parking lot. And that step is to give you a pretty nice step, you can stand up on there, reach anything you may have stored up top, or if you're just hopping up in your Wrangler. Now, these steps do have holes in them. That's going to make it very easy to clean. And it's also going to block any debris that you may kick up, whether you're on the street or on the road and your tires may throw at your vehicle, that's going to keep your pain in a little bit better condition. Of course, add a little more protection.Now, these are very nice designs. They fit really good. I actually have a set of these on my TJ and I've slammed into some stuff. They hold up really well. This comes with brand new hardware. This hardware is stainless steel. So, of course, it's not going to rust over time for you. And all in all, this is a very nice product. The whole thing is coated in a textured black powder coating. And, of course, that's going to add some rugged good looks to your Wrangler. It's also going to protect this from the element, providing some corrosion protection. Now, I think that if you're looking for a very affordable option for some serious side armor, that this is a great option to go with, and it's not really that hard to install. So with that being said, let's hop into our install so I can show you exactly how to get these on.Tools we use for this install: 4-millimeter Allen, 6-millimeeter Allen, 10-millimeter socket, 16-millimeter socket, 1/2-inch drive extension, 1/4-inch drive ratchet, 17-millimeter wrench, 10-millimeter wrench, 1/2-inch drive impact, some painters tape, a drill, 3/4-inch drive impact, 3/16 socket, 3/16 drill bit, 13/32 drill bit, step bit to clean up the holes, a set of clamps, some rust busting lubricant, some black spray paint, and other tools you'll need are some blocks of wood, such as 2 by 4s and a floor jack.All right guys. So before we get started with this installation, there's a couple of things I want to talk about. Now, the installation of these rocker guards is going to require us to drill directly into our tub. We are going to make a few holes. And for those of you that are not a huge fan of drilling into the body of your tub, I would recommend a different option. However, for those of you that want to continue with this process. I'm going to go ahead and lay a few things out. Now the way these mounts they're going to drill into your tub, they're going to mount directly to your tub. And they're also going to mount under a body mount in between a body mount and our tub. So we are going to need to loosen up a couple body mounts. Now, if your YJ is bone stock, you are going to have a fender flare extension right here. And you're going to need to remove that because these are going to go from flare to flare. This is relatively easy to do and as you can see, ours is already removed. You're going to have a couple of bolts there. You can use a 10-millimeter wrench to take those bolts out. They are pretty tricky.Now, another thing that I want to talk about is you can see here that we have tube fenders. So we have tube fenders up front. We're going to be drilling into those. If you have a factory fender up front, same thing, you're going to have to drill through those. Once again, if you're not a huge fan of that, you might want to choose a different option. Now, also back here, we have tube fenders. So we are going to need to loosen up these tube fenders because this rocker guard is actually going to slide underneath those. So we will be loosening these up, loosening up some of these body bolts, jacking the body up. So you're going to need a couple of tools. What I'm going to do right now is I'm going to go grab my creeper, a couple of tools and then we'll get started.So now that we're under the Jeep you can see where our body mounts are. On this side, we're going to have three body mounts that we're going to loosen up and these are all just on this side of the frame rail in between our springs. We're going to loosen up this bolt and then we're going to loosen up the other two bolts. We're just going to back them almost all the way out but we're not going to take them out completely. I'm gonna use a 15-millimeter socket. Go ahead and pull these bolts out. Now, you want to wear safety glasses or something because most likely a lot of rust and dirt is going to fall in your eyes. So just be careful.Now, this one in the middle right here, in the middle of our skid plate, we're actually going to take this one all the way out. So then we go to this last bolt right here above our rear spring. We'll go ahead and take that one out. The same thing, we're going to back this one almost all the way out.So now that we have those body mount bolt loosened up the next thing we're going to do, we're going to jack the tub of the Jeep up. So our Jeep is pretty tall. We're going to have to use a good amount of blocks and a pretty tall jack. What we're going to do is we're going to crawl into there. I'm going to show you exactly where to put these blocks. That way we don't crush any of the tub while we're pushing it up. And that way we can separate that so we can slide our new rock slider rocker guard in between that body mount in the tub. I'll show you exactly what to do when we get under there. So I'm going to slide this under, start pumping.So our rocker guard is actually going to slide into this middle mount. And that's why we pulled that bolt all the way out. So we have a brace rate here and we have another section over here. This is going to be a structural part of our tub. What we're going to do is we're going to bridge a piece of wood from here to here, and we're going to lift up on that body. Now, this piece of metal that comes underneath of here, we need to make sure that we keep this pretty much to this edge right here. That way it's not going to block us when we go to put this new rocker guard on. I'm going to slide all my wood to one end. You want to make sure that while you're pumping that you're making sure that the jack stays directly up and down. Because if it pulls out away from the Jeep at all, your stack of blocks will fall away and then you'll have to do it all over again. But that's pretty much the gap that we need if you can stick your fingertip in there. We'll go ahead and start loosening up this rear fender flare.So like I said, the next thing we're going to do, we're going to loosen up our fenders. Now, we do have aftermarket tube fenders and we only need to loosen up pretty much half of these vendors. That's going to give us enough play. These new rocker guards are going to slide in behind here. Then we're going to tighten up on the hardware when we're done, of course. Now, if you have factory flares on here still, you're going to need an 8-millimeter socket. You're going to get to the screw head from behind and you have little plastic blocks on the front, you can just use a pair of vise grips or pliers to hold this still. These aftermarket tube fenders here, we're going to use a 4-millimeter Allen key for the bolt head we're going to use a 10-millimeter socket for the nut on the back. All right, we'll loosen this one up, this fourth one up here. And then that should give us enough room.So at this point in time, we are ready to install this rock slider. Now, these are going to be marked left and right, R and L. And we're working on the driver side that one's going to be marked right. Then you can see at the front, we're going to have this square cutout. That's going to face towards the front and you can see exactly why we took that middle bolt out. This right here is going to slide into that bolt. And that's actually going to keep that in place. So considering that we need to slide this underneath of this, what we're going to have to do is shift this whole thing in and then slide it back. And then we'll put that bolt back in to line it up. This is a pretty heavy item. So I would recommend a second set of hands. And with that being said, I'm going to go grab a friend. We're going to go ahead and lift this thing up, slide it into place then we will clamp it.So we're going to slide this all the way up to till it bottoms out on our tub. Then we're going to go under this rear fender, side that all the way back, push that in and then it should stay right there. It can't fall, hands-free.All right. So at this point in time, we can see that we have this little slot lined up with our body mount bolt. So we're going to put that in. You can see where this metal is for the support right here and the underside. We placed our blocks pretty much in the exact position that we needed so we wouldn't contact this and keep us from getting it installed. What we're going to do, we're going to put this bolt back in and that's just so we know that this is lined up. You can hand thread this in, you don't need to run it back in with an impact at all. And then we're going to go up top. What we're going to do, this is already centered, we're going to go ahead and clamp it in place and start marking some holes.All right. So now that we have this on, the next thing that we're going to do is clamp this in place. We're going to clamp it at the rear and at the front. And we want to make sure that we push this all the way up. That way it bottoms out on our tub. Now, as far as clamps go, you want to use something that has a wide surface area. That way we're not pushing a point against this, chipping the powder coat. Also, I took some painters tape, some blue painters tape, and I coated these clamps. And that way I'm not going to scratch this finish or anything like that. So we are going to push this all the way up in the air, just like that. We're going to clamp the front and the rear, and then we're going to mark all of our holes. We'll probably pull this back off and then we'll drill all those holes.So what I'm going to do is going to go right here. I'm going to clamp right there. Push my clamp all the way in. I'm going to push it up with my knee or you can have someone hold it up in the air. And we're just going to clamp that down. We don't want to cover any of these holes up with our clamp, of course, we need to drill through. So we're gonna do that. Then we'll go up to the front, we'll clamp up the other ones.So like I said, the next thing we're going to do is mark all of our holes. Now, we have six holes on each side to mark and you want to make sure that you mark them in the center. Another thing you can do is take a punch and then just make a punch mark right in the middle of this hole. You want to make sure that you make it directly in the center because we don't want to drill it offset. Because then our bolts won't fit through when we draw our final holes. What I'm going to do is take a 3/16 drill bit and I'm just going to make a mark and drill a hole directly in the center.So I'm going to drill my hole like that. Make sure that I'm directly in the center. And then I'm going to draw all the way through. Now, since we are working on the driver side, another thing to take in consideration and be careful of, there's a wiring harness on the inside of this panel. So when you're drilling through, you want to make sure that you're not going to drill through that harness because then you're going to cause some electrical issues. So I'm just going to drill my hole like that. I'm going to go across. I'm going to do that to all of them. Now, if you don't feel comfortable with doing that, what you can do is just mark all those holes, pull them back off. I am going to pull this off to do my final hole, which is going to be a much longer [inaudible 00:12:31.684] than this hole.So we'll go across, we'll do that to all six of these holes and then we'll pull this whole thing off. I'm going to start my mark. Make sure that I'm directly in the center then I'm going to drill all the way through. Once again, there is a wiring harness on the inside. Make sure to pull that up and out of the way. Make sure you don't drill through it. Well, this one is going to go through the tub to the inside. Once again, make sure that that wiring harness right there is not in the way.So we got all of our holes drilled with that small pilot bit. We'll pull our front clamp off. We'll pull our rear clamp off, get this whole thing off. Pull our bolt out of the bottom. And we can slide this forward. Down and out. So if you didn't already drill a pilot hole, make a 3/16 pilot hole, then we're going to take a 13/32 drill bit. You might be able to get away with a slightly smaller drill bit but I'm going to go ahead and finish these holes off. So after you get all these holes drilled the next thing you want to do is you want to clean off any excess little pieces of metal that you have sticking off. Also, you want to paint these holes.Now, you can use a file to get that off or you can use a step bit. So what I'm going to do is just use a step bit. And I'm not going to make the hole any bigger but I am going to take any rough edges and little slivers of metal. So now that we're all done with drilling, of course, the next thing we want to do is cover up this bare metal. The exposed bare metal we don't want it to rust. So what I did was I just cut a hole and a piece of cardboard and I'm going to go ahead and spray these holes. Now, of course, you're going to have paint that goes through the hole. So you want to put something on the backside, that way you don't get paint inside of your vehicle. I'm just going to go right over the hole, shake up my can of black paint real good and just spray these holes. After everything is painted, we're going to go ahead and put our rocker guard back on. And then we can reset our clamps. So once we get it on, you want to put that bolt back in there. You want to center this whole thing. Also, you want to line it up with all these holes, then we're going to put this clamp on. So we're gonna start up here at the front. Really doesn't matter if you start at the front or the back. What we want to do is we want to raise that up, then we want to get it centered on these holes. We'll move to the back. Same thing, you want to line all these holes up.Then we want to clamp that down. Make sure it stays in place. So we're just going to start here at the back. So as far as hardware goes, you're going to have these pan head screws. You're going to take the nut and the washer off of that. These are going to fit in right like that. That way they're nice and flush-mounted. Then we're going to do the washer on the backside and then that nylon nut. So we'll do all six of those. We'll keep those clamps on, then we'll tighten everything up. We'll tighten up the bolt underneath and then we can drop our vehicle back down on the ground.See, this is why you want to make sure that you drill those holes in the center. Because if you don't, you won't get your bolts in. This last one we're going to go all the way from the front. We're going to have to reach up through the fender. So there's going to be a little rubber section down here. You can pull that down and out. You'll be able to reach your hand up inside of there, get that on. Then we'll tighten them all up. Now, to tighten these up you're going to need 6-milleter Allen for the bolt head, you're gonna need a 17-millimeter wrench or socket if you have one of those laying around. We're going to go around and tighten all six of these up.Once you have all those tightened up, we can remove our clamps. And since we pulled this little rubber section out, we can push that back up in. Pull that rear clamp off, we can shut our door because we're all done inside the Jeep. While we're here we have our impact with our Allen heads. We're just going to tighten this fender flare back up.Point in time you can lower your vehicle. Then pull those wood blocks out. So now that we have the Jeep on the ground we're going to go and tighten these body mounts up. This is the last thing that we have to do. So we're going to use that 16-millimeter to tighten all 3 of these back up.All right, guys. So now we got this side on you can use that same exact process to get the other side installed because it installs the same way. However, that's going to wrap up my review and install. For more videos and products like this, check us out at extremeterrain.com.
Subscribe to our YouTube Channel
Features, Description, Reviews, Q&A, Specs & Installation
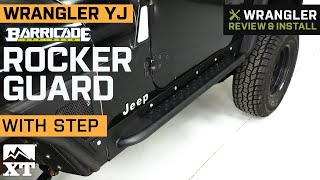
Extra Body Protection. Guard your Jeep Wranglers paint and body panels from brush, stones, and other trail hazards with Barricade Off-Road Rocker Guards. Barricade Off-Road Rocker Guards not only protect your Jeeps paint and body panels from trail debris, but are an excellent way to cover up and hide existing scuffs, scratches and body damage.
Integrated Side Step. These Barricade Off-Road Rocker Guards feature a convenient integrated side step making entry into your lifted vehicle much easier. Plus these integrated side steps also double as side armor to provide additional protection from brush, trail hazards and door dings.
Durable Steel Construction. Manufactured from heavy duty 1/8" steel sheet and 2" x 0.120" steel tubing for strength and durability, these Barricade Off-Road Rocker Guards are completed in a two stage finish using epoxy pre-coating and high-grade textured wrinkle black powder coating for aggressive good looks and long lasting corrosion resistance.
Straight Forward Simple Installation. These Barricade Off-Road Rocker Guards are simple and straight forward to install, but will require some drilling into the body panels for proper installation.
Application. These Barricade Off-Road Rocker Guards with integrated Side Step are specifically designed for use on all 1987 to 1995 Jeep Wrangler YJ models. Includes driver and passenger side Rocker Guards.
Fitment:
Barricade J100299
CA Residents: WARNING: Cancer and Reproductive Harm - www.P65Warnings.ca.gov
Installation Info
Installation Time
(approx) 2 Hours
Difficulty Level:
Light to Moderate mechanical skill required.
Installation Guides
What's in the Box
10 More Questions