 FREE 1 to 3-Day Delivery on Orders $149+ Details

How to Install Barricade Rear Sill Body Shield Decal - Black on your Wrangler
Installation Time
15 minutes
Tools Required
- X-acto knife
- Spray bottle with dish soap & water mixture
- Surface cleaner– such as Mequiars Deep Crystal System paint cleaner

Shop Parts in this Guide
Body shield is a textured material with permanent adhesive. It can be removed safely from stable finishes. It can be used to cover surface imperfections to help conceal them. It should be installed above 50° F. Best installations are done in closer to room tempera-ture. If done in excessive heat it may adhere to quickly for dry installations. In colder environments it may not conform as well. Make sure the surface is clean to be sure of good adhesion to the vehicle. In some application it may be installed by misting the ad-hesive backing with an mixture of soap and water. This solution is made by adding 4-5 large drops of baby shampoo to 32oz. Of water in a spray bottle. Other applications it will be installed dry. When placing the material on the car do not press it down hard till you are satisfied with the location. You can pull it off to reposition as long as you install it without too much pressure. Once the ma-terial is in position you can then press it firmly down to the surface. In the event of the wet installation a hair dryer can speed up dry-ing but it must be firmly in place before driving. Locate the parts for each section, if multiple pieces are in the product being in-stalled before starting, making sure to know were each piece goes. Reading the instructions through and studying the photos will help with this.
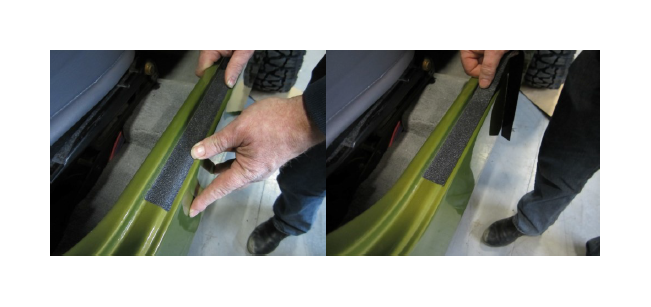
Step 1.
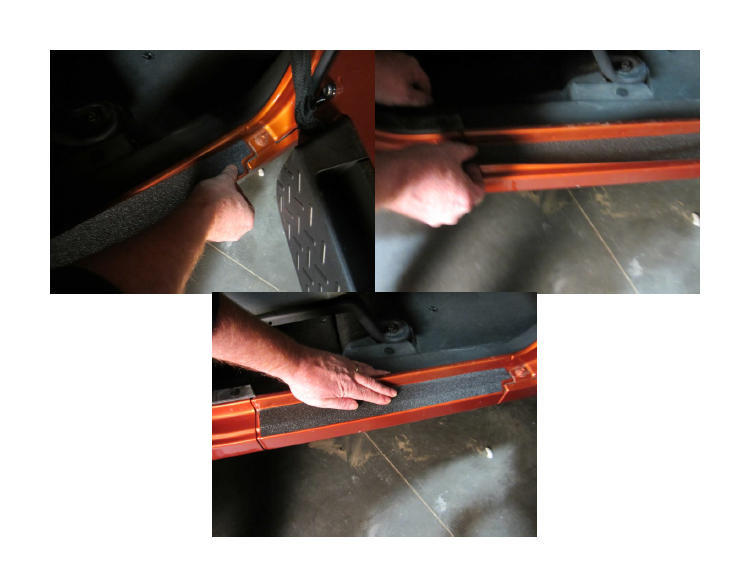
Clean the area thoroughly. This install will be done dry.
On the JK the longer piece with the notch goes on the flat section of the door sill. On the TJ the notched part goes on the upper door sill. On the JK rear door the rounded corner goes on the bottom. On the TJ the wider notched goes on the outside of the vehicle and rolls over. The smaller goes on the upper rear sill.
TJ Door sill
Step 1: start with the flat section of the door sill. Find the section of the door sill were the metal is rolled in on the inside of the vehicle. There is a notch cut in the metal on the left and the right of the sill. You want the material to be within that section. Place the first section (the narrower of the two) with the long edge butted up against the vertical part of the sill. Carefully lay the material along the sill keeping it up against the sill and straight. Do not stretch when applying. Do not apply hard pressure yet.
Step 2: take the upper sill piece (the wider of the two) and place it butted up against the bottom sill to ensure no gap between the two. Run the mate-rial along the sill keeping it straight and against the bottom sill. If the two don’t line up it is because of stretching during install.
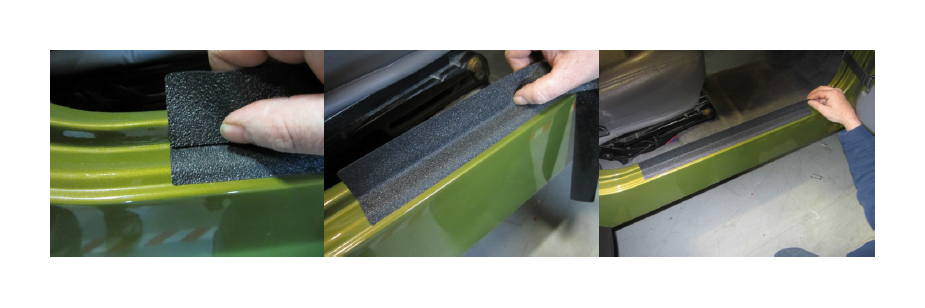
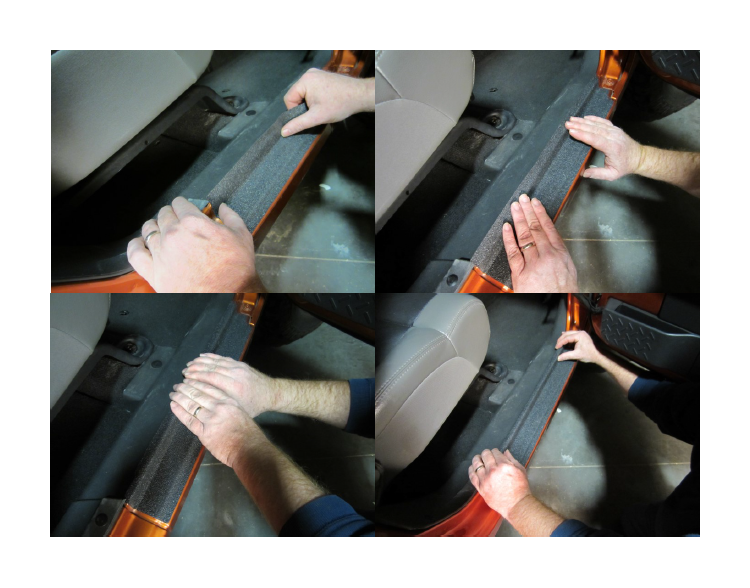
Step 3: Evenly from outside to inside working from the center out, lightly press the material around the upper door sill.
TJ Rear sill
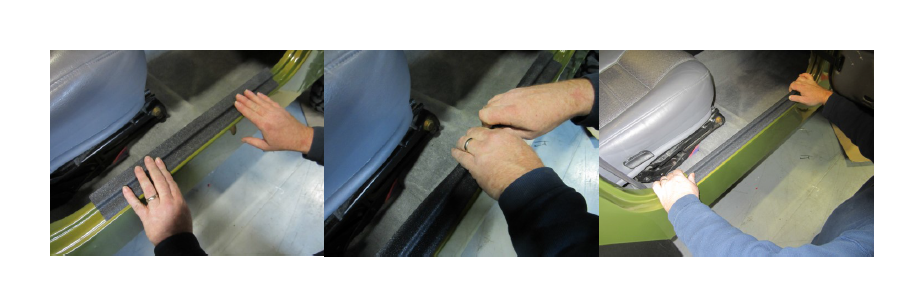
Step 1:Using the larger piece for the low-er rear sill. Start in the top corner. Locate the notched corner on the vehicle. Light-ly apply the material along the length of the sill and butt it up against the upper part of the sill. You should end up on the other end with about the same amount of spacing in the notch area and the body. You can lift the material and re apply as you need to in order to get it aligned. Once aligned you can firmly press down on the section that you applied but not the section that goes on the outside of the vehicle. Working from the center out and down apply the outside section of the rear sill.
Step 2: the upper sill should be handled as the door sills before. Refer to step 1 of the door sill section of the instruc-tions.
JK Door sill
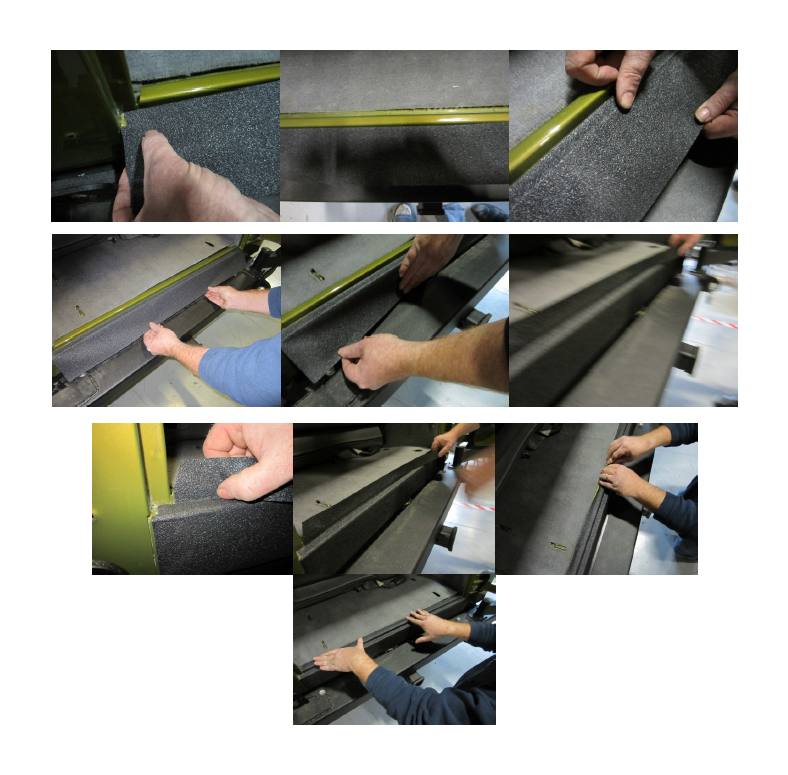
Step 1: start with the flat section of the door sill. Start in the front corner. Locate the notched corner on the material. Place the first section with the long edge butted up against the vertical part of the sill. Carefully lay the material along the sill keeping it up against the sill and straight. Do not stretch when applying. Do not apply hard pressure yet.
Step 2: take the upper sill piece and place it butted up against the bottom sill to ensure no gap between the two. Run the mate-rial along the sill keeping it straight and against the bottom sill. If the two don’t line up it is because of stretching during install.
Step 3: Evenly from outside to inside working from the center out, lightly press the material around the upper door sill. Once both are aligned put pressure to the material to adhere it On the 4 door install the rear pieces in a similar manner location of these is up to the installer, the tapered one is the lower sill piece. This piece should be installed with the edge placed on the outside line of the door sill. It may come up on the top sill part. This is ok and is due to the loca-tion choice and the taper of the door sill. If any overlap does exist a hair-dryer to ensure bonding of the materi-al can be helpful
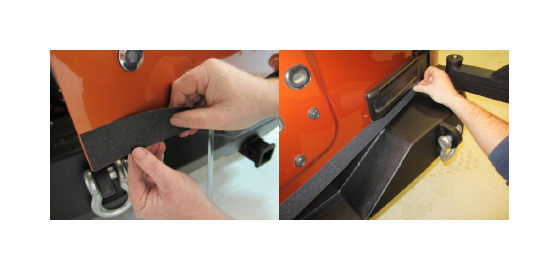
JK Rear door
The rear door is a simple install. Place the material on one end with the rounded corner down and install from one side to another. Keep the bottom even with the door. Don’t put full pressure on till the material is aligned, then press firmly.
After installation you would do best by leaving ample dry time before driving or washing the vehicle, if you installed the recom-mended wet method. This is a permanent adhesive on this product. Great care should be taken if it is needed to be removed later.
