Installation Time
(approx) 3 Hours
Difficulty Level:
Simple installation for anyone.
FREE 2 or 3-Day Delivery on 10,000+ Items. Details
$491.99 (kit)
FREE Shipping Market Price $545.99 You Save 10% ($54.00)Saved - View your saved items
We're sorry. We couldn't save this product at this time.
or use
Ryan: These Teraflex Sport Front Lower and Rear Upper Fixed FlexArms for 21/2 to 3 Inches of Lift are for those of you that have a 2007 to 2018 JK, with that amount of lift, that are looking for a good fixed set of control arms that are going to help fix your caster angle and your pinion angle and just be a really strong set of control arms that are gonna hold up really, really well and be less expensive than some of the adjustable options out there or some of those adjustable options that also have Heim joints on them.These are going to be a pretty easy one out of three wrenches to install on your Jeep. A little bit of disassembly to do, but we are gonna show you how to get that done in just a second. So when you're looking for control arms, you're going to be looking for a variety of different things. Usually, you're gonna swap out your control arms because you need or want ones that are longer. And that's going to help to fix a variety of things. As you lift your Jeep, both axles are going to be moving toward the center line of the vehicle. So in order to push the axles back out and center them under the wheel wells, you'll want some longer control arms.Also, the length of your control arms is going to affect your pinion angle which is the angle of both of your driveshafts and how they relate to both your transfer case and also the differential in the front and in the back of the Jeep and also your caster angle upfront which is the angle of the steering knuckles. And what that actually feels like is the steering wheel re-centering itself. So if you're making a slow turn in a parking lot, you let off the steering wheel, as you move forward, the steering wheel re-centers. That's because of your caster angle.And if you don't have enough caster angle, the steering wheel won't wanna self-center and then it can actually feel like you have a little bit of a wobble or a wander on the highway because you don't have enough caster angle. So in the front, caster and pinion angle are directly related. In the back, are you worried about pinion? But no matter what your reasoning is, a new set of control arms is going to help solve those problems.Now an adjustable control arm, or a set of adjustable control arms, is going to allow you to completely dial in the pinion and the caster angle, front and rear, of your vehicle. What this is going to be is a set of fixed control arms designed specifically for those of you that have 2 1/2 to 3 inches of lift, so you don't have to worry about dialing them in. You don't have to worry about making that adjustment. You don't wanna have to make sure GM nuts stay tight. So you don't have to worry about all of that stuff. You just bolt these in and your pinion and your caster angle are going to be set for you. This is also going to be a set of four, the four most important ones for setting pinion and caster at that 2 1/2 to 3 inches of lift. Of course, the length is already preset for you.And like I mentioned before, these are going to be rubber bushings in both ends of all four of these control arms. So you're gonna get a nice comfortable ride, a nice quiet ride out of these control arms. However, you're not going to get quite as much additional flex as you would get with a Heim joint. So as this control arm moves, it's going to wanna move in one plane up and down, but it's not gonna wanna twist and it's not gonna wanna move in the opposite plane where a Heim joint will do a little bit of that additional motion.So if you're doing a lot of off-roading, you want maximum articulation, you'll probably wanna look at a Heim joint. The downside, if you wanna call it that, are that they're much more expensive. They require a little bit more maintenance. You have to keep them greased. And, eventually, they are going to wear out probably a little bit quicker than a rubber control arm bushing like this one will. So it really depends on what you're looking for on your Jeep. What this set is really gonna be good for is 2 1/2 to 3 inches of lift. You do some off-roading, maybe but and you're not worried about maximum flex and you just want something that's going to be solid and set your pinion and your caster angle without needing to worry about any sort of adjustability.This kit right here is going to be an incredibly high-quality option from Teraflex. They are going to come in at right around that $400 mark which I think is really fair for a set of four control arms like this. It's going to be a great option for you if you are looking for an easy solution to setting your caster and your pinion angle. So this is going to be a one out of three wrenches for the installation. Let's show you how to do it.Man: Tools required for this installation: a pry bar, a breaker bar, a 21-millimeter wrench, a 1/2-inch drive with an extension, a 21-millimeter socket, ball pin hammer, a ratchet strap is extremely helpful to get that axle back into place, a 1/2-inch gun to get those bolts and nuts out, then I use this air ratchet to help get those bolts back in.All right. So as you can see, we have our Jeep up on the lift, all of our wheels and tires off and I actually have the axles supported with a couple of pull jacks. Now, I have a breaker bar with a 21-millimeter socket. I'm going to attack my upper control arm bolts first just to break these free because I know that they've been in for a while.All right. So now that that one's nice and loose, give another little turn on it. We can attack our lower bolt for our upper control arm. All right, so this is the lower bolt for your upper control arm. Again, I'm going to use my breaker bar just to get things moving. Make sure it's on there nice and square. All right, and you can see that tab for the nut starting to move. Once it moves to the forward-most position, that's when the bolt will actually start loosening up. And once you can get it loose enough that you can get a socket in there for the ratchet, we'll switch off our tooling.All right, so let's bring our socket into place now and get this out the rest of the way. So I wanted to take a second and just show you the tab nut right here. So this actually is inside of your frame rail and that is what the bolt attaches to. So this is not going to come out of the frame rail. It will, maybe, fall out a little bit, but when we bring our new upper control arm in place, we'll have to use two hands, position that and also run our bolt through and try to capture that nut on the back. So let's go ahead and get this bolt out the rest of the way.So there's that nut. Let's get our control arm out of here. Let's go ahead and get this new rear upper control arm in place. We're gonna start in the front. Just get that captured nut set. I'm gonna put my bolt through and start to find the tab or this rests. Then I'm gonna start threading my bolt just like that. So let's snug that up. So we're just gonna snug that up. We'll get our final torque when the vehicle is down on the ground at ride height.All right, guys. Now, moving on to the lower part of the upper control arm, we're gonna position this into place. And it's important to note, I do have a jack stand on the pinion right now and that's to help me find and locate that hole. So with the jack in place and down a little bit, right there... And we are reusing the factory hardware with that captured nut on the backside to start that, the socket wrench. Again, we're just gonna snug these up and then, once the vehicle is down on the ground and at ride height, we can give them the final torque. And Teraflex lists all the torque readings on their instructions. That's very nice. So let's tighten up this front one as well. All right. So all the steps you just saw, we're gonna repeat on the driver's side to get that upper control arm in.All right. Moving on to the front, you can see that we have our wheels and tires off. We also have the axle supported with a couple of pull jacks. Now, in my hand, I have my 1/2-inch air gun with a 21-millimeter socket and my 21-millimeter wrench. It's the same type of hardware upfront except for we don't have captured nuts. So I'm gonna go ahead and put my 21-millimeter wrench over here and my 21-millimeter socket on my 1/2-inch impact here and just loosen it up.All right, moving on to the front of our lower control arm, it's the same deal, 21-millimeter bolt, and nut. We're gonna loosen this up and not remove it just yet. All right, now we're gonna be removing the bolts holding in our upper control arms upfront here. I already did loosen up the ones on our driver's side. So I do have the nut on here just a few threads, just to protect the end of that bolt. Let's go ahead and just give this a little tap. All right, we're gonna take the nut off the rest of the way now.All right, so let's separate the bottom of our control arm here from the axle. Just use a pry bar here. All right, now we're gonna remove the nut and bolt for our control arm back here and just wiggle it out of place. All right, with our old lower control arm out of the way, we can bring in our new Teraflex unit. Slide that up into the place. We are reusing our factory hardware. We're just gonna hand-tighten this for now, swing it into place and attach it to the bottom.So one of the issues you may run into while connecting the lower control arms to your axle is you can notice our spring right here is actually kinked backwards and pushing the axle towards the rear. So what we have here is a nice ratchet strap, we're going to wrap around our axle tube and our radiator core support right here on the bottom, these into each other. And when I get some tension on it, you can actually watch this spring and the axle start rotating forward.So right around there we should probably be able to get our control arm back into place. So bringing the lower control arm into place, you can see we still have a little bit to go, but I'm just gonna give this a couple more cranks and you can watch that. That's about good right there. Get our bolt started. It's a little off on that side, so I'm gonna give it one more. All right, I can just start that with the air ratchet. All right, now we're gonna repeat that on the other side. All right, so with our control arms in place, we have our 21-millimeter socket and wrench, we're gonna tighten these up, get the wheels back on, get it on the ground and torque them down.That's gonna wrap up my install of the Teraflex Sport Front Lower and Rear Upper Fixed FlexArms, fitting your Jeep JK with a 2 1/2 to 3-Inch Lift. And for all things Wrangler, keep it here at extremeterrain.com.
Subscribe to our YouTube Channel
Features, Description, Reviews, Q&A, Specs & Installation
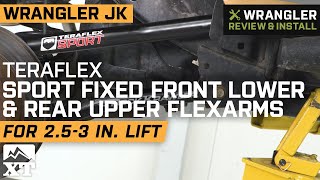
Quality Construction. The Teraflex Sport 4 FlexArm Kit for 2.50-3 inch Lift provides maximum strength, while the black e-dipped coating gives you amazing durability, and corrosion resistance. The factory style bushings also work to eliminate noise, vibration, and harshness for an enjoyable driving experience in your Jeep Wrangler JK.
Product Details. With the maintenance-free, Sport 4 FlexArm, it’s pre-adjusted length is going to correct the caster and pinion angle for 2.50-3 inch lift kits. You’re getting full-range movement that’s not going to restrict any articulation of flex off-road.
Moderate Installation. Installing the Sport 4 FlexArm is fairly simple and hassle-free. If you get a little stuck, follow along with the included set of detailed instructions.
Two-Year Warranty. When you order the Sport 4 FlexArm from Teraflex, you’re backed by a warranty that has you covered by defects in materials and workmanship for 2 years, starting from the date of purchase. Refer to your warranty manual for more information.
Application. The Teraflex Sport 4 FlexArm Kit for 2.50-3 inch Lift is custom made to perfectly fit 2007 to 2018 Jeep Wrangler JK models.
Fitment:
Teraflex 1254000
CA Residents: WARNING: Cancer and Reproductive Harm - www.P65Warnings.ca.gov
Installation Info
Installation Time
(approx) 3 Hours
Difficulty Level:
Simple installation for anyone.
What's in the Box
10 More Questions